
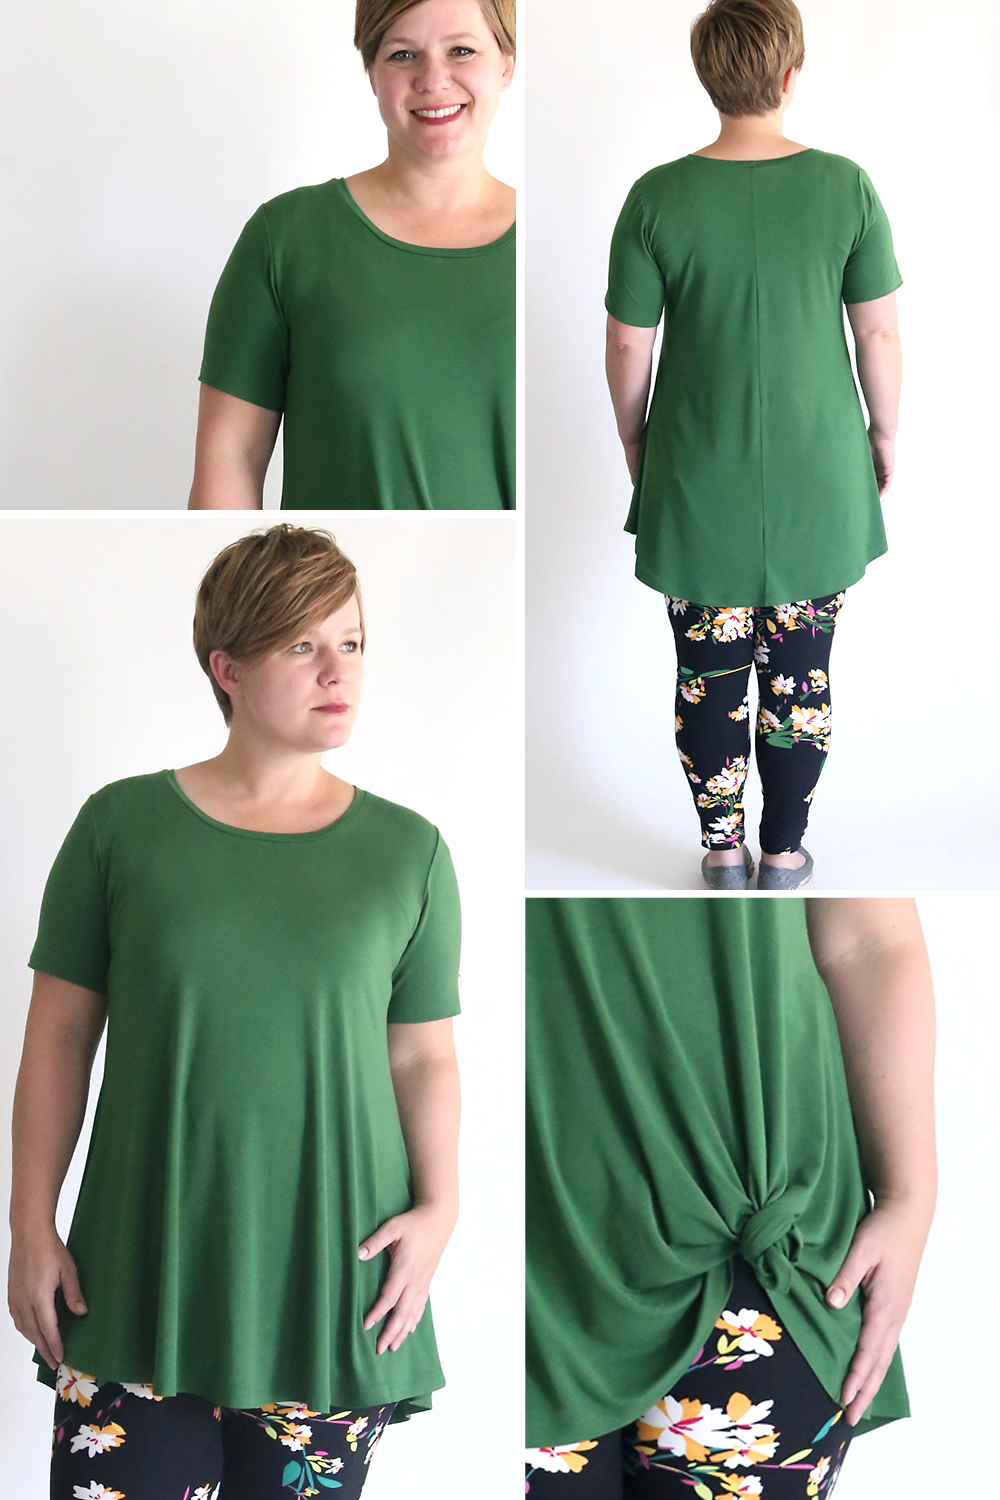
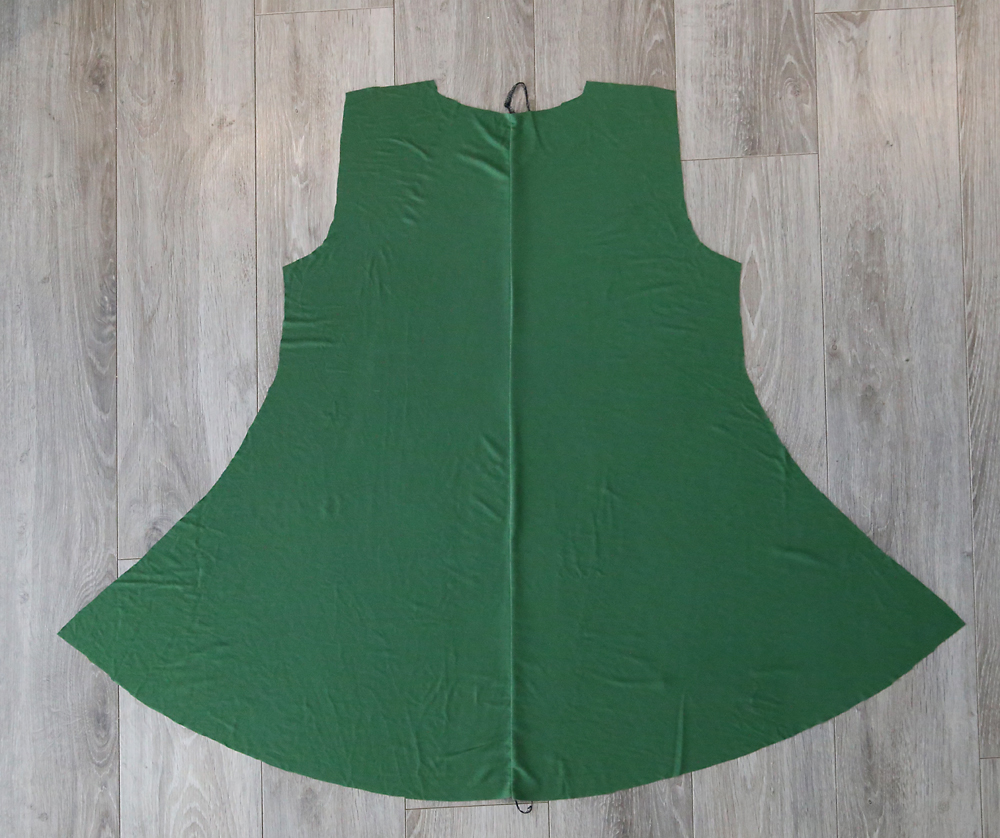
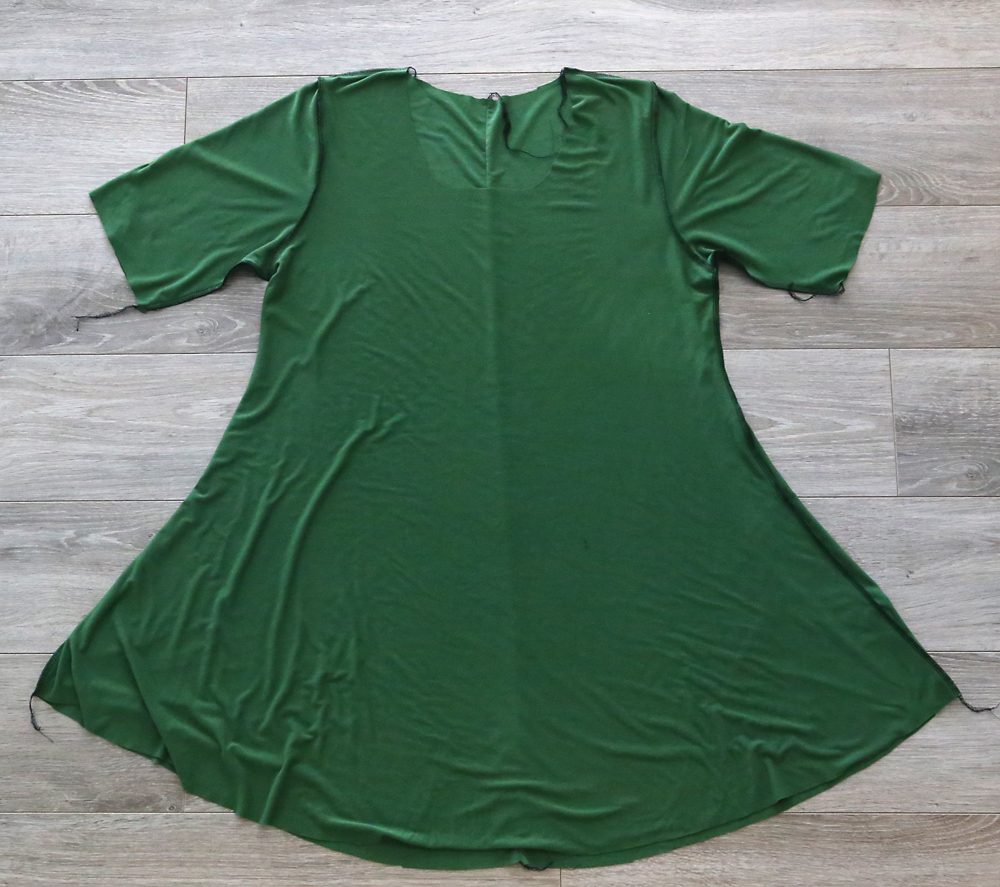
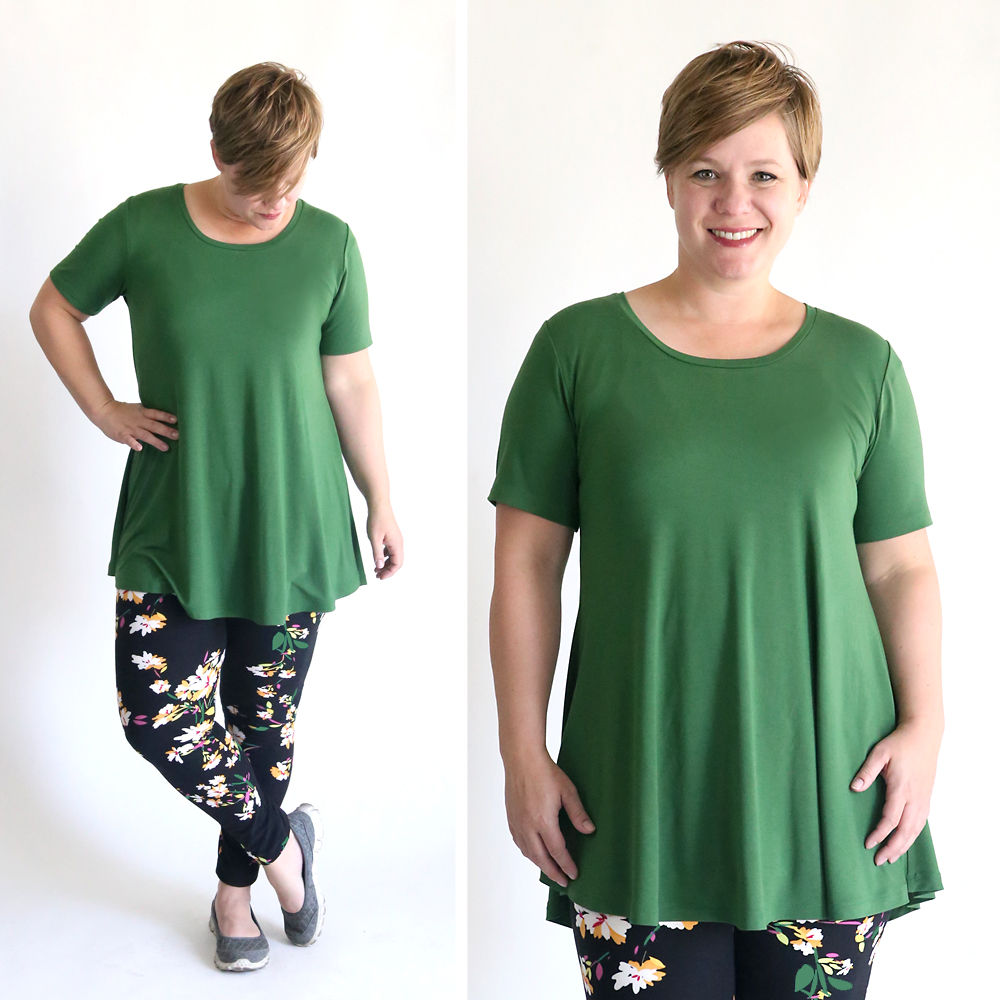
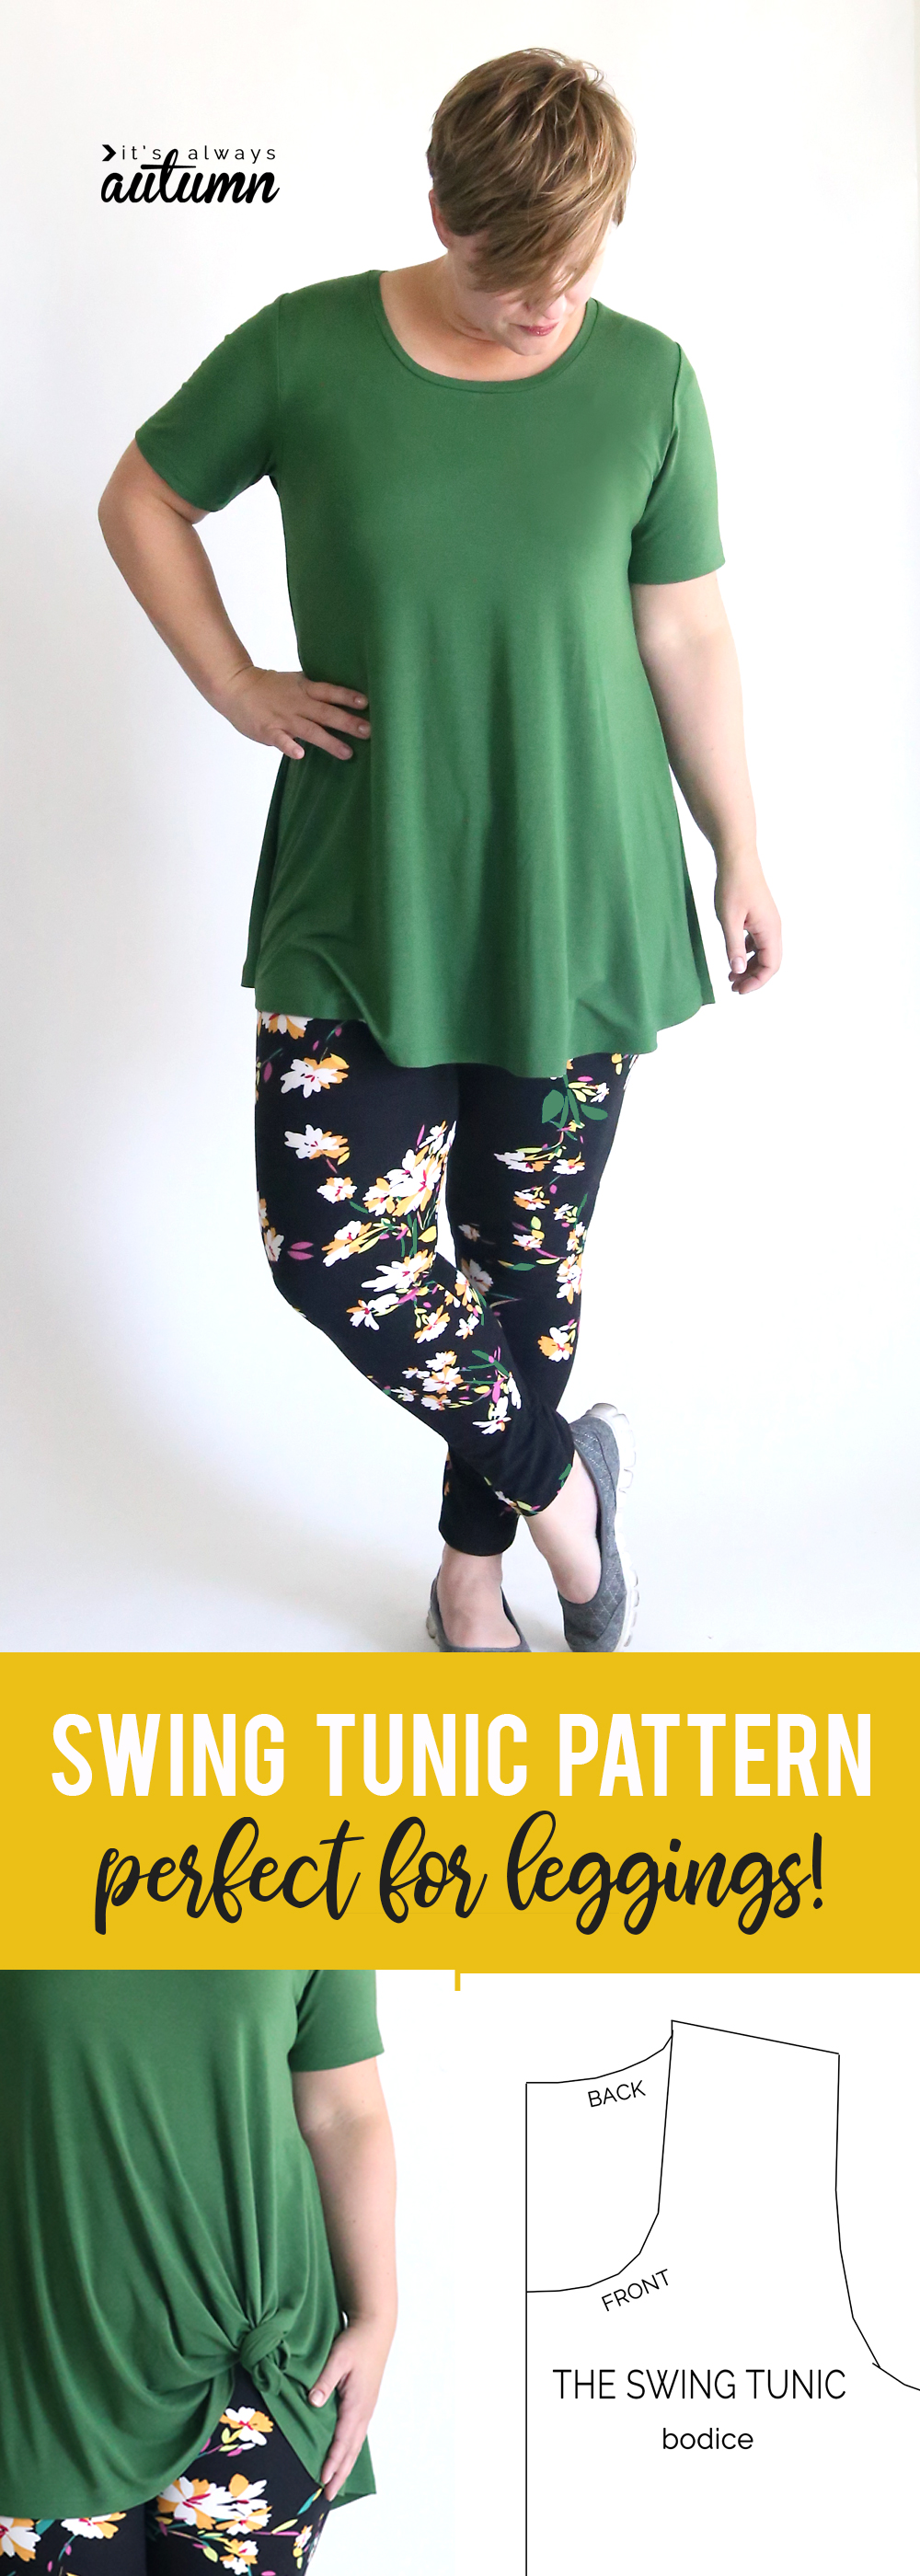
This free swing tunic sewing pattern is an easy sew and the perfect longer length to wear with leggings! Similar to the LulaRoe “perfect tee” but with a little extra swing and a slightly longer length.
For the past few years I’ve been avoiding the LulaRoe leggings trend, partly because I wasn’t sure I wanted to spend $30 per pair and partly because I worried if I actually did buy some I’d never put real pants on again. Stretchy pants can be a bit dangerous, you know?
Anyway, a kind friend gifted me a pair of LulaRoe leggings and they really are as soft and comfy as everyone says. But I still think they’re a bit pricey, and I’m too grumpy to watch a whole FB live to find a pair I might actually want to order. But the unrivaled comfyness just kept tempting me to buy more. Finally, I discovered the Viv Collection leggings on Amazon which are less than half the price and made from the same buttery soft brushed fabric, and I’m sold! I’m right in between the one size and tall + curvy size in Lula leggings and I ordered the Plus size of the Viv leggings and they’re perfect!
Of course, if I’m going to walk around in leggings, I gotta be wearing a long shirt so that I don’t scare the neighborhood children. So today I’m sharing a free swing tunic sewing pattern, a long tee shirt pattern with extra room around the hips for a pretty “swing”.
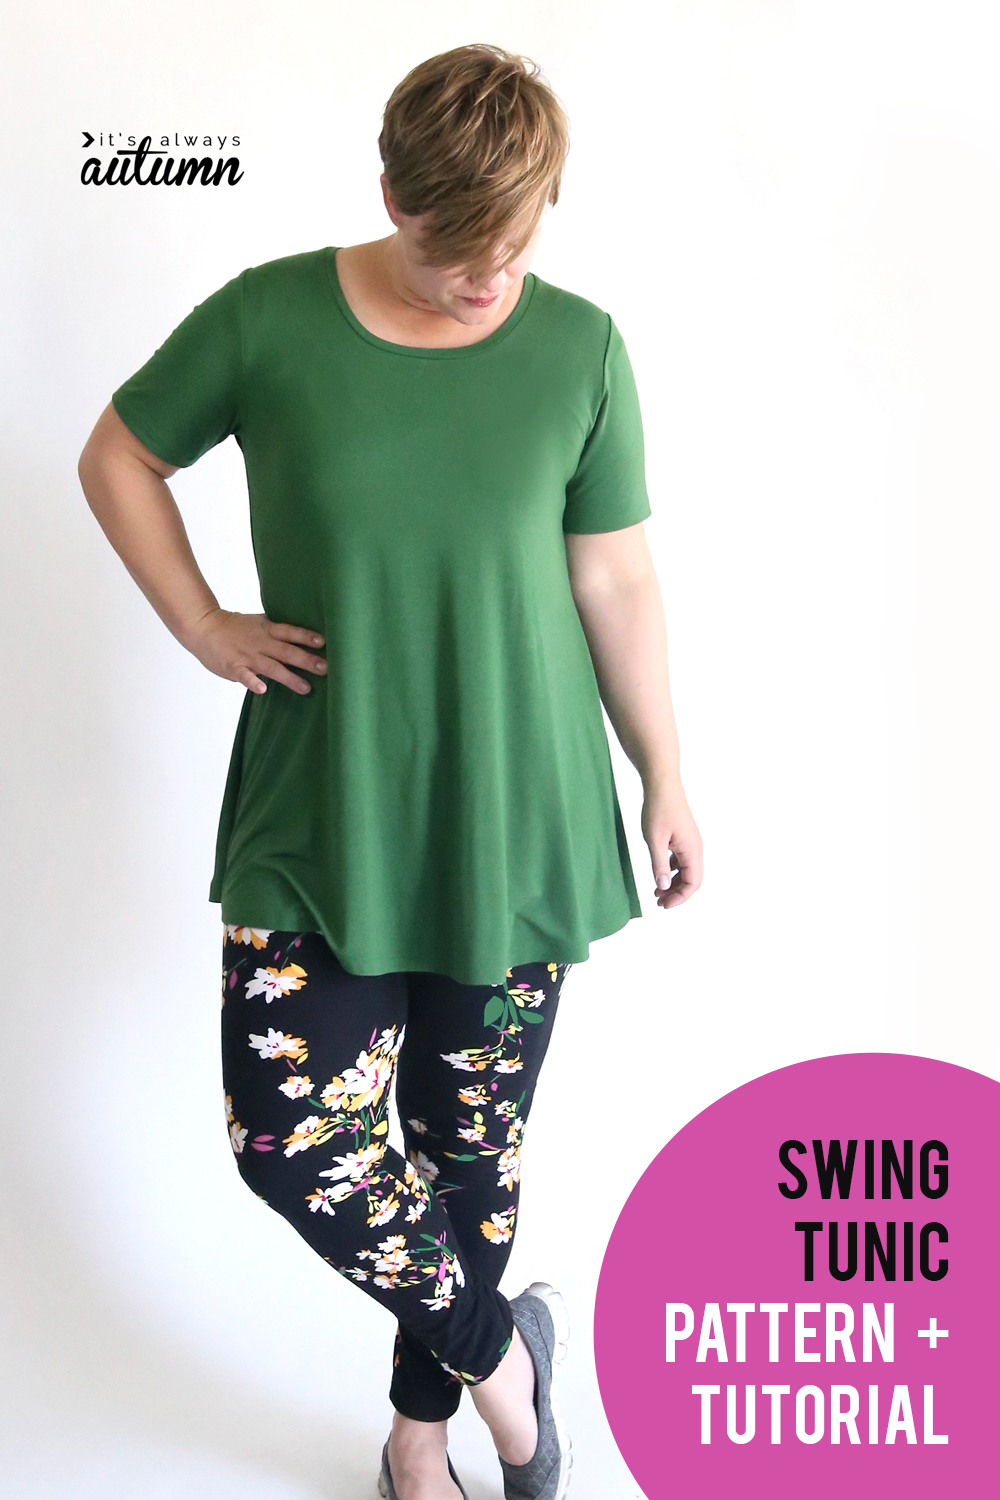
This pattern is available in size large only (38 inch bust), but since it is made with stretchy fabric and is very roomy around the waist and hips it will likely fit a range of sizes. This free tunic sewing pattern is similar to the LulaRoe perfect tee, although I think it’s actually a bit swingy-er. And a bit longer. I’m 5′ 3″ and I cut almost 2 inches of length off before hemming my shirt, so it should be long enough even for taller ladies, i.e. the rest of the world.
Free tunic sewing pattern
Click here to download the pattern. Print it out at 100% or full size and make sure the test square measures 1 inch. Butt the pages against each other without trimming and tape together. It takes 10 sheets of 8.5×11 paper and looks like this:
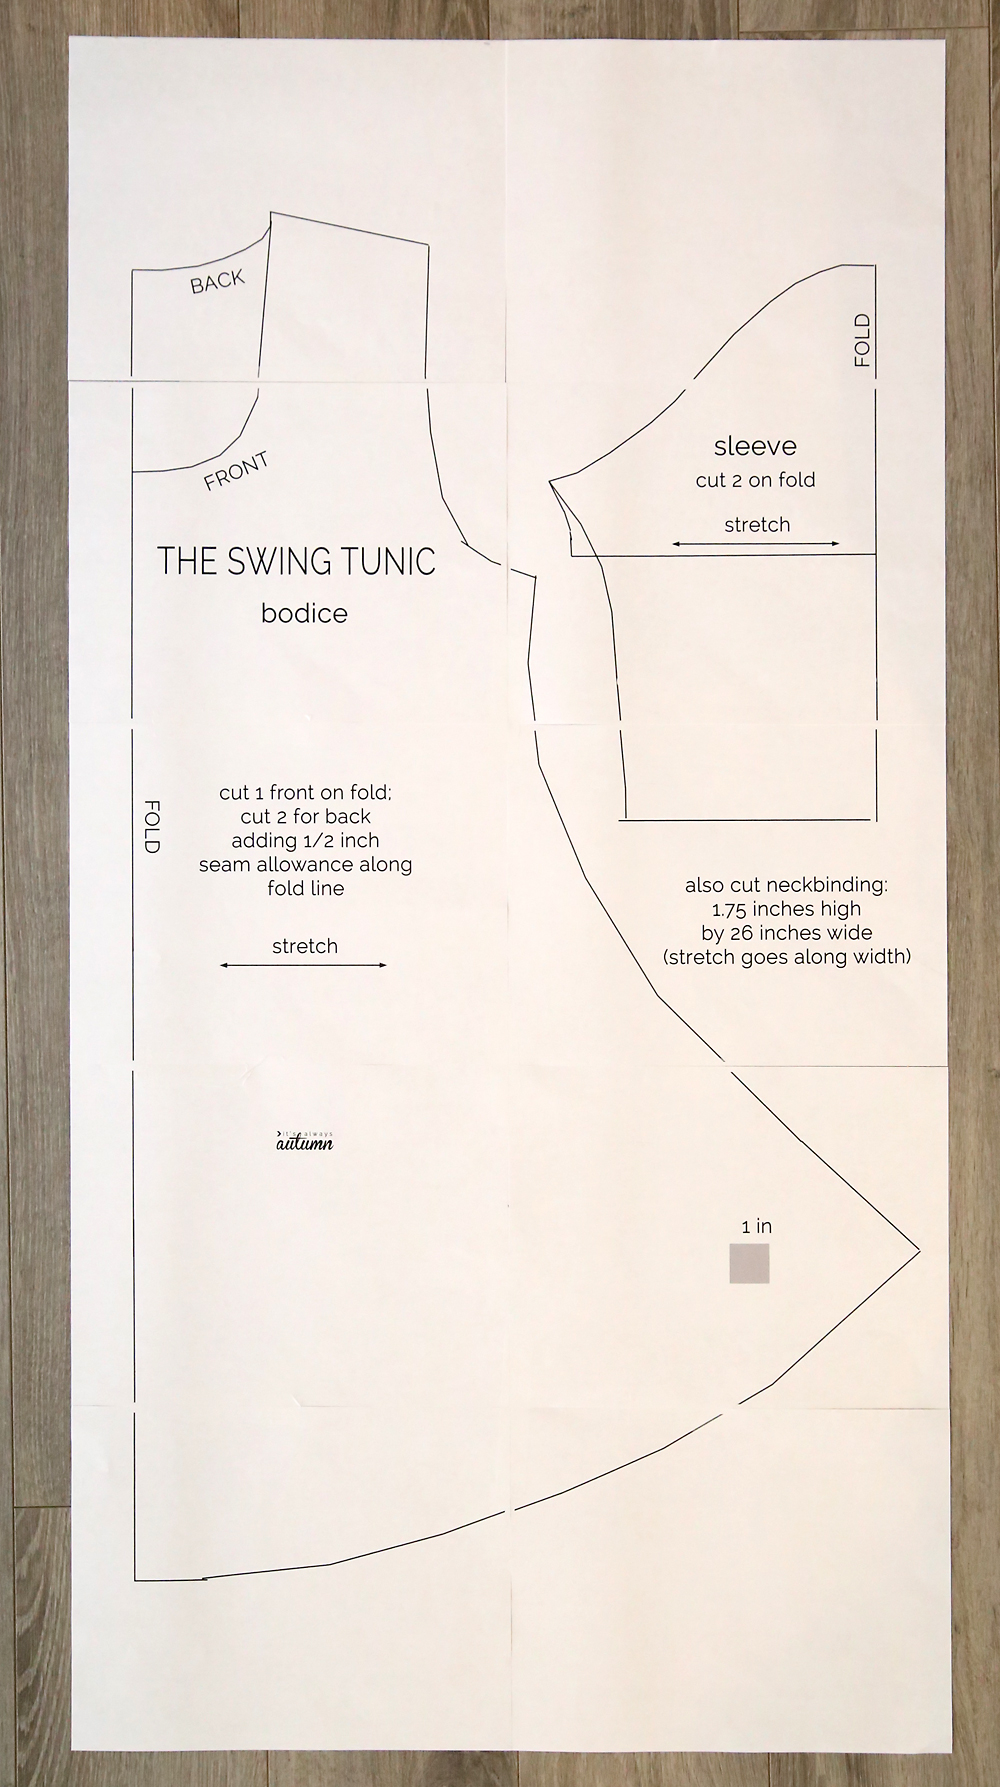
You will need 1.5 yards of 55-60 inch wide knit (stretchy) fabric for this shirt. Wash and dry your fabric before you begin.
Tip: If you are planning to wear it with Lula leggings or the similar leggings I found on Amazon, you’ll want to choose a fabric that is a bit slippery, otherwise it may not drape nicely across the brushed fabric of the leggings.
Here’s how I laid out the pattern:
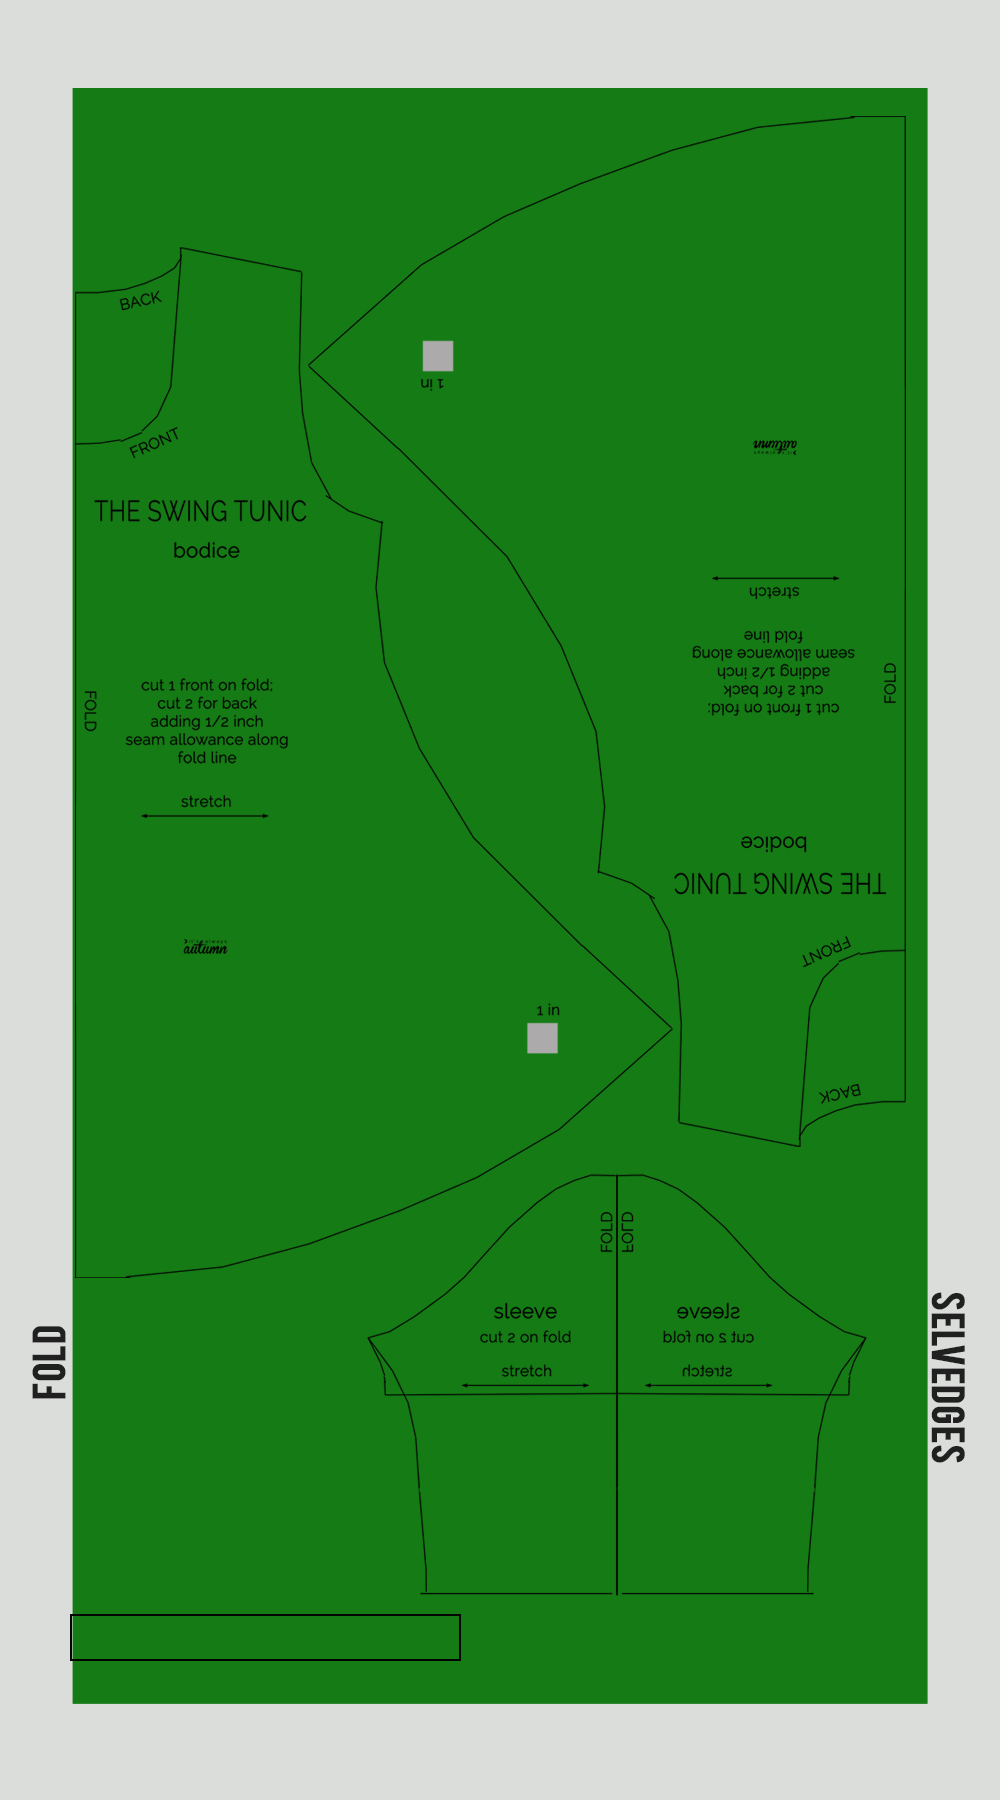
Notice that the front of the shirt is cut on the fold. The back of the shirt is not cut on the fold, so you need to add 1/2 seam allowance along the long straight edge when cutting. All the other edges already have 1/2 inch seam allowance included.
How to sew a tunic (long shirt) to wear with leggings
You’ll begin by placing your two back pieces right sides together and sewing down the center seam. This will make the back piece look just like the front piece, except the front piece has a lower neckline.
Place the front piece on top of the back piece, right sides together, and sew across the shoulder seams as shown below.
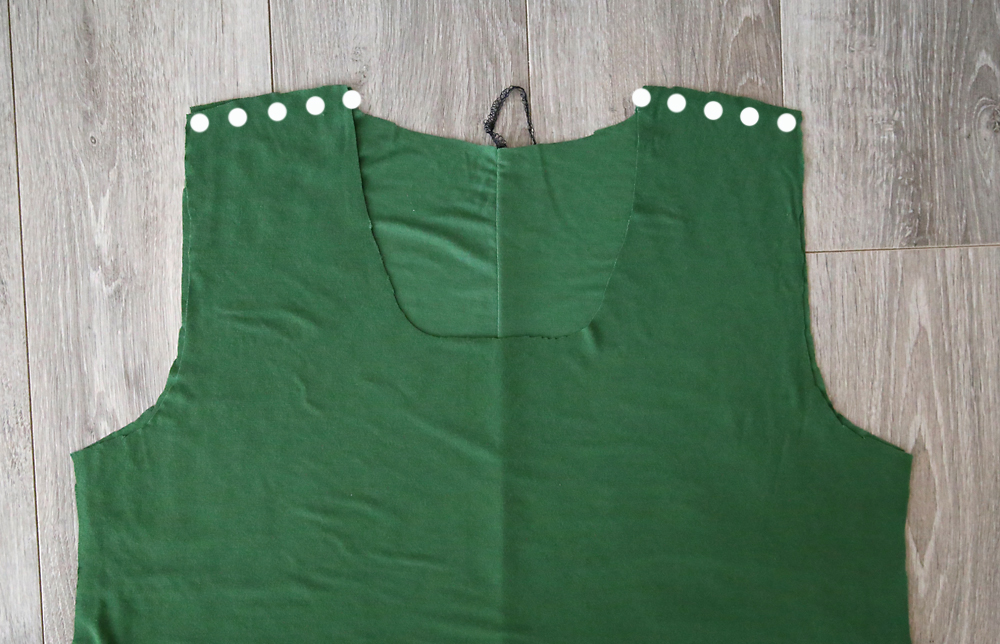
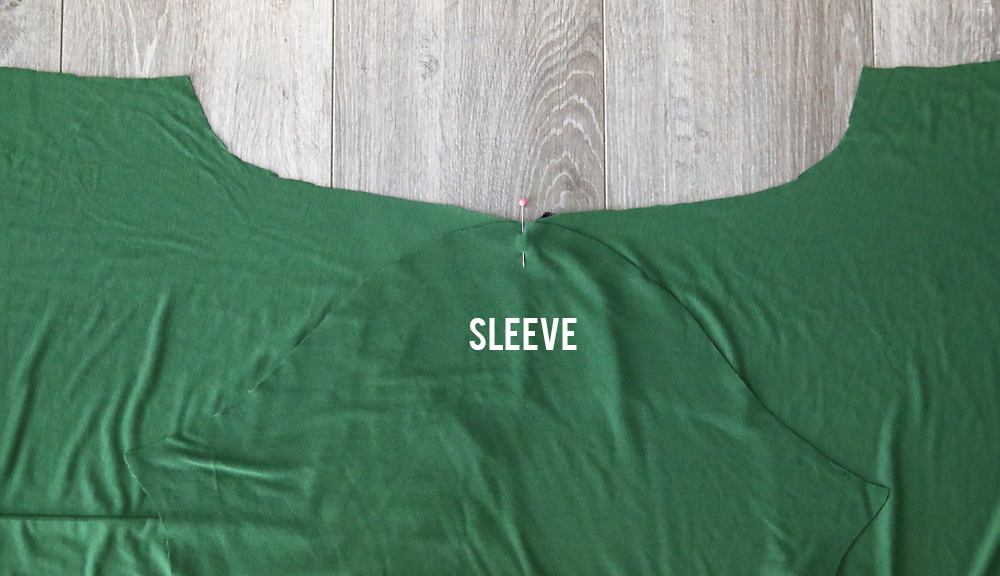
Next, we’ll attach the sleeves. Lay the tunic down flat, right side up, as you see below.

Grab one of your sleeves and find the center of the top curve. Mark it with a pin. Match that point up with the shoulder seam and pin together, as shown below. Right sides are together.
Continue to match up the curved edge of the sleeve with the rest of the armscye. The sleeve curves out and the armscye curves in, so the body of the shirt will get bunched up as you pin the two pieces together.
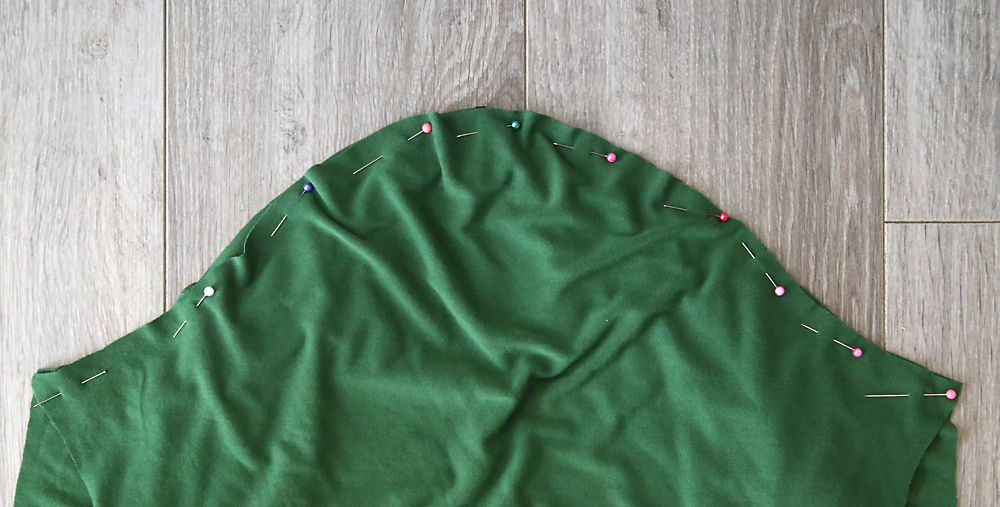
Sew along your pins to attach the sleeve to the shirt. Repeat with the other sleeve.
Now you can flip your tunic so the front and back pieces are right sides together again. Sew the side seams: up the sleeves, under the arms, and down each side. It will now look like this:
The next step is to bind the neckline. Grab your 26 inch piece of fabric and fold it in half lengthwise and press (photo 1). Note: you won’t use the entire length of the neckbinding. Find the middle of the neckbinding and pin it to the middle of the front neckline, raw edges matching up (photo 2).
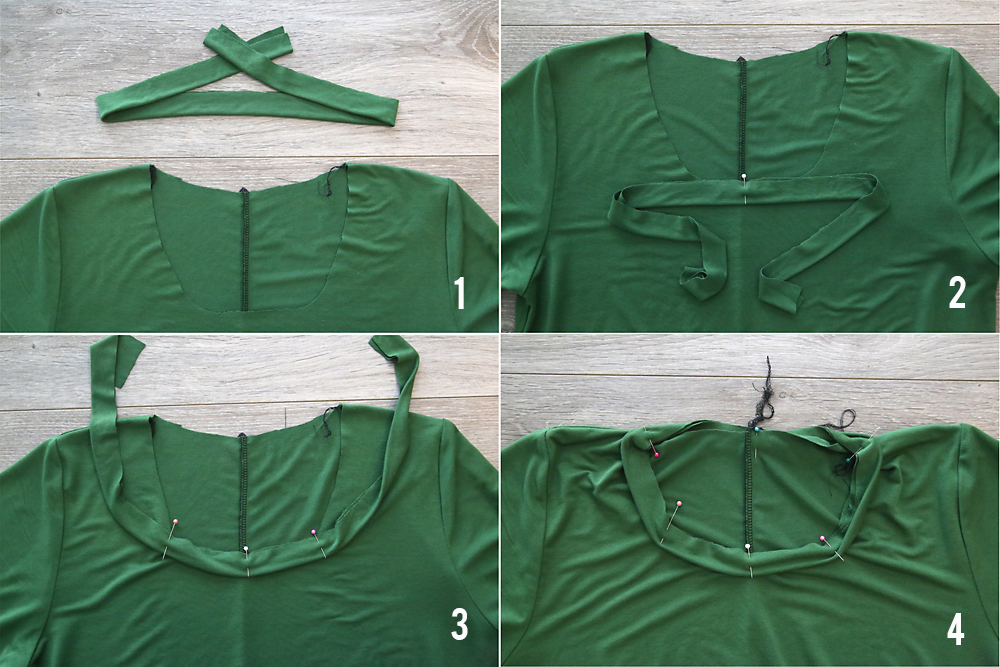
Give the neckbinding a bit of a stretch, and start pinning it around the neckline. The binding should be a bit shorter than the neckline itself, causing the neckline to bunch up a bit as you pin (photo 3). When you get to the back, open up the neckbinding and sew it to itself, then trim away the excess (photo 4).
If you’ve never sewn a knit neckbinding before, it can take some trial and error to figure out how much you should stretch the binding piece as you’re pinning it to the neckline. If your fabric doesn’t have a lot of stretch, you don’t need to stretch the binding piece too much, but if your fabric is very lightweight and stretchy, you’ll want to stretch it more. As you sew more knit neckbindings you’ll get a feel for how it works. If you’ve never sewn one in before, you can measure the neckline, then multiply that number by .85 to get the estimated length your neckbinding should be. If you do that, just sew the short ends of the neckbinding together before you start pinning it to your neckline, then pin it on evenly.
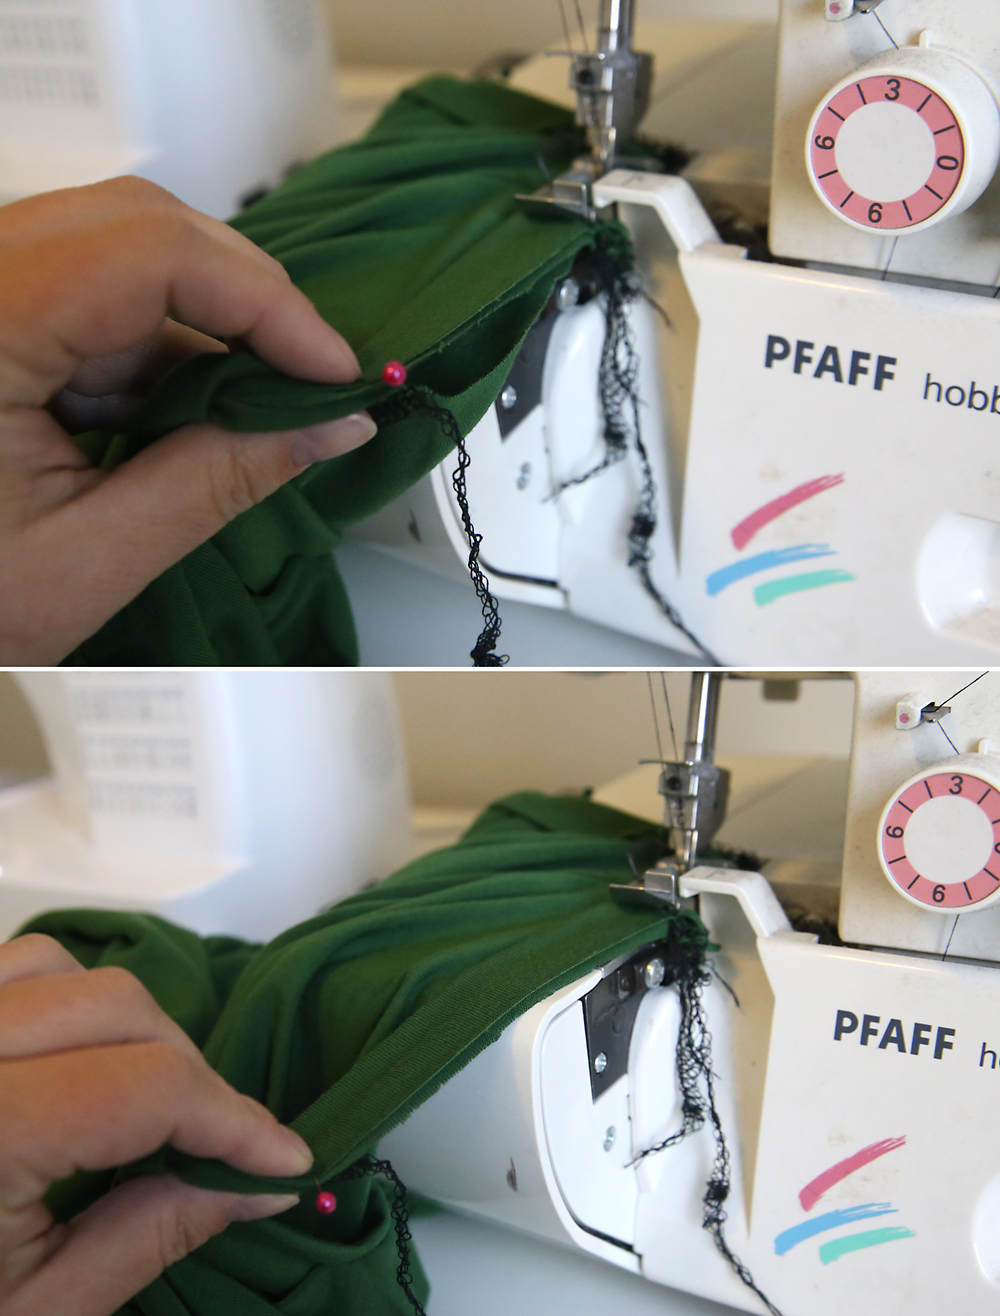
When you go to sew the binding to the neckline, the neckline will be bunched up under the binding (top photo below). Stretch it out until the fabric lays flat (bottom photo below), and then sew the binding all around the neckline.
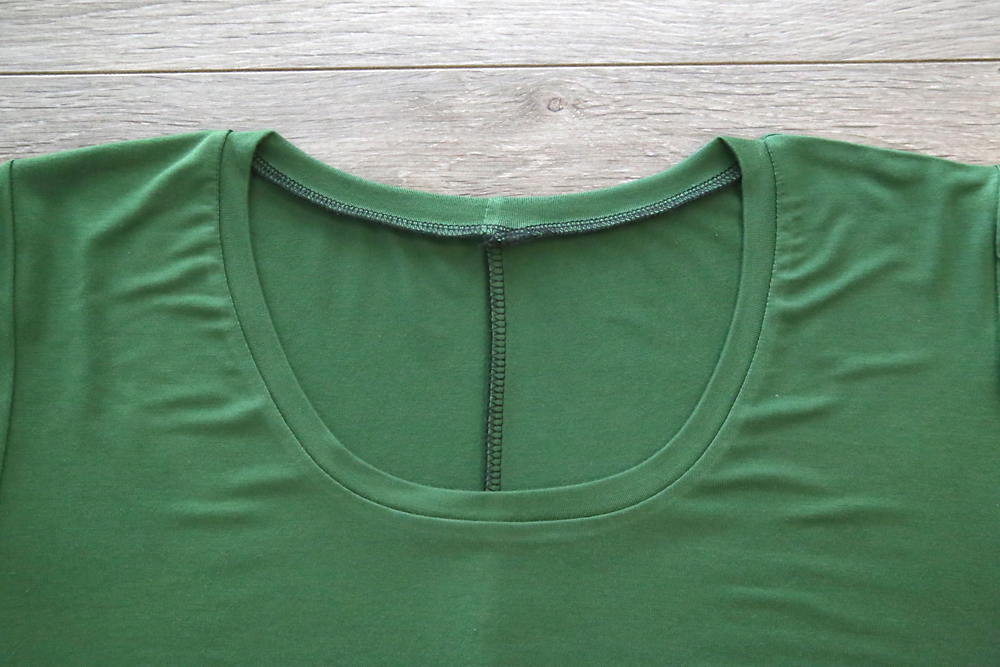
It may look a bit wonky right off the machine, but when you press it with plenty of steam it should shrink up nicely and lay flat:
The last thing to do is hem the sleeves to your desired length, and hem the bottom of the shirt. I took off about an inch and a half from the bottom hem, and then turned it up 1 full inch, so even if you’re a bit taller than I am it should be plenty long to wear with leggings. Let me know if you decide to make the swing tunic sewing pattern!
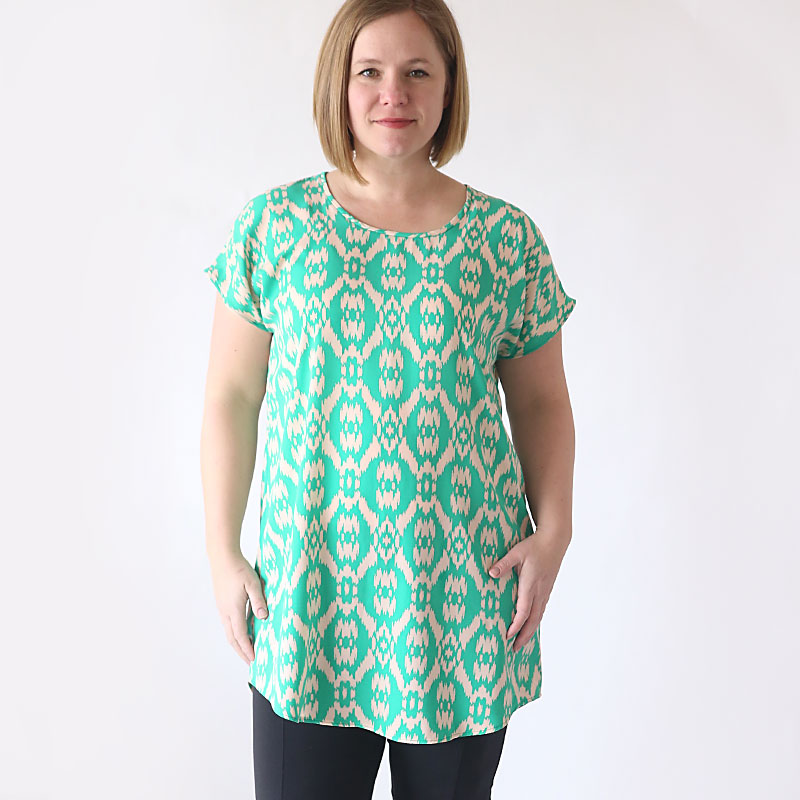
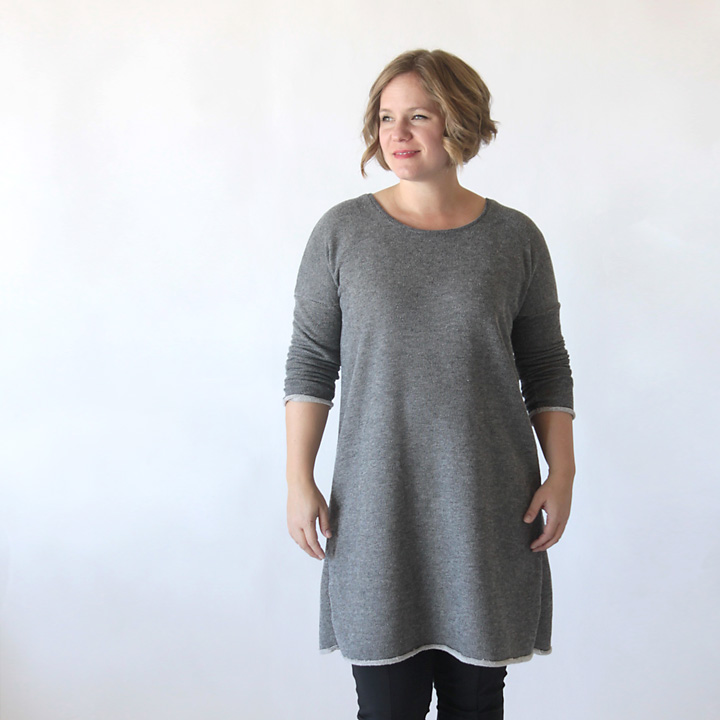
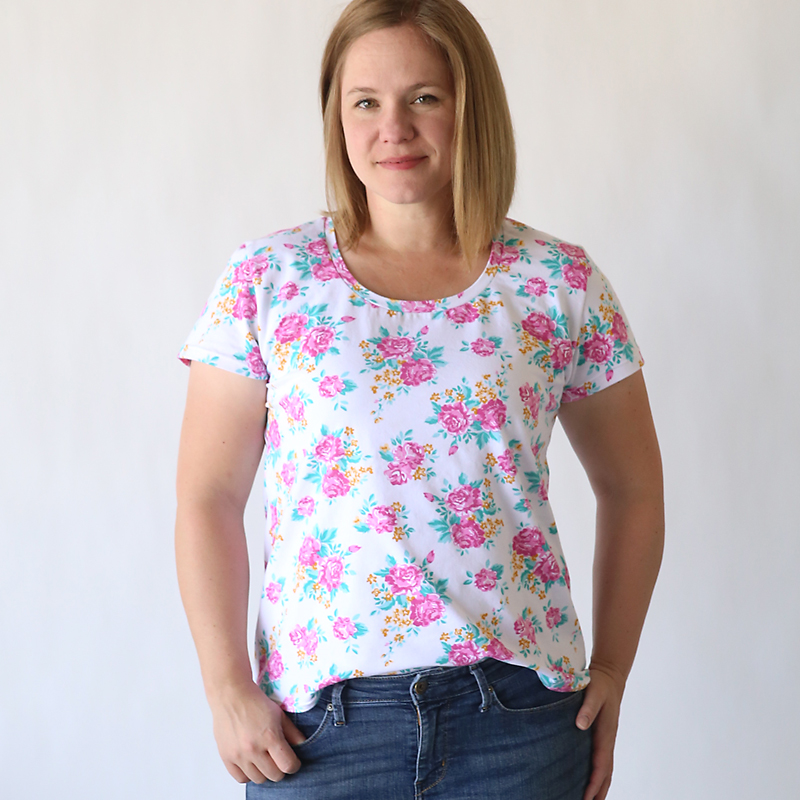
Check out more of my free sewing patterns + tutorials:
The “Breezy Tee” sweater dress
The Classic Tee sewing pattern


Krystal says
It prints kinda like a puzzle. You have to pice it together and tape it before you cut it out. For upsizing I measured my shoulder super arms and my back from neck to low waist. Then I payed the pattern on larger paper (I use the back of old Christmas wrapping paper) add the inches you need around the outside outline of the pattern. I am a side 18/20 and it works pretty well with her patterns for me. I hoe this helps.
Susan L. says
I’ve downloaded several of your patterns, Autumn, but so far have only sewn the swing top. I like it because you can adjust the length of the garment as well as the length of the sleeve. For summer, I’ve used it to sew several tops with elbow-length sleeves (hiding my upper arms) and a bit higher neckline . Thank you so much for your helpful instructions about neckline binding, too. This is a great pattern to whip up summer tops that have all the features you want but you can’t find in the stores — and at a better price, too!
Pauline Palmer says
Just made your top all first for me but your pattern was so easy to follow never done sleeves or a neck line it turned out great thanks
Laurie says
Thank you for the free pattern, just made a top and I love it.
Linda H says
I love this pattern! I have made my own changes to it to suit my needs. I’ve made 3/4 length sleeves, no sleeves, and racer-back. I love the shape and the drape and I enjoy the compliments I get from these tunic tops! I’ve shared your website with several people. I am so thankful for your website and your generosity in making this available for free! I love my new wardrobe. I’ve also made several leggings from the pattern you pointed to, and I’m delighted to be able to pick the colors I want (when I can find them) and make them capri length for the warm climate I’m in. Thank you, Thank you!!