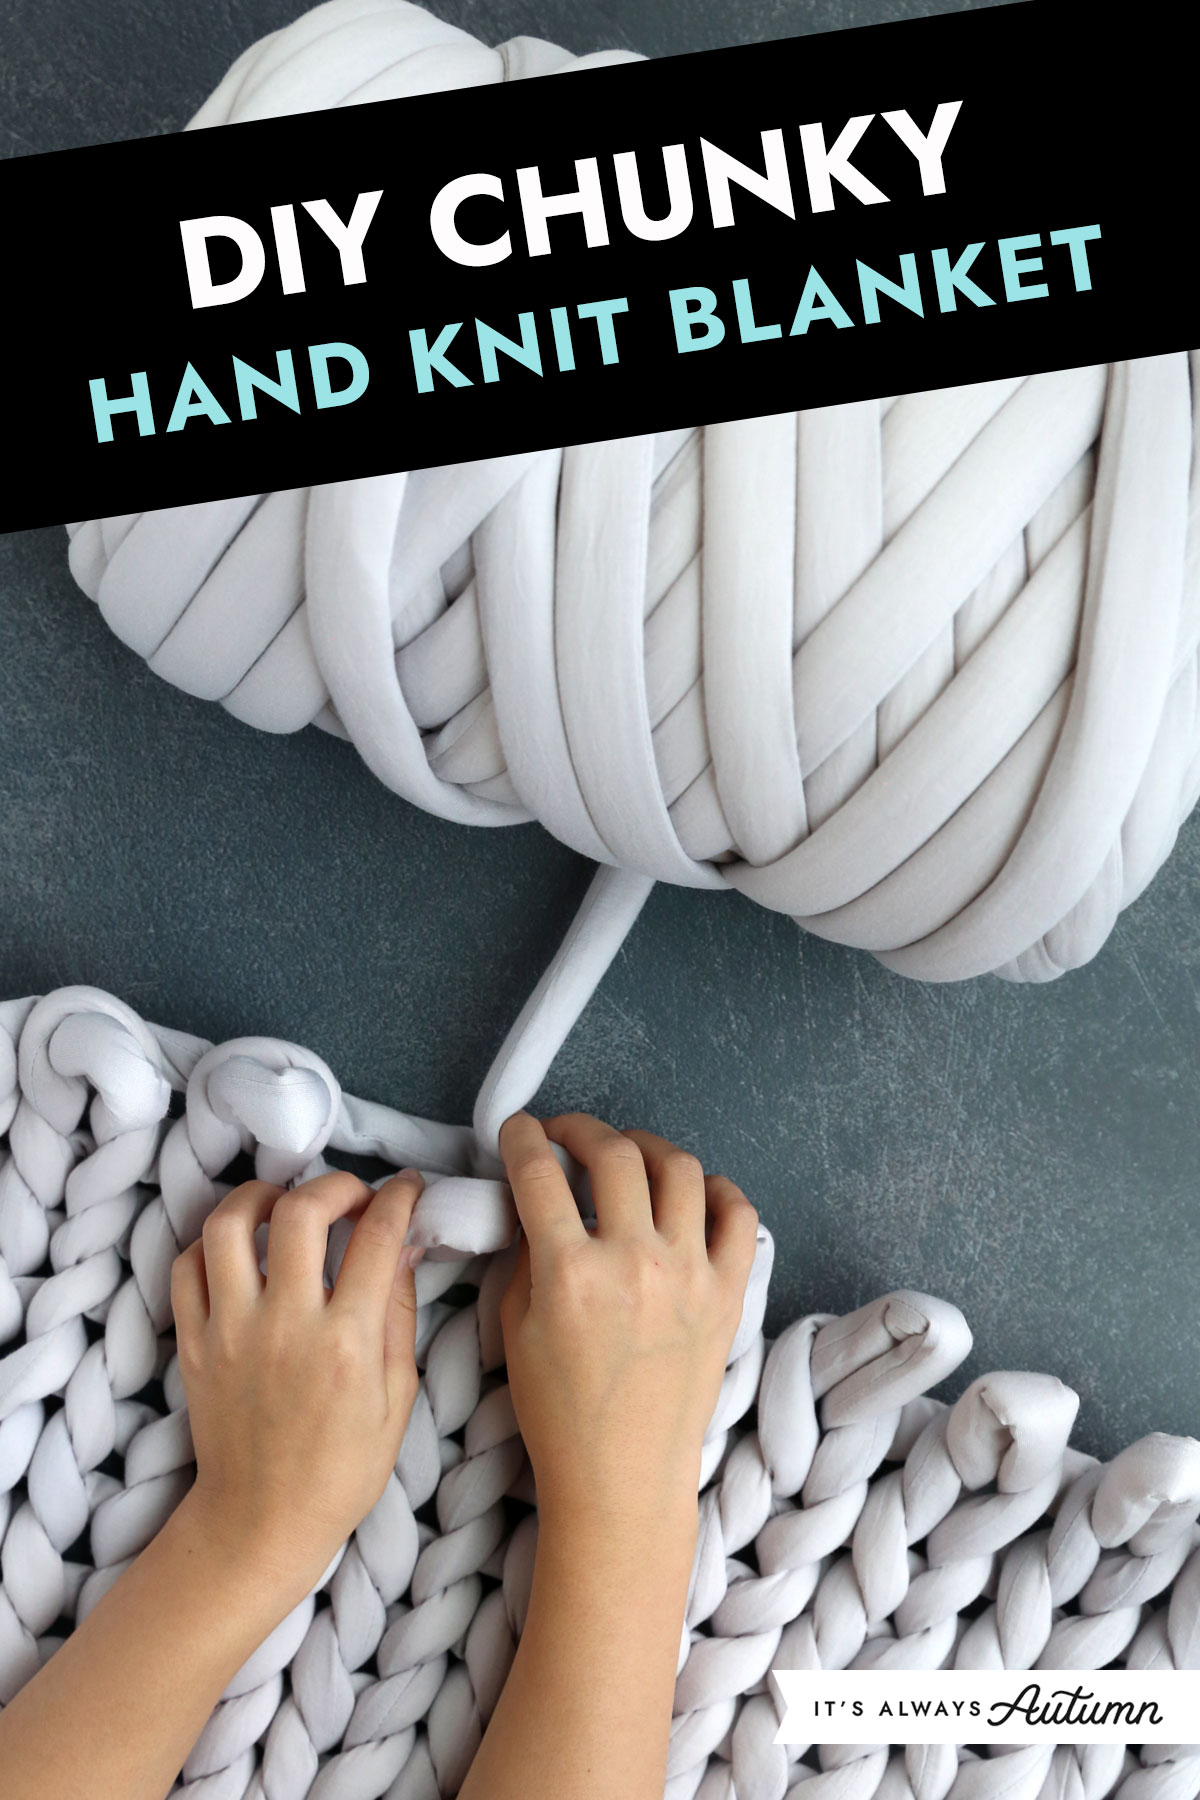
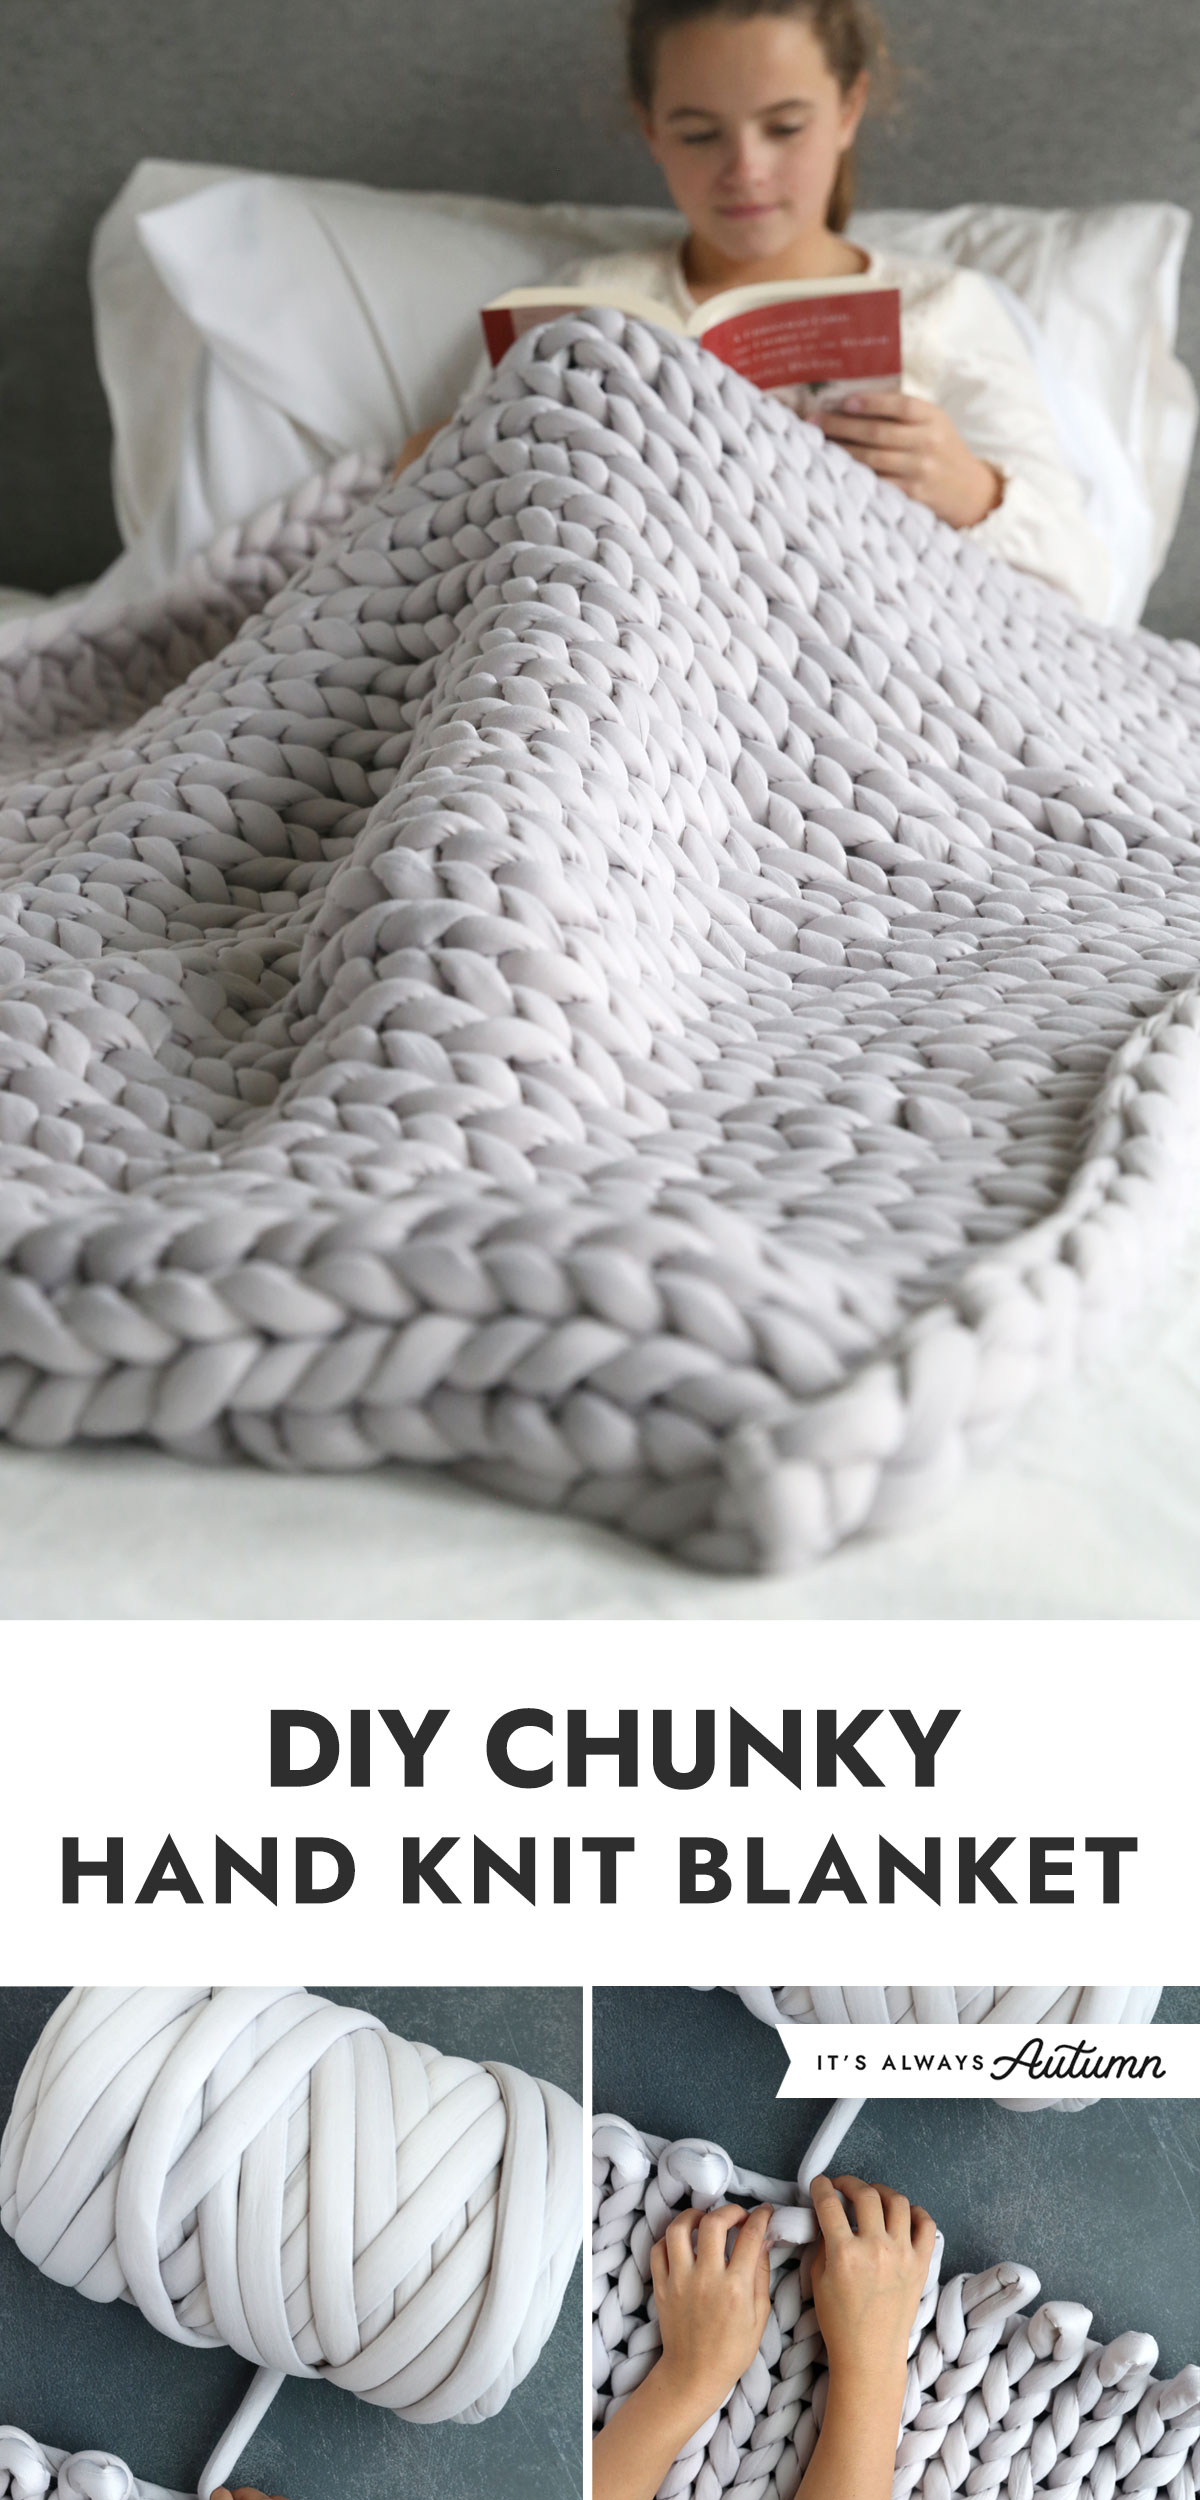
In today’s post: Learn everything you need to know to make a gorgeous chunky hand knit blanket in just a few hours – no knitting experience needed! We’ll cover what kind of yarn to use, how to get started, and how to make a chunky blanket for about $30.
How to Make a Chunky Knit Blanket
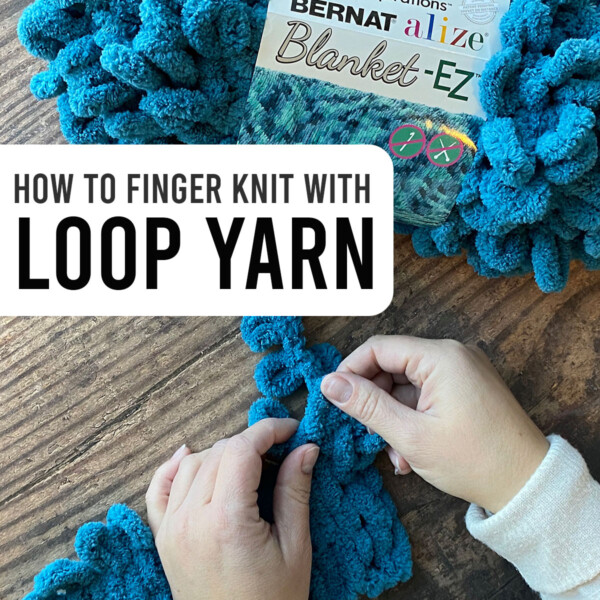
In the past few years, I’ve made a number of finger knit blankets using loop yarn, and I love them! But I wanted to make a really chunky blanket this time, using a super fat yarn. I’d heard of arm knitting, but it just seemed confusing to me, and I know you can use super fat needles, but since I’ve never knit with needles before that seemed confusing too.
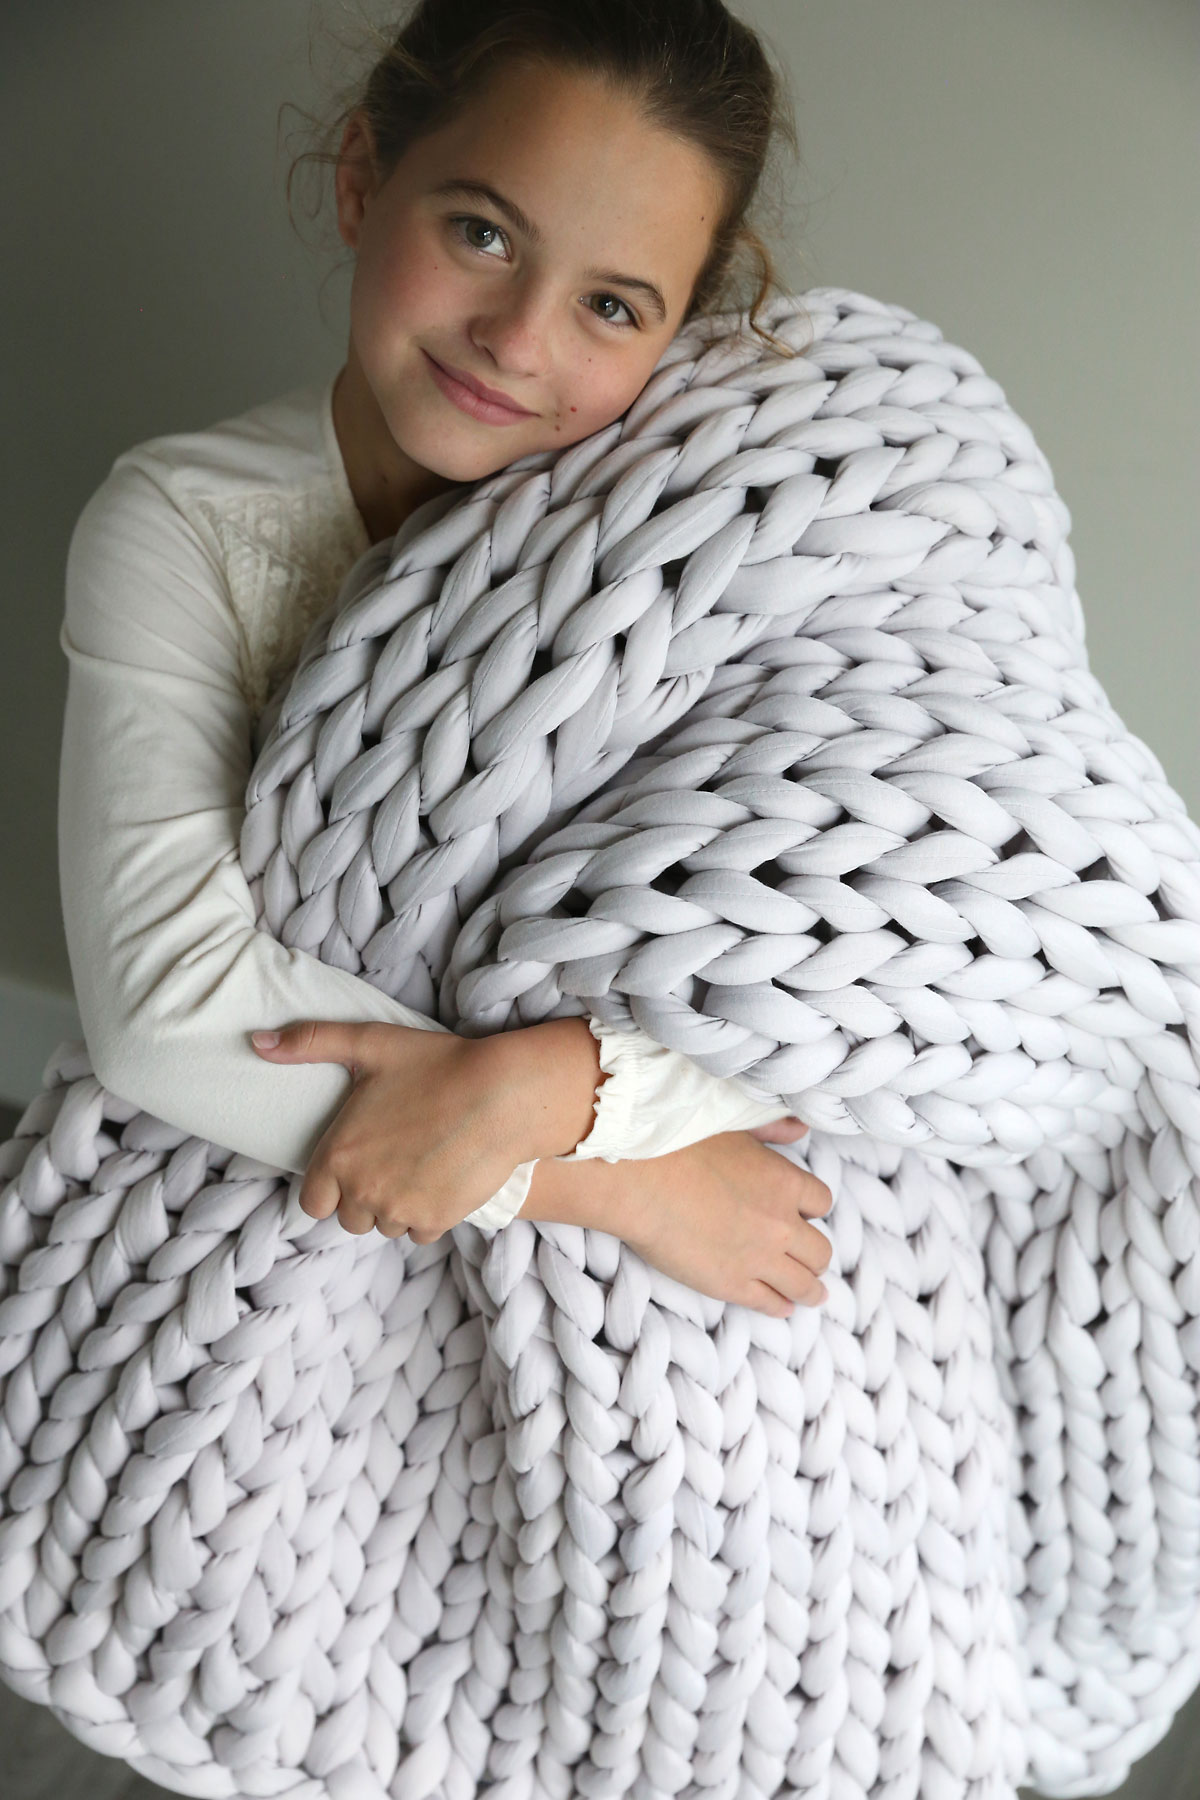
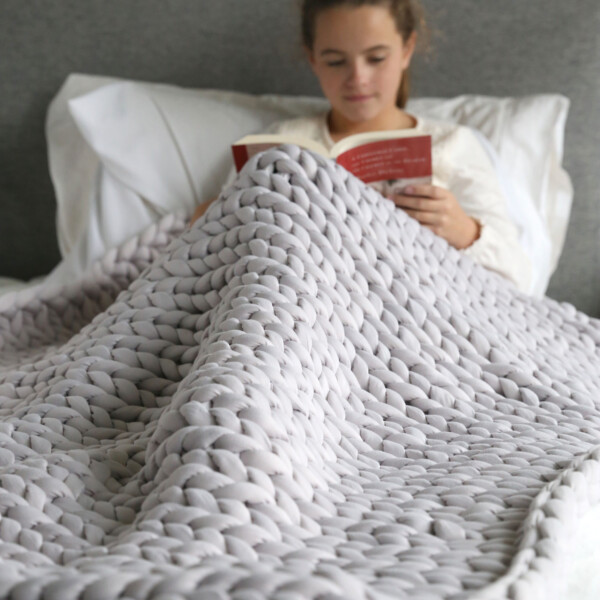
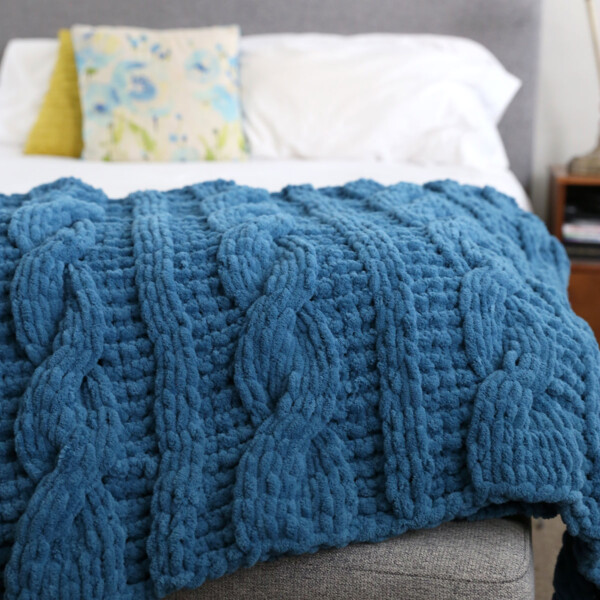
So instead I decided to try hand-knitting, and it turns out that it’s a super simple and totally doable craft, even for a complete beginner with no knitting experience. I was able to hand knit this cool DIY chunky blanket in a couple of hours:
Z
Supplies
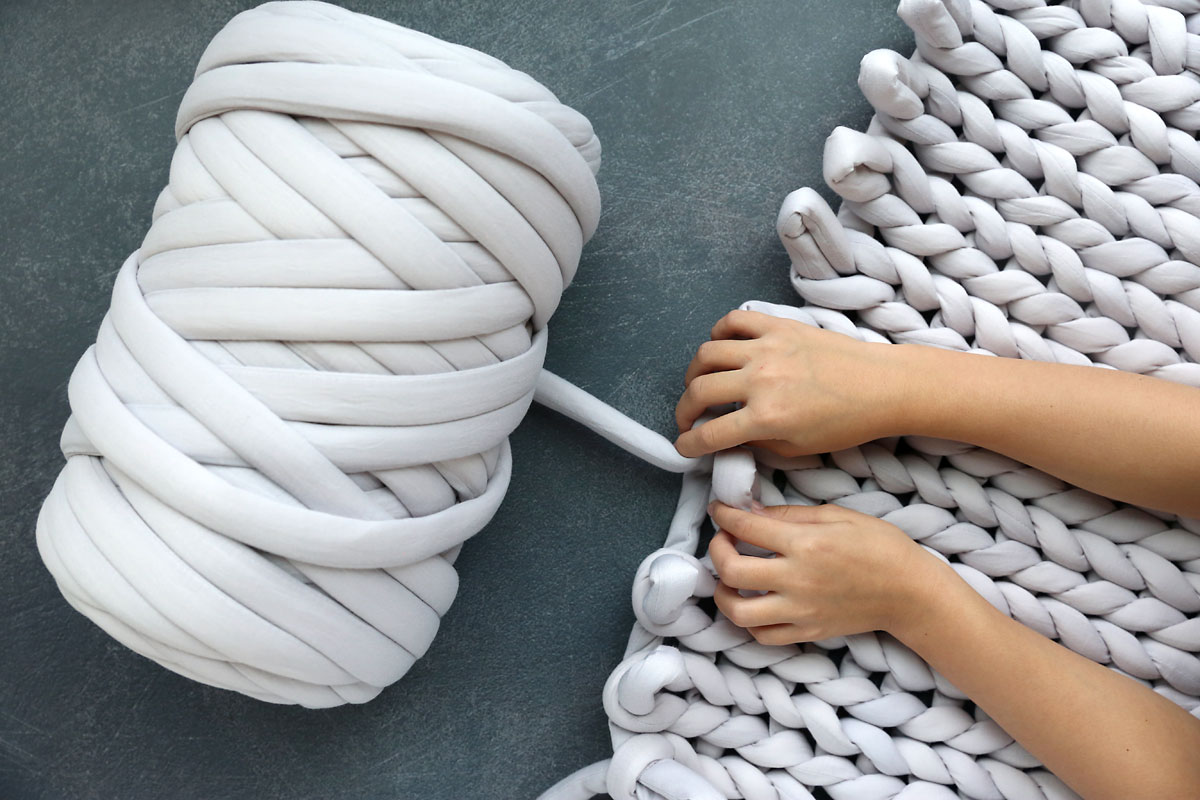
All you need to make a chunky hand knit blanket is some super chunky yarn and maybe a needle and thread for joining balls of yarn together. That’s it! No knitting needles required.
What’s the Best Yarn to use?
Honestly, the hardest part of this project might be figuring out what type of yarn you’d like to use! Here are some options for super fat yarns:
Merino wool
Also know as wool roving, thick wool yarn was the most popular option for making chunky blankets when they first came on the scene. Since it’s so thick, it makes up into gorgeous blankets that look very cozy. However, using wool has some drawbacks. First up, it’s not washable so you’d have to dry clean it. Also, it’s fairly delicate – some people mention in online reviews that it sheds quite a bit and is super easy to snag. Finally, it’s pricey. For a throw size blanket you can spend over $100 for the wool to make one of these. I decided I wasn’t willing to spend that much for a blanket that might end up being mostly decorative.
Tube Yarn
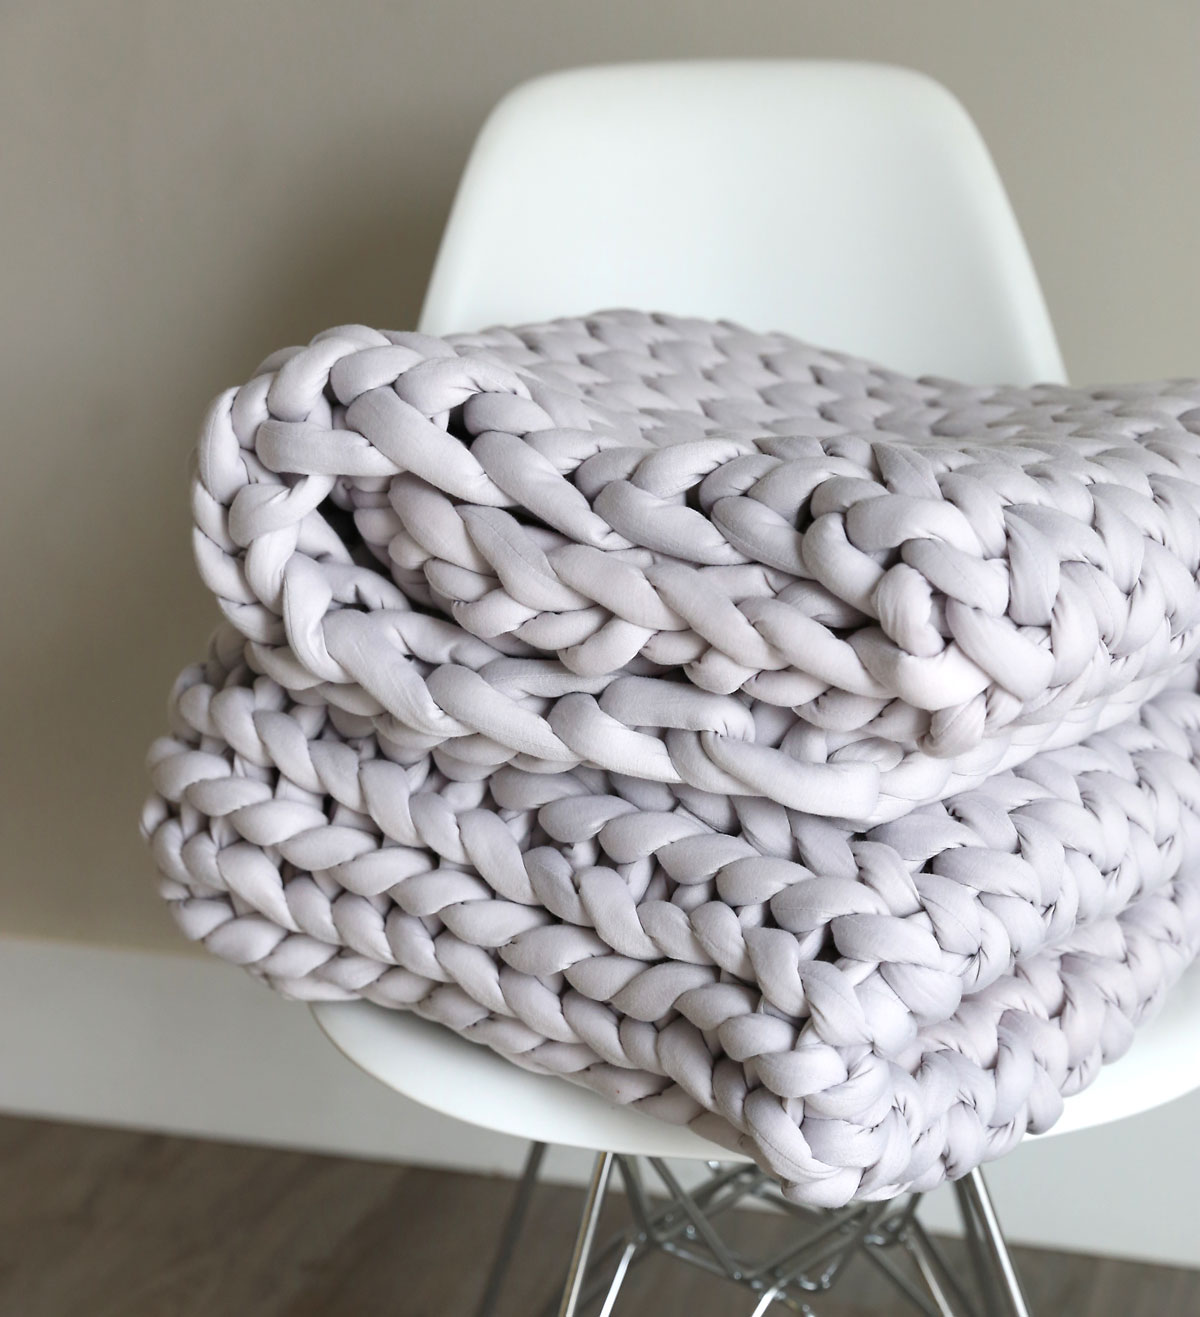
Tube yarns are also known as “vegan wool” because they are made to replicate the large, chunky look of wool using cotton and polyester instead. They are called tub yarns because they are made up of a cotton tube that’s stuffed with cotton or polyester filling. This allows tube yarns to be washed – maybe even in your washing machine – in cool water. Additionally, the material is not nearly as prone to snagging as wool. Tube yarn is very easy to work with, and has a very cool, modern look when knitted up into a blanket! One additional thing people like is that this yarn is heavy – I used just over ten pounds of tube yarn for my blanket. So a tube yarn blanket can be a nice weighted blanket option for people who find traditional weighted blankets too hot. But because of the open weave they aren’t as warm as traditional weighted blankets. (Be aware they are also not as soft and cozy as traditional blankets. It’s a different texture than any blanket I’ve made before, which is part of what makes it look so modern.)
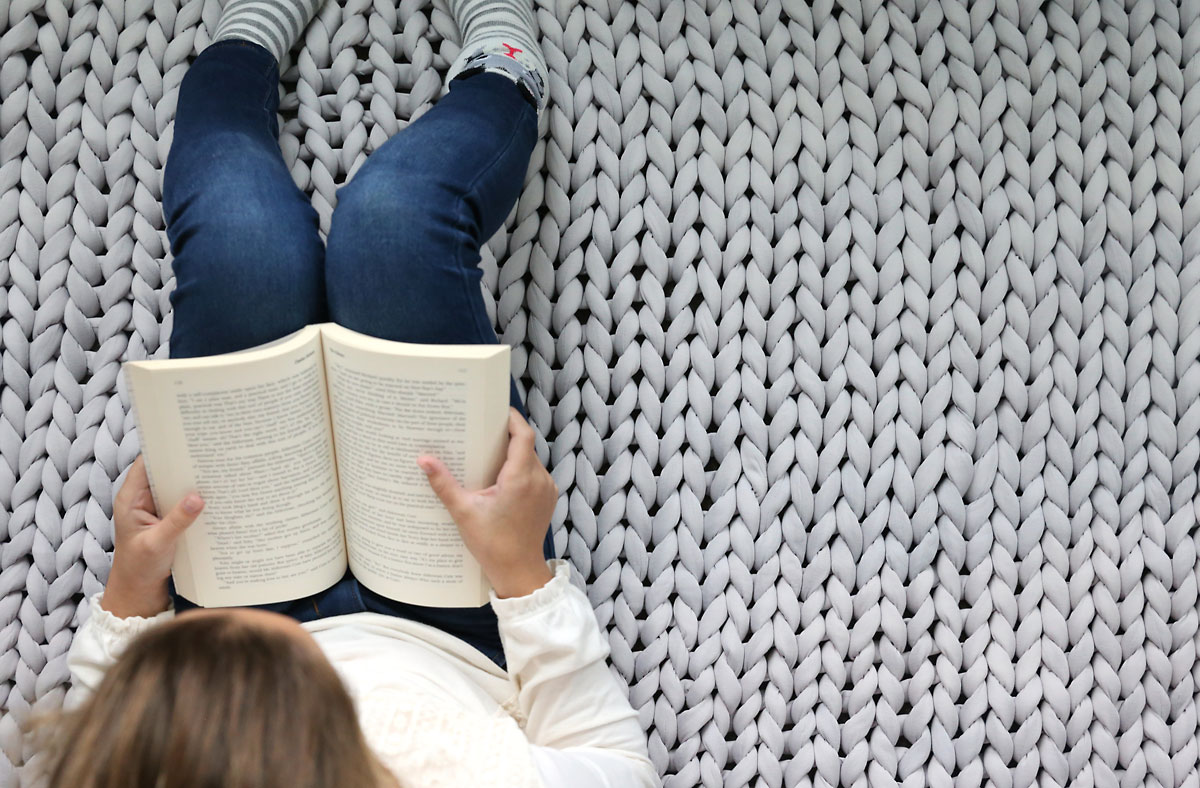
The biggest drawback of tube yarn is that it’s quite expensive. I used three 3.5 lb balls of tube yarn ordered from Amazon to make a 50×54 inch throw blanket and the total cost was $140. You can also find a large variety of tube yarns on Etsy, although they seem to be a little more expensive than the yarn I ordered from Amazon. For me, having the cool modern look of this yarn plus the fact that it would be useable and washable made it worth the splurge.
Chunky Chenille Yarn
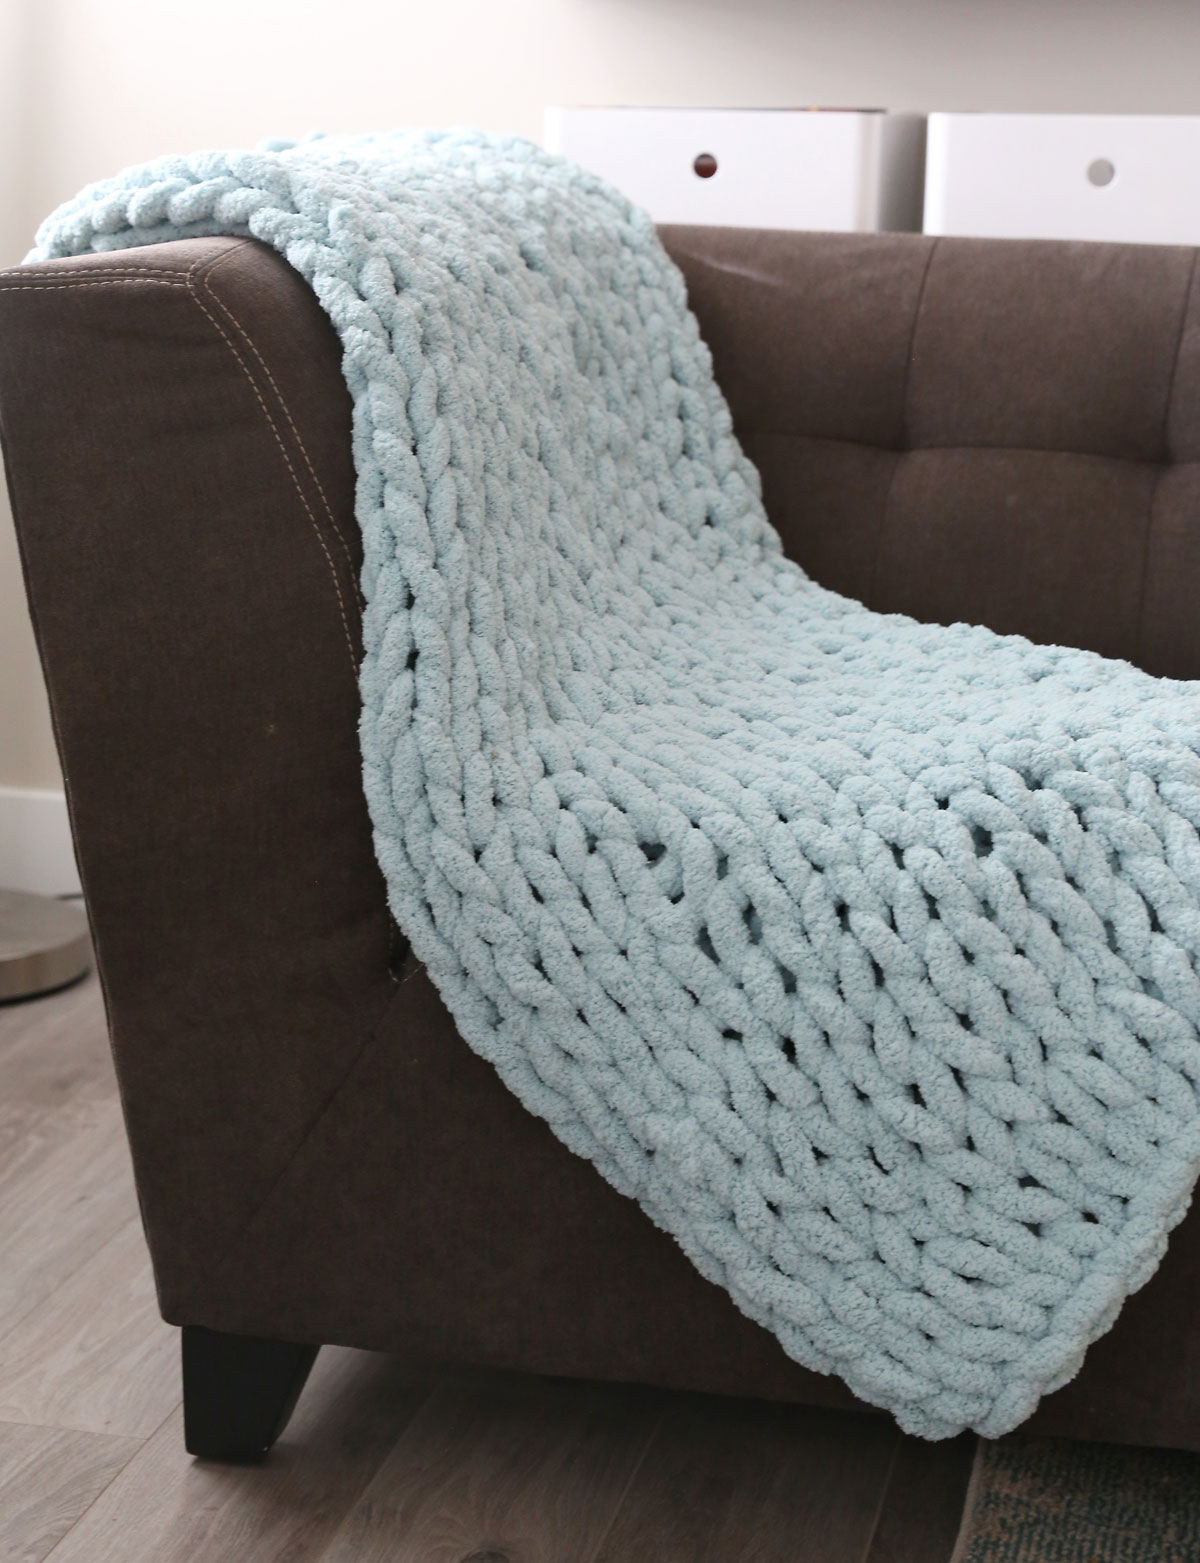
If you really want to hand knit a chunky blanket but are thinking “no way I’d drop a hundred dollars!” then chunky chenille is going to be your go-to yarn. This is a fat, fuzzy, super soft yarn that’s generally machine washable and is much more economical than tube yarn. I made the aqua blanket you can see in the next photo below using the Yarn Bee Eternal Bliss yarn from Hobby Lobby. Because I purchased it when it was on sale, I only spent $30 on this yarn (it would have been $42 full price). Walmart also sells chunky chenille yarn, and you can also find skeins on Amazon and Etsy.
Chunky chenille yarn is great if you’re working on a budget or your prefer a cozy blanket that’s a lighter weight. It’s a fuzzy yarn so it doesn’t give you the same clean, modern look that tube yarn does, but if you’re more concerned with feel than looks, chenille is probably the way to go. This is what the chenille version looks like:
How Much Yarn will I need?
It can be hard to figure out how much yarn you’ll need, because it will vary depending on how big of a blanket you’d like to make and how loose or tight you make your stitches. But I’ll share what I used for both my own blankets so you have an idea:
- For the chenille blanket you can see above, I used 6 balls of yarn that were 28 yards each for a total of 168 yards. That blanket is approximately 48×52 inches, which is a little smaller than a standard throw size blanket. It’s a good size for using over your lap on a couch or throwing over the side of a couch. I also used a slightly looser stitch on this blanket, about 2.5 to 2.75 inches.
- For the tube yarn blanket you can see below, I used 10.5 lbs of tube yarn, which was approximately 250 yards. My stitches were slightly smaller for that blanket, just over 2 inches. That blanket measures 50×54 inches. If I made it again, I’d make it slightly narrower, maybe 46 inches in width, so that it would be a bit longer and more of a rectangle than a square.
Hand Knit Blanket Video
I’ve made a video that walks you through each step for making a hand knit blanket. You’ll find written instructions and step by step photos following the video, and a printable instruction card at the very end of the post.
Make a Slip Knot
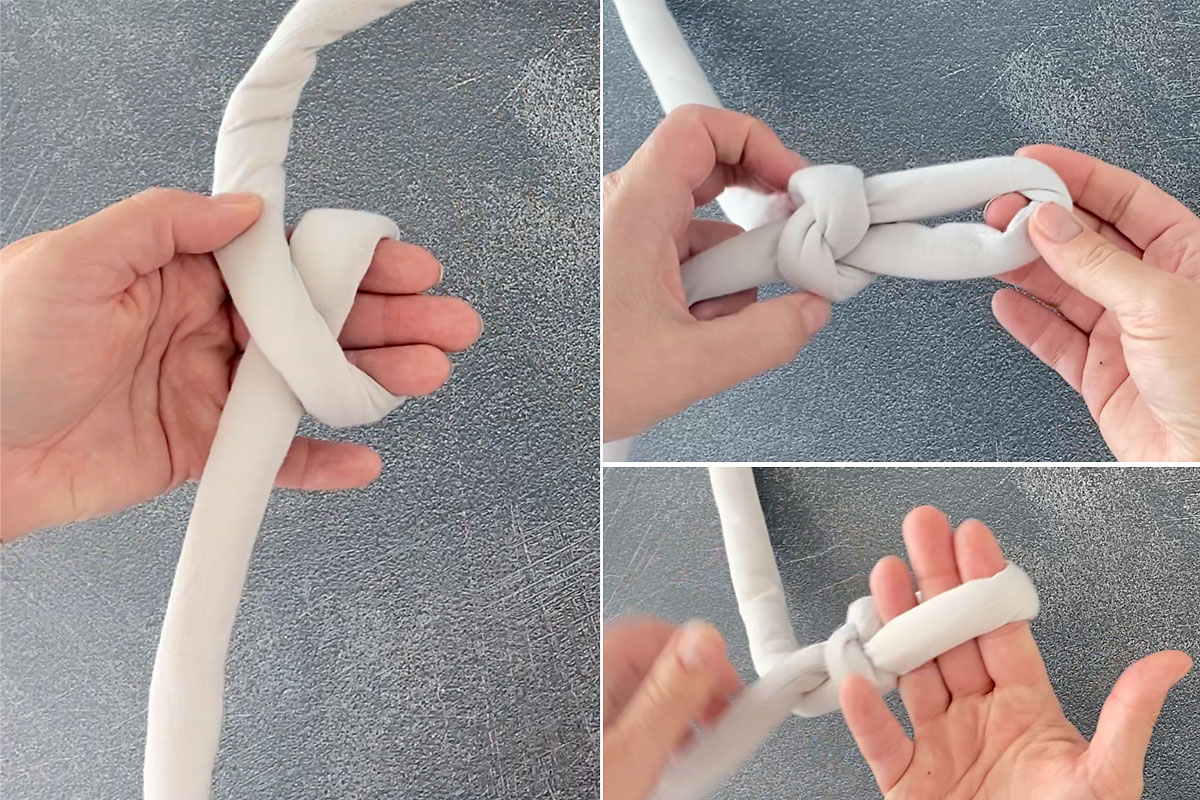
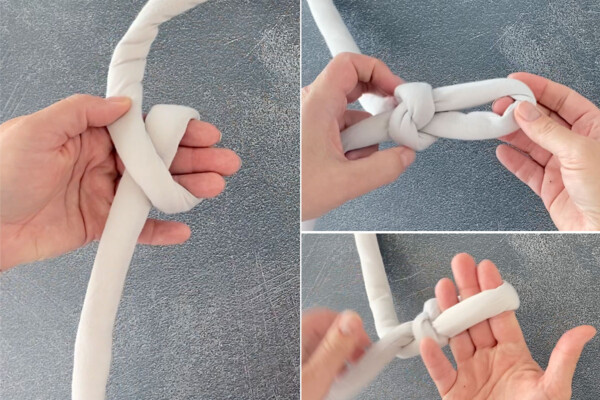
Start by sitting at a table or other flat surface with the ball of yarn in front of you and the tail end of the yarn extended toward you. Tie a slip knot about 6 inches from the end of the yarn. The loop of the slip knot should be the same size that all your other stitches (loops) will be. I like to use my hand to keep loops all the same size, so I pulled my slip knot until three fingers can fit inside it, which makes it just over 2 inches. If you want to make your loops larger or smaller, you can measure your loops or use a piece of cardboard to check the size for the first few rows until you are able to keep things even without checking.
Create a Chain for the First Row
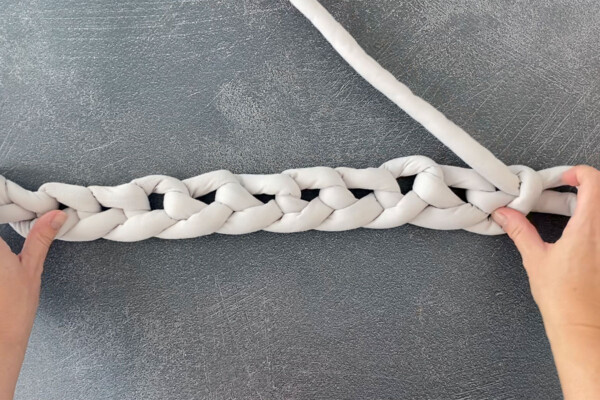
For the first row of the blanket, you’ll create a chain. Reach through the loop you just created and grab the working yarn. Pull it through the first loop to create second a loop that’s the same size (use your hand to check the size of the loop). Then pull the working yarn through that second loop to create a third loop. Continue pulling loops through and adding to your chain until it is the width you’d like the finished blanket to be. **Then make one more loop.**
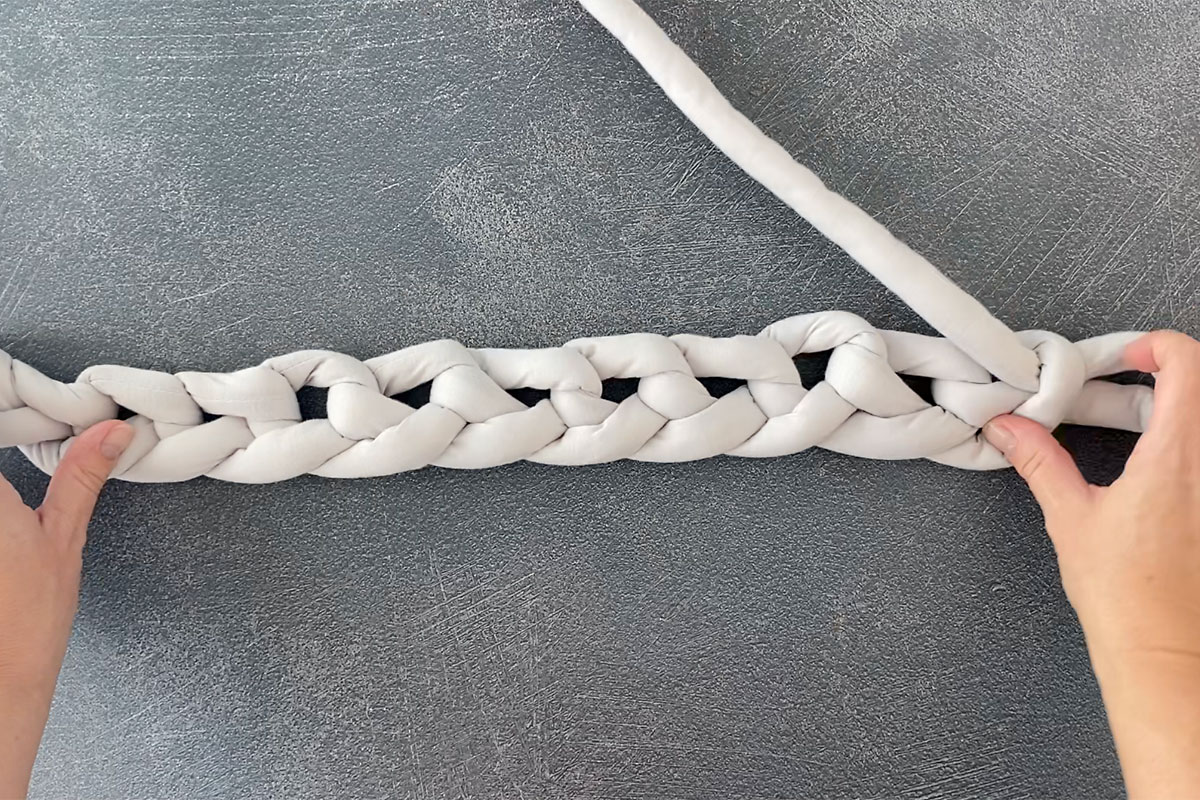
Remember to keep the loops the same size. For a chunky blanket, I use the width of three fingers as a way to keep my loops a uniform size (just over two inches). As I pull a new loop through, I slide three fingers inside the loop to check the size – if my hand fits snugly, I know it’s correct. On your first few rows, it’s helpful to quickly check the size of each loop to make sure they are uniform.
Start the Second Row
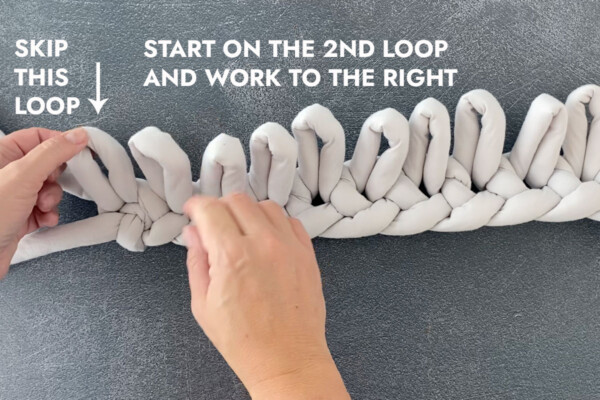
Now you’ll start creating knit stitches, which is the simple stitch you’ll repeat to hand knit the whole blanket. You are ready to start your first row, working toward the left. Each time you start a new row, you will skip the first loop, which is the last one you just made. This gives you a more finished edge on each side of the blanket.
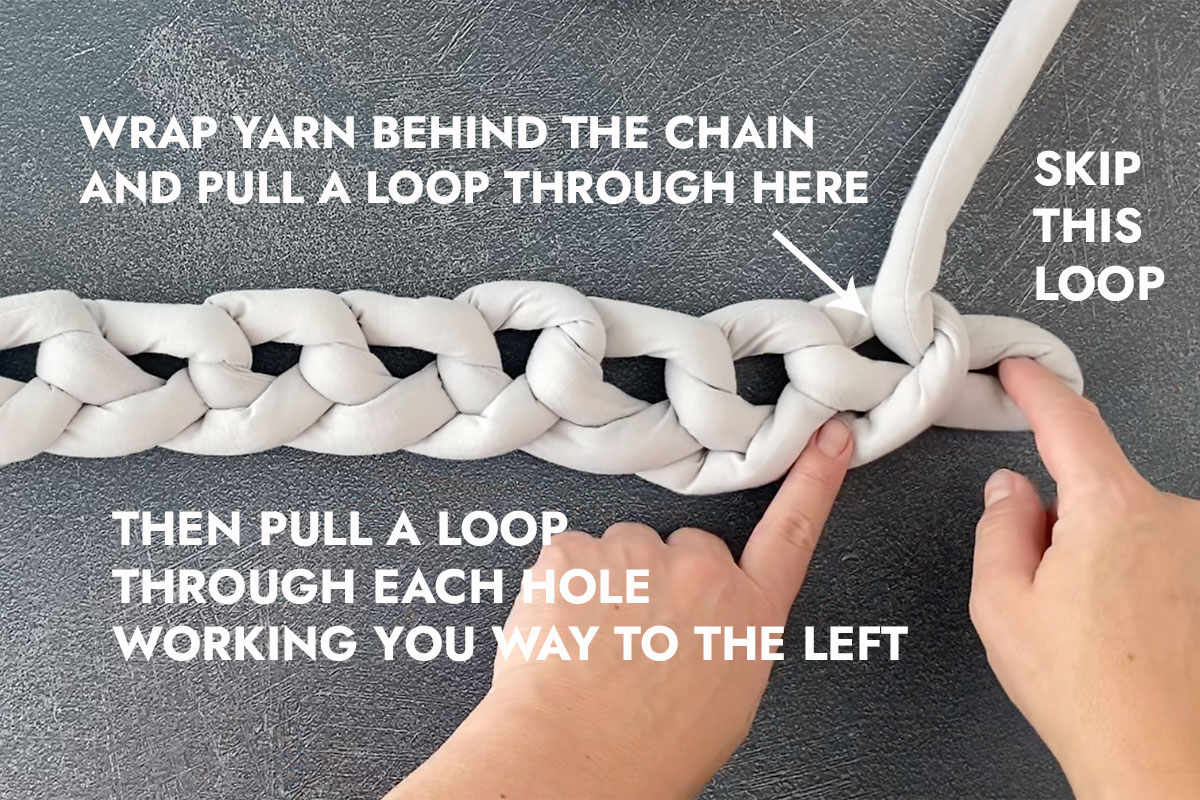
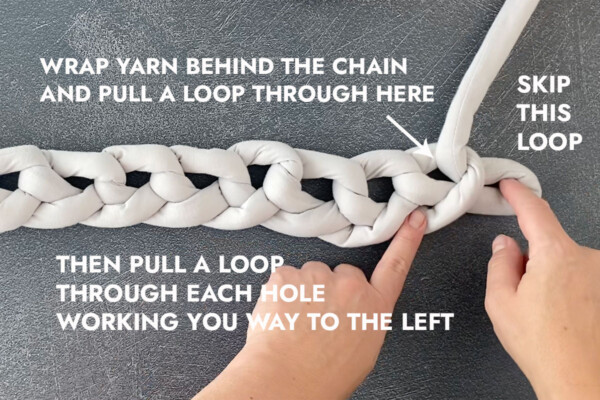
Look at the chain you’ve just made and find the hole inside each loop (remember you are skipping the first loop, which is the last “extra” one you just made). Pull the working yarn from the back through the 2nd hole/loop from the right, and pull it upward to create a vertical loop. Again, use your hand to check the size of this loop. (If your chain starts to unravel, you are trying to pull the working yarn through the chain from the front. Make sure to pull it from the back.)
Continue Knit Stitching
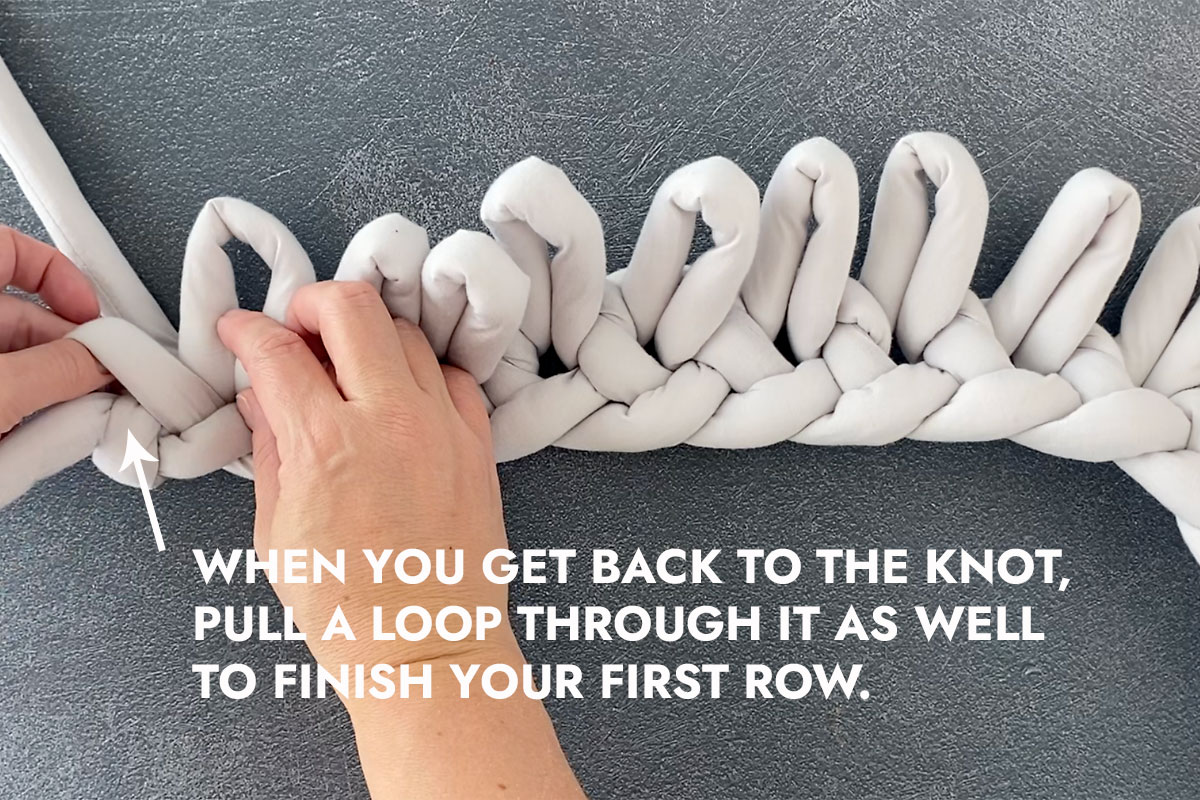
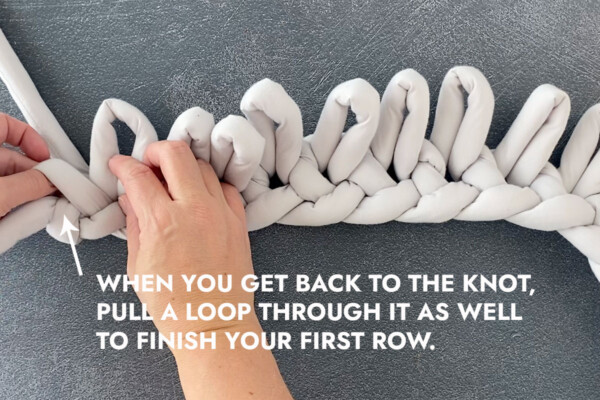
Continue pulling yarn from the back through each loop in your chain, creating vertical loops that are all the same size. When you get to the end, make a loop (knit stitch) through the very last hole, and then also through the knot itself.
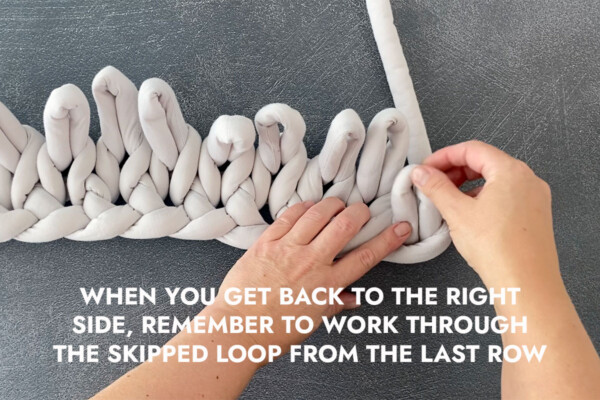
Then it’s time to start the same process, going back toward the right. Again, remember to skip the first loop on the row, which is the last loop you just made. Make your first knit stitch going toward the right in the second loop, and continue all the way across until you get to the end of the row. At the end of the row, pull up the skipped loop from the first row and make a loop through it.
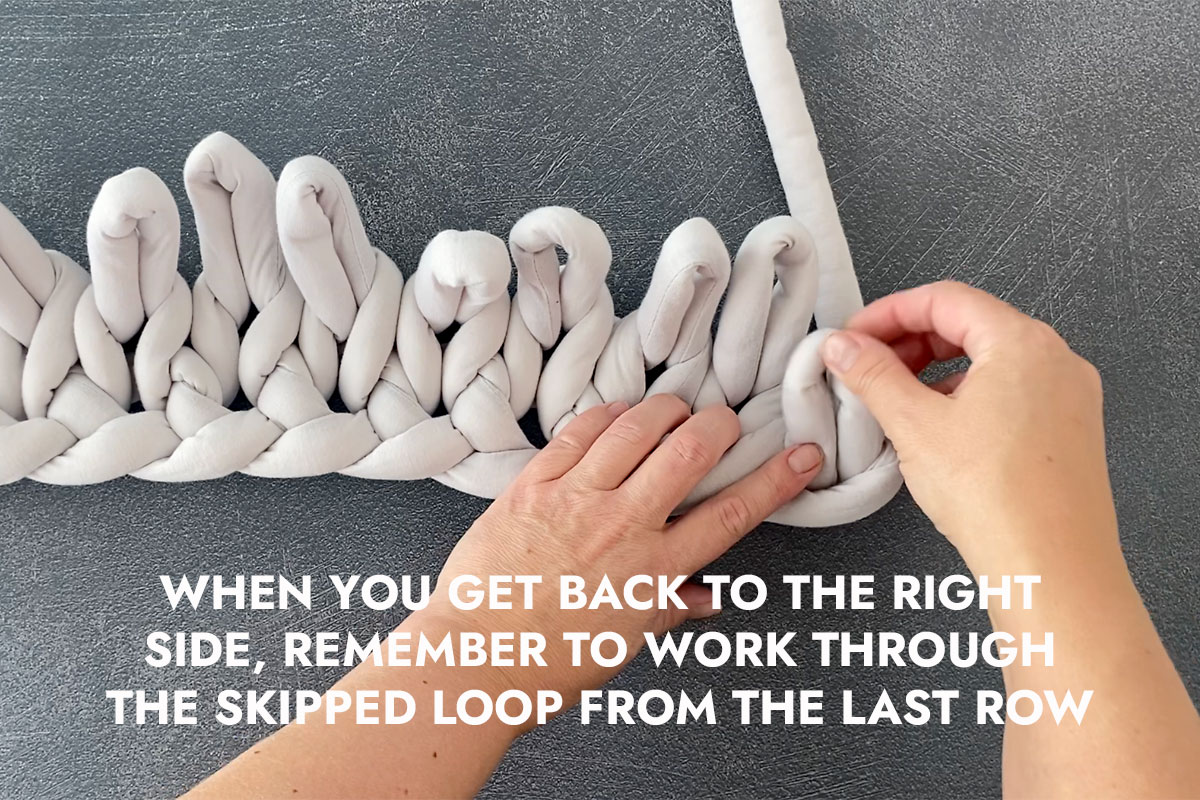
Then skip the loop you just made, and continue knit stitching toward the left. Everytime you get to the end of a row you’ll stitch through the skipped loop from the row before. Everytime you start a going in a new direction, you’ll skip the very last loop you just made. This gives the sides of your blanket a braided finish.
Joining New Yarn
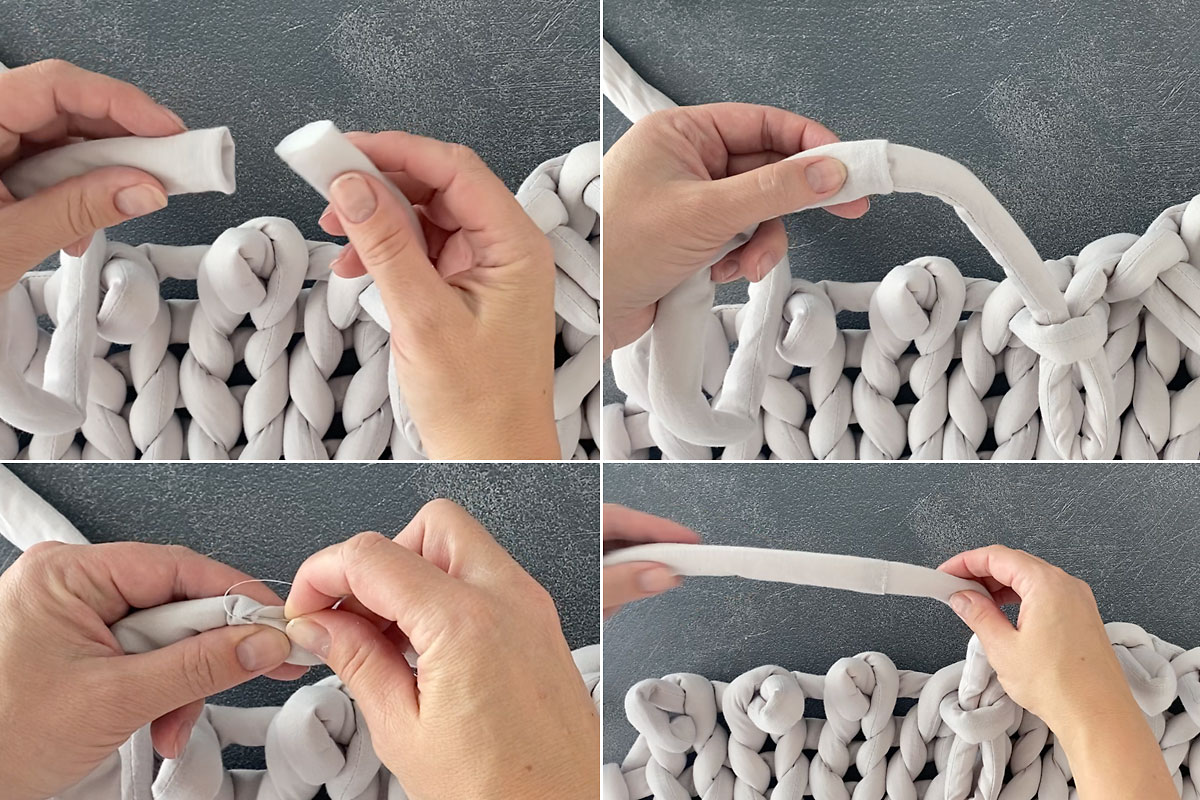
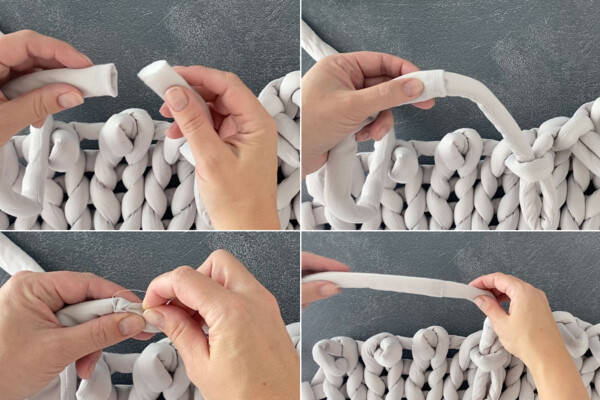
If you are using skeins of yarn instead of one long piece, you’ll need to join them. If you are using a chunky chenille yarn, you can just tie the new piece of yarn and old piece of yarn together in a double knot. Pull the knot tight and cut off any excess. However, if you are using a tube yarn, you’ll want to quickly stitch the two pieces of yarn together.
Pull back the casing on the new piece of yarn and cut off about an inch of the polyester filling. Then turn the casing inside to create a clean edge. Stuff the end of the old yarn inside the casing for the new yarn, and then use a needle and thread to quickly hand stitch the two pieces of yarn together. Don’t stress about making it look perfect; once the blanket is finished no one will ever be able to find the place you attached a new ball of yarn.
Binding off the Top
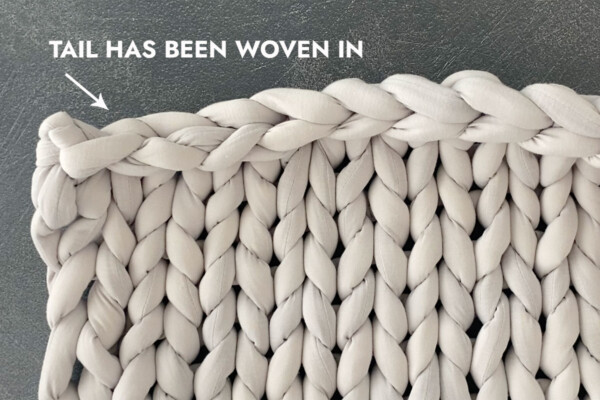
When the blanket has reached the desired length, it’s time to bind it off. Make all the loops on your last row slightly longer/looser than the other loops in your blanket. Finish the last row row and cut off the excess yarn leaving a 12 inch tail. Go to the other side of the blanket to bind off (if the tail is on the left side of the blanket, go to the right side). Take loop 2 and thread it through loop 1, which is the “skipped” loop from the row below. Then thread loop 3 through loop 2, then loop 4 through loop 3, and so on. This continues the braided effect from the sides of the blanket.
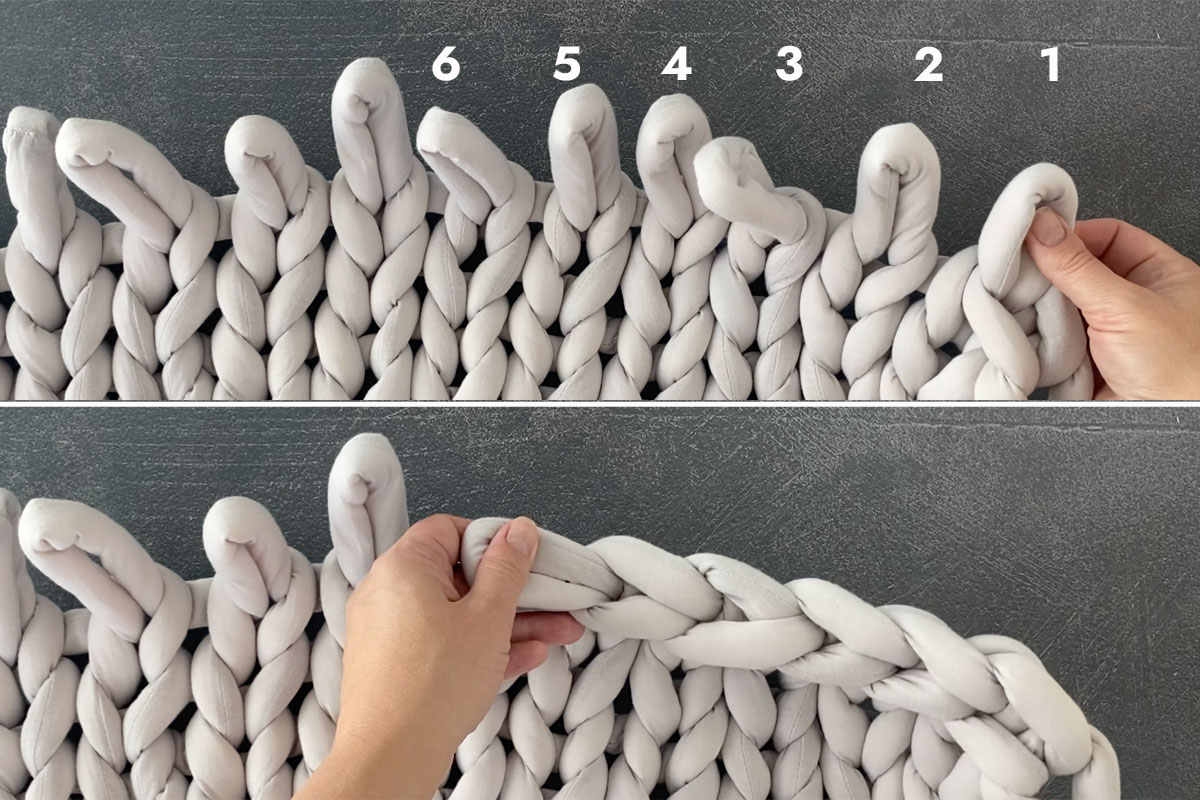
When you get back to the end, overlap the last loop with the skipped loop from the row before and thread the tail through both of them. Use the tail to tie a knot and pull to secure it.
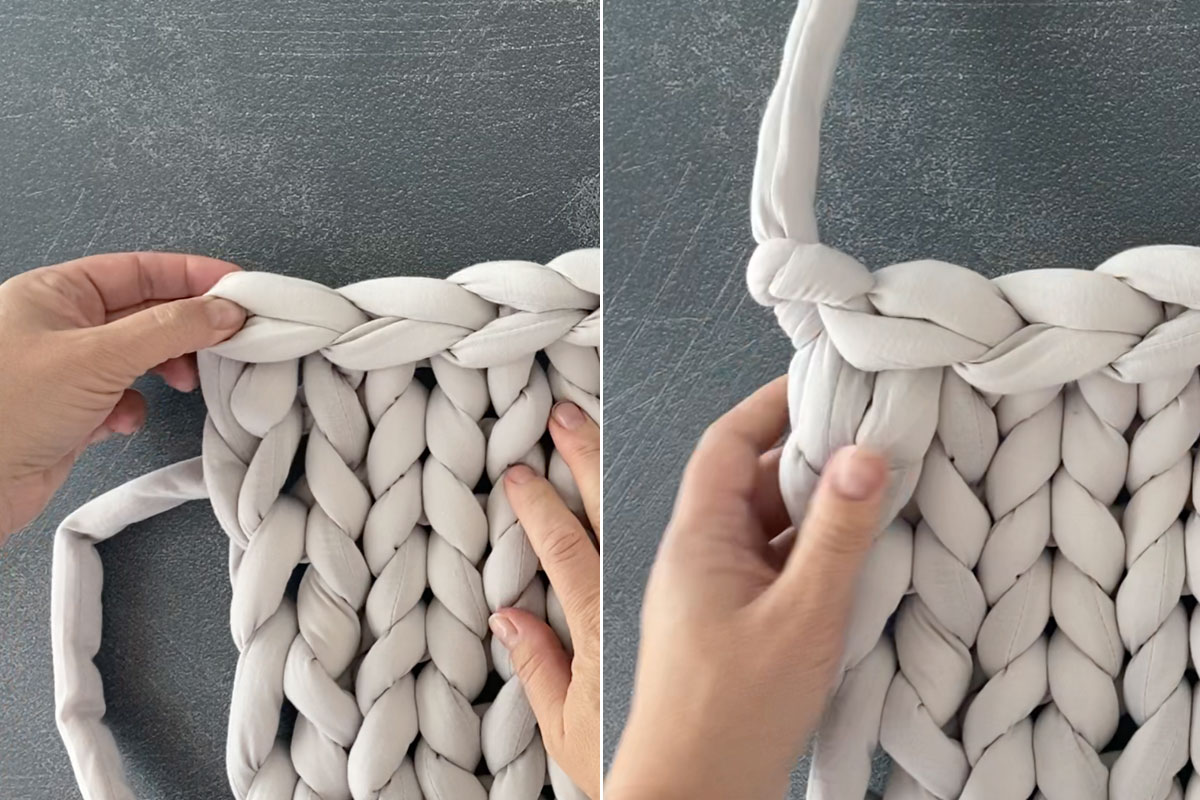
Securing the Tails
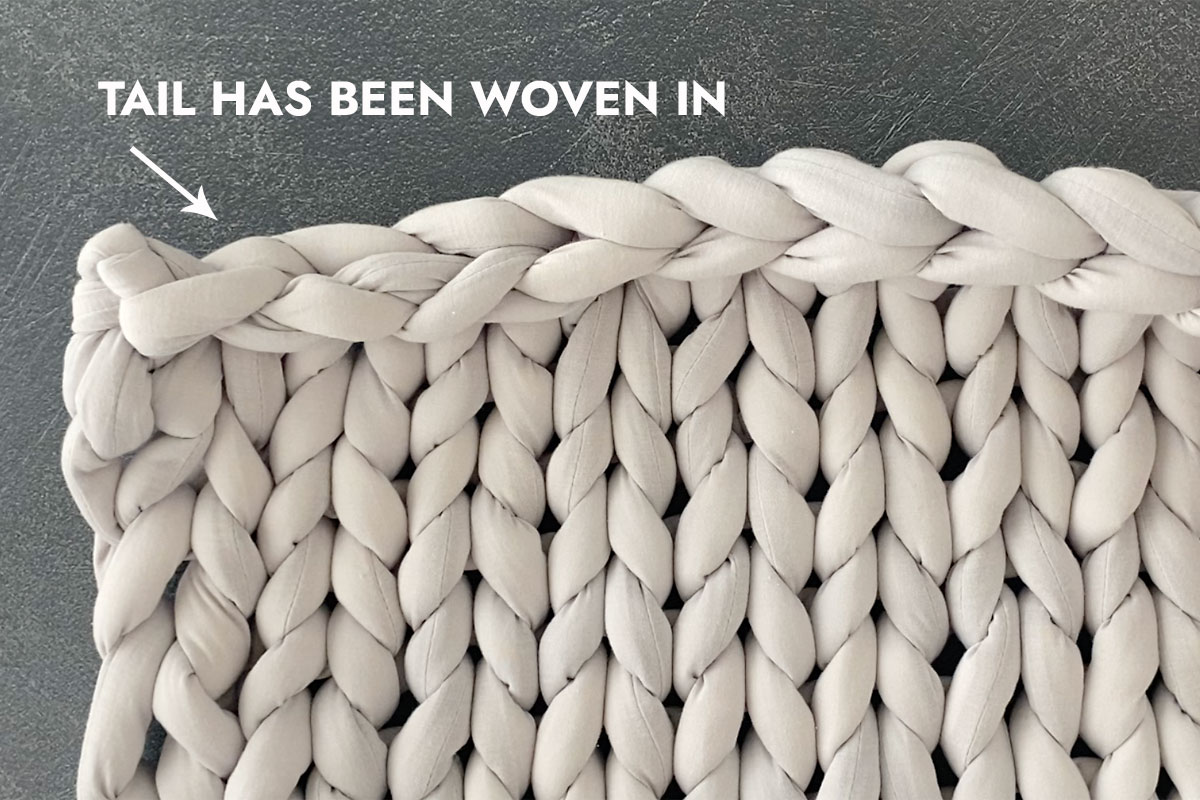
At this point there will be a tail at the beginning and end of your blanket. The last step is hiding and securing those tails. Some people recommend weaving the tails in and hiding them within the blanket. However, I find that if you just weave them in they always work their way back out. So I recommend weaving them in and then using a needle and matching thread to stitch them in place.
Tips for Success
Here are a few tips to make sure your blanket turns out great:
- DO NOT forget to work a loop through the “skipped” loop from the previous row every time you get to the end of a row. This is essential.
- When working through a skipped loop at the end of each row, keep the stitches fairly tight (this makes the edge neater).
- When you are working your very last row, make your loops slightly bigger. That will ensure that you can bind off the blanket without the top being too tight. If the top does seem tight, you can give it a good stretch to make it the same width as the bottom of the blanket.
Chunky Hand Knit Blanket
Supplies
- 150-250 yards Chunky Yarn Tube Yarn, Chunky Chenille, or Chunky Wool yarn
- Needle and Thread if using tube yarn
Want more project ideas? Sign up to get my favorite easy crafts and recipes straight to your inbox!
Instructions
- Start by tying a slip knot, leaving a 6 inch tail. The loop of the slip knot should be just over 2 inches.
- Create a chain for the first row of your blanket, working toward the right. Make the chain as long as you'd like the blanket to be wide, then add one more loop.
- Start working toward the left for row two. Skip the first loop, then pull a loop (knit stitch) from behind through the second loop.
- Continue pulling a loop from behind through every loop (hole) in the chain. Make sure all the loops you create are the same size, just over 2 inches. When you get back to the knot, pull a loop through the knot as well.
- Start working toward the right for row 3, pulling loops from behind the same way you did in row 2. Every time you start a new row, skip the first loop. Every time you end a row, make sure you work through the skipped loop from the previous row.
- Continue working back and forth until the blanket is as long as you'd like.
- To join a new ball of yarn, tuck the tail end of one yarn inside the tail end of the other yarn. Sew together with a needle and thread. (If you're using chenille yarn you can just tie the two pieces of yarn in a tight knot and trim the tails.)
- When the blanket is as long as you'd like, cut a 12 inch tail. Starting from the other side, bind off the top, then thread the tail through the last two loops and tie a knot. Weave in the tail, then use needle and thread to secure it.
Video Tutorial


Sumana says
good job
Nancy says
Is it common for the blanket to roll around d the edges? Wanted to make sure I wasn’t missing something.
Anna says
Great pattern! Very thorough and perfect for a beginner knitter! I’ve always crocheted, but I find the look of knit to be way more neat!
Michael Neely says
I often shop at Walmart, people ask me why I’ve been with this place for so long and why there are discount codes for my purchases on the DazzDeals website, all of which are free to use.
Karen Loewen says
Is there any limit to how wide a chunky blanket can be. I seem to end up with it wider at the top. Somehow my gauge is out. I’m trying to make a throw for a king bed advice?
Anna says
There is no limit to how big you want a blanket to be. Adjust chain size for width and row size for length.