
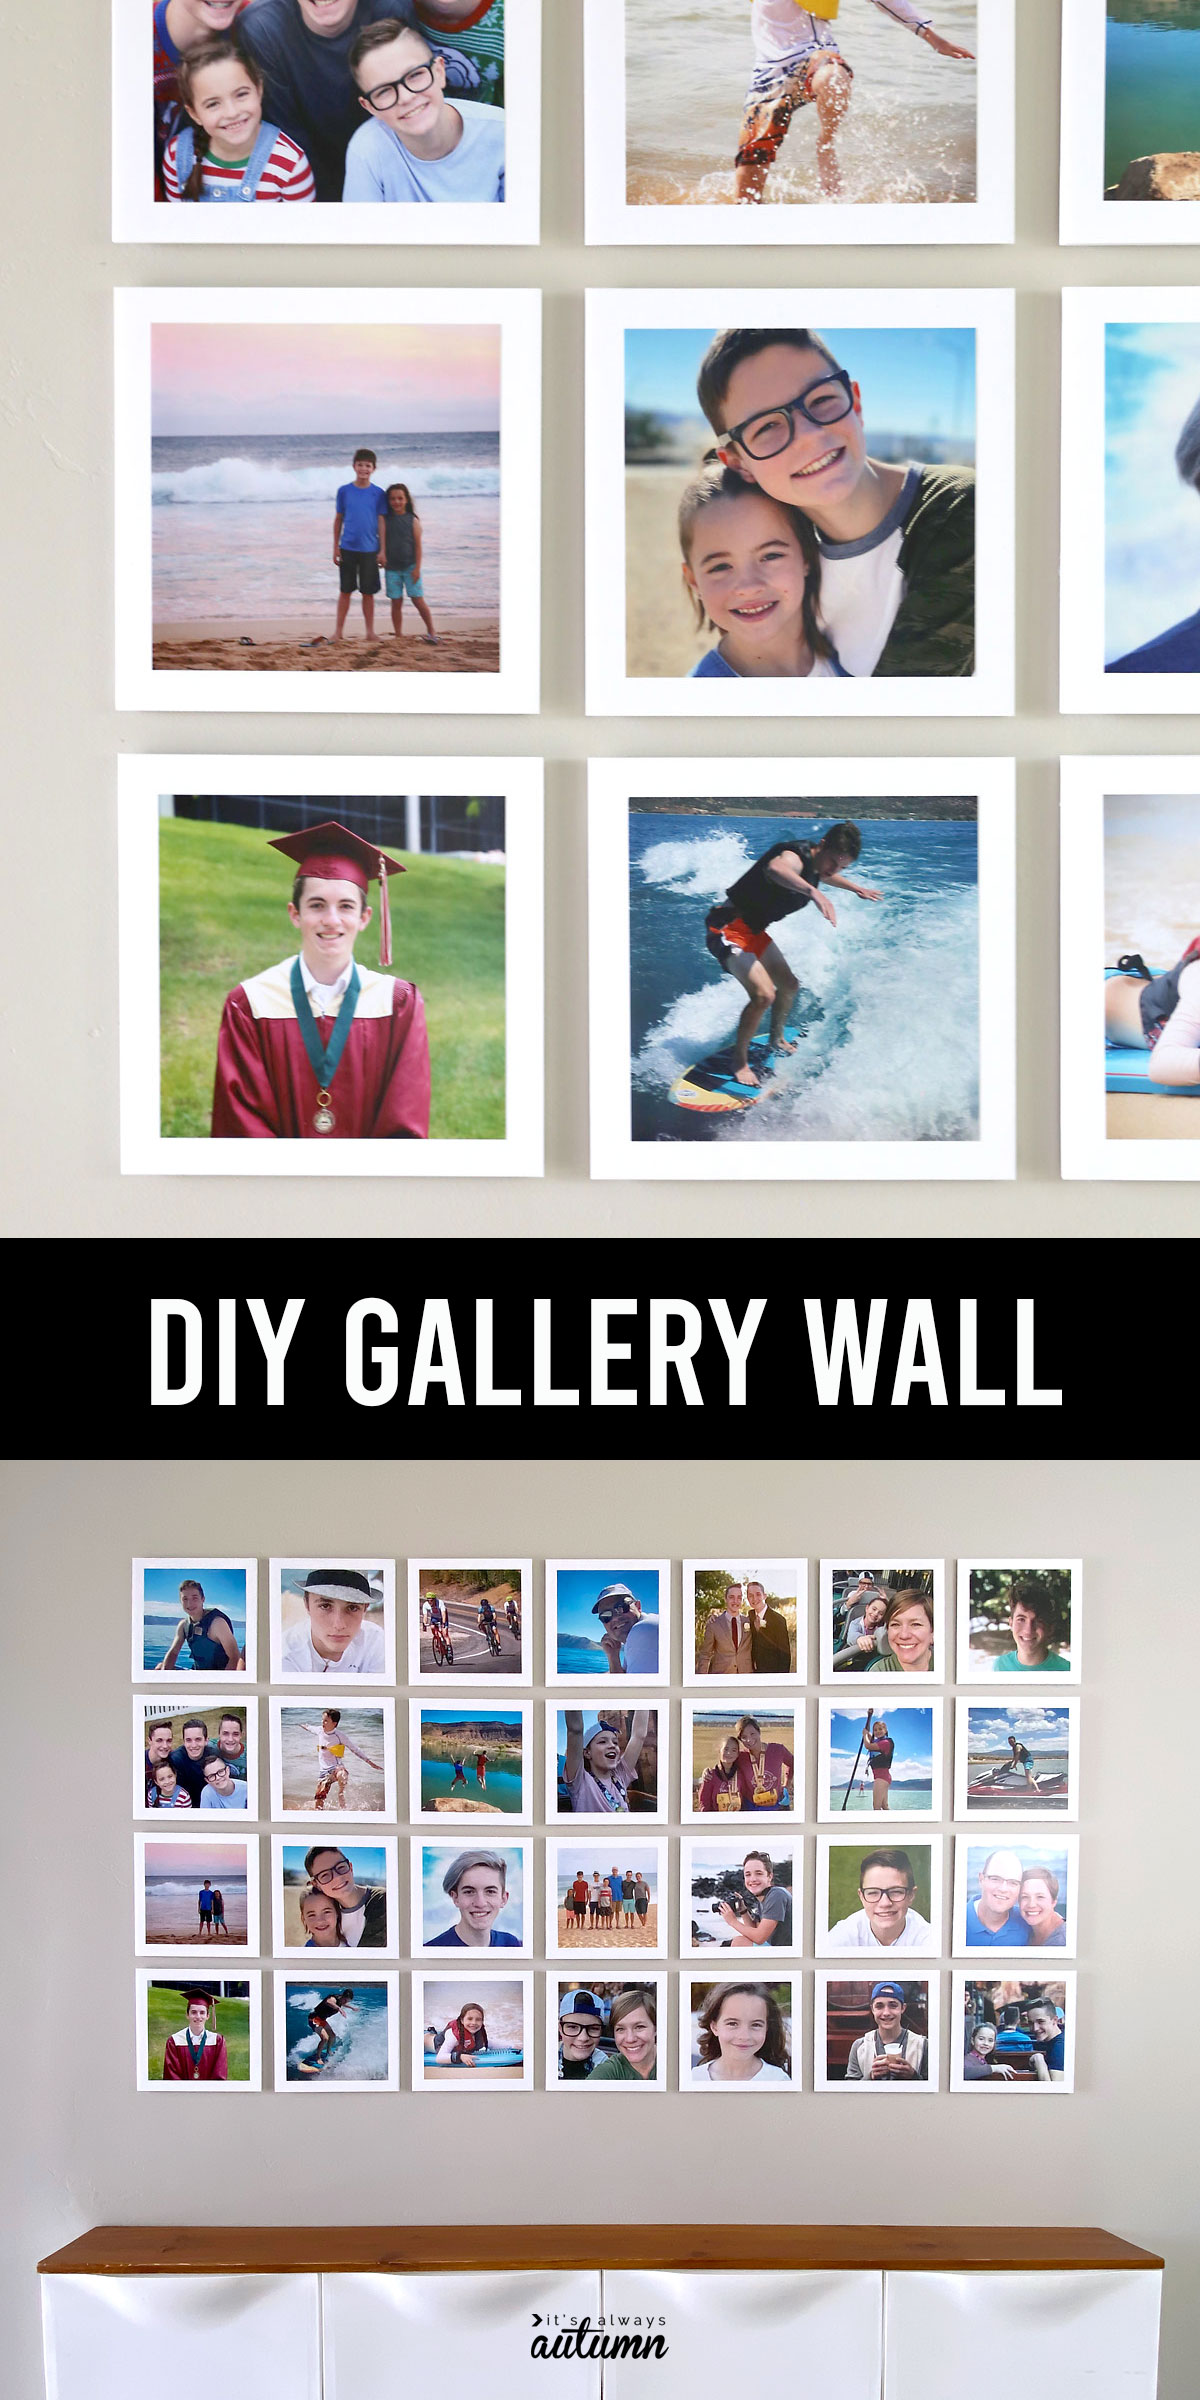
In today’s post: Learn how to make a huge impact DIY gallery wall at a fraction of the cost!
I’ve always loved the look of photo collage gallery walls, but not the cost. Buying a whole bunch of frames is pricey, and then hanging them all – and trying to make sure they are evenly spaced and not crooked – is a huge hassle. So when I decided to *finally* put up a photo collage in my front hallway, I turned to the photo mounting hack I’ve used before with large prints: foam core board.
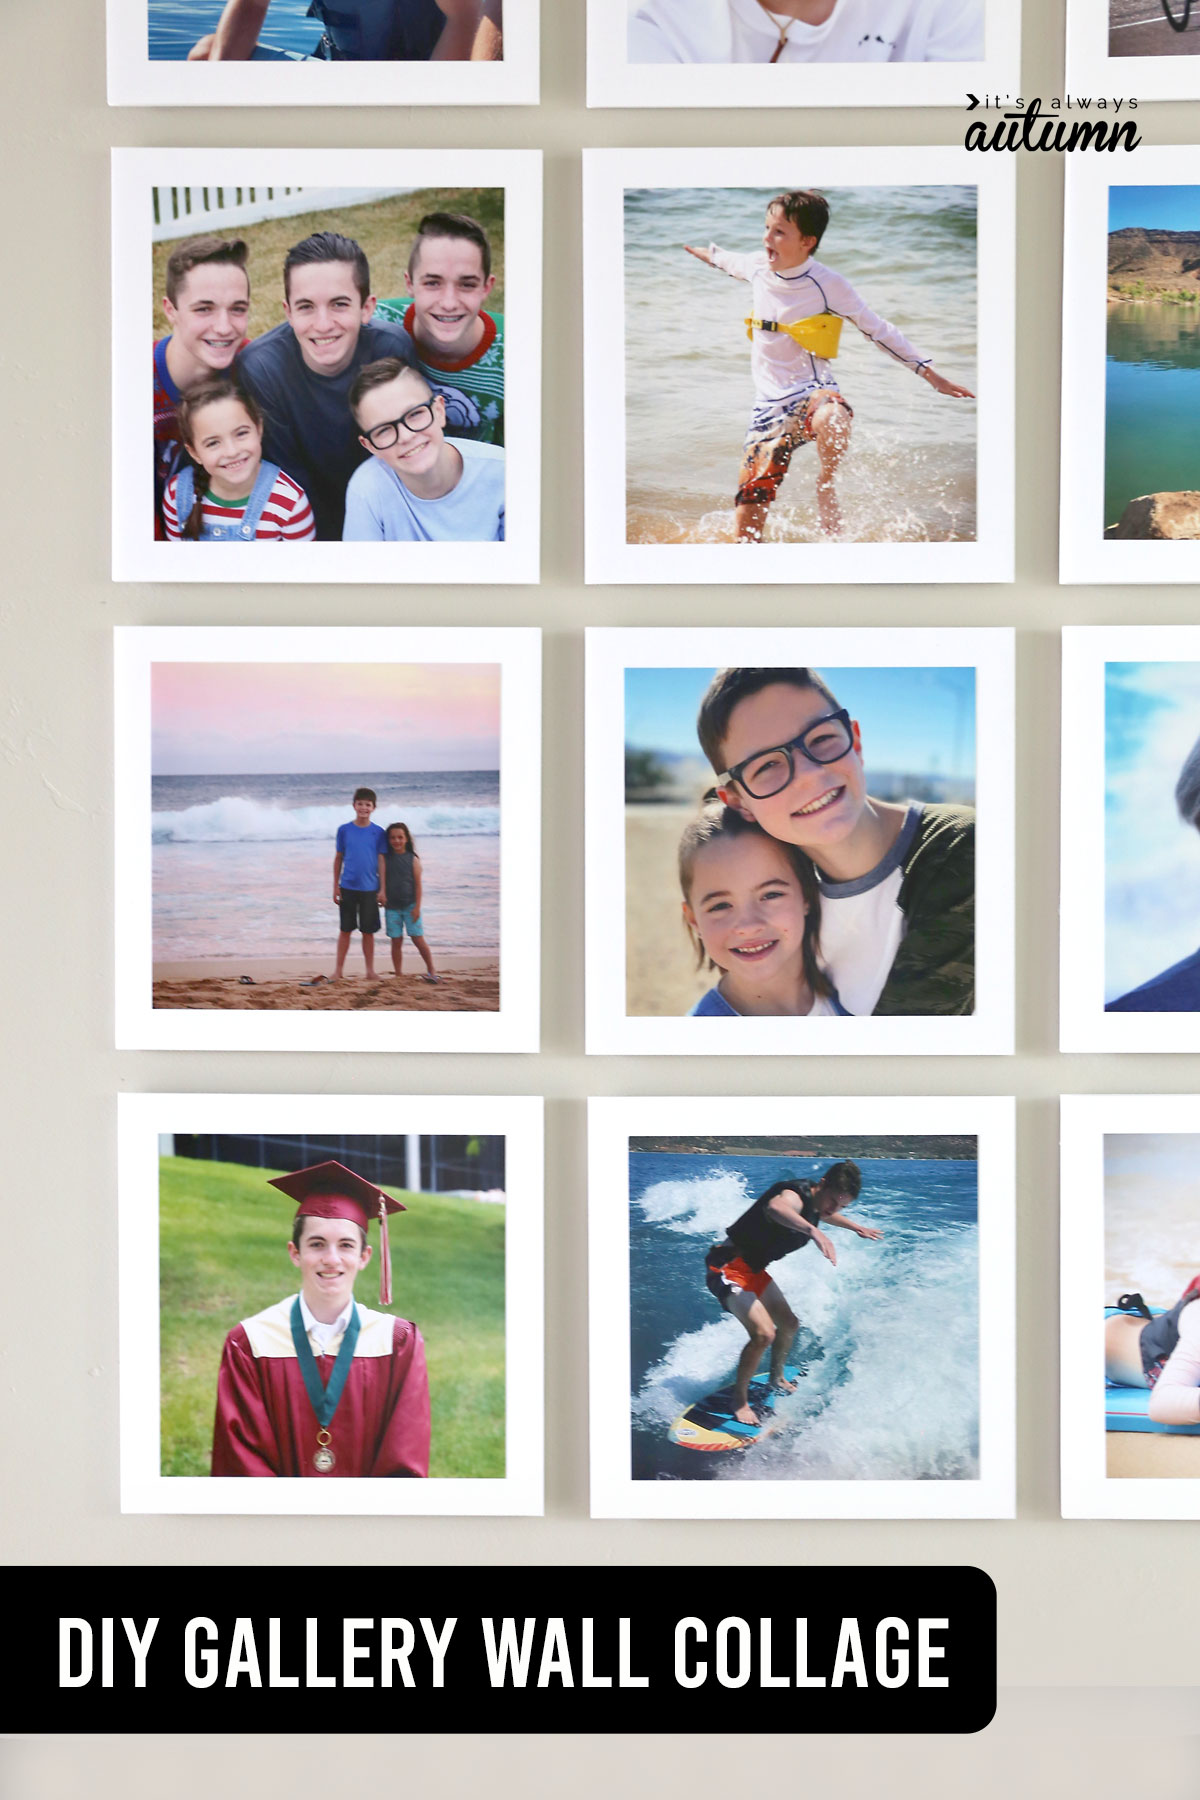
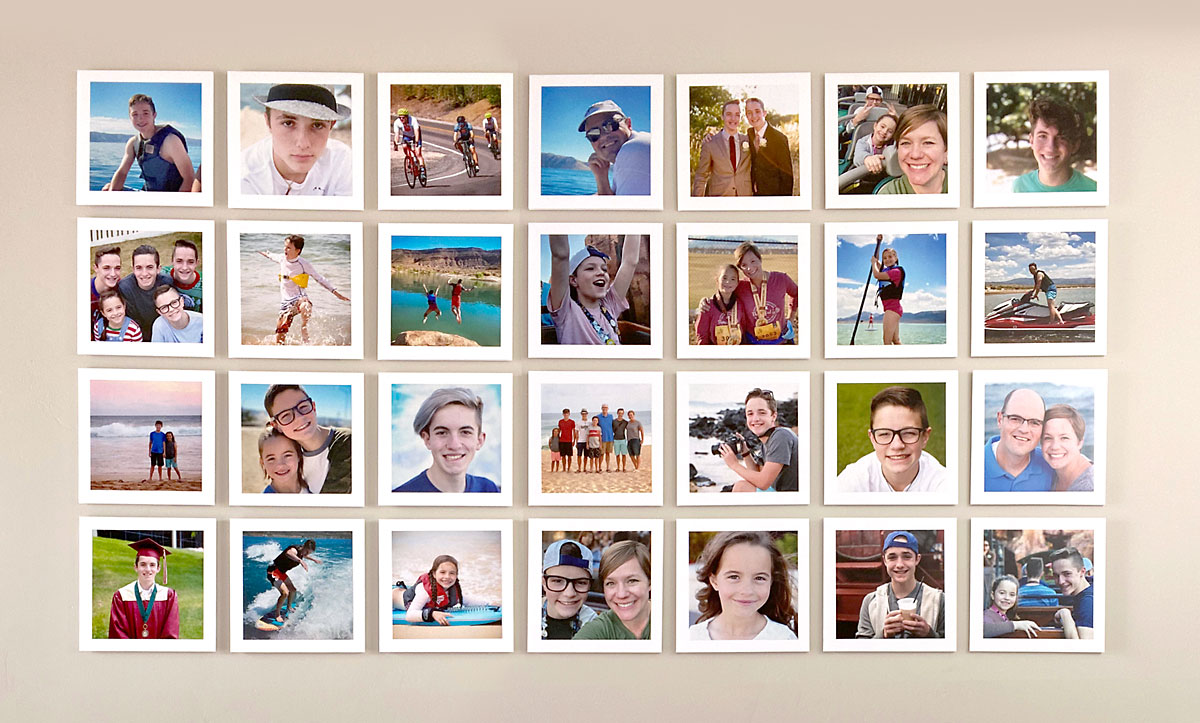
Foam core board is super inexpensive, has a great minimalist look, and is very lightweight so it’s easy to hang on the wall using picture hanging strips or photo mounting putty instead of nails. I used foam core before to mount large prints, but this week I used to it make a photo collage using 8×8 inch photo prints:
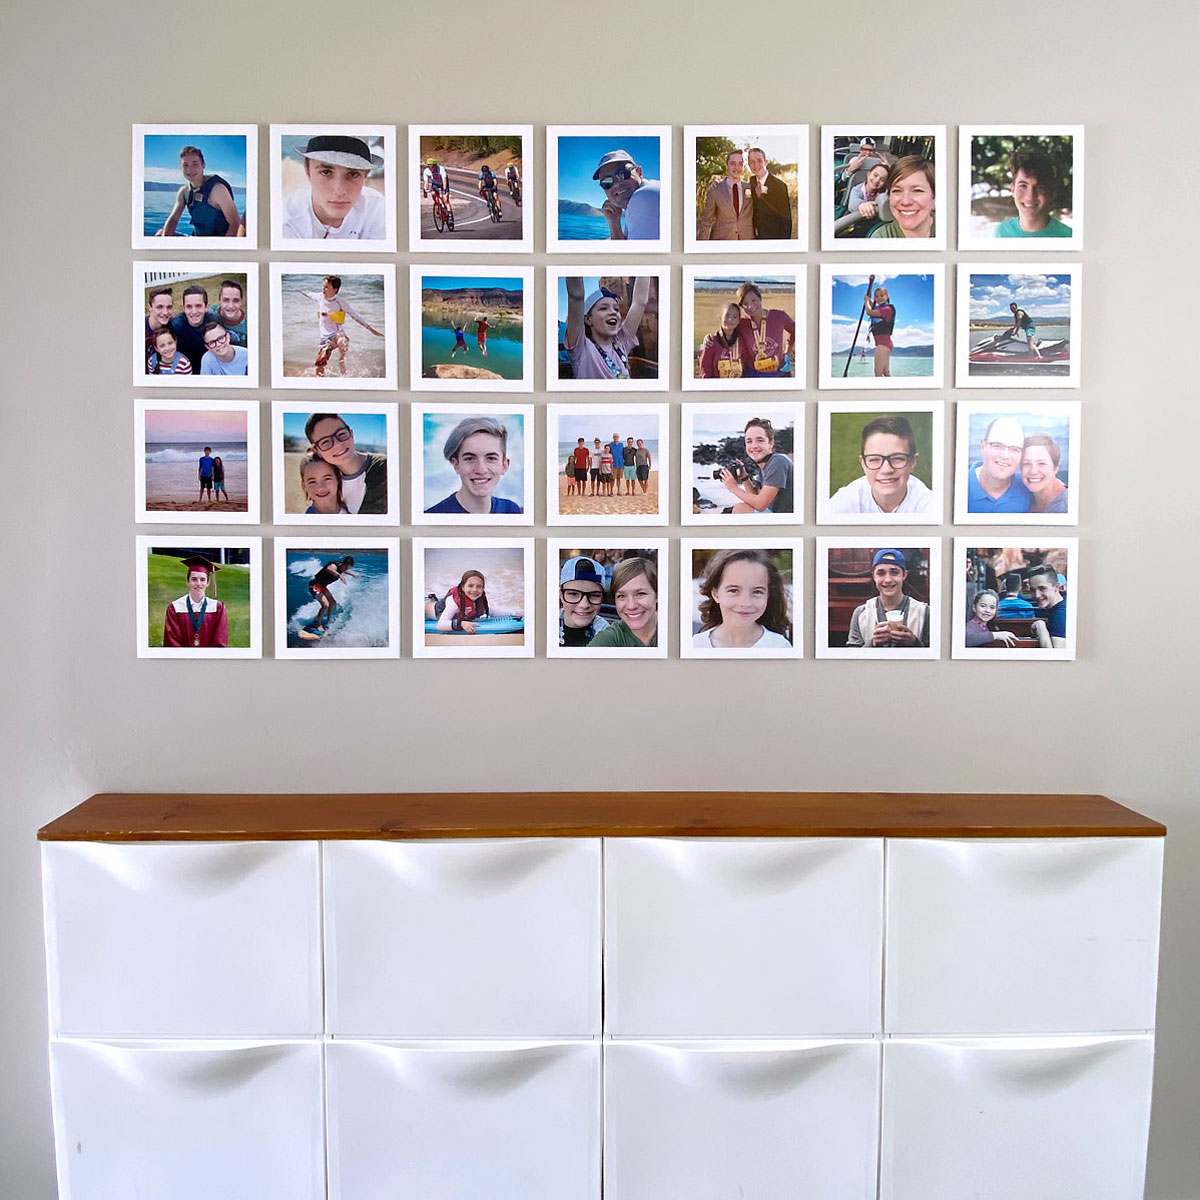
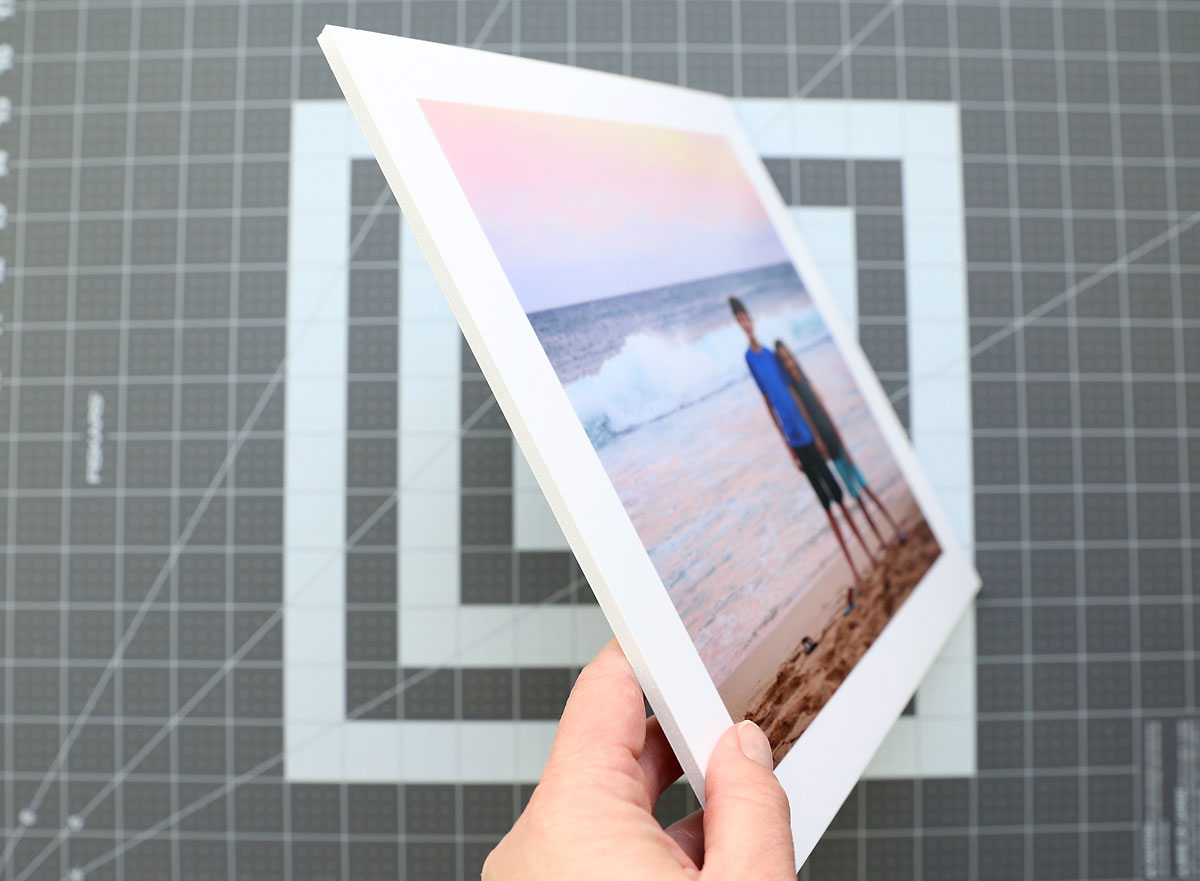
Instead of placing each photo in a frame, I adhered them to a square of foam core board, which gives the look of a frame without the cost. You can buy cheap foam core at the dollar store for a dollar per board (which makes 6 squares of this size) OR you can really splurge and get nicer quality board at Walmart for about $1.80 per board. Either way, each foam core square is only going to cost about 30 cents plus the time it will take you to cut them. And when you want to hang 28 photos, that’s a WHOLE LOT cheaper than buying frames.
Gallery Wall: Should I buy or DIY?
Using foam core to make a gallery wall will definitely save you money, but it will require effort AND you’ll need a few additional supplies. If you don’t want to take the time, or you don’t already have things like a large ruler and cutting mat, you might just want to look into an online service that will send you preprinted photo tiles. That will certainly be easier and faster.
But if you like making things, already have basic craft supplies, and don’t mind a little elbow grease, this is a great project. Just be aware that if you decide to do LOTS of photos like I did (28), you’ll spend a couple of hours just cutting the foam core board and adhering photos to it. So queue up a favorite show before you get started!
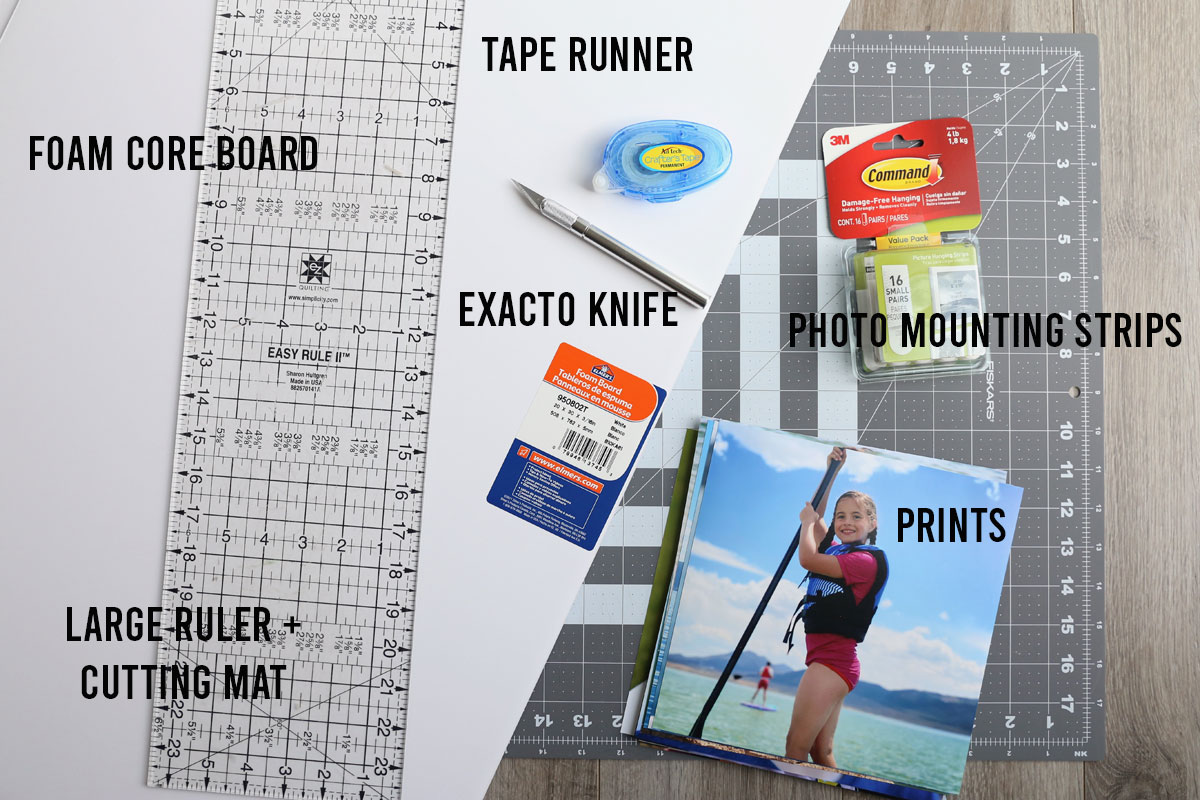
Supplies + Cost Breakdown
This is what you’ll need to make a gallery wall photo collage:
- 8×8 photo prints
- foam core board
- adhesive tape runner
- exacto knife with a new, sharp blade
- large ruler and large cutting mat
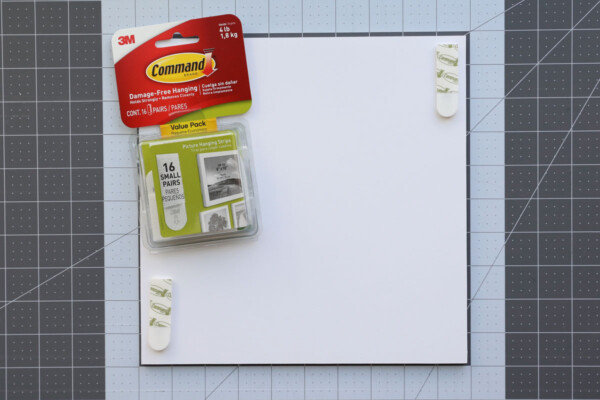
- Command picture hanging strips or photo mounting putty
If you already own a large ruler, cutting mat, and exacto knife, your cost will stay quite low for this project. My photos ended up being under $3.50 each including:
- 8×8 photo prints from Costco ($2 each)
- foam core squares (6 per $2 foam core board at Walmart, so $.30 each)
- Command picture hanging strips ($8 per pack of 16 sets of small strips at Walmart, so $1 per photo)
- tape runner adhesive (Walmart)
The cost would be slightly lower if you use photo mounting putty instead of picture hanging strips.
Ordering preprinted photo tiles online would be two to three times the cost.
Cutting tips
Cutting the foam core boards into squares is the most time consuming part of this project. I probably spent about 2 hours cutting out 28 squares.
You MUST have a new, sharp blade on your exacto knife to get really smooth cuts in your foam core board. A dull blade will be very frustrating to work with and may chew up your board, but a new sharp blade will cut through very smoothly.
If the edges of your foam core boards look good, with no nicks or crunched corners, you can just cut each 20×30 foam core board into six 10 inch squares. However, my foam core board did have crunched corners so I decided to cut the outer 1/4 inch off my board and then cut it into 9.75 inch squares instead.
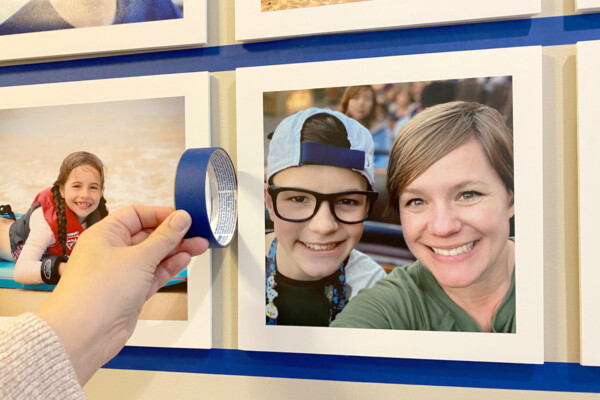
It’s easiest to make your cuts across the board the short way first, as shown in the photo below.
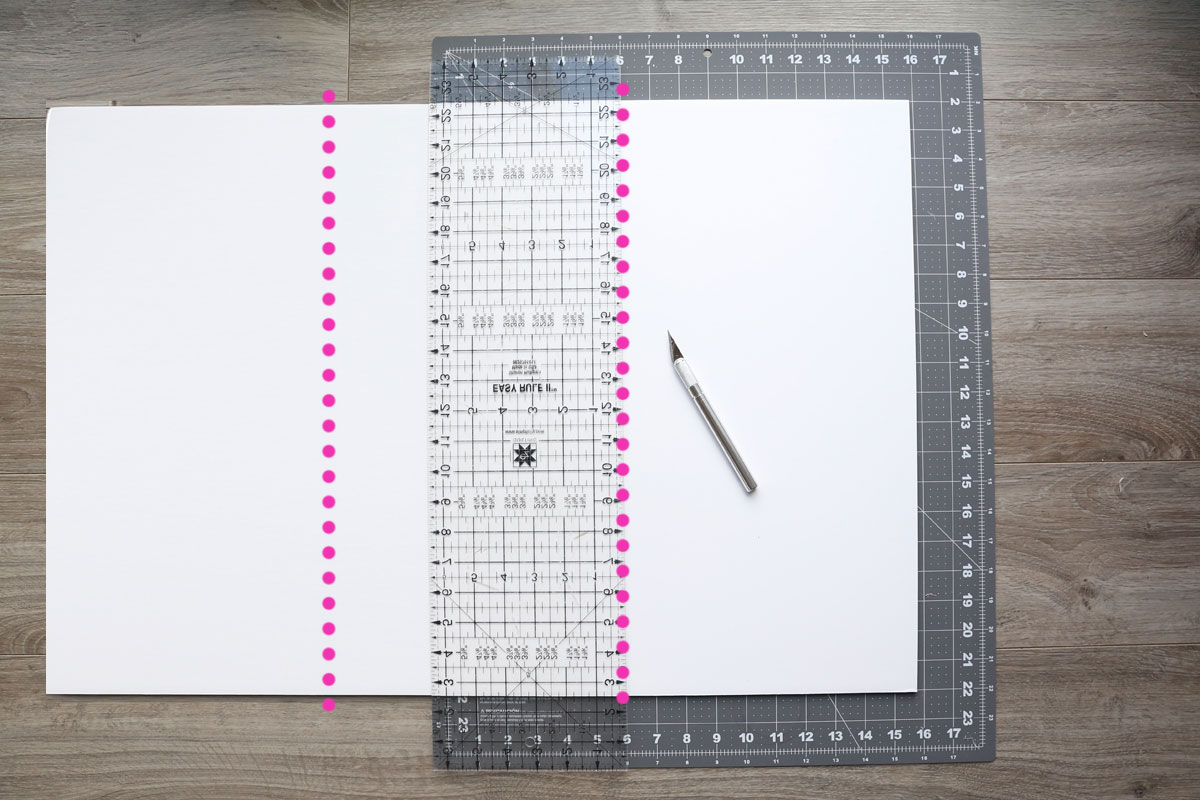
When you are using a large ruler and cutting board, you will want to line everything up, then lean forward on the ruler with your entire forearm. This will help to stabilize the entire ruler so it doesn’t slide around as you make the long cuts.
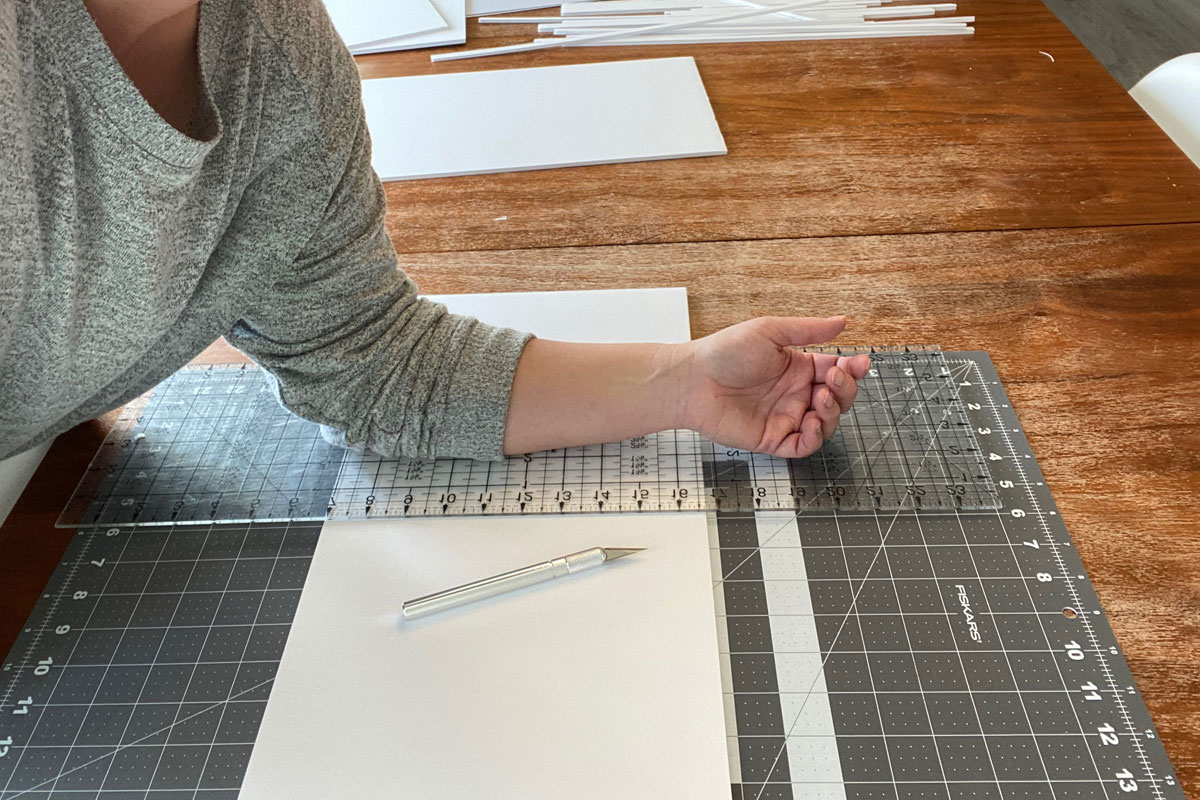
Please remember that YOU WILL mess up on a few of your cuts. That’s ok, and you’ll get better at it as you go along. So purchase a few more boards than you think you will need – they’re cheap! Also, foam core board is pretty sturdy, but it’s not indestructable, so don’t press down on it super hard. And once you’ve cut your squares, don’t leave them out on the kitchen table where someone could knock them off – a fall will nick the edges.
A final note about cutting: Yes, it IS possible to cut foam core board if you don’t have a large cutting mat and ruler…but it’s really hard, so I don’t recommend it.
How to make a DIY gallery wall

DIY Gallery Wall
Supplies
- Photo Prints 8x8 inches
- Foam Core Boards 1 per 6 prints
- Tape Runner Adhesive
- Exacto Knife with a new blade
- Large Ruler
- Large Cutting Mat
- Command Small Picture Hanging Strips or Photo Mounting Putty
Want more project ideas? Sign up to get my favorite easy crafts and recipes straight to your inbox!
Instructions
- Using an exacto knife with a very sharp blade, cut the foam core boards into 10 inch squares (you can get 6 from each 20x30 inch foam core board). Please note that if you would like to trim the outer 1/4 inch off your foam core, like I did, you will need to cut 9.75 inch squares.

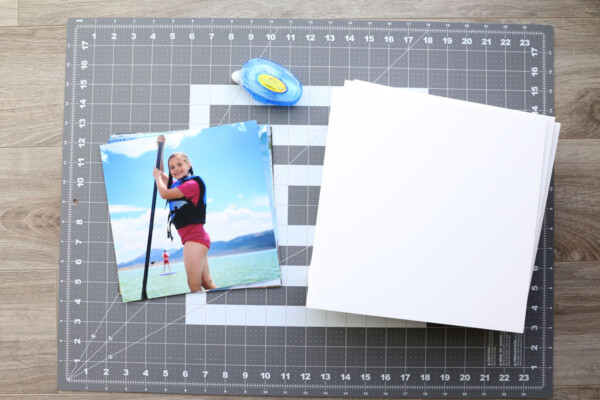
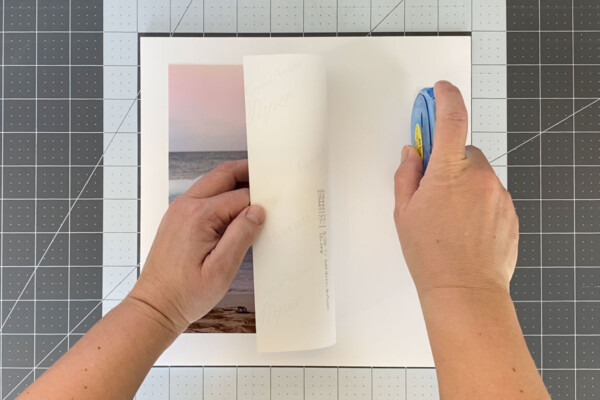
- Use tape runner adhesive to adhere each photo into the center of a foam core square. If you want to be exact, the easiest way to do this is to lay the photo down on a foam core square and get it centered. Then lift just the right side of the photo, while holding the left side in place, and used the tape runner to add a line of adhesive on the foam core square under the right side of the photo. Press the right side of the photo down, then lift the left side and add adhesive on the foam core square on the left side. DO NOT press hard with the tape runner or you can dent the foam core board. Alternately, you can just flip over the photo and place adhesive around the edges on the back side, then place the photo in the middle of the foam core square.
- Your photos are now ready to be hung on the wall. You can use whatever mounting product you prefer, such as Command picture hanging strips or photo mounting putty. To use picture hanging strips, press together the velcro sides of two strips. Remove the backing from one side, and place the strip down on the back of the foam core board. I recommend using 2 sets of strips on each photo board.
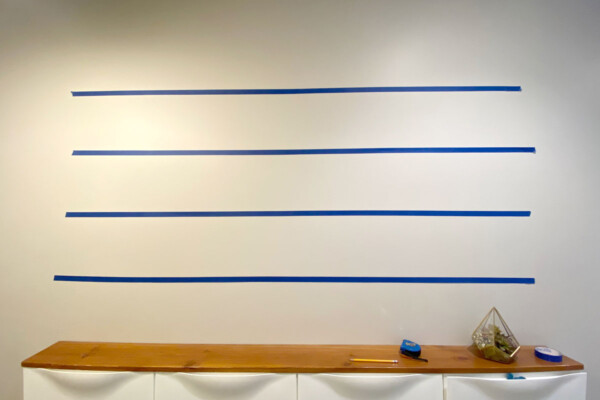
- Prep your wall by measuring and marking where the photo collage will go. Place masking tape on the wall at the height you want the bottom row of photos to go. Make sure that line of masking tape is level. Then measure 9.75 inches up from the first line of masking tape to place your second line of tape (or 10 inches up if your squares are 10 inches). Continue until you have marked all your rows of photos.
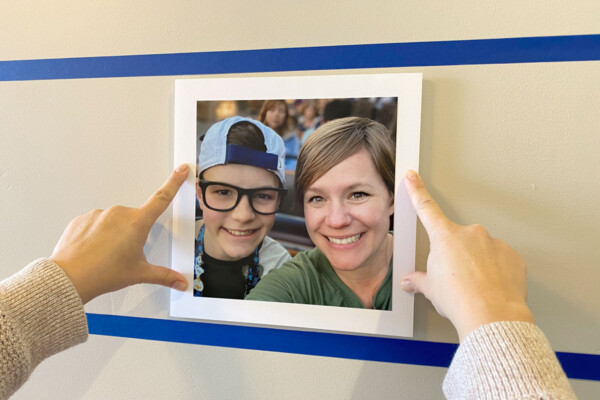
- Mount your first photo on the wall by removing the remaining backing from the picture hanging strips and pressing the photo to the wall.
- Continue mounting photos in the collage, using the width of the masking tape roll to determine how far apart each photo should go.
- When all the photos in your collage have been mounted, remove the masking tape.


Haley says
How has this held up? Does the board get dirty at all?
Autumn says
It holds up well! I have not found that the boards get dirty.
Fiona Jackson says
what is the dimension of the images?
Autumn says
I used 8×8 inch prints.
Barbara says
Could you do 5×7 or 8×10 pictures?
Autumn Baldwin says
Sure, you’d just want to cut the foam core board to 7×9 or 10×12.
sandra says
This is a great idea and your tutorial is nicely detailed. This is something I would like to try. Thank you.