
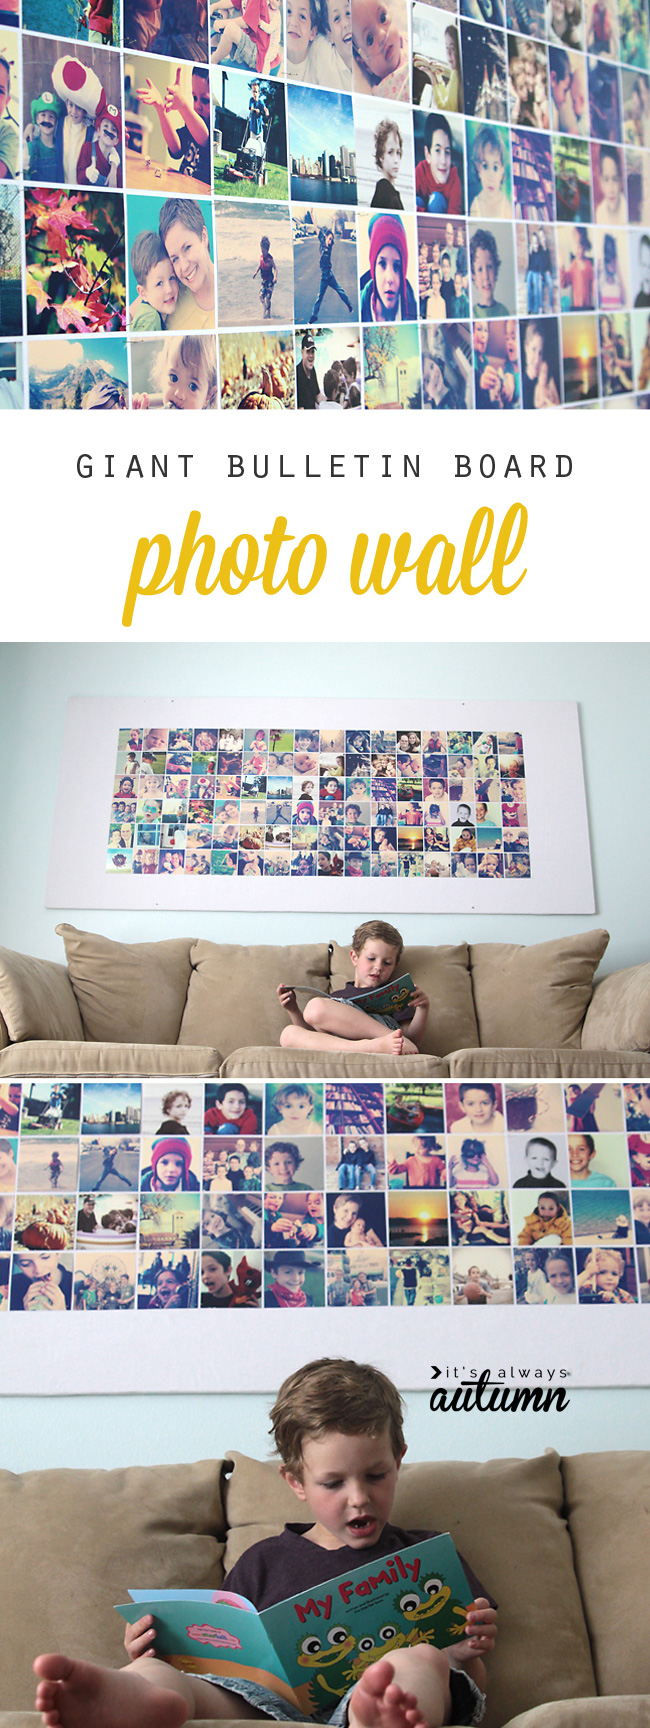
In today’s post: how to build a giant picture bulletin board for ten bucks!
Any other members of the “I have so many blank walls in my home I can’t even begin to think how to decorate any of them” support group out there? Show of hands? I think it’s easy to assume from blogs that every person in the world has a beautifully decorated home, full of gallery photo walls and DIY designer knockoffs and thrify finds spray painted white or metallic to perfectly accent the vintage flea market finds that adorn the mantel. I wish… My home is a little bit decorated, here and there, but there are lots of blank walls…and the things that are actually hung up on walls are often sadly out of date. Case in point, I still have my Easter print up over my piano. How long ago was Easter? Anyway, all this is to say that when I think about decorating, I want something simple, inexpensive, and with a big impact (‘cuz then maybe I only have to put one thing up to make the whole room look cool). That’s where this huge photo wall bulletin board comes in.
How to built a giant picture bulletin board
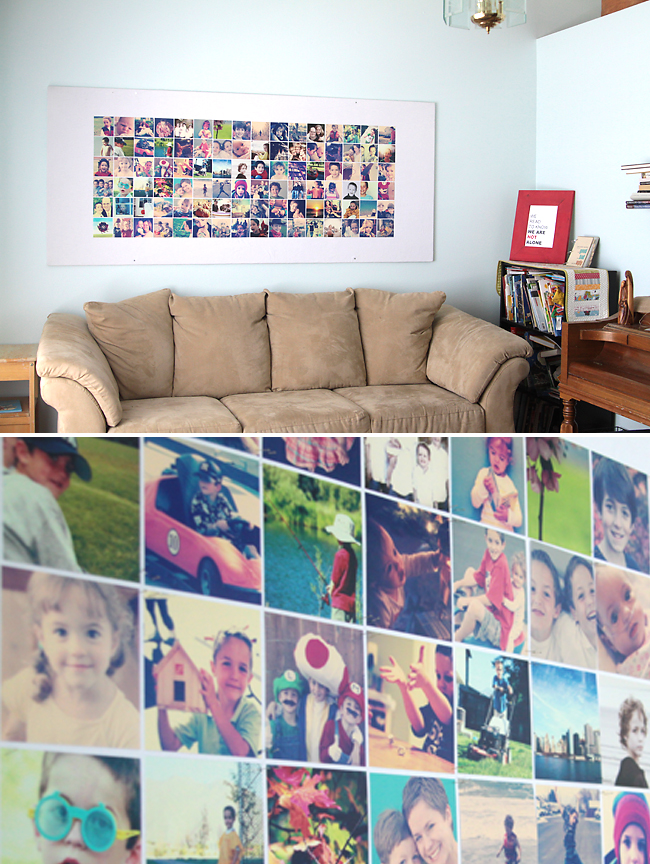
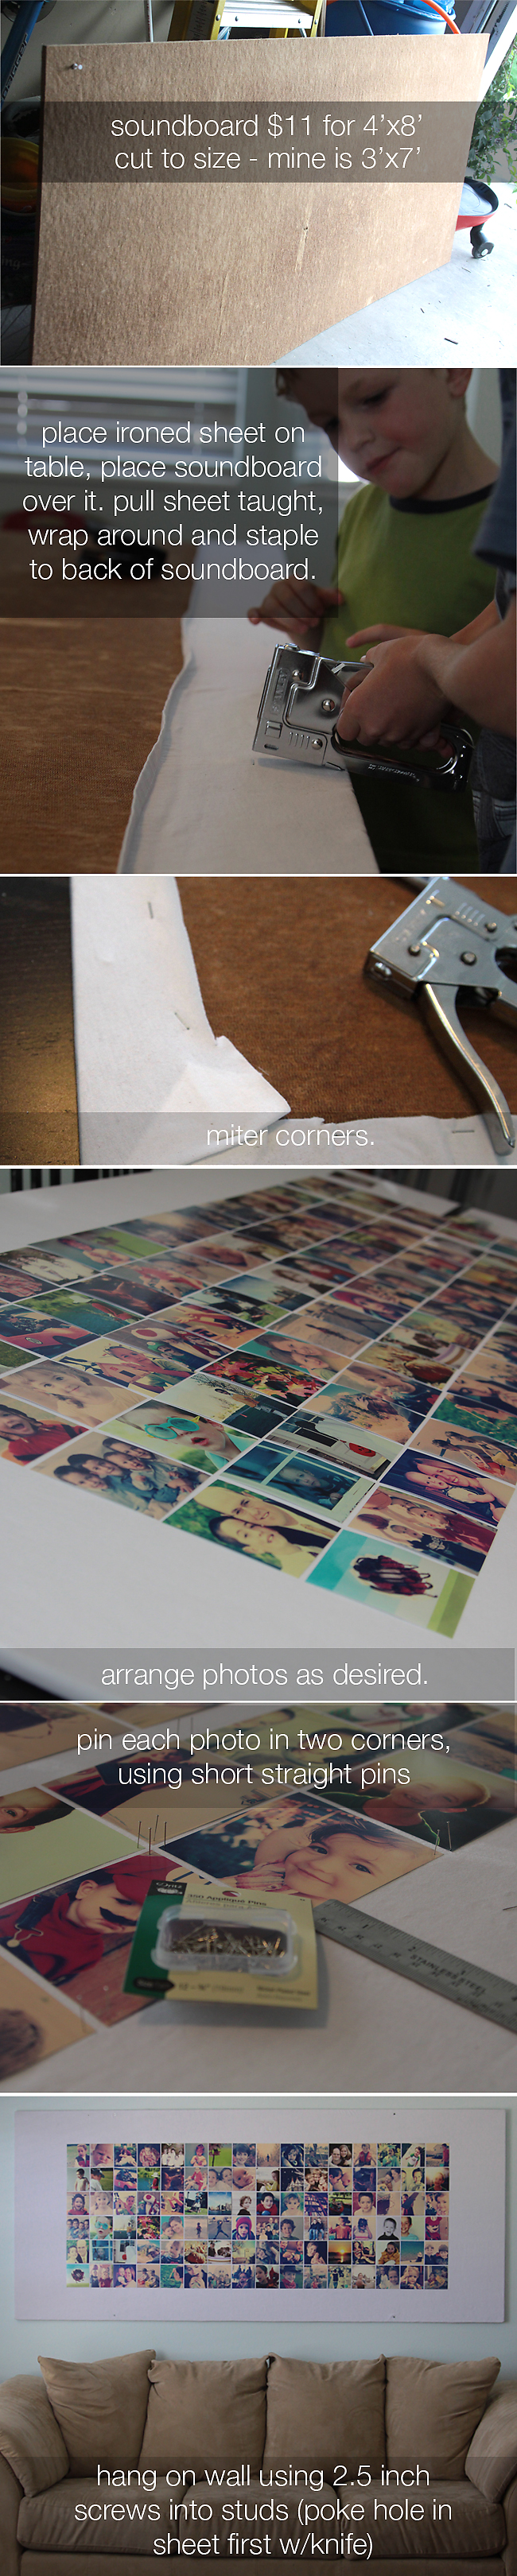
This bulletin board is 7 feet wide and 3 feet tall, and fills the space nicely above the couch in my front room. It’s made from soundboard, an inexpensive building supply you can find at Home Depot or Lowes for about $12. It comes in 4’x8′ sheets, so you could make a bulletin board that’s even larger than mine, or two 4’x4′ boards, or any other combination you can think of.
I covered my piece of soundboard with a white thrifted sheet. My sheet was nice and thick so it looks very white – if you are using a thinner white sheet you may want to buy a queen size so you can double it before you wrap the board to make sure the brown color of the board doesn’t show through.
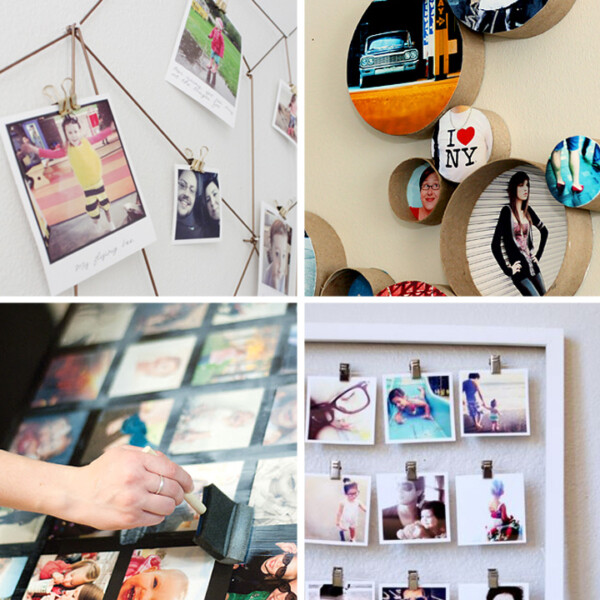
Love photos? Check out this post for more photo project ideas: 40 DIY photo crafts
The photos I used are all 4×4 archival prints from Persnickety Prints (check the giveaway post to see why I chose Persnickety Prints for this project–they’re very cool!). Alternately, you could order 4×6 prints from Costco and trim each one down to 4×4. I used a square size because it made my collage look very tidy. And all these photos got insta-fied using the Photoshop actions I talked about here. I know some people are iffy on the Instagram look, but I thought the super saturated colors and retro feel made for a fun collage.
DIY picture bulletin board instructions
Here’s how to make your own huge DIY picture bulletin board:
Because the photos are just pinned on instead of inside a frame, I can swap out any photos at any time, meaning I can gradually update this collage with 10 new photos every few months without having to take anything down from the wall.
Janice Bradley says
Do you have pictures Gallery on the walls
Alecia Clark says
My mom has something similar but she’s moving so I would like to start over. Can you please tell me what size push pins you use? These are a bit long and causes the photos to curl up on some.
Thank you!
Autumn says
Hi there! Sorry, I made this board years and years ago and no longer have it so I don’t remember what size I used. Your best bet might be to check the sewing section of a Walmart and look for the shortest pins they have. Good luck!
Sakshi Verma says
Lovely ideas. Thank you for sharing.