
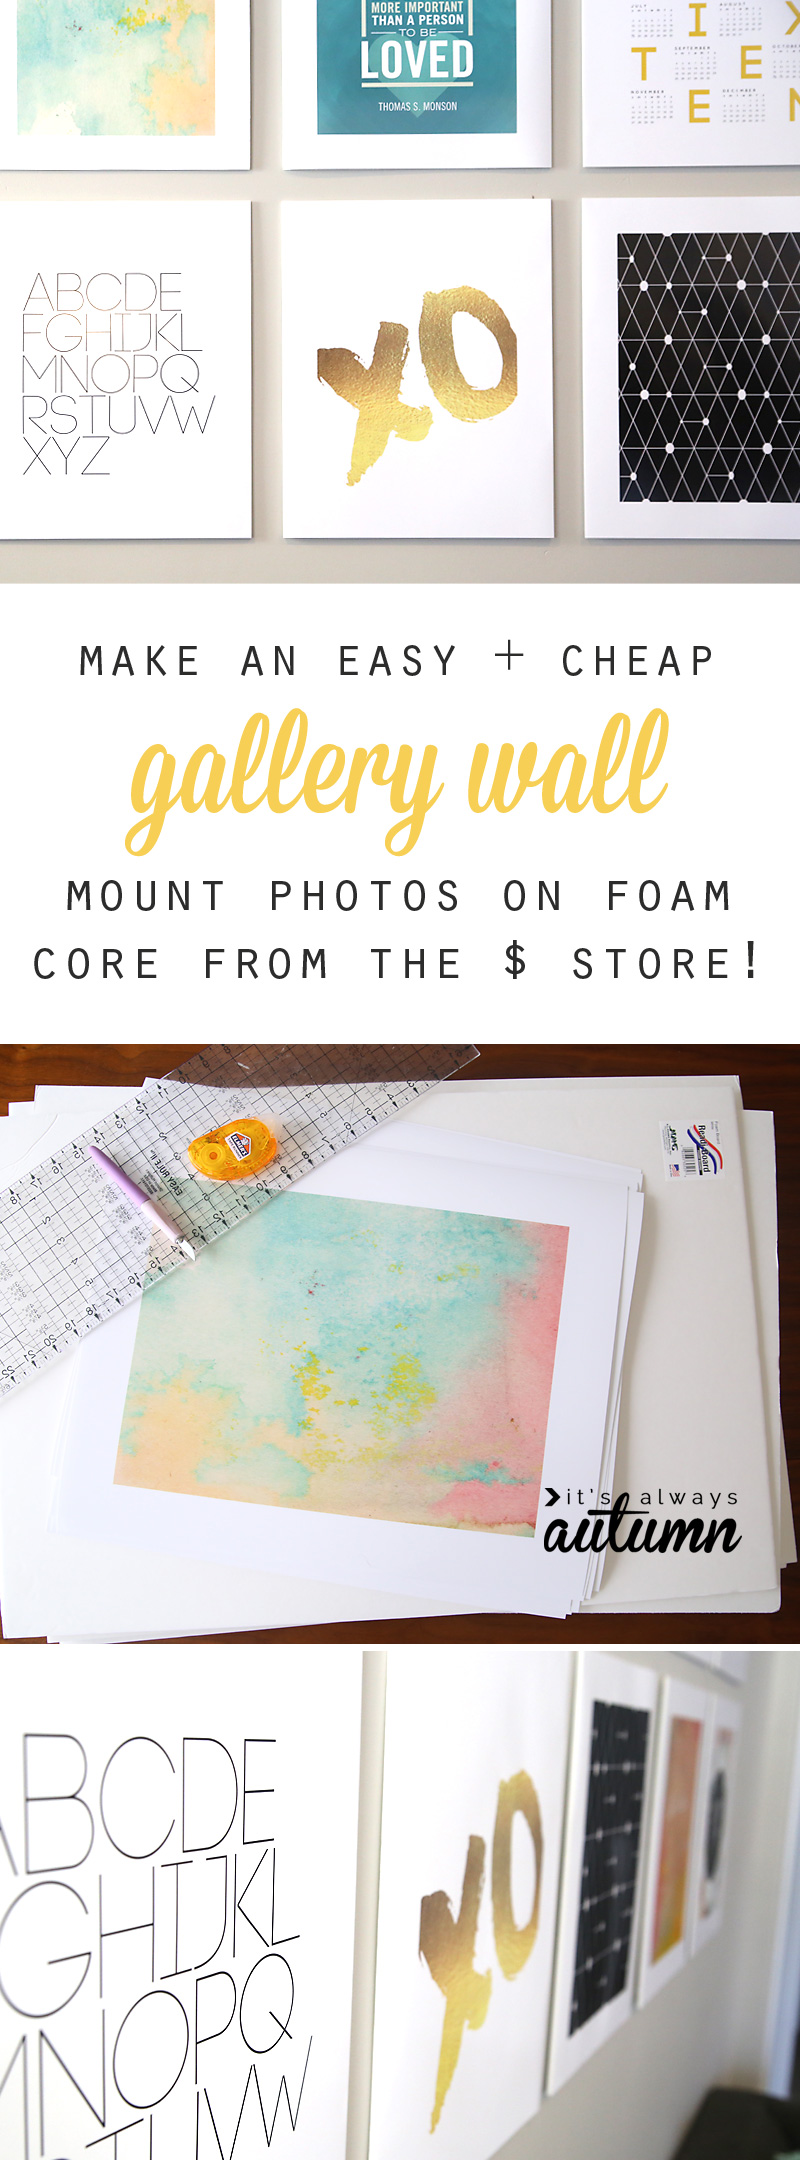
Mount large prints on dollar store foam core board for an easy, inexpensive way to create a large gallery wall. Also, learn the best way to get them spaced perfectly when you hang them!
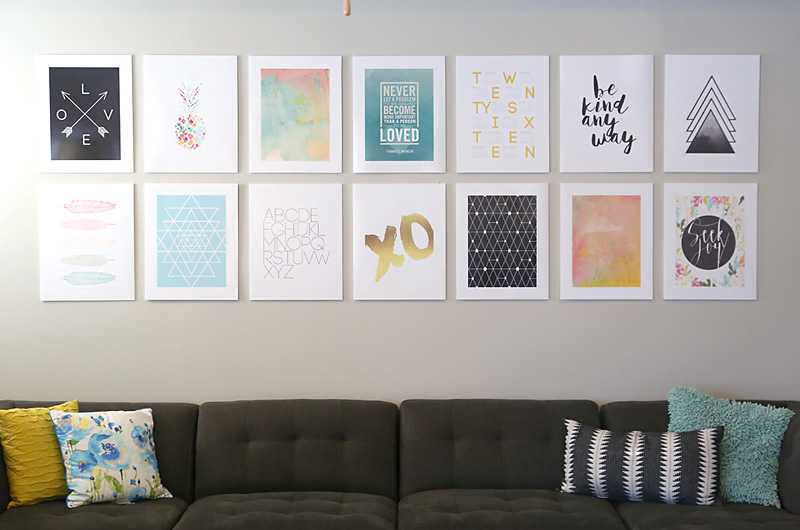
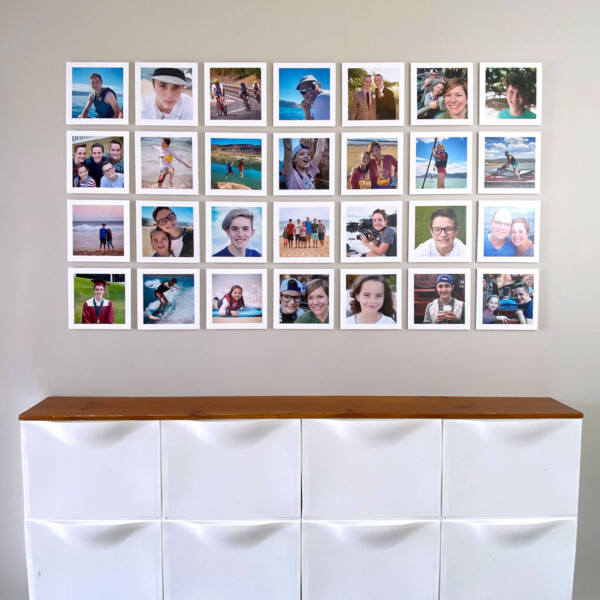
We moved into our new house last May and as of last week I still hadn’t hung one thing up on the walls! Our kitchen/dining/living area is all one big room, which makes it a nice open space, but it means the walls are great big. I worried that whatever I put up would either look ridiculously small in comparison to the wall size, or be ridiculously expensive to frame and hang. I finally came up with a collection of 14 prints that I love and deciding that printing them each at 16×20 would fill the wall nicely. But the costs of frames was going to be prohibitive, plus I really wasn’t looking forward to struggling with trying to get frames spaced nicely without putting a crazy amount of nail holes in my new wall. There had to be a better way!
There is.
At first I thought maybe I’d just tape the prints directly to the wall, but I worried that without any dimension it would end up looking like posters in a dorm room. I wanted a clean, modern look – something more like canvases without the hefty price tag.
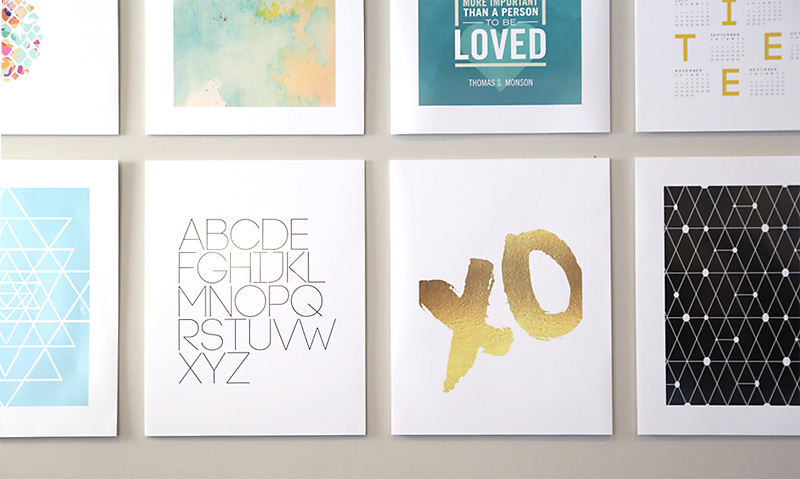
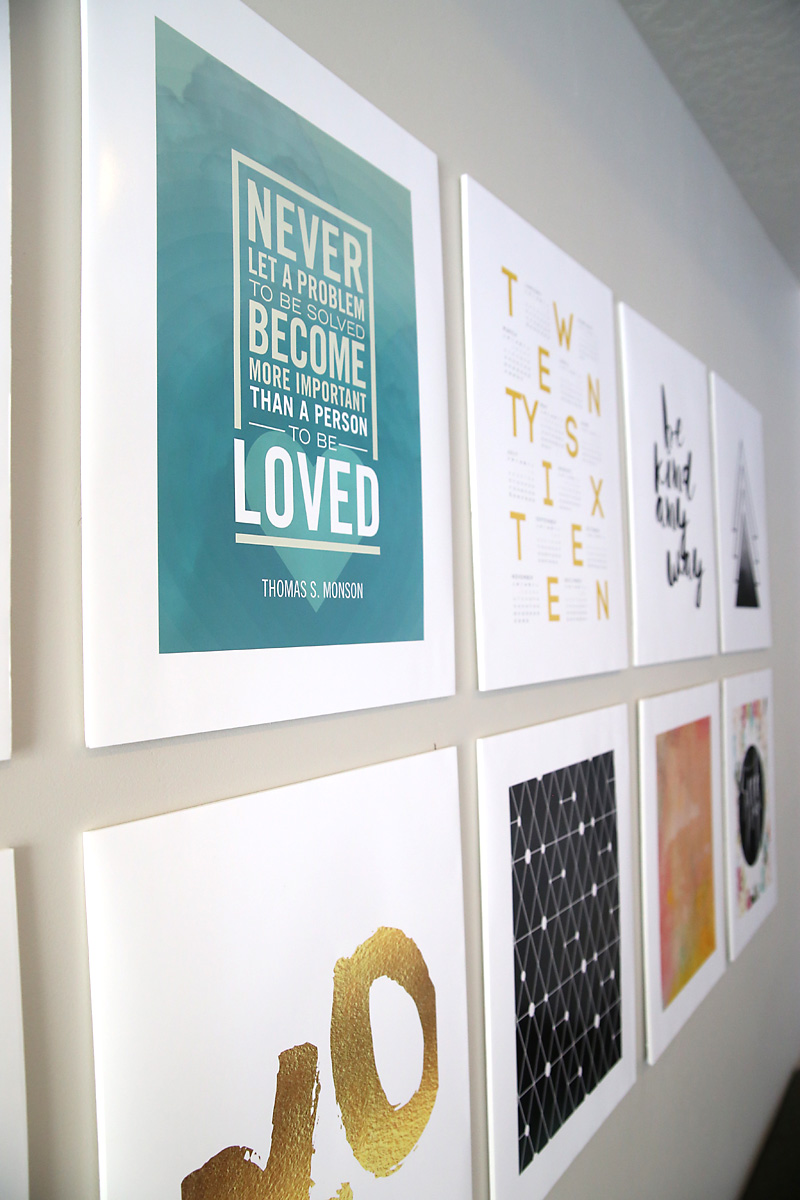
Finally, I realized I could use foam core board from the dollar store to mount my photos on, and I love how they turned out:
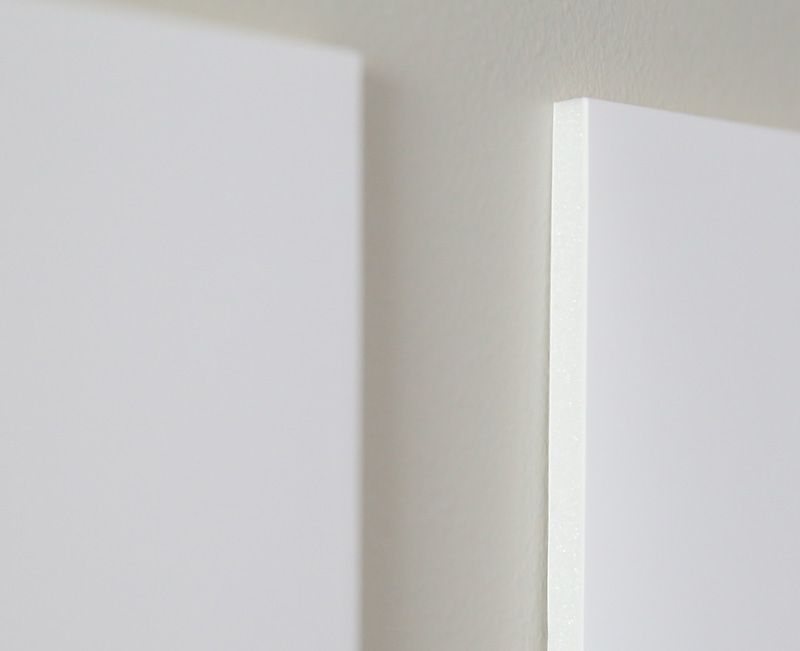
The foam core has enough dimension to make the photos look like they’ve been professionally mounted, but it only costs $1 per large print. And it’s super light, which makes hanging these on the wall a breeze! (more about that later in the post).
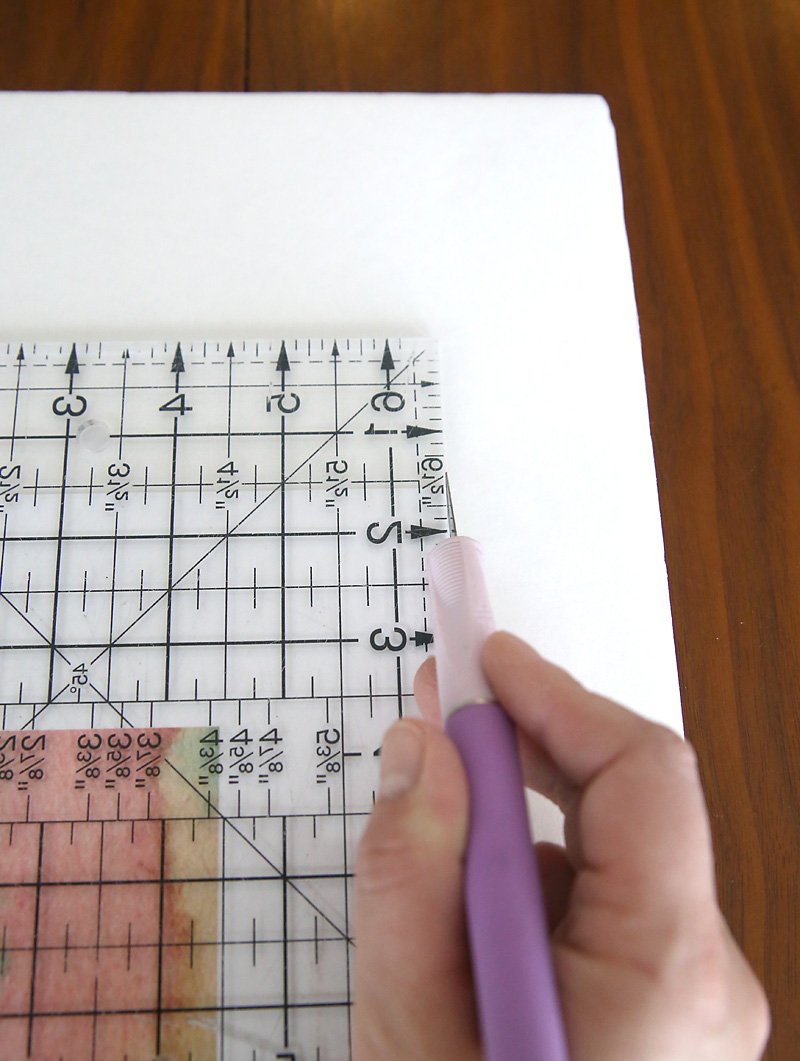
To mount photos or prints, you’ll need: foam core board, an adhesive runner, a soft cloth, a large ruler and cutting mat, and an exacto knife with a new blade.

First, here’s a quick video I shot to show how simple the basic process is. Keep reading after the video for all the details you need to know to do this yourself:
The first thing you want to do is make sure your prints are as flat as possible. I printed mine at Costco, and they come rolled, so I unrolled them and laid them under heavy books for a few days to get them flattened out. Do not skip this step.
To mount a print, place it face down on a clean surface. Apply adhesive all the way around the edges, as close to the edge as possible. If your photos are still a little curved instead of flat, it’s a good idea to apply a second row of adhesive all the way around the edges. Then apply a small strip of adhesive right in the center of the print. Flip the print over and lay it on top of a piece of foam core. Using the soft cloth, press down in the middle of the print. Then swipe from the middle out to one corner, smoothing the print down flat as you press down the adhesive on the edges. Continue swiping from the middle out to make sure the print is as flat as possible (see video).
Once the print is adhered, trim away all the excess foam core. Use a large cutting mat and ruler to make this easier. And BE SURE your exacto knife has a fresh blade so you’ll get a clean, smooth cut.
At this point it’s a good idea to let the print rest, perhaps with a few books on top of it, for a day or two. If you hang it immediately, the print may start to curl back up a little and the adhesive might not hold.
Hanging the mounted prints on the wall is a snap! No nails, no sawtooth picture hangers, just Command Picture Hanging Strips (note, that’s an Amazon affiliate link so you can see what I’m talking about, but I found them a few dollars cheaper at Walmart). Two sets of strips per print is plenty, and they’re so much easier to use than nails!
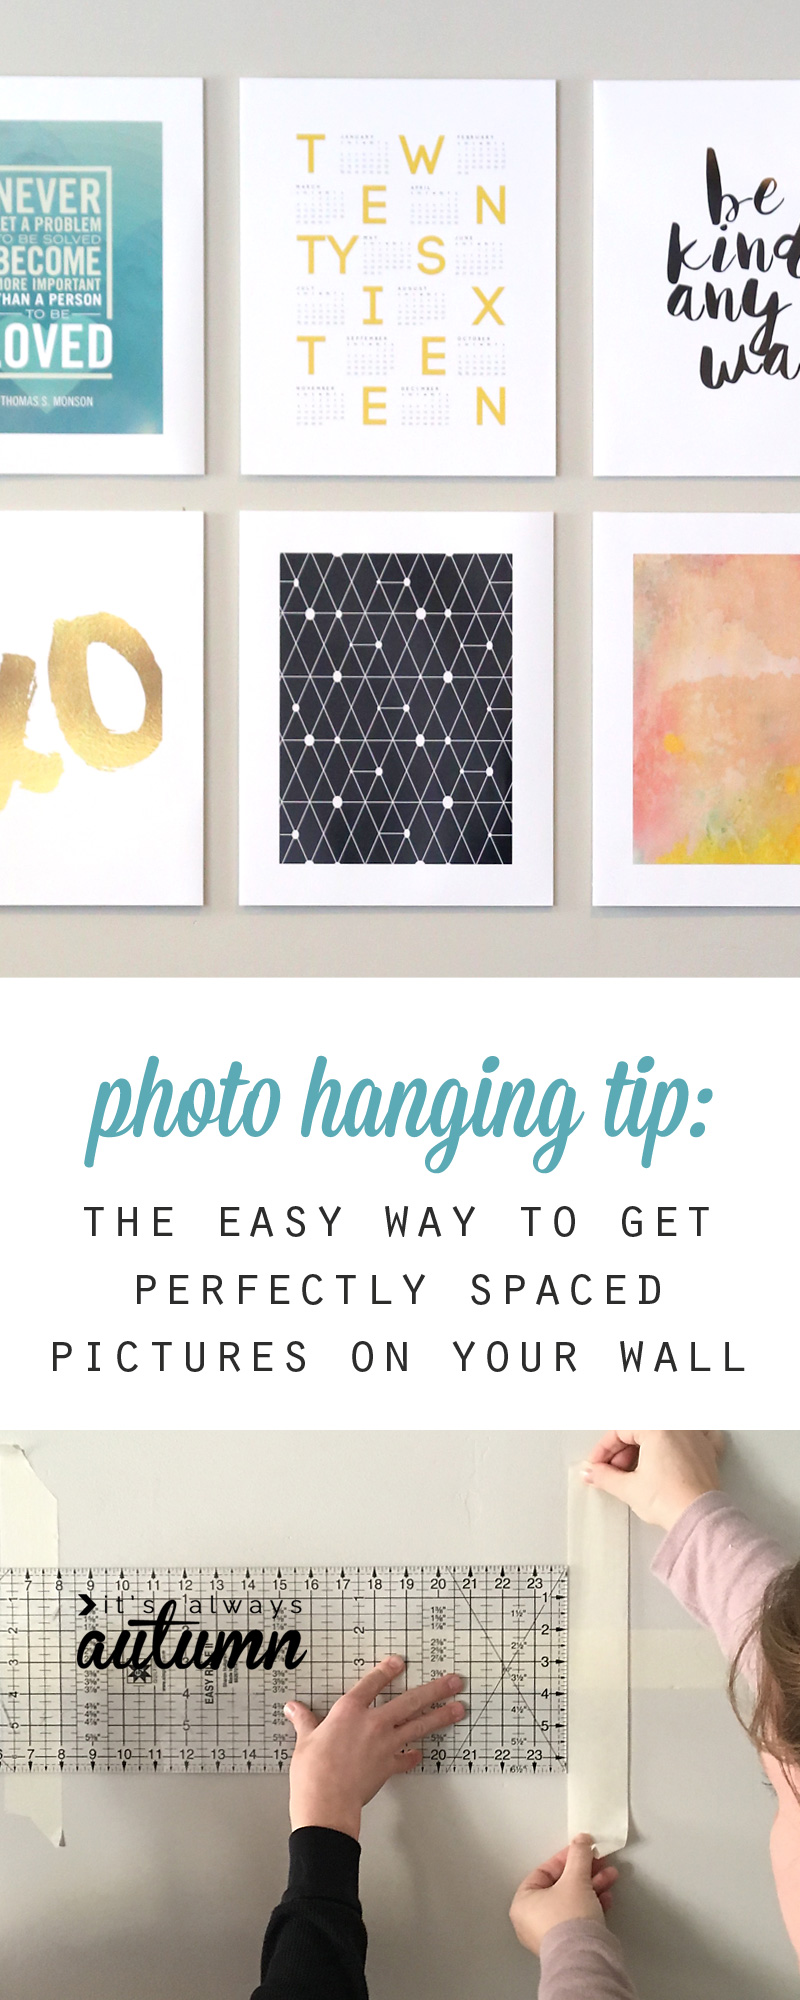
To get the prints even and perfectly spaced on the wall, I used 2 inch wide masking tape. I started by placing a long horizontal strip of tape all the way across the wall, right at the space that would be in between the top and bottom rows of prints. Then I placed vertical strips of tape 16 inches apart.
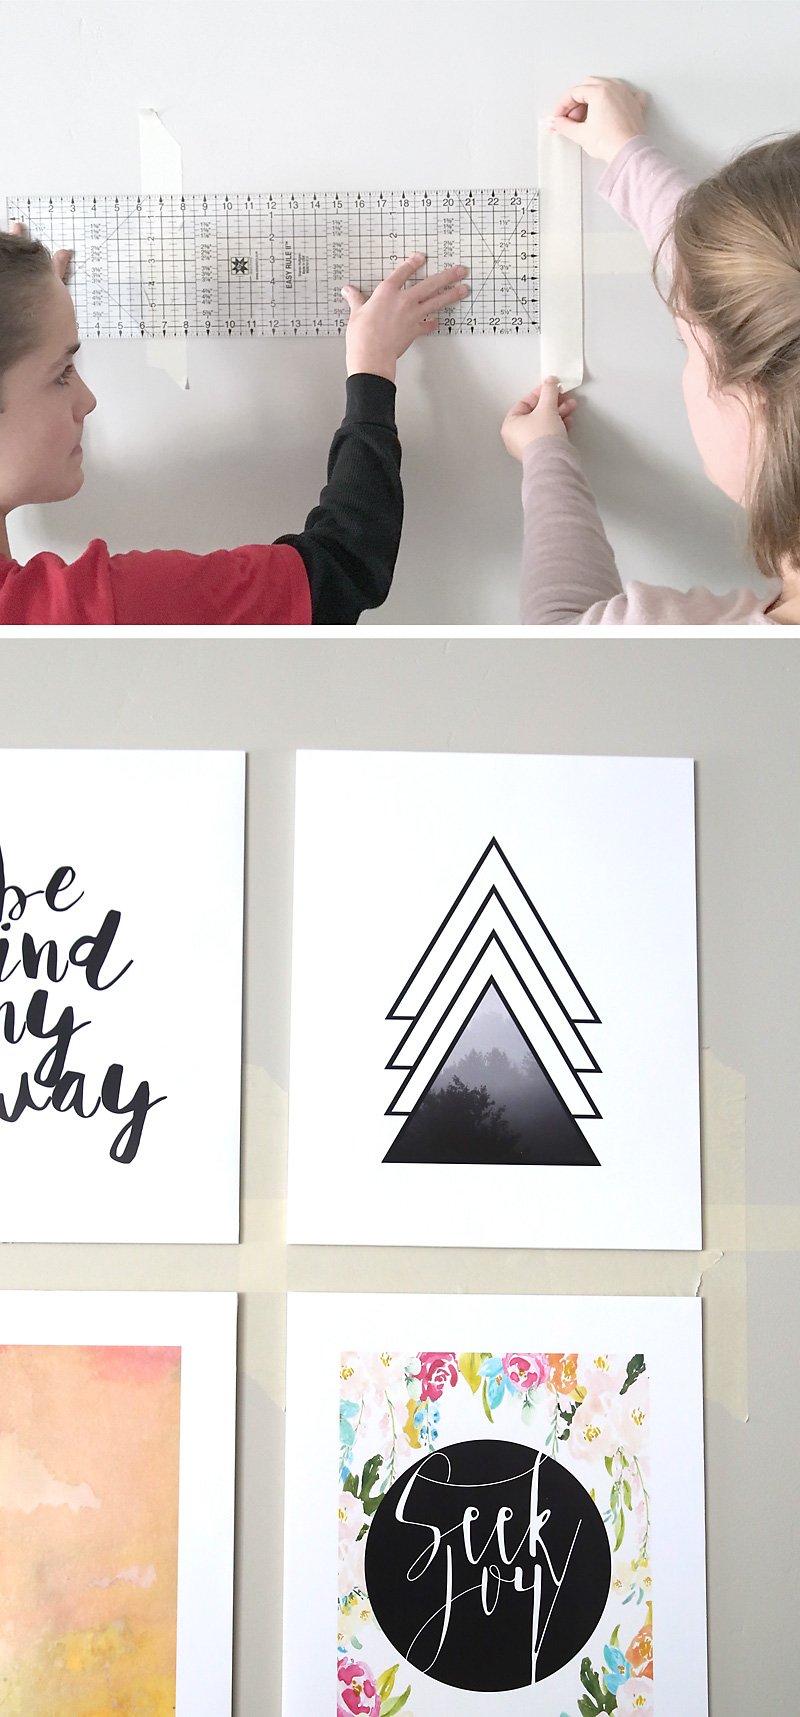
This created “picture slots” for each print. I applied the command strips to the back of the foam core, took off the backing from the strips, and then just stuck the prints on the wall, one in each “slot” as you can see above. Once I removed the masking tape, I had all 14 prints up on the wall with exactly 2 inches of space between each one. They were perfectly spaced and aligned on the first try! No nails, no trying to get the frame to hang straight, no adjustments.

And I love my new giant gallery wall! In case you’re interested, here’s the cost breakdown for the mounting and hanging:
14 foam core boards: $14
adhesive runner & refills: $8
new exacto knife: $3
picture hanging strips: $16
total: $31 to mount and hang all 14 prints, which is a great deal. If I’d framed them, I probably would have spent 20-30 bucks per frame!
Moon says
I’m sorry, how did you adhere prints to foam board? Would printed photo copies be flat enough as well? Thx fr yr inspiration.