
In today’s post: Learn how to make a cute farmhouse pumpkin using a mop head and a foam pumpkin from the dollar store. This is an easy fall craft you can complete in under an hour.
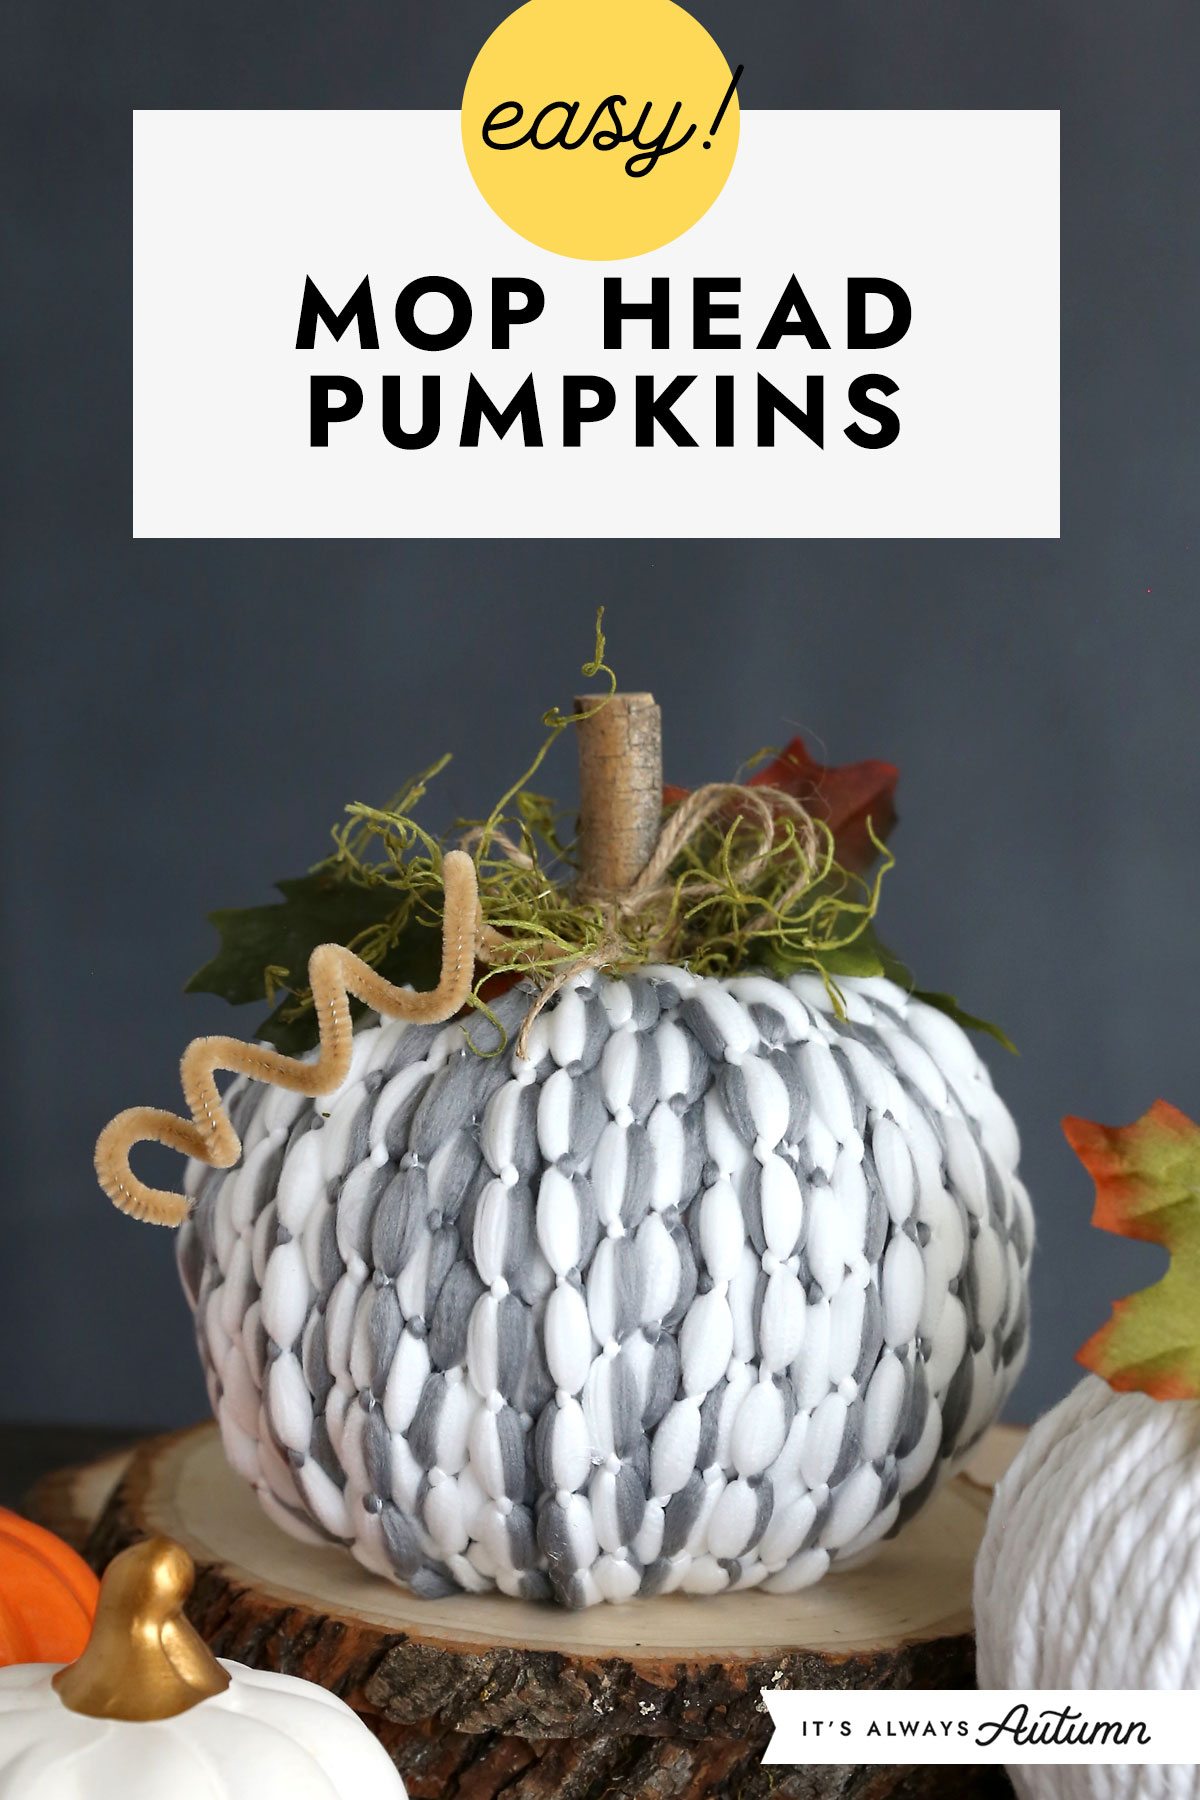
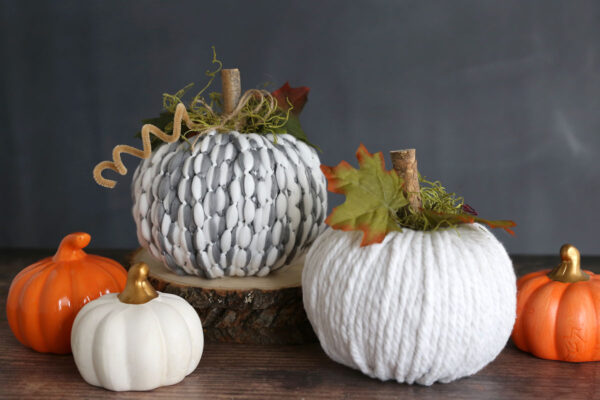
Who doesn’t love a good craft transformation, right? Today we are taking the cheap, tacky looking styrofoam pumpkins from Dollar Tree and covering them in yarn to turn them into pretty, textured pumpkins that will look great with your fall decor. Here’s the fun part: the yarn comes from mop heads you’ll also find at Dollar Tree!
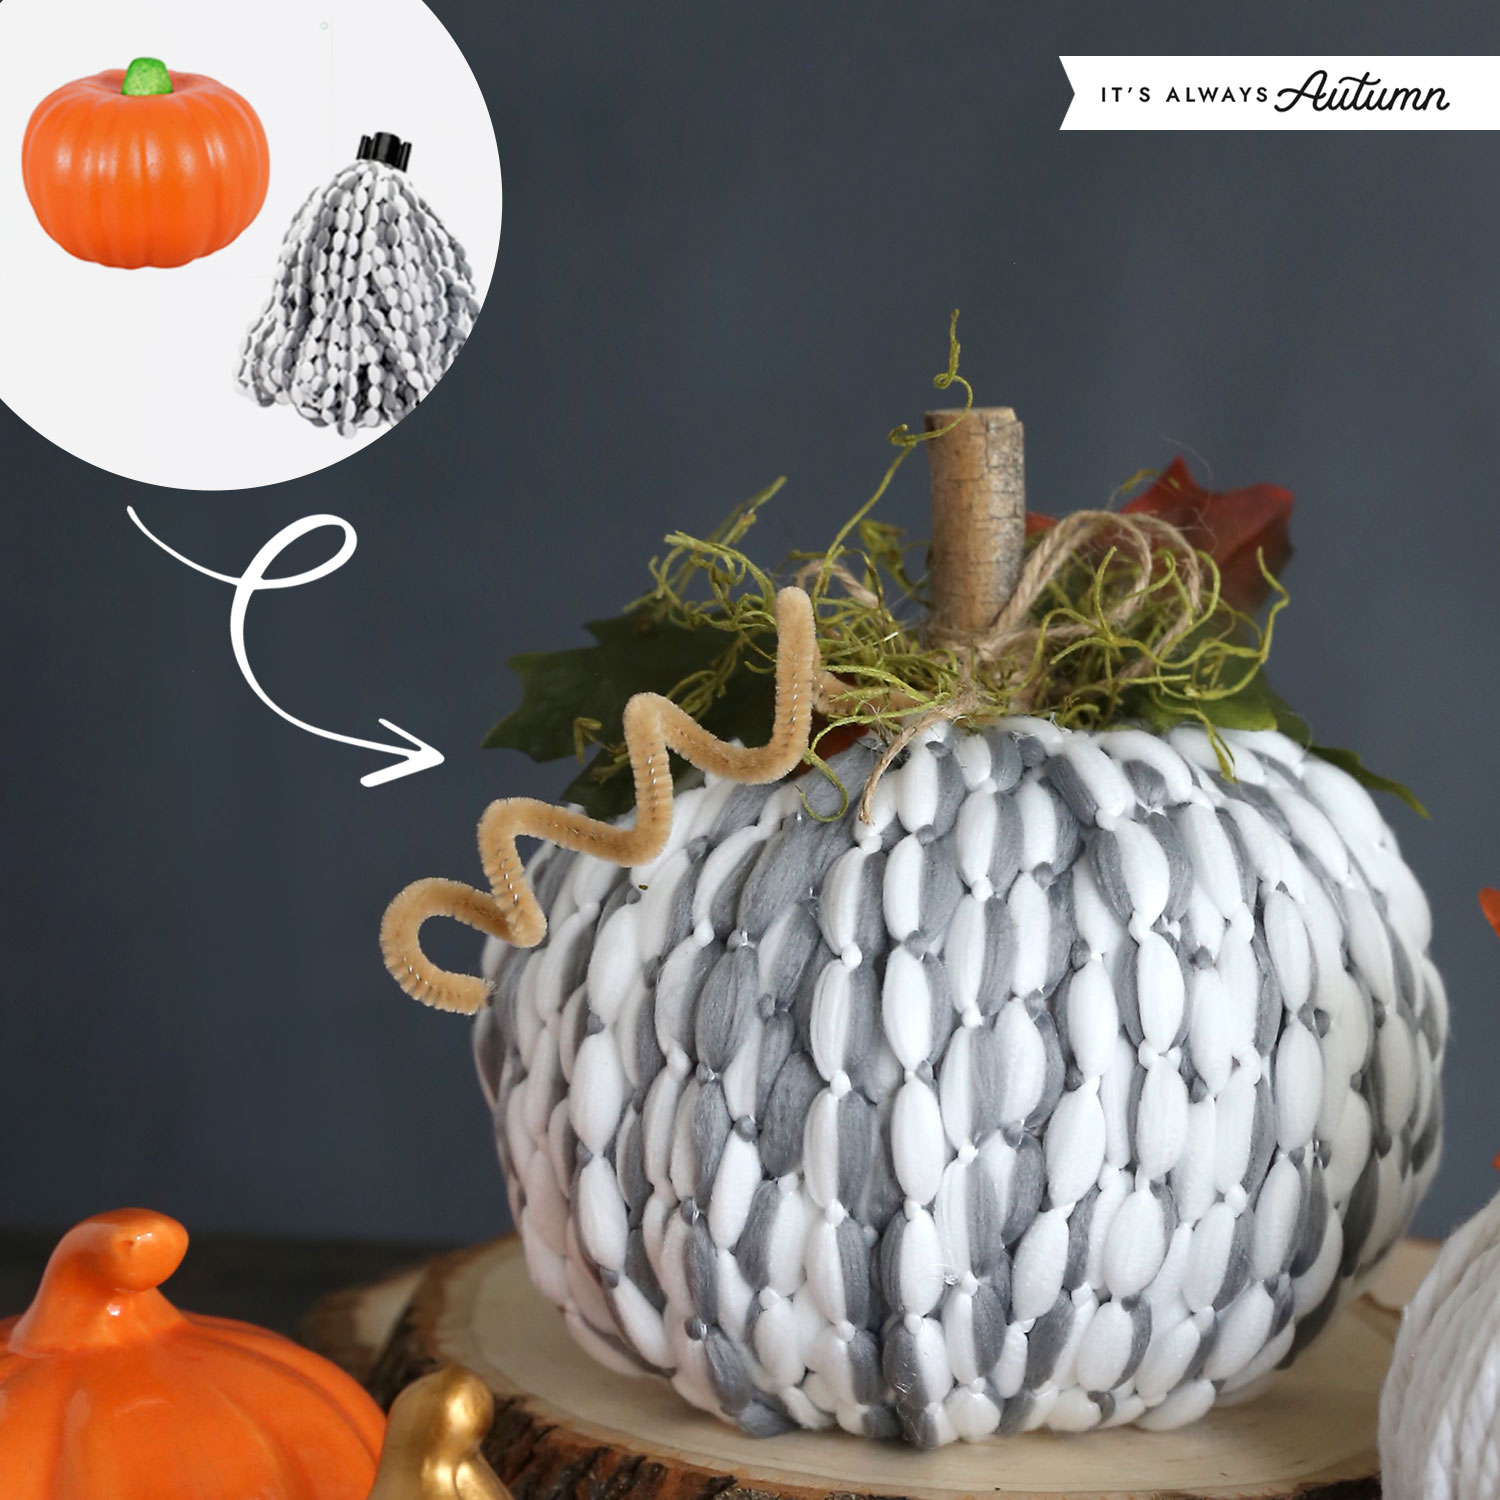
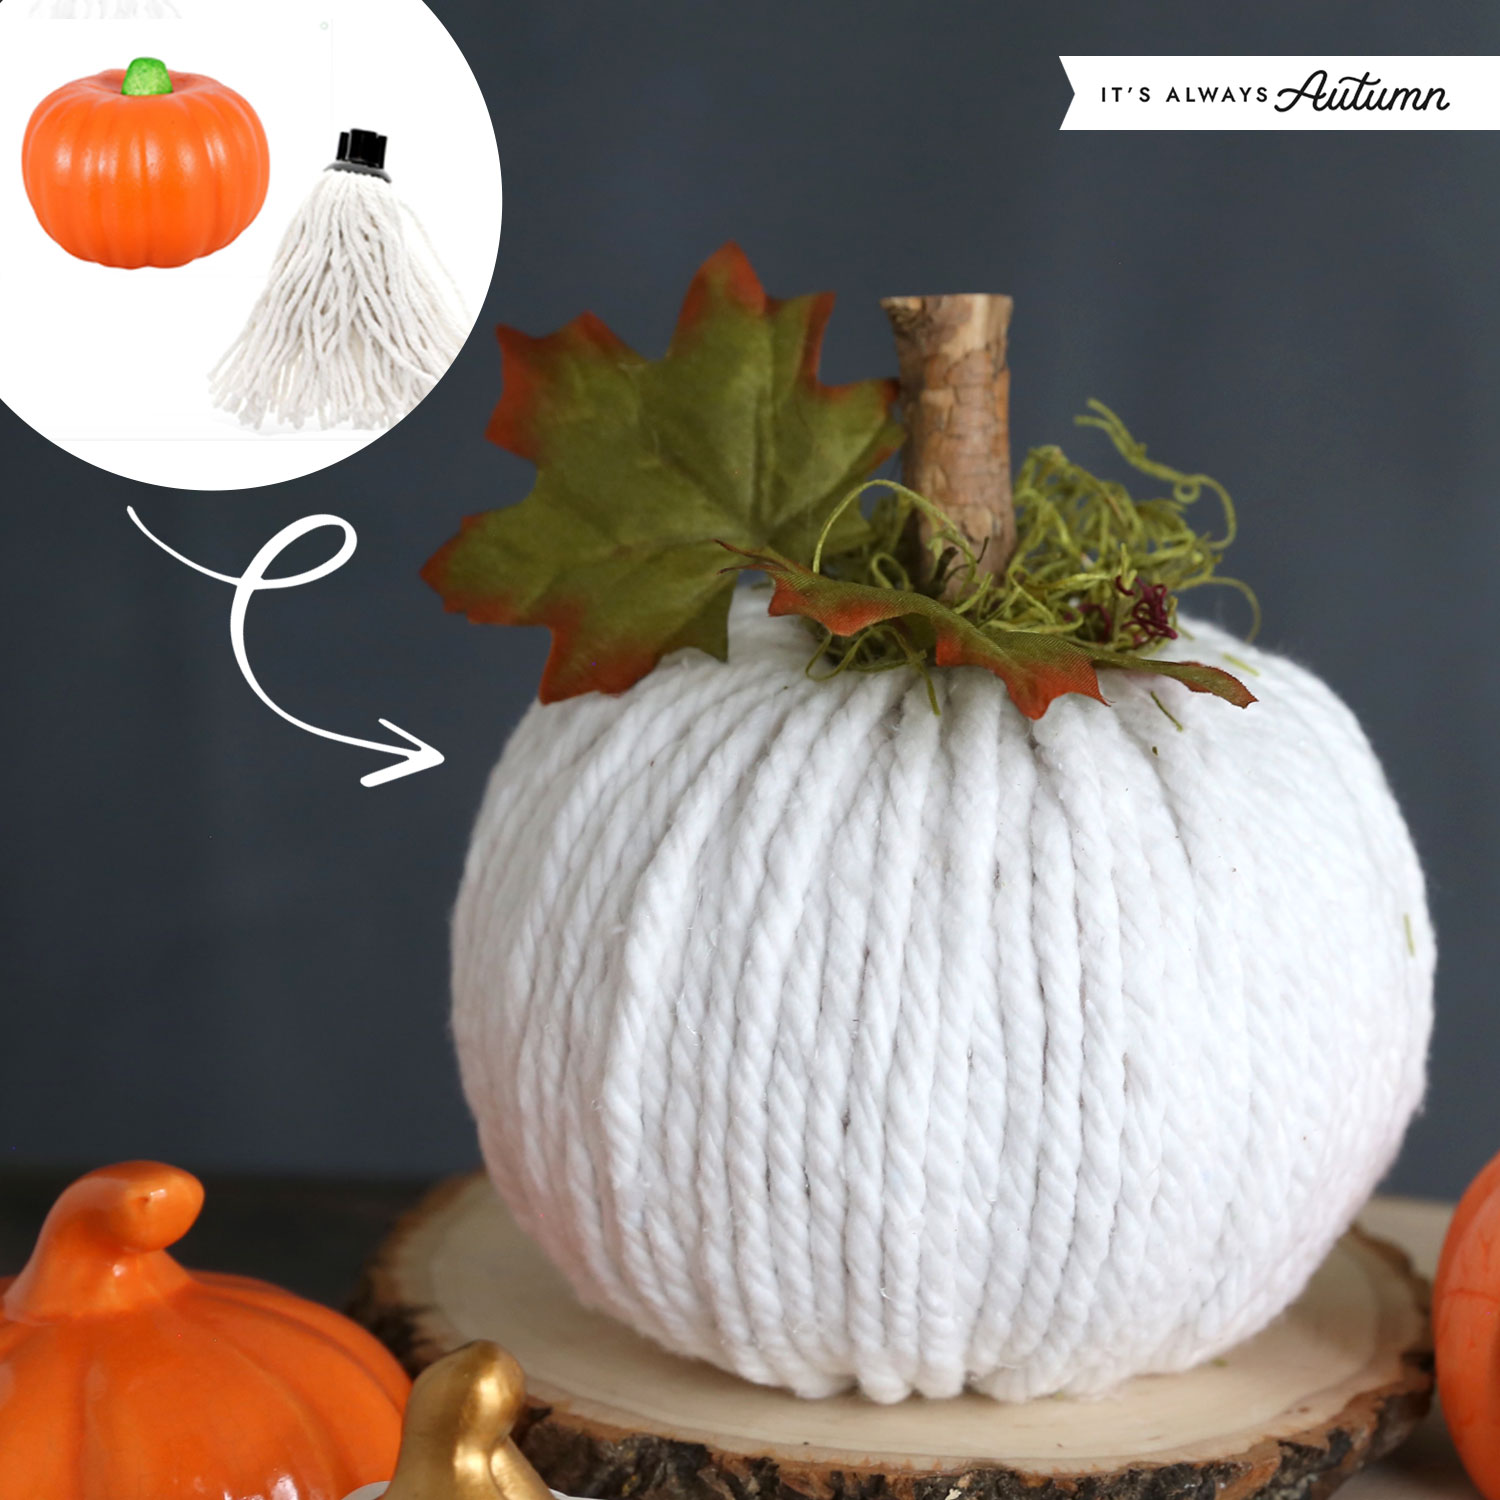
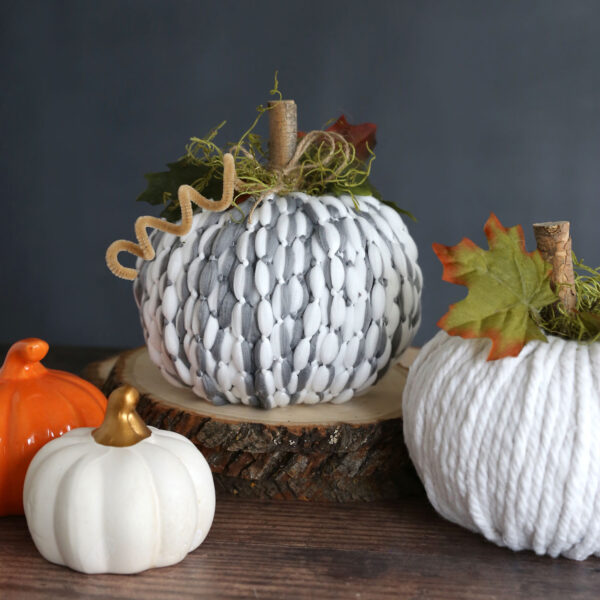
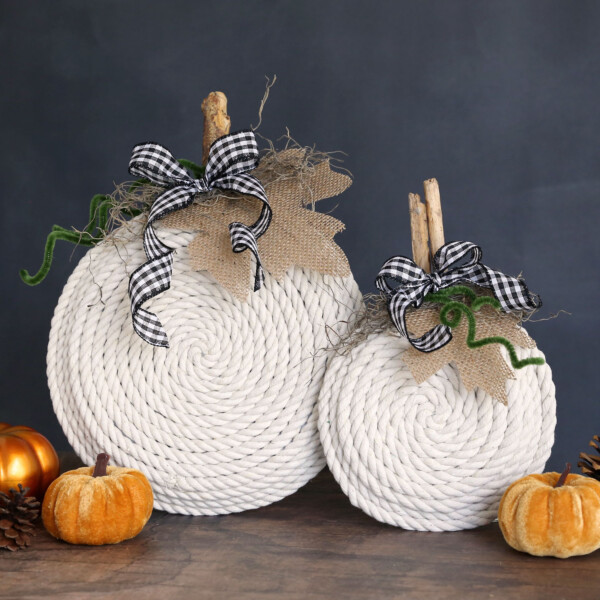
That grey and white yarn looks so pretty on a pumpkin! I also made a white pumpkin using the plain white mop head. This one feels a little more farmhouse – I can’t decide which one I like better.
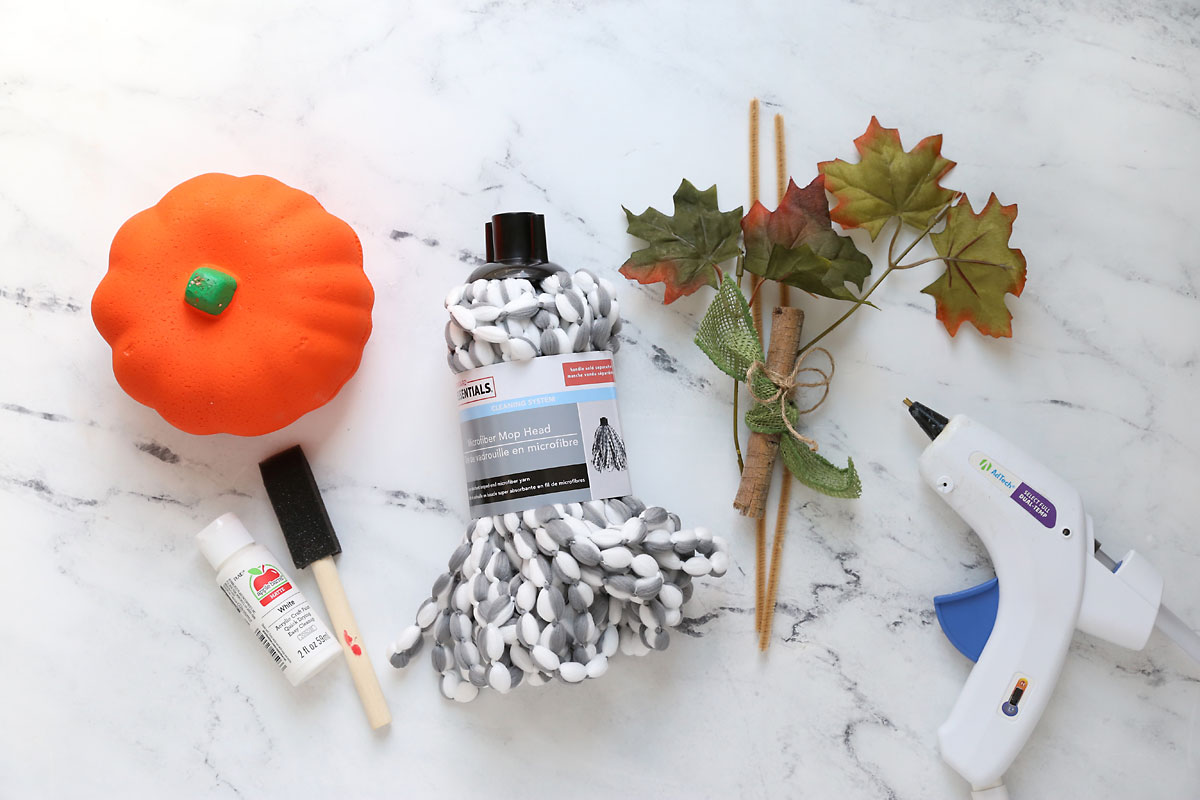
Supplies
Here’s what you’ll need to make a mop head pumpkin:
- Carveable Foam Pumpkin from Dollar Tree: These pumpkins are about 5.5 inches wide and 4.5 inches tall.
- Mop Head from Dollar Tree: I made these pumpkins using two different mop heads, one that’s made with plain white yarn and one that’s made with a textured white and grey yarn. Both heads are called “Microfiber Mop Head, 11 inch”. You’ll use one mop head per pumpkin.
- White craft paint and paint brush: You’ll give the pumpkin a coat of white paint just to make sure no bright orange peeks through the yarn. If your Dollar Tree carries the white carveable pumpkins you can use one of those and skip this step!
- Decorations for the top of the pumpkin, such as: stick for stem, faux leaves, pipe cleaners to make vines, moss, twine, ribbon, etc.
- Hot glue gun and a small knife
Protect Your Fingers!
You’ll be doing a lot of hot gluing in this project and it’s very easy to burn your fingers. I highly recommend using silicone finger caps when gluing the yarn onto the pumpkin. They only cost a few dollars and will save your fingers from getting burned! I used these finger caps from Amazon.
How to Make Mop Head Pumpkins
This is an easy fall craft project for adults that you can complete in about an hour. The pictures below are from the grey and white version of this pumpkin, but the process is the same for making the white pumpkin.
Cut the Pumpkin
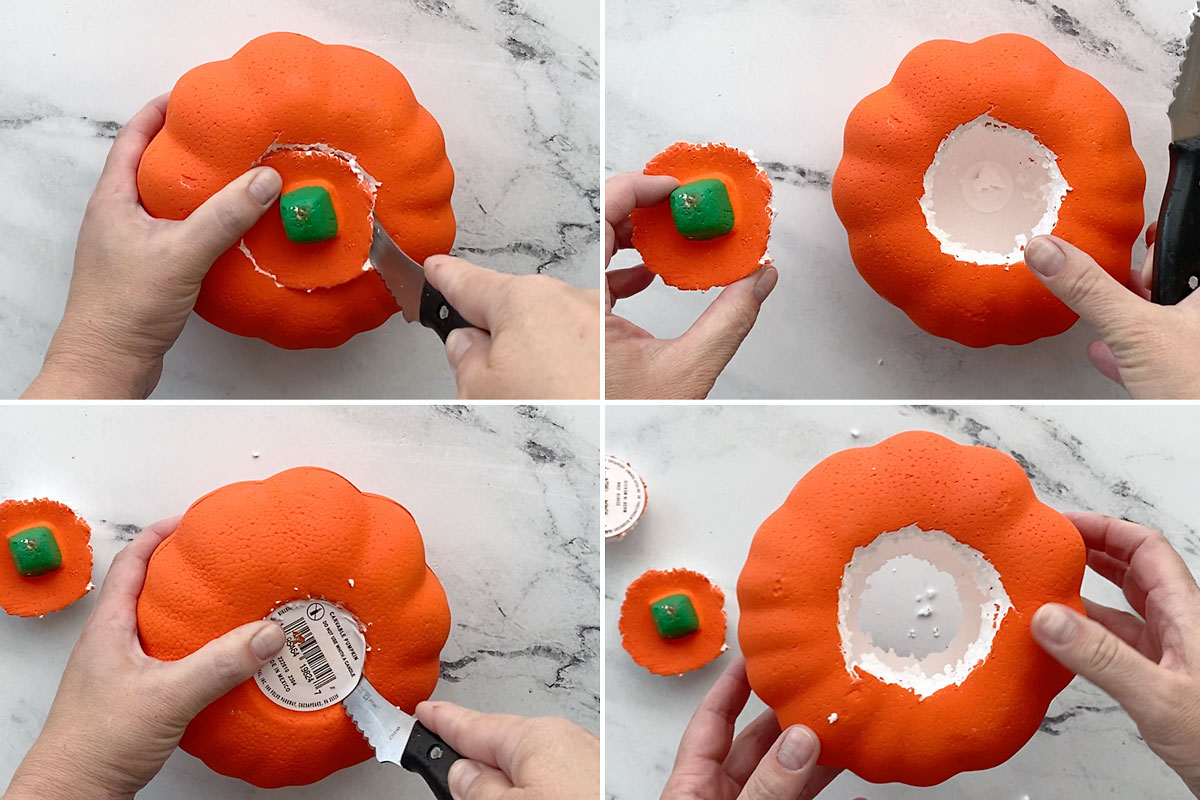
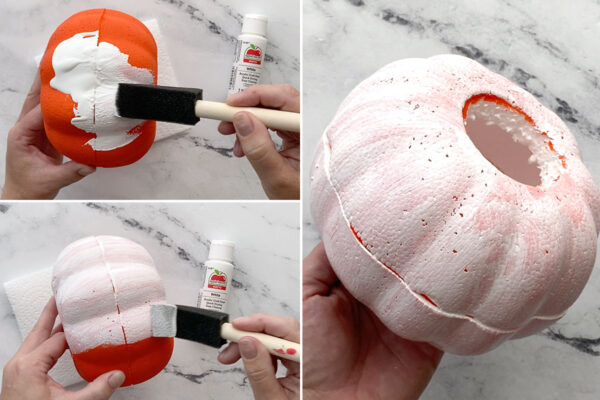
Begin by using a knife to cut out a circle around the stem of the pumpkin (just like you would cut the top off a real pumpkin to carve it). Flip the pumpkin over and cut out the circle you see that’s covered by a sticker. Now your pumpkin will have a hole at the top and and the bottom. The hole at the top should be slightly larger.
Paint the Pumpkin
Next, paint the pumpkin white. This ensures that once you wrap the pumpkin in the mop head yarn you won’t see any bright orange peeking through. I used inexpensive acrylic craft paint and a small foam paintbrush. Just one coat of white paint is fine – you don’t need great coverage here. Allow the pumpkin to dry completely – this should only take about 10 minutes and you can use a hair dryer to speed drying if you’d like.

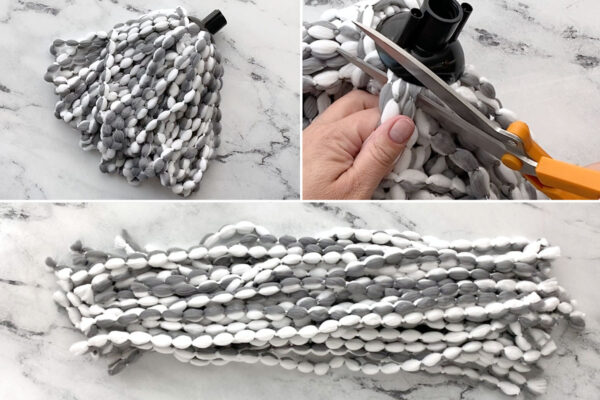
Cut the Yarn
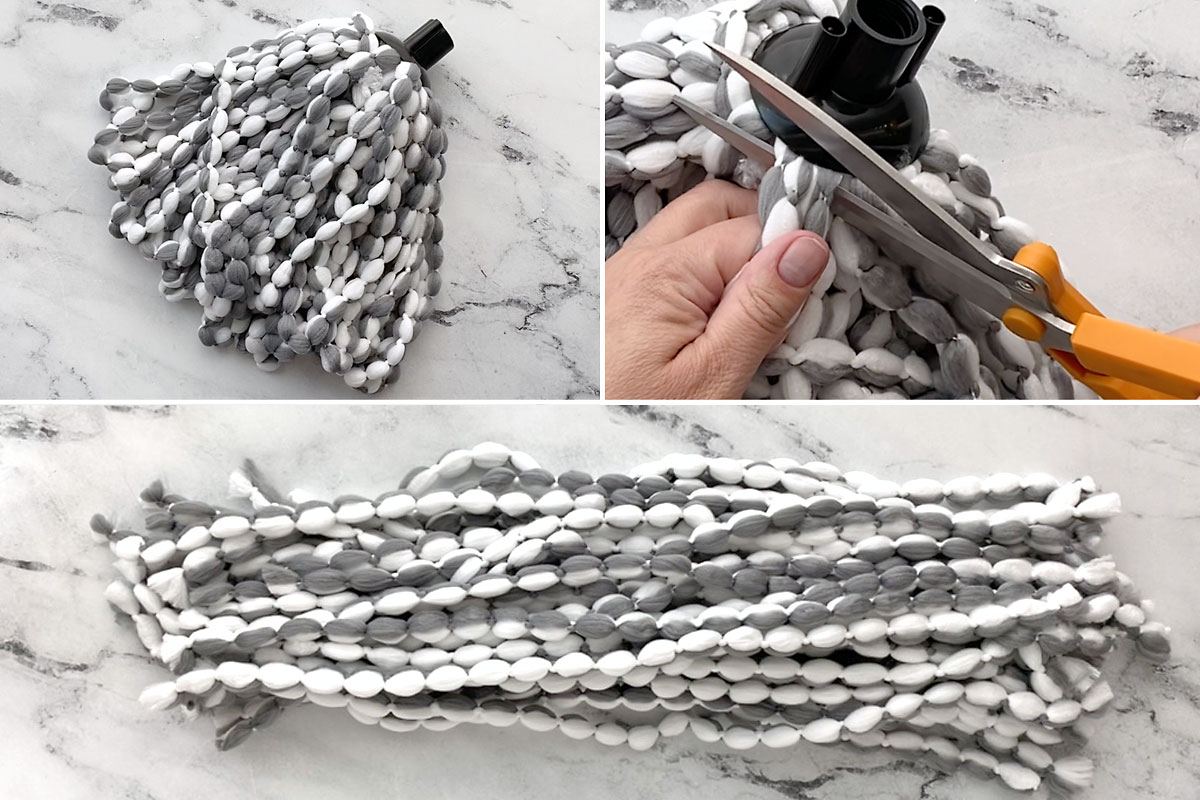
Next, cut all of the yarn strands off the mop head. Grab three or four at a time and snip them very close to the mop head. Continue until all the yarn is cut off the mop.
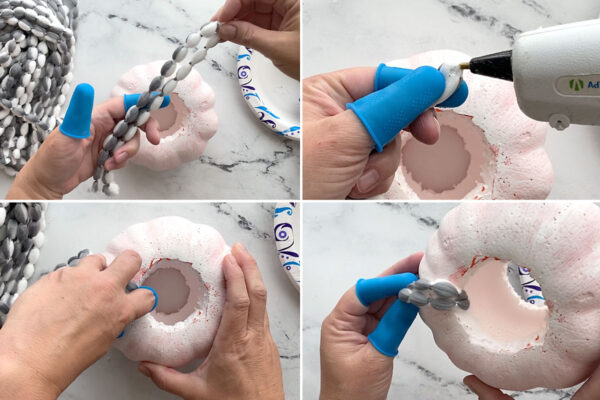
Cover Pumpkin with Yarn
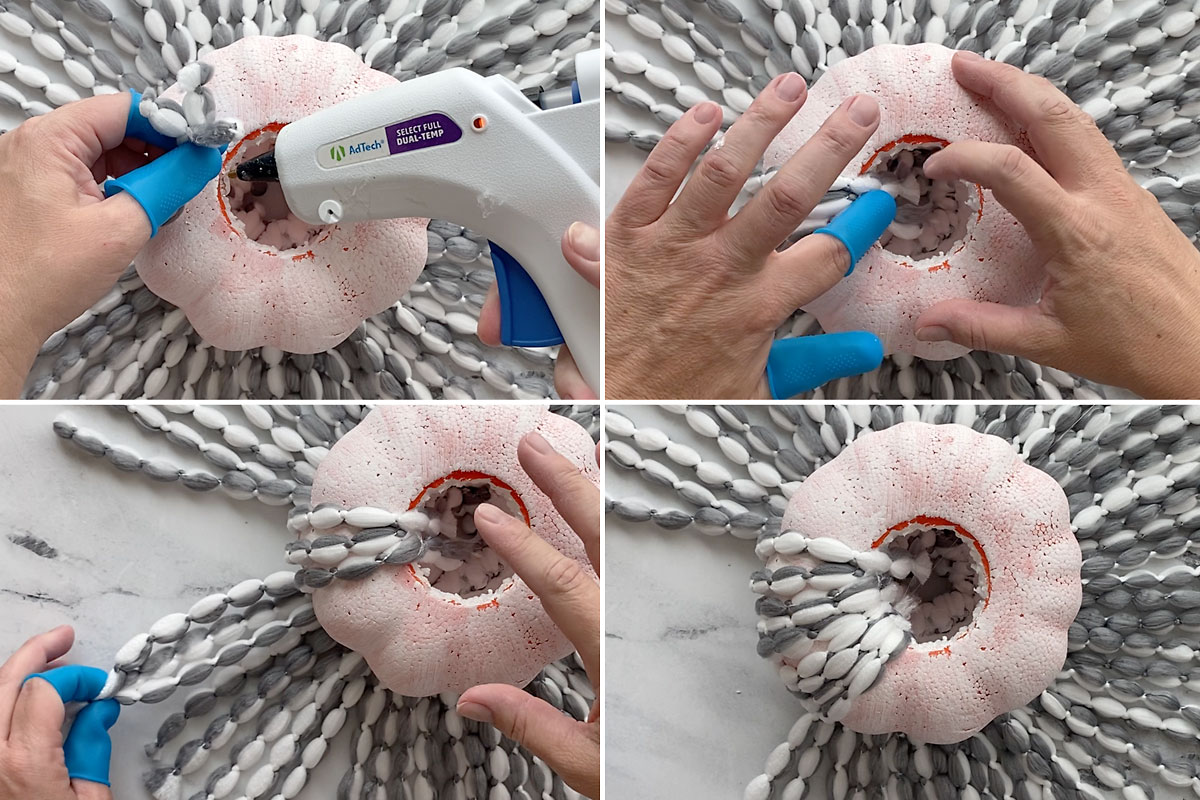
Now it’s time to start gluing! I found it was easiest to have the pumpkin in the middle, the yarn to the left, and the hot glue gun to the right. Grab a piece of yarn and fold it in half, pinching the the fold in your left hand. Place a small amount of hot glue on the folded yarn, and then stick it to the inside of the circle that’s been cut in the pumpkin. Hold it for 3-5 seconds for the glue to adhere. I highly recommend using silicone finger caps that will protect your fingers and keep them from getting burned. (Note: if you are using the all white yarn, the strands are shorter so you will not fold them in half. Just grab two at once, pinch them together and glue to the circle the same way.)

Repeat with another yarn strip, folding it in half, placing glue on the fold, and sticking it to the inside of the circle. As you add more yarn pieces, squish them in as close to each other as you can. Continue until you’ve glued yarn all the way around the circle. You’ll probably have used about 2/3 of the yarn from the mop head.
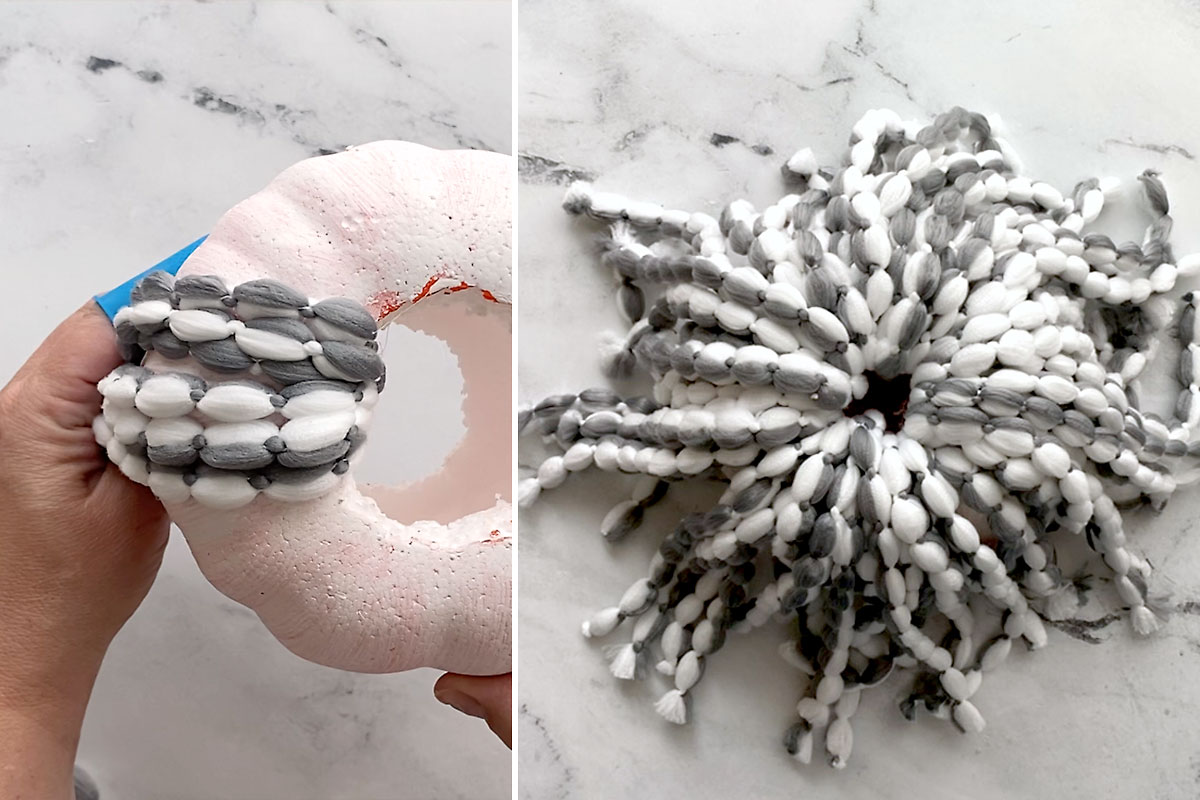
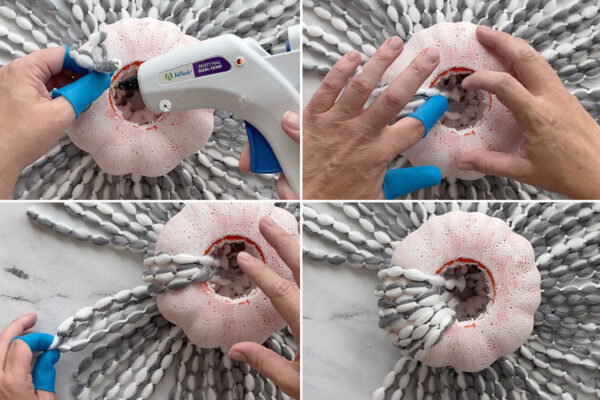
Flip the pumpkin over, and fan out the yarn in a sunshine shape. Use your fingers to comb the yarn out, ensuring it’s going straight out from where it’s glued to the pumpkin, as you see below.
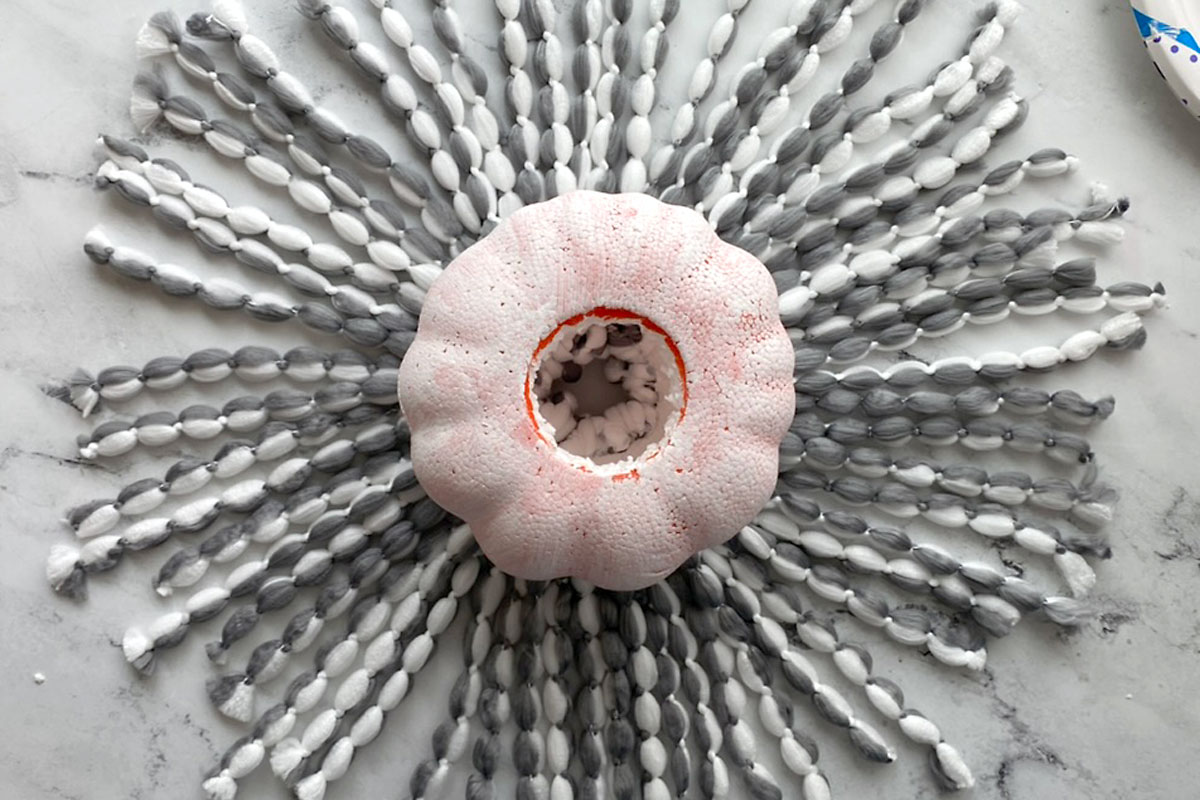
With your left hand, grab three strands of yarn and bring them up around the pumpkin. Add hot glue to the inside of the cut out circle, then fold the yarn over the hot glue and hold it in place for 3-5 seconds until it’s adhered. Repeat with the next three strands of yarn, then the next. As you continue around the pumpkin, make sure you are pulling the yarn straight up on the pumpkin. You will end up overlapping yarn as you glue it into the circle. Make sure the yarn lies flat against the pumpkin, but don’t pull it super tight.
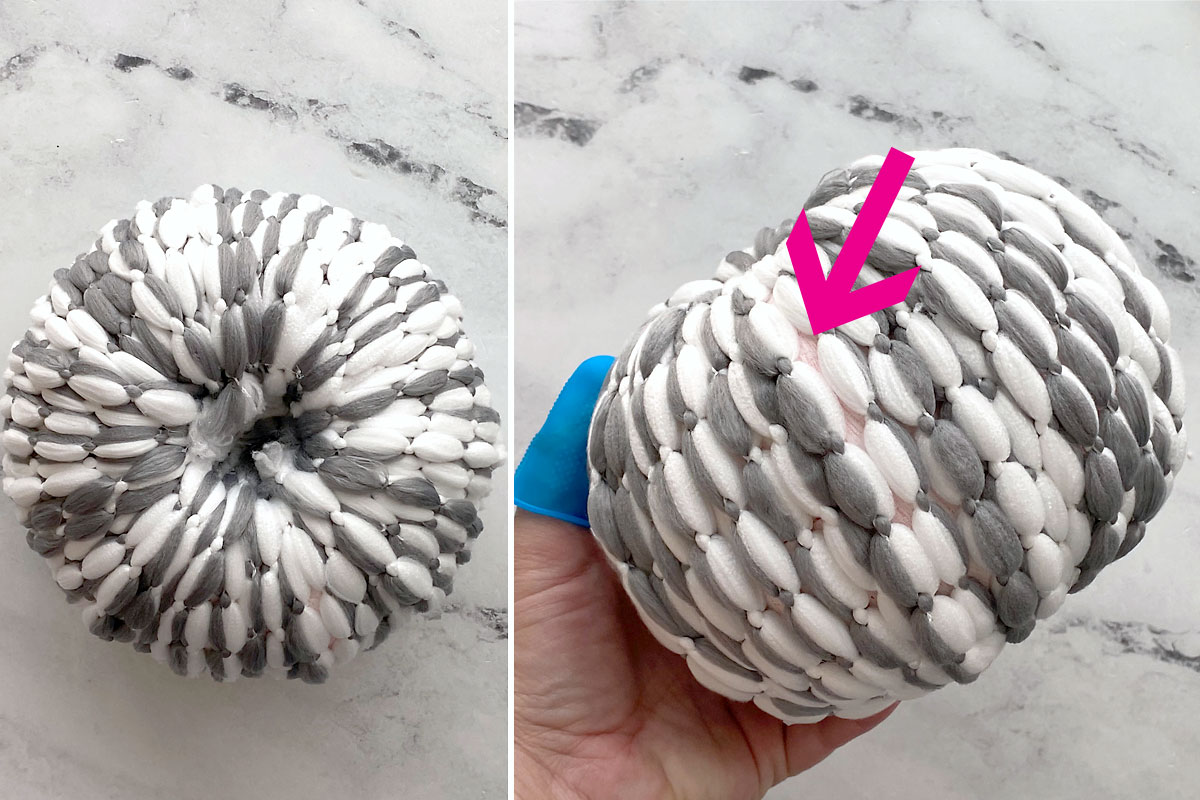
Continue until you have gone all the way around the pumpkin, bringing all the yarn up and glueing it inside the cut circle. If you look at the sides of the pumpkin, you’ll see some bare spots where the yarn doesn’t completely cover the pumpkin (as shown by the arrow).
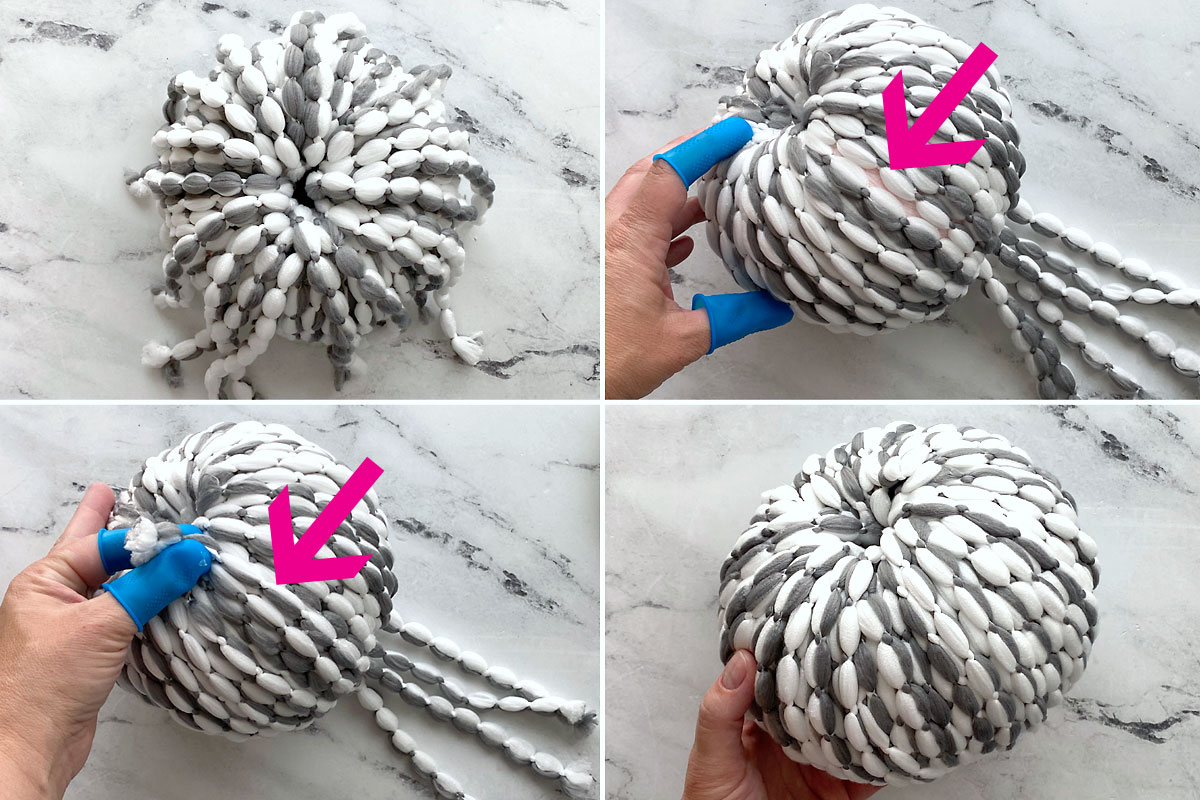
Now you can use the remaining mop head yarn strands to fill in any spots where the pumpkin shows through. Flip the pumpkin back right side up and repeat the original gluing step, overlapping folded yarn strands anywhere it looks like you need more coverage. Again, flip the pumpkin upside-down and pull yarn up and glue, paying attention to make sure you are covering any bare spots. When you are done, the pumpkin will be completely covered in yarn. I ended up using all the yarn from the white and grey mop head for one pumpkin, and about 3/4 of the yarn from the white mop head for the other pumpkin.
Finishing Touches
At this point all the hard work is done and you get to decorate! Push a stick inside the top hole of the pumpkin to act as a stem (you could also use a few cinnamon sticks or a stem taken from another faux pumpkin). Add any embellishments you like. I used some faux fall leaves, moss, pipe cleaner, and twine (all from the dollar store).

Mop Head Pumpkins
Supplies
- Foam Pumpkin from Dollar Tree
- 11 inch Microfiber Mop Head from Dollar Tree
- White craft paint
- Paintbrush
- Decorations such as sticks, moss, faux leaves, pipe cleaners, twine, ribbons, etc.
Want more project ideas? Sign up to get my favorite easy crafts and recipes straight to your inbox!
Equipment
- Hot Glue Gun
- Small Knife
Instructions
- Cut a hole in the top and bottom of the pumpkin.

- Paint the pumpkin with one coat of white paint and allow to dry.
- Cut all the yarn off the mop head.
- Fold a strand of yarn in half. Place hot glue on the fold, then stick it to the inside of the cut out circle. Hold it there a few seconds until it's adhered.
- Repeat with more yarn, gluing pieces as close together as you can. Continue until you've glued yarn pieces all the way around the circle.
- Flip the pumpkin over and fan out the yarn. Pick up a few pieces of yarn, pull them up over the side of the pumpkin and glue them inside the cut out circle. Repeat all the way around the pumpkin, overlapping yarn as needed inside the circle.
- Repeat that entire process with remaining yarn, taking care to cover any bare spots.
- Decorate as desired.


Mary says
Love the pumpkins! Beautiful!
Dottie says
Yet again Autumn you come up with a fantastic project, we don’t have Dollar Tree stores here but we do have Poundland so guess who’s off hunting the pumpkins and mop heads. Xx