What Is Bleach Tie Dye?
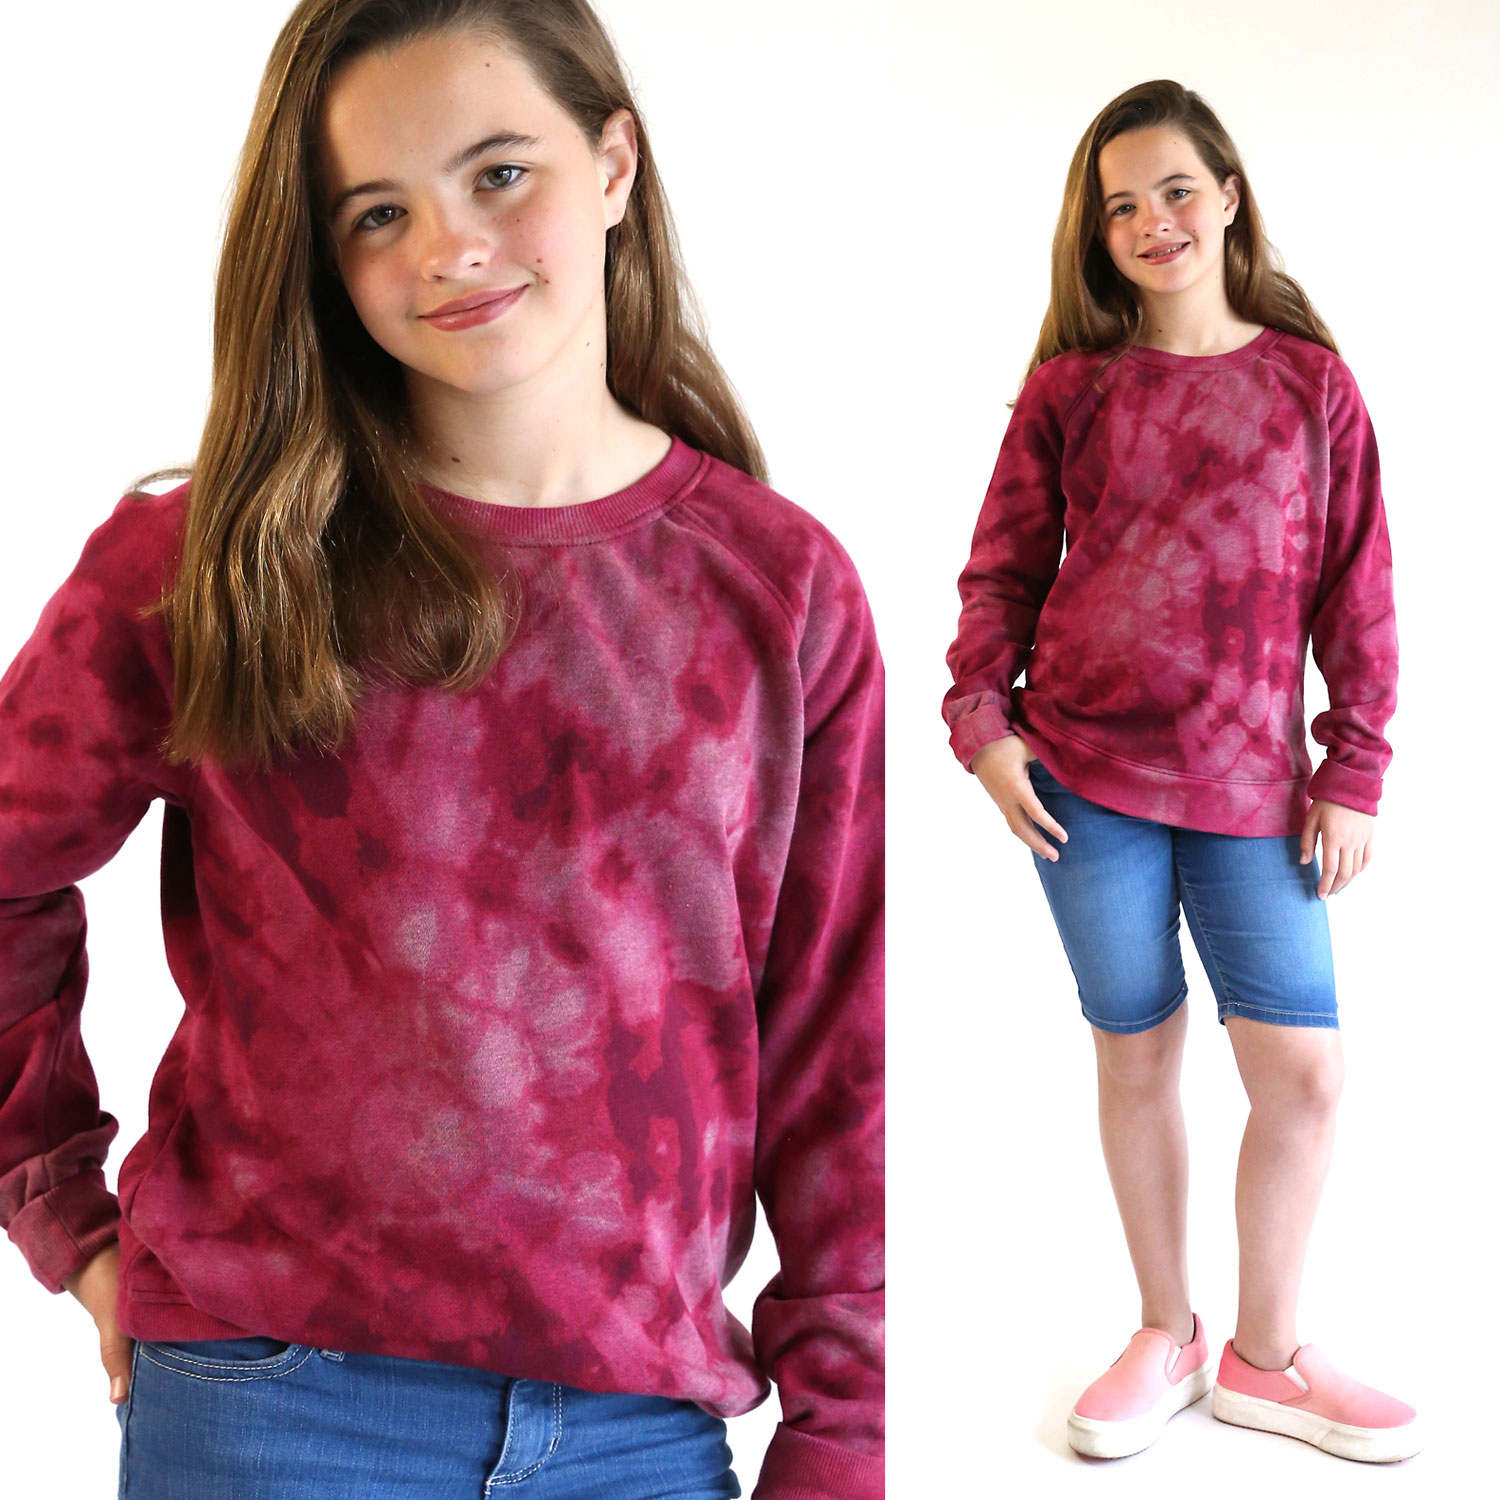
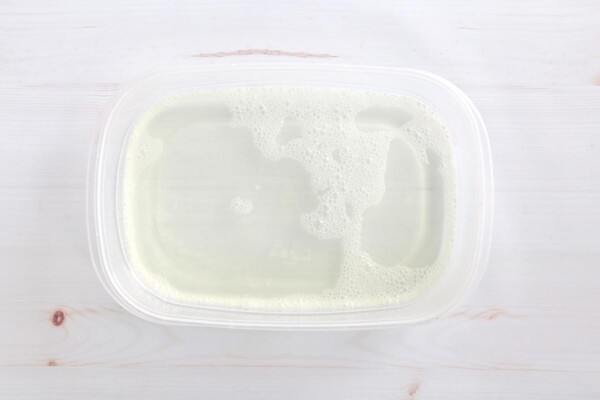
You’re probably familiar with tie dyeing, since it’s been a popular DIY project for years. But recently, bleach tie dyeing has become popular as well. Bleach dyeing is also known as reverse tie-dye because instead of adding a bunch of bright colors to a white shirt, you start with a colored item and use bleach to remove color. You still end up with a variety of colors, but they are all different shades of the same hue, making the finished garment a bit more sophisticated looking than traditional tie dye shirts. This is a fun, easy craft technique that’s super on-trend right now – stores are full of clothes that feature this reverse dye pattern. Plus it’s super easy, and only takes a couple of supplies that you might already have in your house right now!
Working with Bleach Safely
We’ll be using regular bleach from the laundry aisle in this project. Even though bleach is a common household supply, you do need to use some caution when working with it. First, make sure to do your bleaching in a well ventilated area: either outside or near a large open door or window so the fumes from the bleach can easily dissipate. Next, wear gloves to protect your skin while working with the bleach. Finally, be careful not to get bleach on the clothes you are wearing or your work surface. (It’s a good idea to wear old clothes just in case you do get a spot of bleach on them.)
Supplies
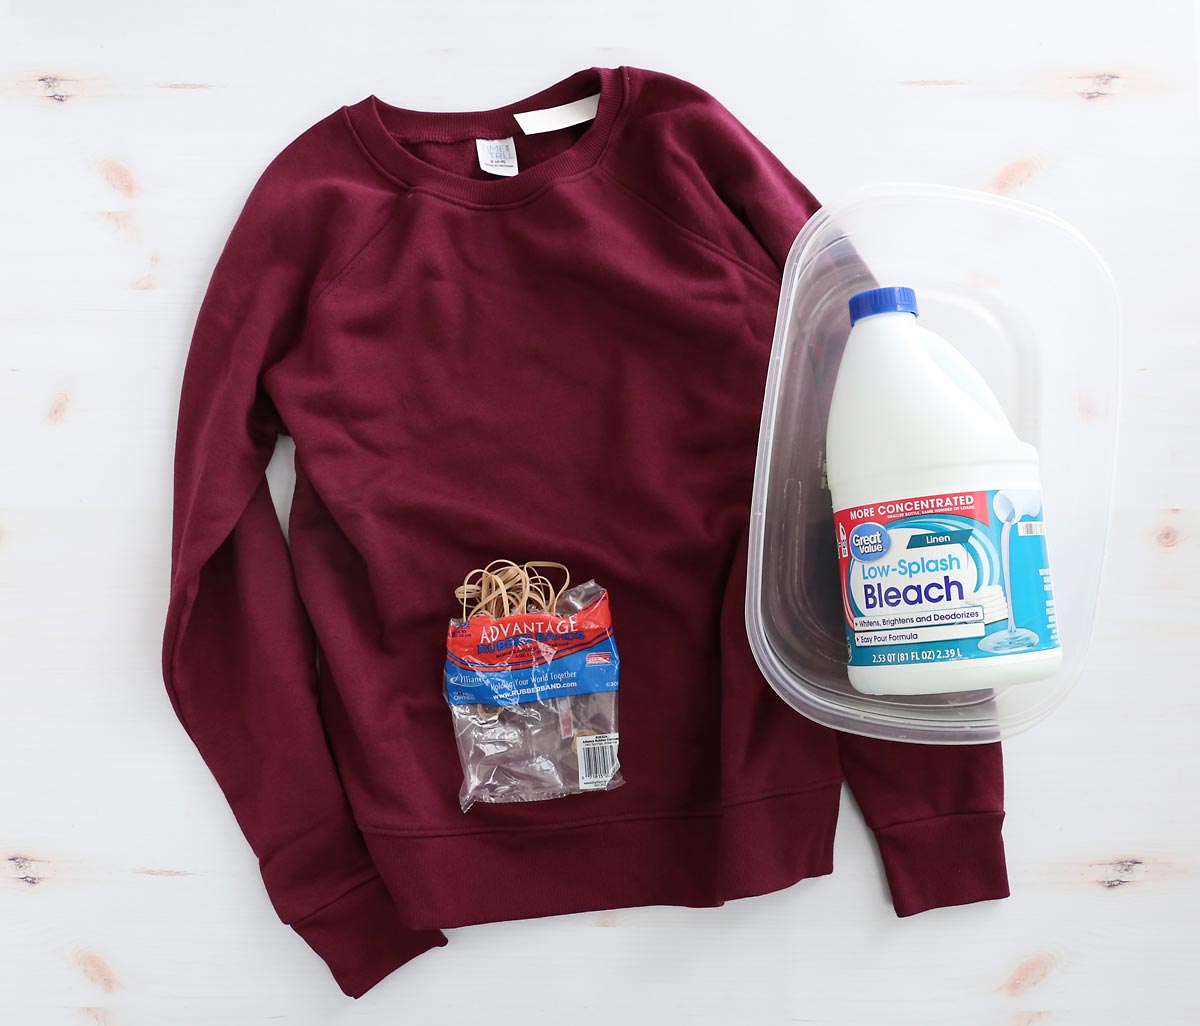
You only need a couple of things to bleach tie dye a shirt. No need to purchase a tie dye kit! Here’s what I used:
- Sweatshirt: Bleach dyeing is easiest on a t-shirt or sweatshirt – hoodies work great too, and it would be fun to do matching sweatpants. Choose a shirt that’s either 100% cotton or a cotton poly blend. 100% cotton fabrics will respond fastest to the bleach while blends will take a little longer. The shirt I used was about half and half cotton/poly and it worked great. Do not try this technique on items that are not at least half cotton.
- Rubber bands: You can find a package of rubber bands in the office supply section of most large stores.
- Bleach: This is just normal bleach from the laundry aisle.
- Plastic bucket, bowl or tub: This should be large enough to fit the entire shirt inside
- Gloves: Wear cleaning gloves or disposable rubber gloves to protect your hands from the bleach
Rubber Band the Shirt
The first step for bleach tie dyeing is to rubber band your shirt. There are lots of different rubber band patterns for tie dye you can use, depending on the finished design you’d like to make. You can try:
- scrunching the shirt up and placing rubber bands across it at random places to get random splotches of light and dark on your shirt
- according folding the shirt, then rubber banding across it to create stripes
- pinching one spot on the center of the shirt and pulling it up to create a cone shape, then placing rubber bands down the cone to create a sunburst (or bulls-eye) pattern
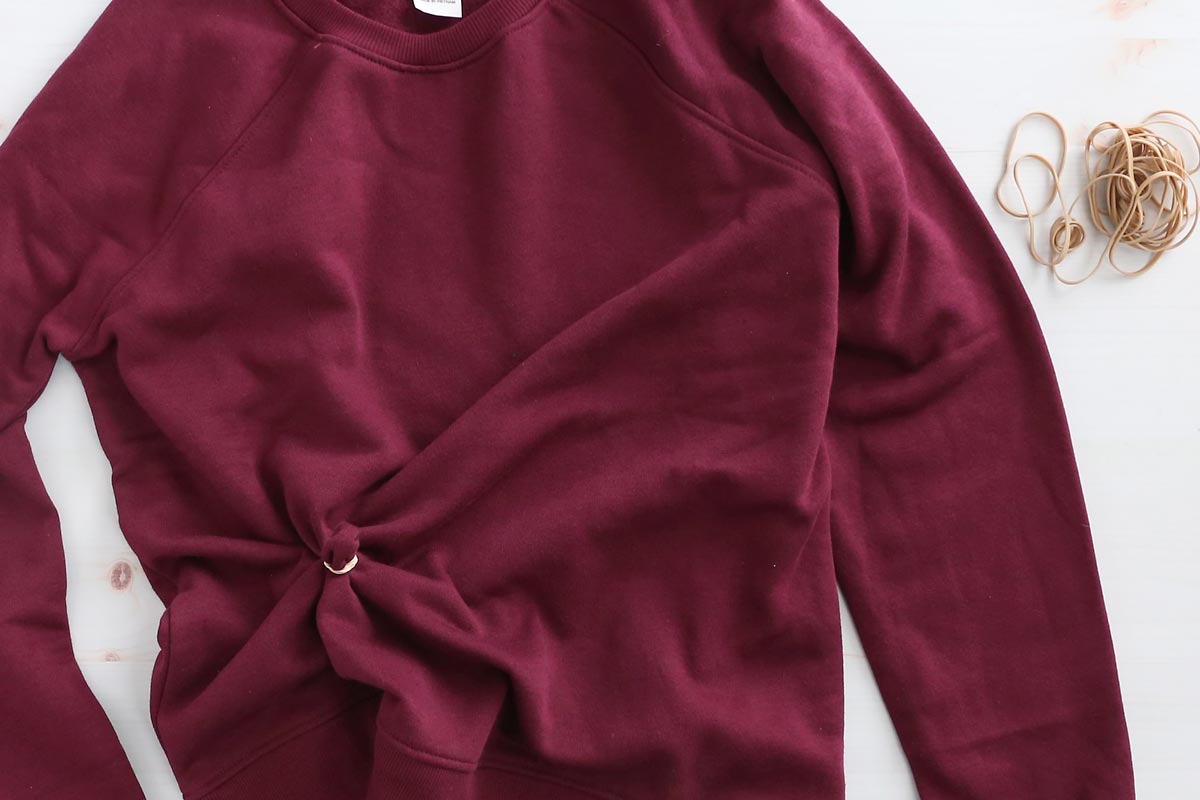
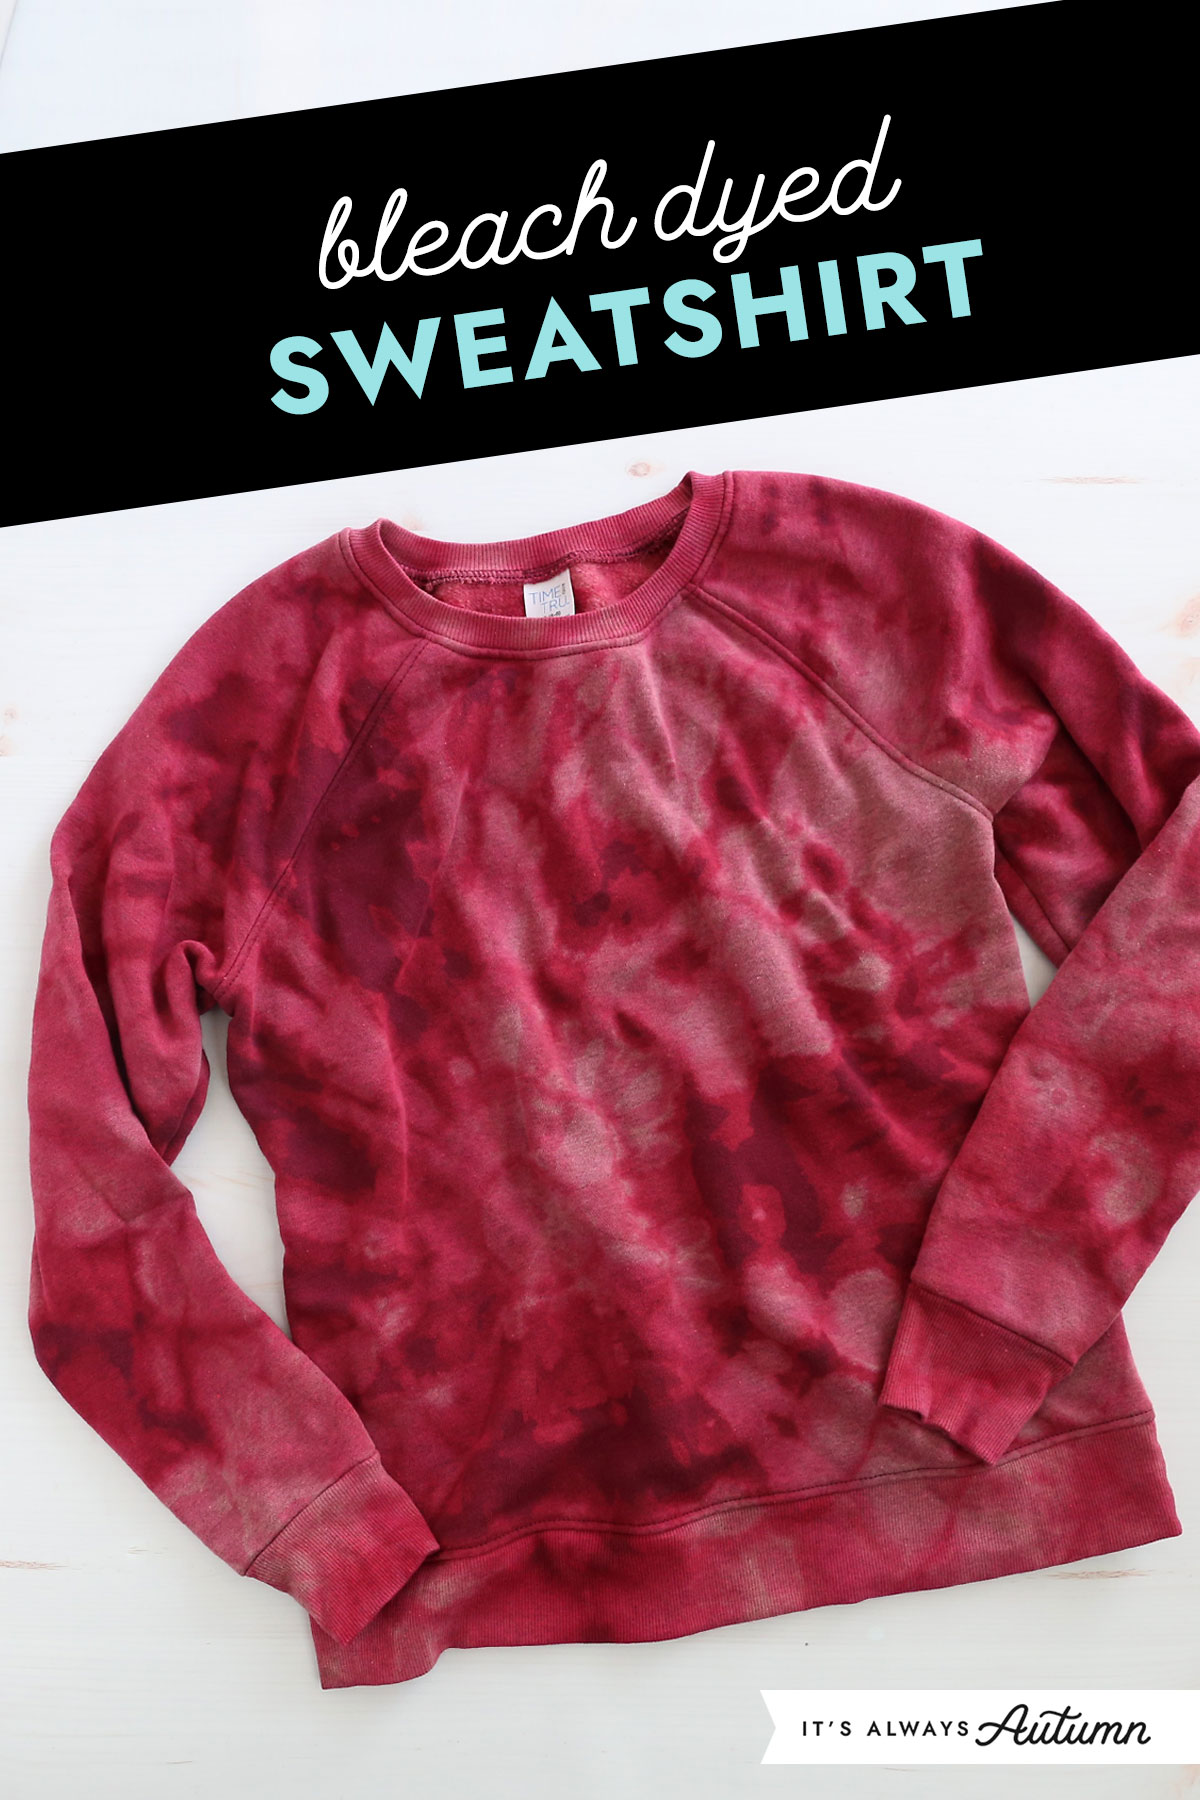
For an overview of different bleach tie-dye patterns, visit this post at Sarah Maker. I used a sunburst pattern (aka bulls-eye or spiral pattern), making a large sunburst over the entire front of the shirt, and then starting new sunbursts for each sleeve and the back of the shirt:
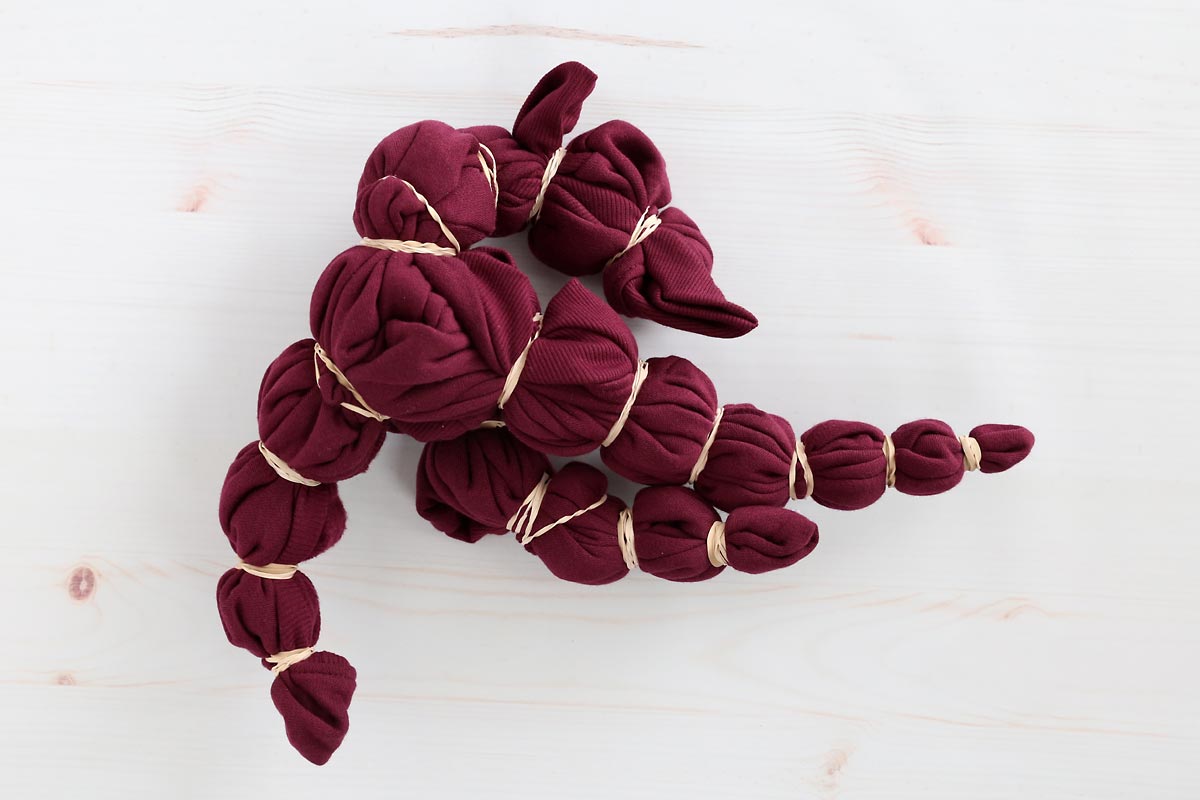
Remember to wrap the rubber bands quite tight. They are what keep some portions of the shirt from getting any bleach. If you don’t wrap the rubber bands very tight, almost all of the shirt will get bleached and you won’t have many darker areas left.
Prep the Bleach Water
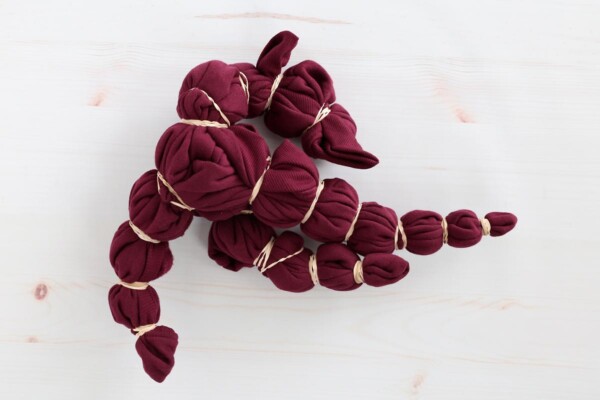
In your plastic tub, make a bleach solution by mixing bleach with water at a 1 to 1 ratio. I placed about two cups of bleach and two cups of water in the tub I used, and that was plenty. I probably could have used just one cup of each. You will need to pour the bleach mixture out (or have a second tub handy), so it’s easiest to do this right inside your kitchen sink.
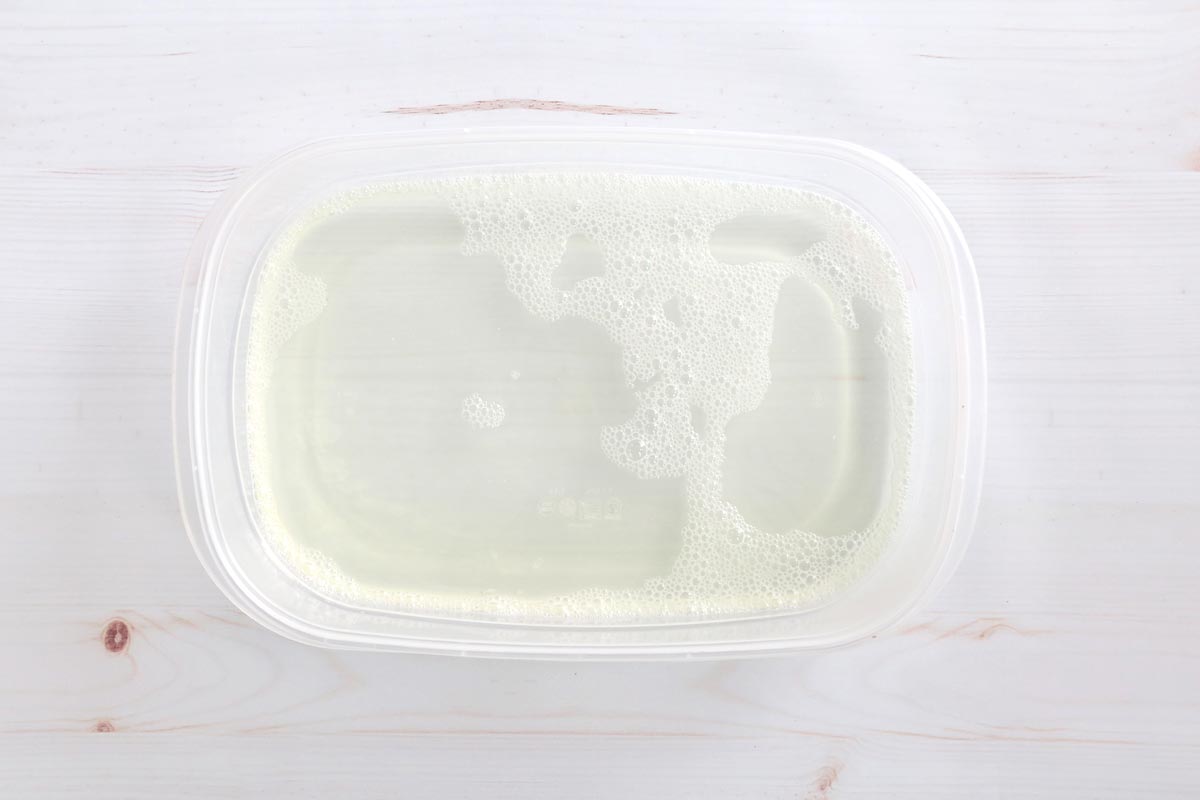
Dunk the Shirt
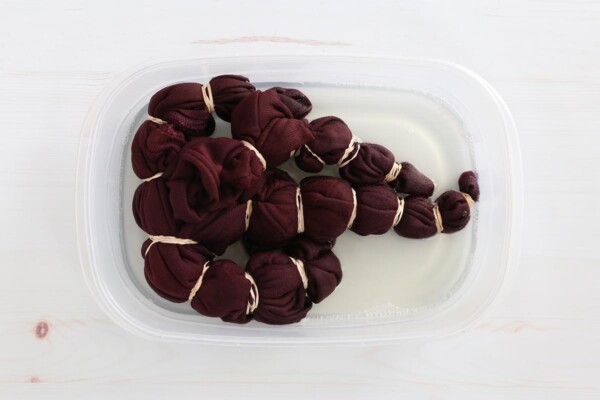
Wearing gloves to protect your hands, place your shirt inside the tub with the bleach water. Push the shirt down and flip it over if necessary to make sure all parts of the shirt get wet.
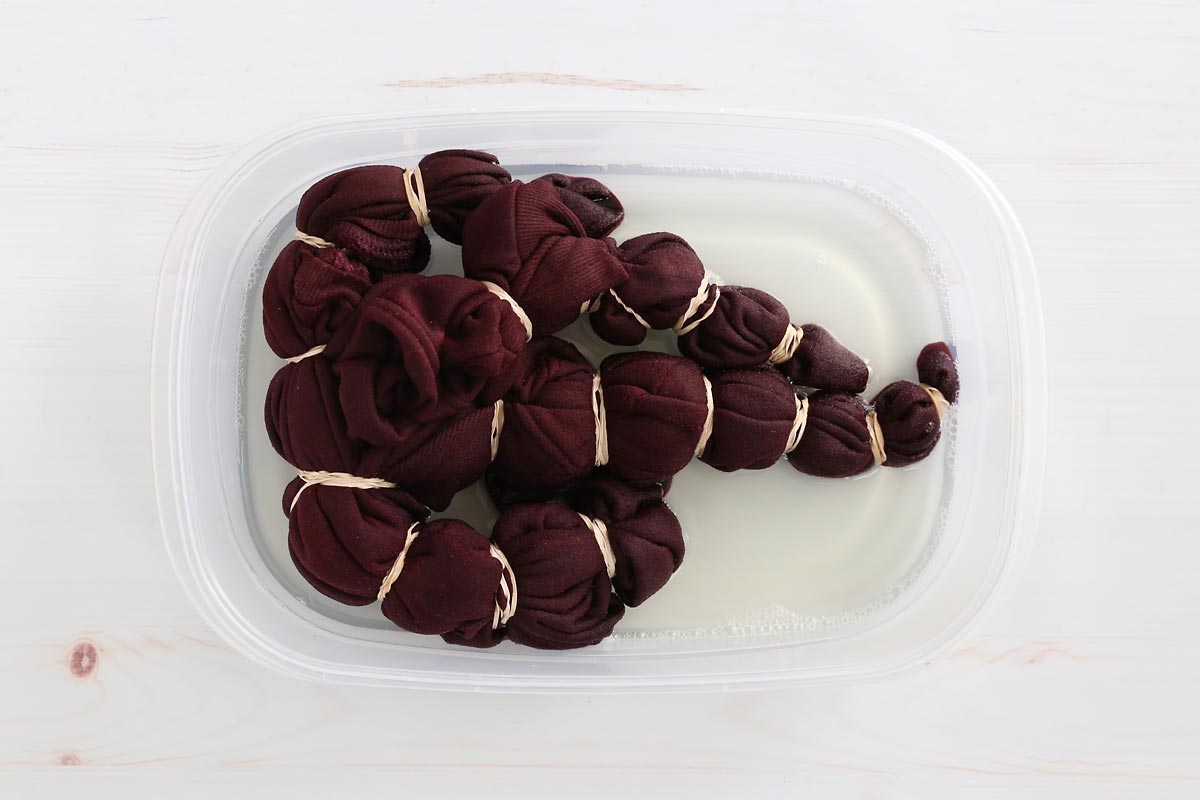
Drain and Wait
Once you can see that all of your shirt is wet, pour the bleach water out of your tub (or move your shirt to a second plastic tub). Now you will wait for the bleach to start reverse dyeing your shirt. This can take anywhere between 5-20 minutes depending on the fiber content of your shirt. Shirts that are 100% cotton will begin to reverse dye very quickly, and you’ll see the color lightening almost immediately. Watch your item closely (don’t walk away from it) and move on to rinsing it as soon as you are happy with the color change – and remember the color will be lighter once the shirt is washed and dried.
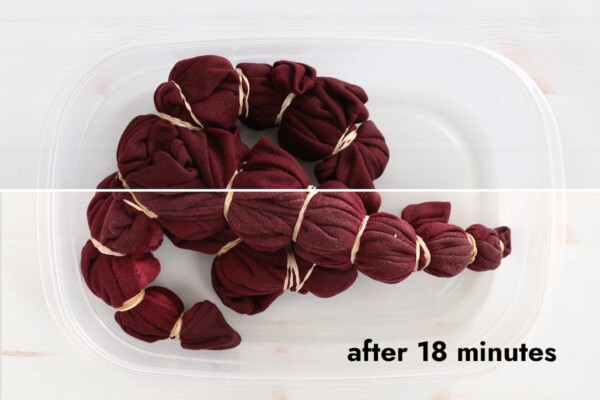
Shirts that are cotton/poly blends will take longer to bleach, and it may be harder to see the color change. I let my cotton/poly sweatshirt bleach for 18 minutes, and it looked like the color had just barely changed:
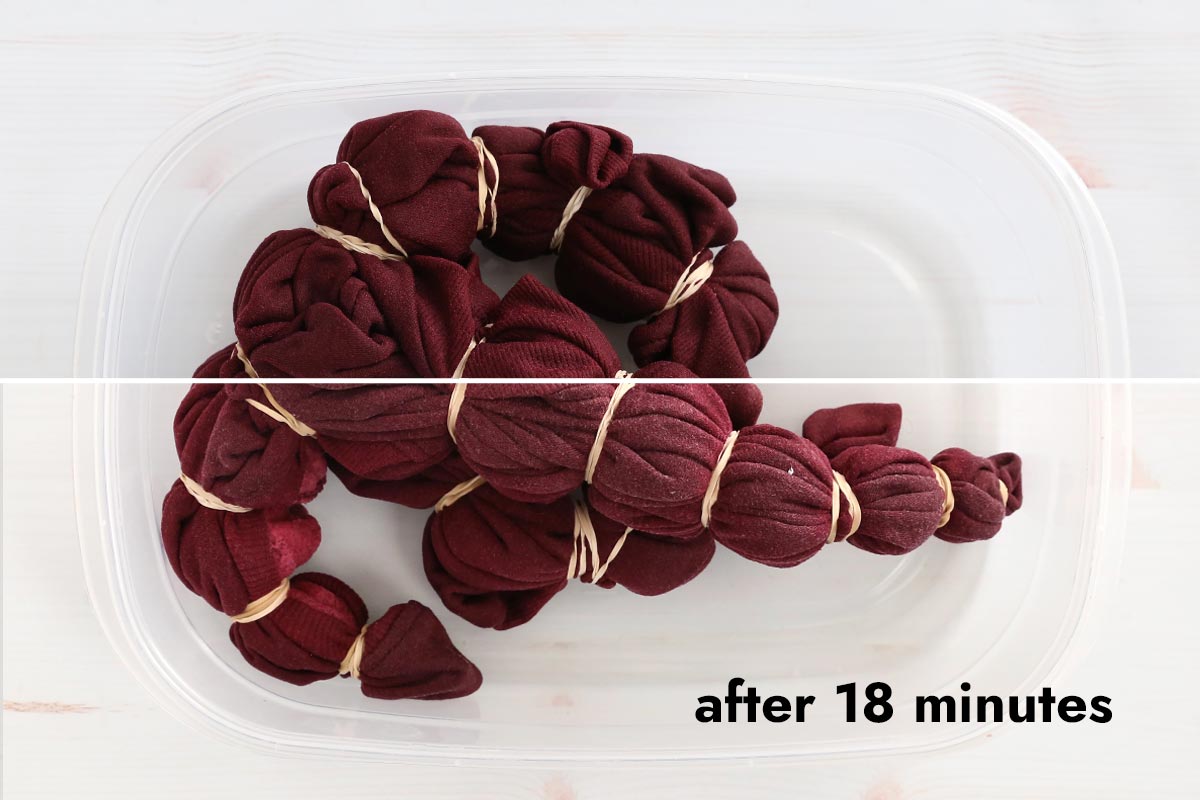
However, remember the bleached areas will be quite a bit lighter once the shirt is washed and dried. The surprise is part of the fun of bleach dyeing! Do not let your shirt sit with dye on it for longer than 20 minutes, as the dye can begin to corrode the fabric.
Rinse, Wash and Dry
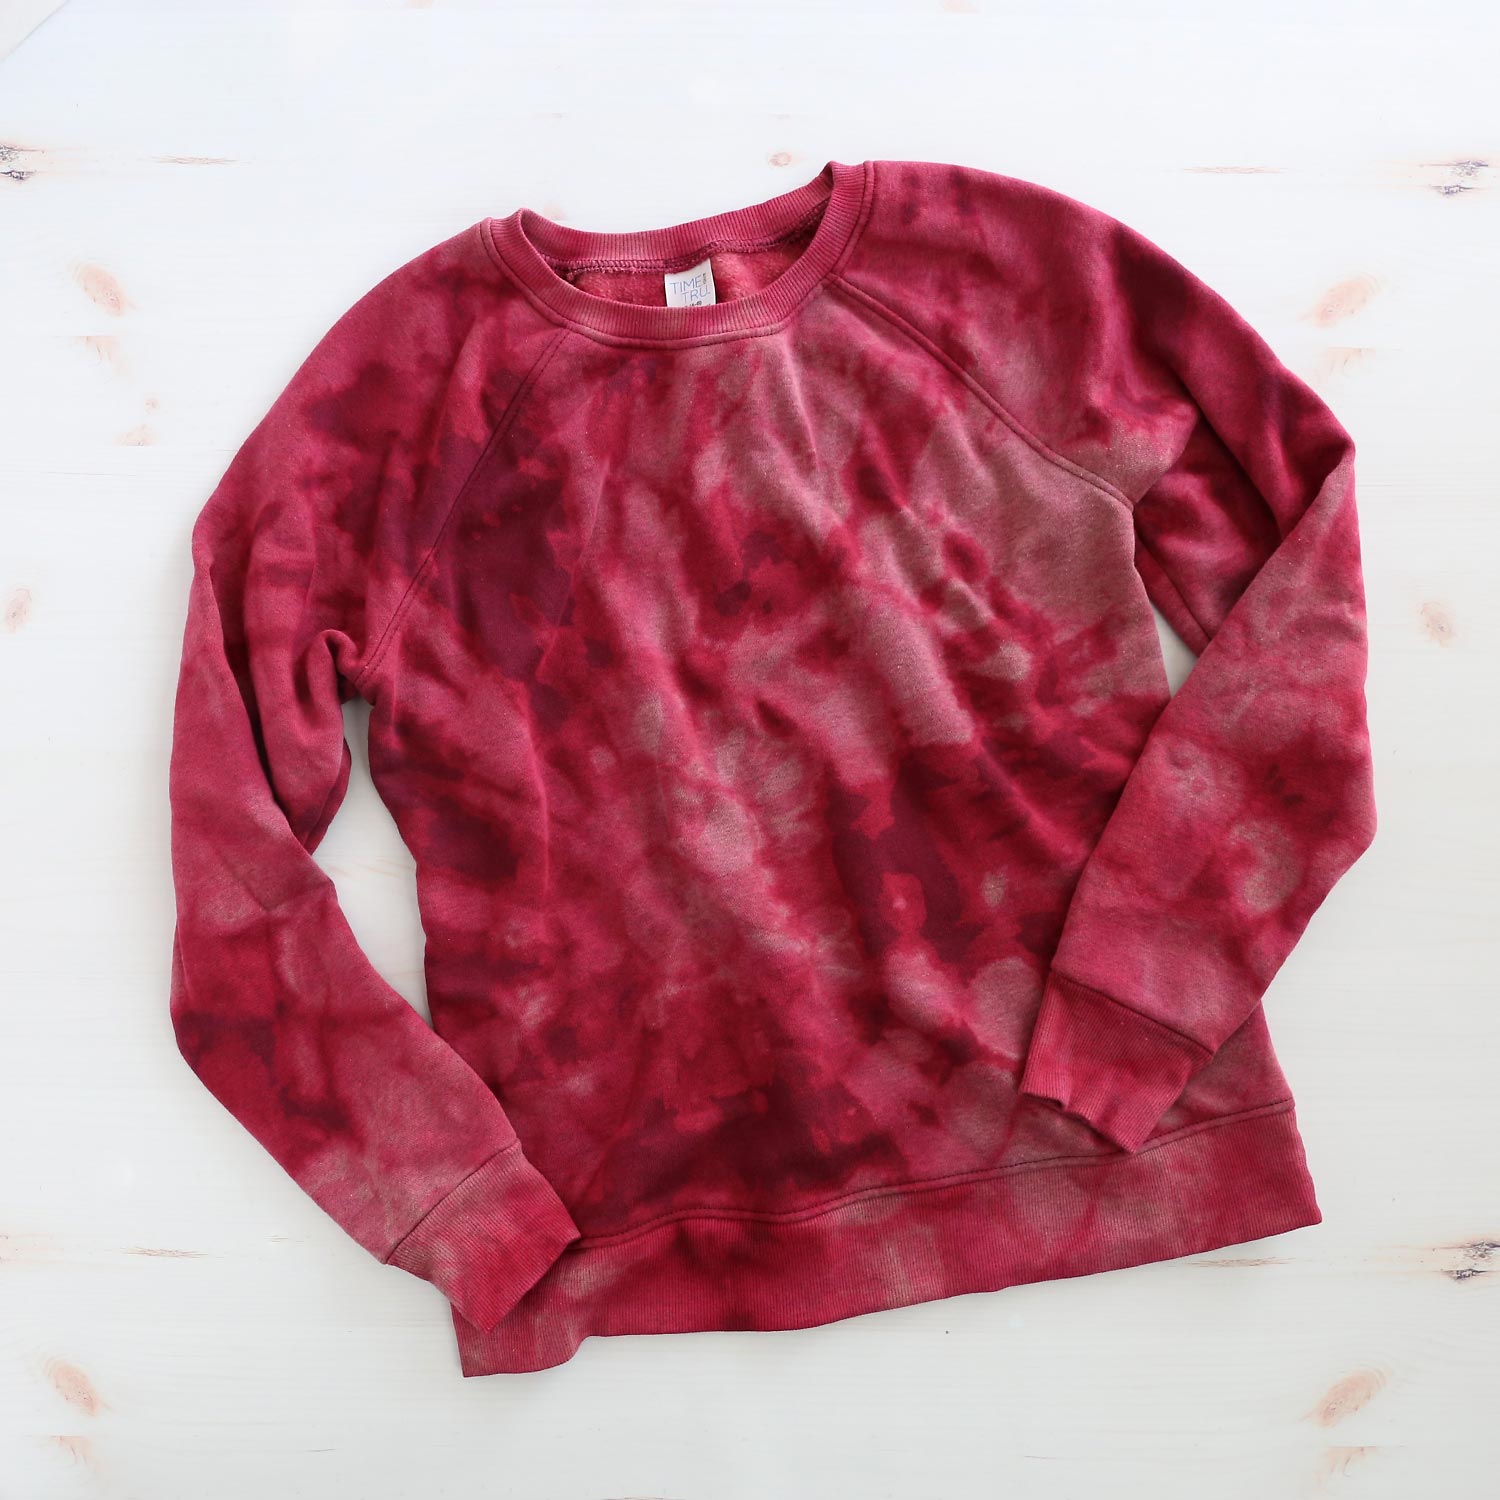
Once you are happy with the color change or 20 minutes have passed, use scissors to clip through each rubber band and remove them. Rinse the shirt thoroughly in your sink to halt the bleaching process. Continue rinsing until the water runs clear (it will look slightly yellow while there is still bleach being rinsed out). At this point, you can run it through a normal cycle in your washing machine with your regular detergent and dry in your dryer (or hang dry) to see you finished project.
FAQ
It’s hard to predict exactly what color your finished bleach tie dye shirt will be. As you can see in my example, I started with a dark berry purple colored sweatshirt, and got a variety of lighter colored pinks. Black shirts or navy shirts often bleach dye to a reddish-orange or tan. Lighter colored shirts may bleach close to white. If you really want to know what color the shirt will turn in the bleach, you can dab a small drop of bleach on an inside cuff to see what happens.
You can probably beach dye anything that’s made from some natural fibers. Shirts and sweatshirts are easy to deal with because they are soft, making the rubber banding process simpler. You can bleach dye jeans; it’s just a little more difficult. Just be sure that whatever you choose is at least half cotton or the reverse dyeing may not work very well.
The longer the item sits with bleach on it, the lighter it will get. Items that are 100% cotton will bleach much faster than items that are a cotton poly blend. Generally, you’ll let your item sit for 5-20 minutes, depending on the fiber content and how light you want parts of the shirt to be. Do not let bleach sit on the shirt for more than 20 minutes or it can start to eat away at the fabric.
You can use a spray bottle or squeeze bottle to apply the bleach instead of dunking your clothing item in bleach water, but you need to make sure your item is well saturated, especially if it’s a cotton/poly blend. Also be sure your work area is protected and be careful of overspray if you plan to spray bleach onto the shirt.
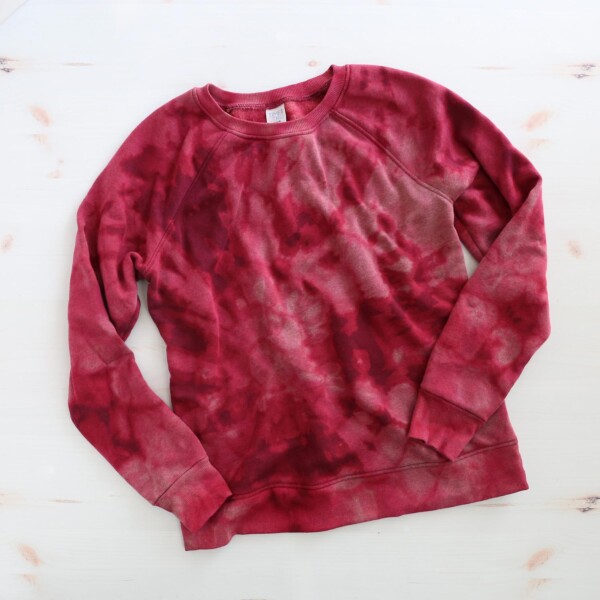
Bleach Tie Dye Sweatshirt
Supplies
- Shirt 100% Cotton or Cotton Poly Blend
- Bleach
- Rubber Bands
- Plastic Bucket or Tub
- Disposable Gloves
Want more project ideas? Sign up to get my favorite easy crafts and recipes straight to your inbox!
Instructions
- Choose a tie-dye pattern and rubber band your shirt accordingly, making sure the rubber bands are tight.
- Wear gloves to protect your hands and open windows to ensure good ventilation if you are working inside. Mix 1 part bleach and 1 part water in a plastic bucket or tub.
- Dunk the shirt into the bleach water, pressing it down and turning it over to ensure that all of the shirt has been saturated.
- Drain out the excess bleach water. Allow the shirt to sit 5-20 minutes until you are happy with the color change. Remember the color will be lighter after it's washed and dried, especially for cotton/poly blends. Do not let the shirt sit longer than 20 minutes.
- Remove the rubber bands and rinse the shirt thoroughly in the sink. Wash and dry the shirt as you normally would to see the finished result.




Sarah Maker says
Looks awesome!
Sandy Kiser says
This is one of your best articles ever. Thank you so much for posting. Your darling daughter is becoming a beautiful young woman. Thanks for all your sharing over the years. I remain a big fan and admire you enormously.