
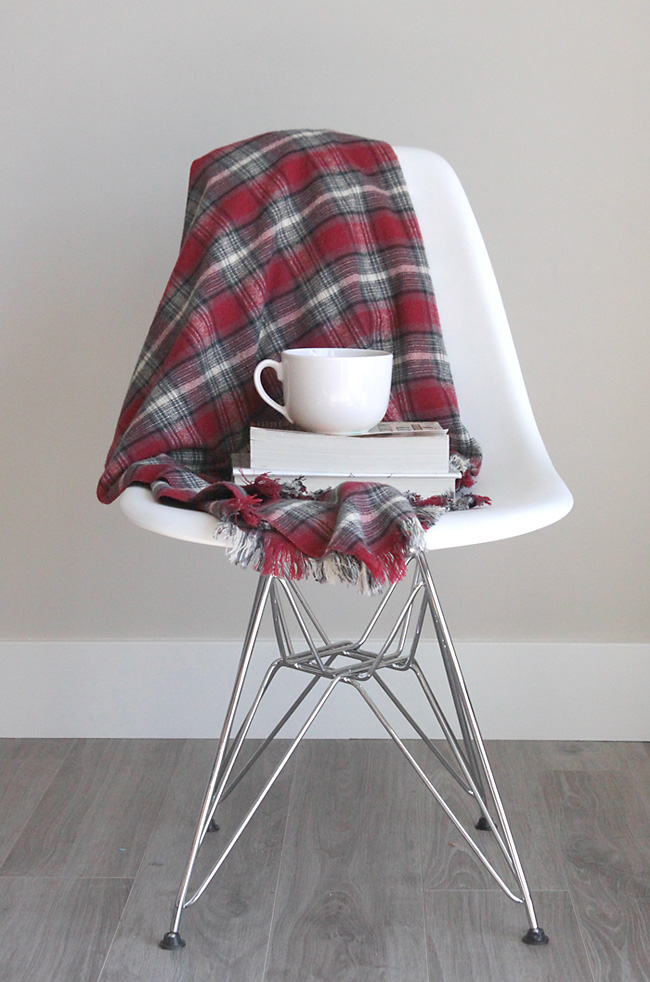
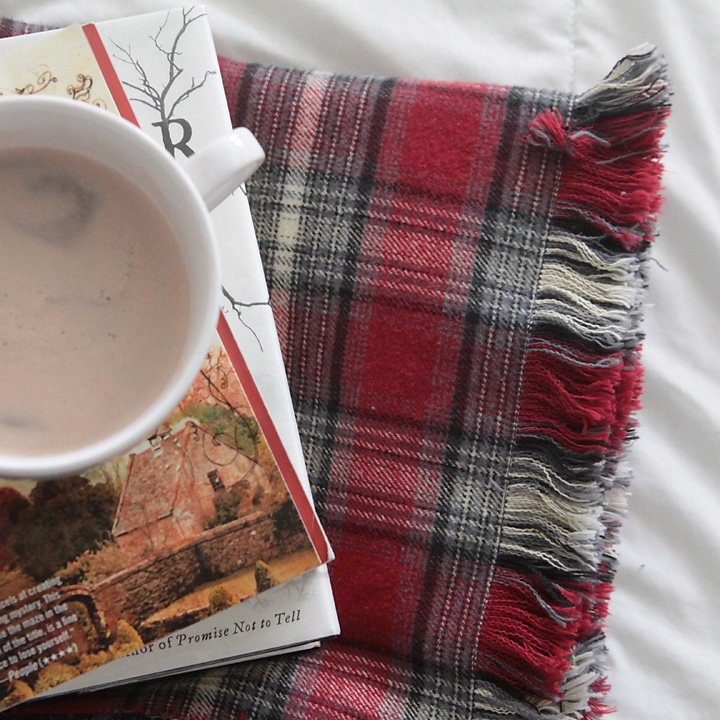
This DIY fringed flannel throw is cozy, fashionable, and easy to make for about $10, making it a great handmade holiday gift!
My mom starts asking us for Christmas lists every year in July. No joke. We all act like she’s crazy, saying we couldn’t possibly start thinking about Christmas that far in advance. Of course, when it’s a week before Christmas and I’m praying that Amazon Prime will get my last minute purchases to me in time, she’s relaxing because all her gifts have been wrapped and ready to go for a month. So I thought I’d plan gifts early this year so I’ll actually be able to enjoy the holidays instead of waiting around for the UPS guy or staying up all night sewing frantically. That means starting now, especially for handmade gifts. My first DIY gift idea of the season is this simple fringed flannel throw.
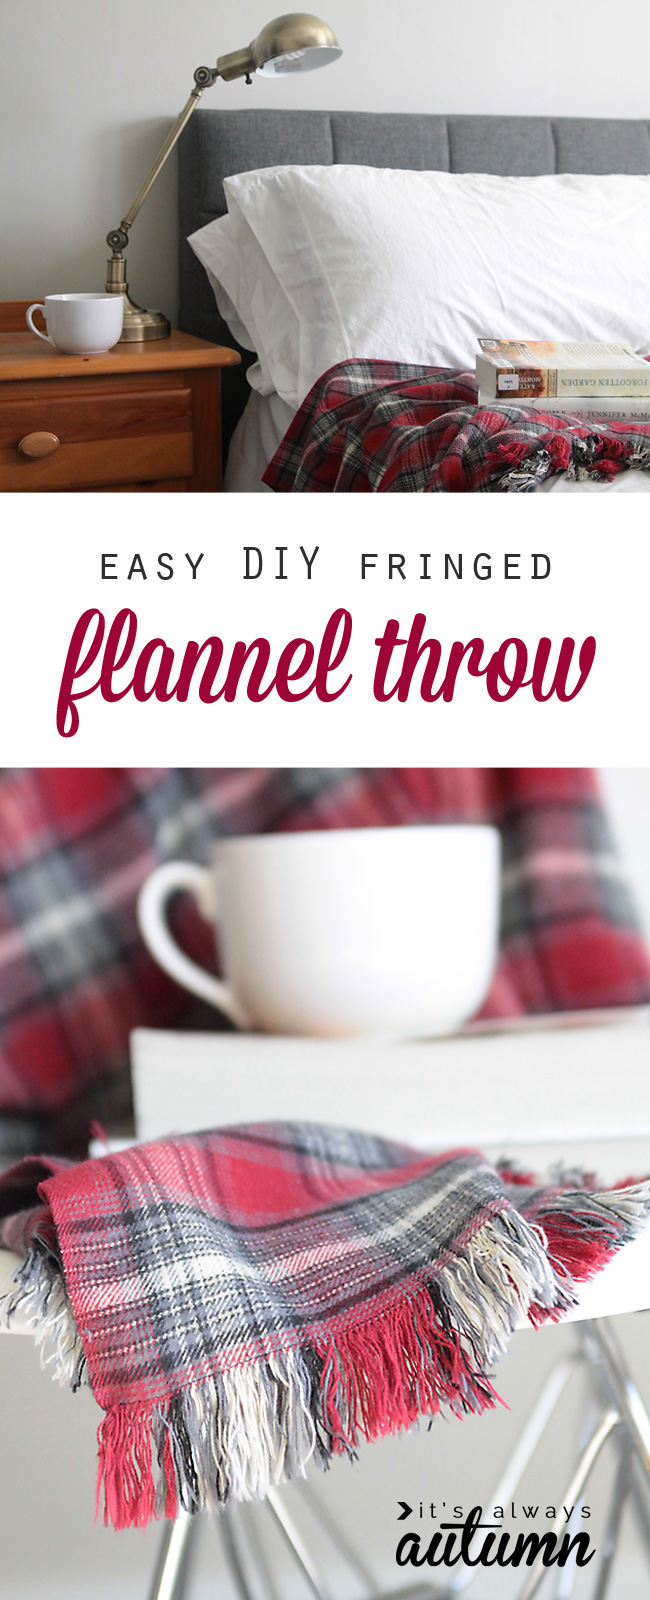
Plaid is everywhere right now and fringe has been popular for a few years, meaning this easy to make throw is right on trend. It’s the perfect size for throwing over your shoulders on a cool night or covering your lap and feet while reading a book, without being as heavy or hot as a large blanket.

It makes a lovely gift and it takes hardly any sewing! You can have one done in about an hour for just over 10 dollars.
To make a fringed flannel throw, you’ll need one and three quarters yards of nice thick flannel. I used flannel from the “Plaiditudes” line at Jo-Ann Fabrics. There are lots of different colors and types of plaids and it’s a nice weight and gorgeously soft (don’t use flannel shirting – it will be too thin). It’s about $10/yd, so if you use a 40% off coupon it will cost just over $10 for 1.75 yards.

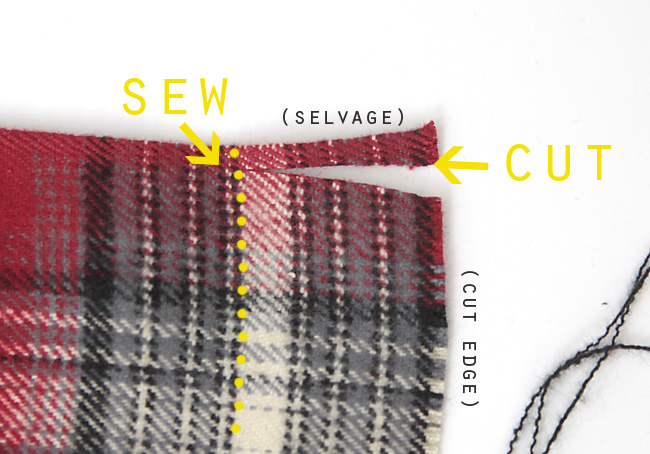
Your cut piece of fabric will be about 45 inches wide and 65 inches long. Each of the long sides will be a selvage, which will be a finished edge, and each of the short sides will be the cut edge, which you’ll be able to fray if you pull at the threads. Trim both cut edges in a nice straight line. It’s easiest to cut right along the plaid to get a very straight edge.
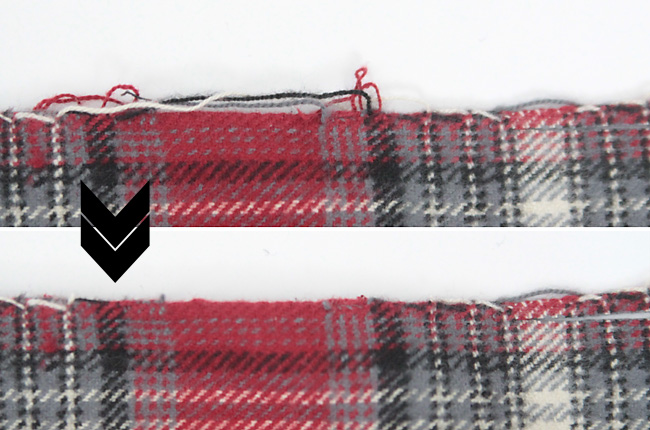
On this particular fabric one selvage is very clean, while the other has a few messy threads. Just go ahead and clip those threads off all the way down the length of the fabric.
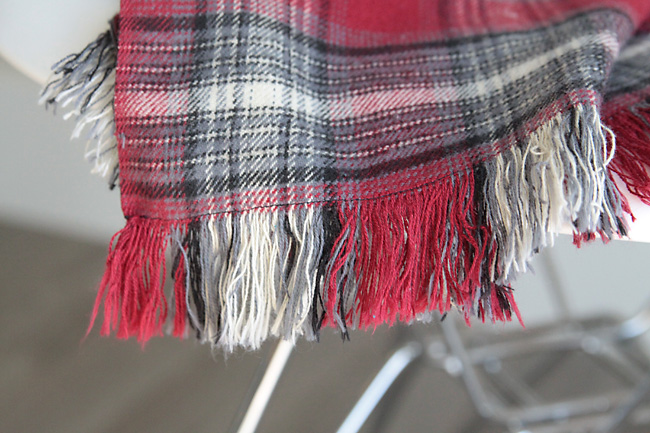
Next you’ll want to decide how long you want your fringe. Mine is nearly and inch and a half long, and I love the look. However, over time and multiple washing a shorter fringe (like half and inch) will stay tidier looking. I did wash my throw and the fringe got a bit tangled – I was able to smooth it out though. Additionally, shorter fringe won’t take you as long to make. Longer fringe = prettier. Shorter fringe = faster and less likely to get tangled in multiple washings. You decide 🙂
From the cut edge, make a cut the depth of your fringe near each selvage edge, as shown below. This will make it easier to pull out threads to create the fringe. Then sew a straight line from one selvage edge to the other selvage edge, again at the depth you want your fringe. Use a short stitch length. This will provide a barrier so the fabric doesn’t continue to fray past where you want the fringe to end. If you want to wash the throw before you give it away, do that now. Washing and drying it will fray the cut edges a bit, starting the fringing process for you.
Now you get to start pulling threads. Basically you want to pull out all the threads that run selvage to selvage until you get to the seam you just sewed, creating a fringe. I found that just trying to yank the threads out didn’t work very well because they kept breaking. After a few tries, I found this was the best way: hold the fabric across your lap with one cut edge up toward you. Use a seam ripper or a pin to grab a thread and pull it gently away from the fabric (1st photo below). Then pull the thread sideways, which will gather up the fabric (2nd photo below). Keep pulling the thread one way and the fabric the other way until the thread comes loose. Don’t pull hard, or the thread will snap. Start kind of slow and gentle until you get the hang of it.
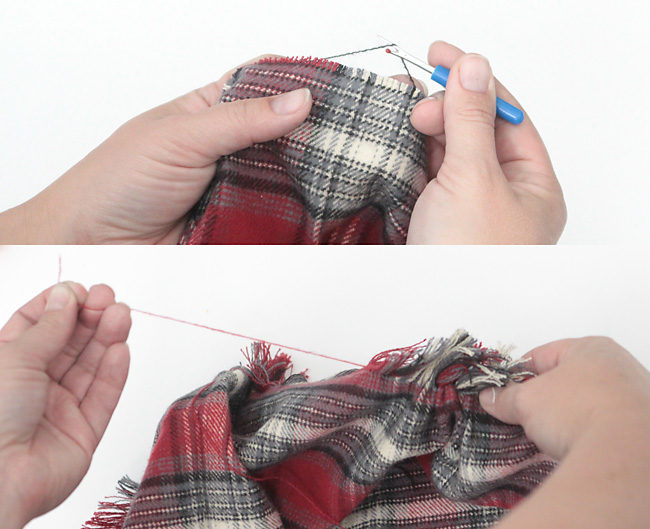
If the thread snaps, no biggie. Just find it and keep pulling it sideways until it comes out. Continue pulling threads out until you have the desired depth of fringe. In the photo below you can see the fringe as well as the black line of stitching that I sewed across the fabric in the first step.
Repeat all the steps for the other side. This throw took about an hour total, and it’s a great project to work on while you’re watching your favorite show.
One last thing I want to mention is that I bought another color of fabric from the same fabric line at Jo-Ann’s, but when I started to fringe it the threads snapped much more often, making it harder to fringe. I ended up only doing about half an inch on either side because it was taking too long. If you know you want a deeper fringe, you may want to ask for a swatch of fabric to do some “test fringing” on to make sure it’s going to work.


Patty says
Thanx for the tutorial, I already made 3 of these for Christmas gifts and one for myself. They all turned out beautiful. So easy to do.
Kate says
Great gift! I really like it! I’ll try to make one.