
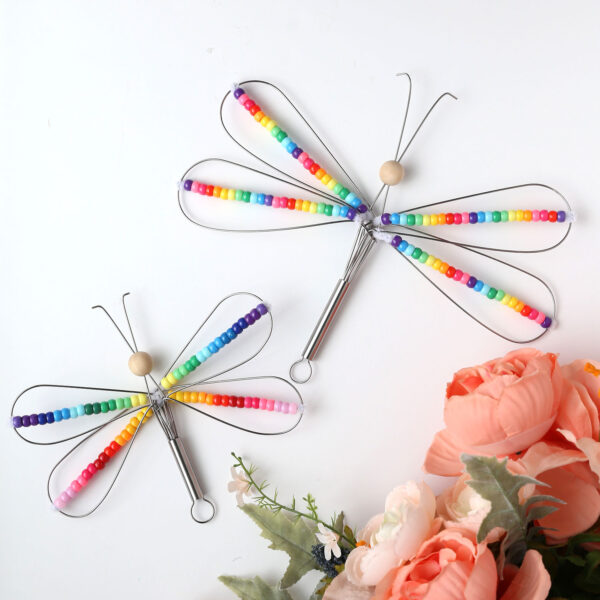
In today’s post: Learn how to turn a metal whisk into a cute dragonfly – then have fun decorating it! This is an easy craft you can do with your kids in about half an hour.
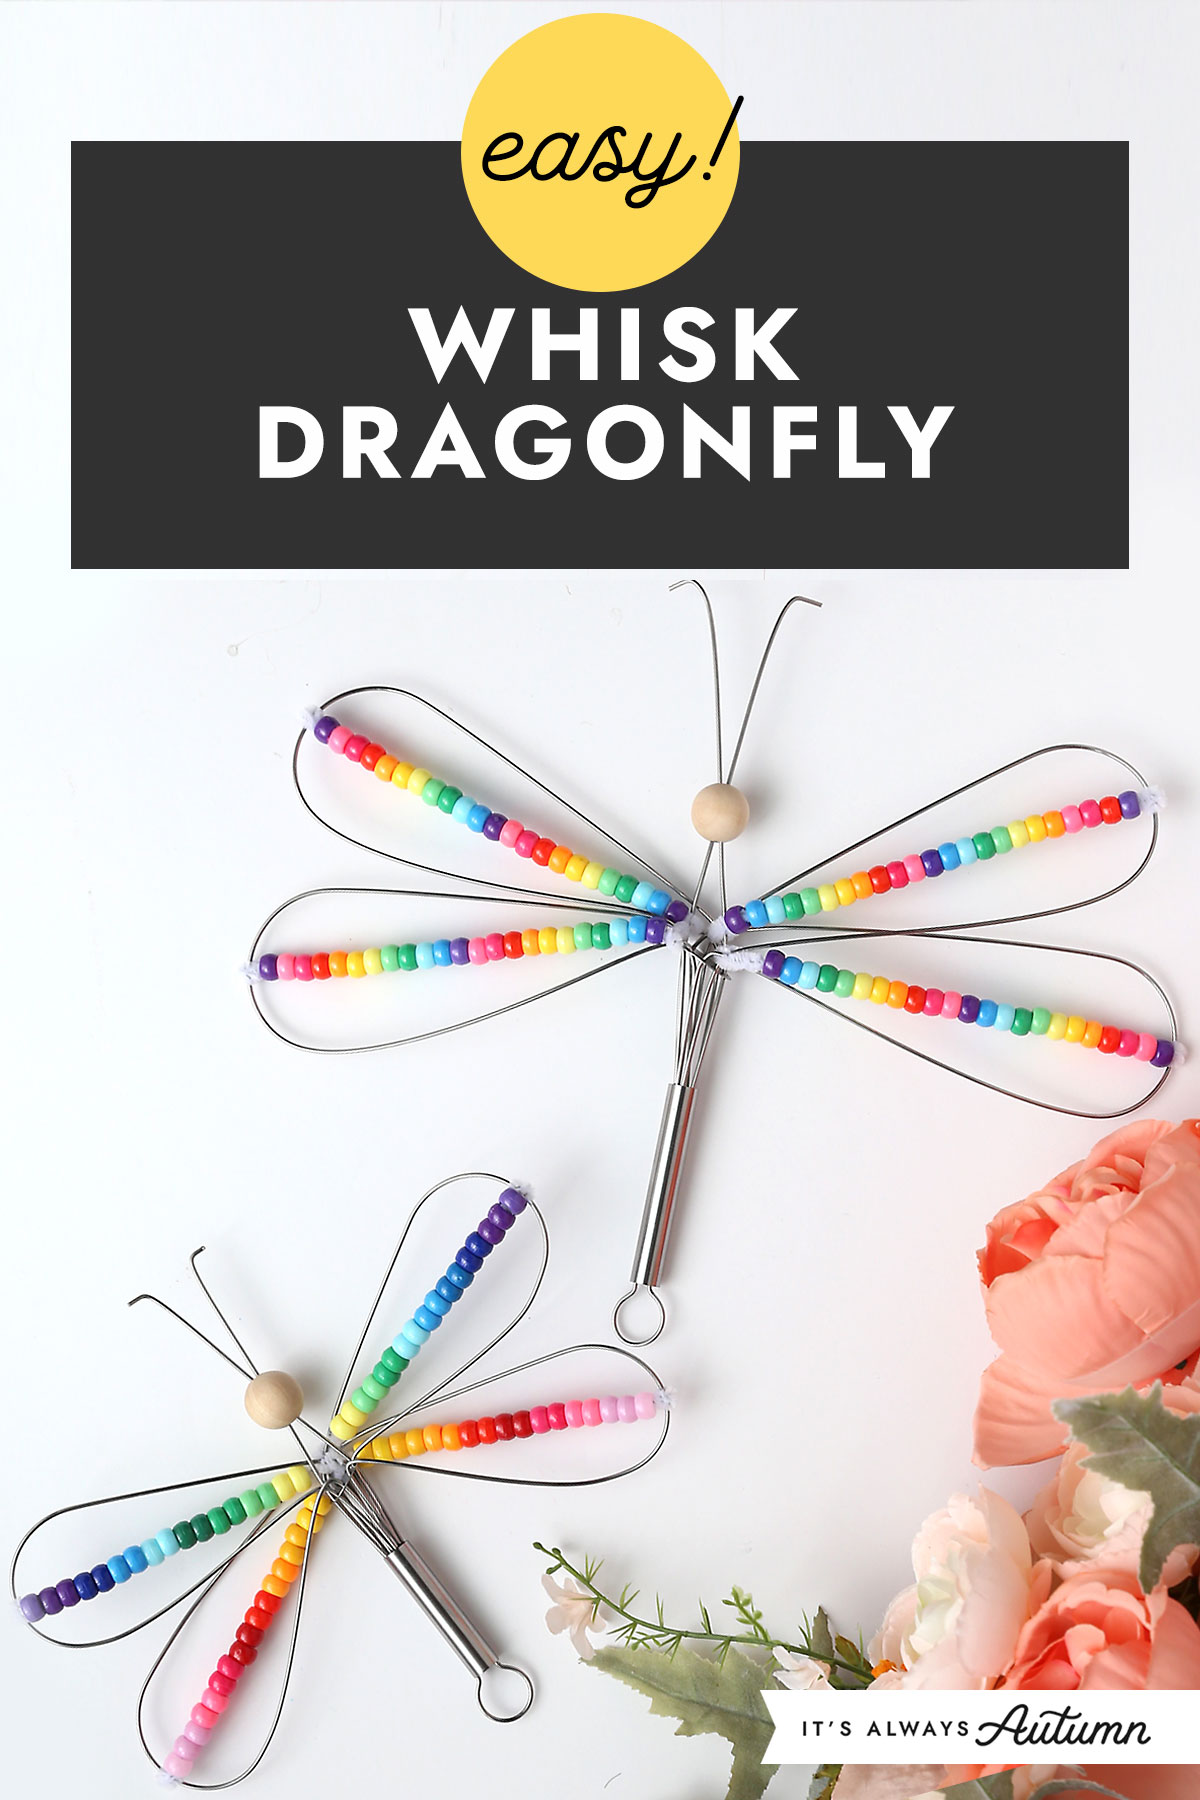
Today’s project is a fun idea that your kids are going to enjoy: whisk dragonflies. You start with an inexpensive metal whisk and bend down some of the loops to create wings. The final loop gets cut and threaded with a wood bead to create a head and antennae. Then you can decorate it however you’d like! We used pipe cleaners and colorful beads to create a rainbow effect on the wings.
Supplies
Here’s what you’ll need to make a whisk dragonfly:
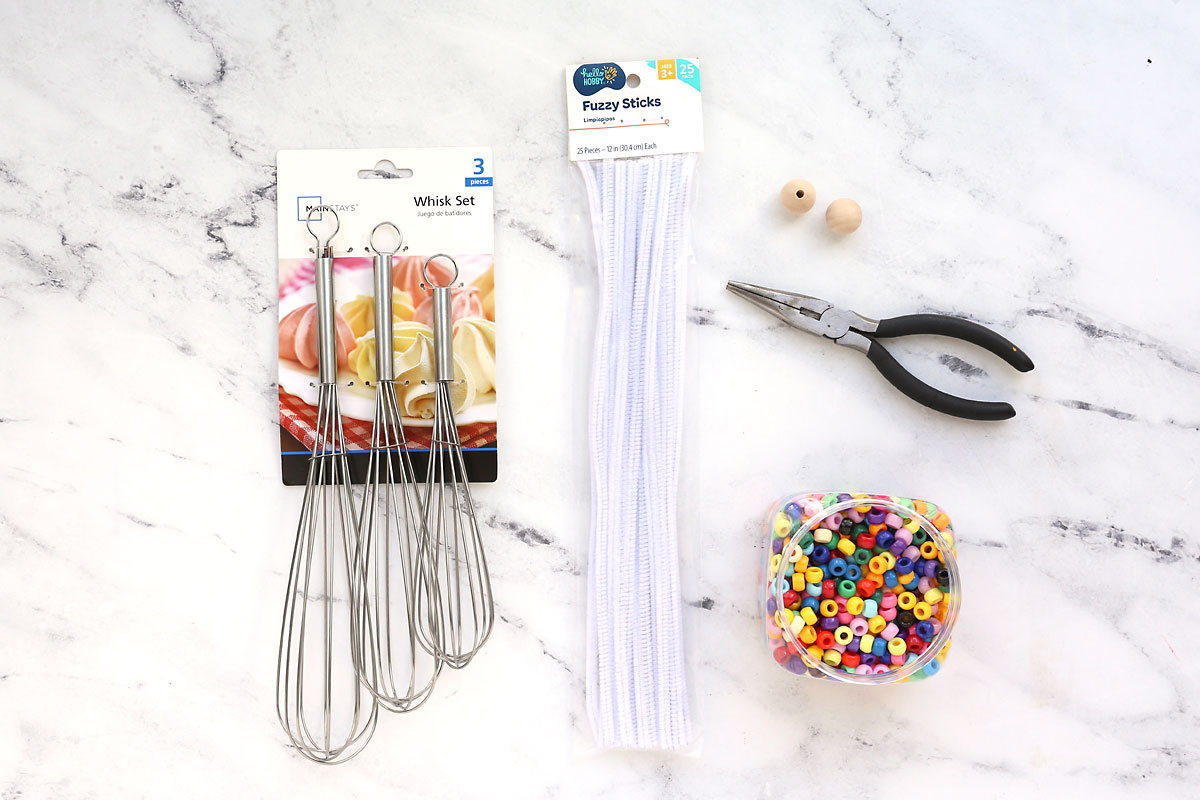
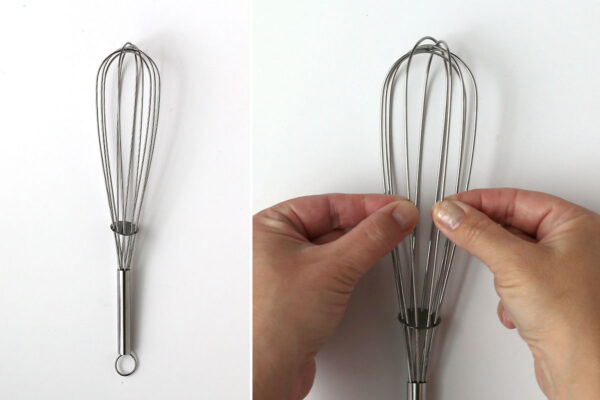
- Wire whisk. I used inexpensive wire whisks from Walmart which are very easy to bend. Look for a whisk that looks like the ones you see in the photo below. The whisk should have 5 “loops” and a handle. Walmart sells a set of three different sizes for under five dollars, or you can get a single whisk for about one dollar.
- Needle Nose Pliers. You need pliers that have a snip section so you can cut through one of the metal loops to create antennae. You’ll also use the pliers to bend the end of the antennae down.
- Wood Bead. I used 3/4 inch wood beads. Make sure to get beads which have a hole all the way through and not knobs which are solid.
- Pipe cleaners (aka fuzzy sticks or chenille stems).
- Colorful Pony Beads. I used this large, inexpensive set of pony beads from Amazon so we would have lots of colors to choose from when decorating.
How to Make Whisk Dragonflies
Most kids will need help bending and snipping the wire whisks to create the dragonfly shape, although tweens will probably only need help snipping the center loop. This part only takes 5-10 minutes, then you can turn the kids loose to decorate as they please.
Create Wings
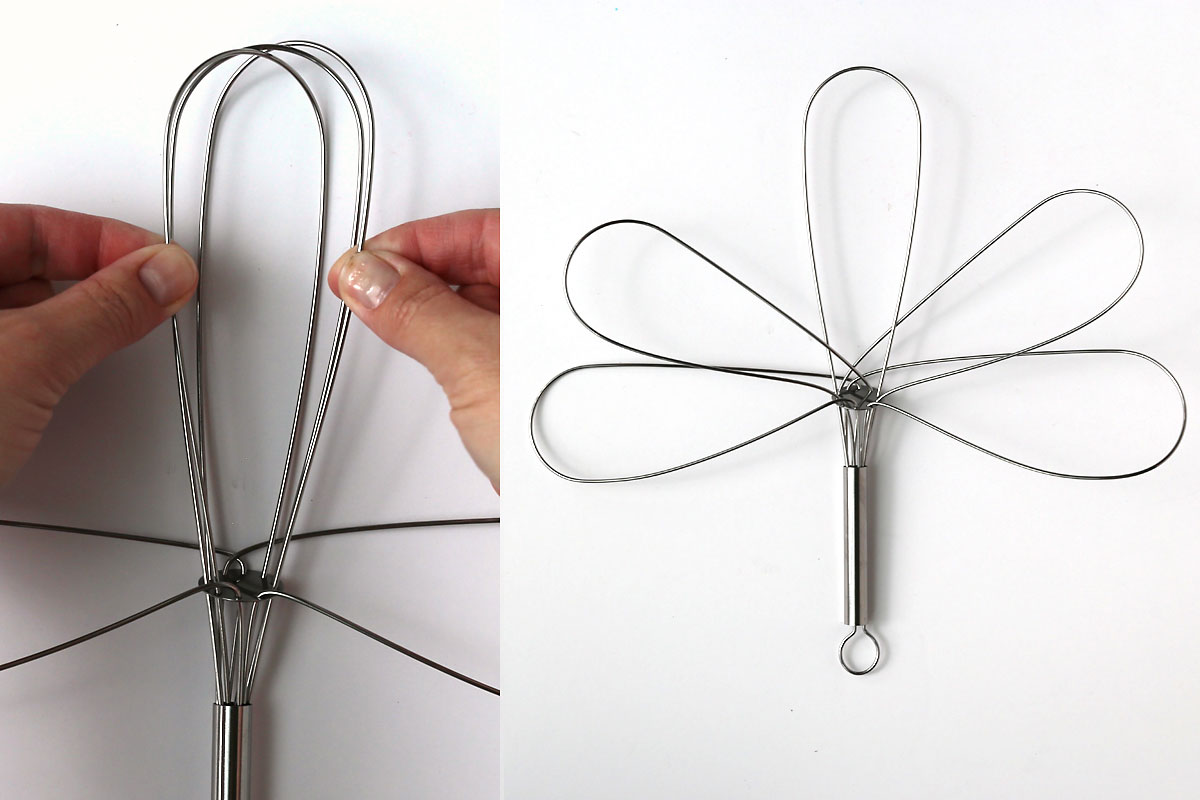
You will be pulling the loops of the whisk down to each side to create wings. Turn the whisk until you can find the place where the two top loops come down right next to each other to hook into the handle. Grab those two loops as shown below.

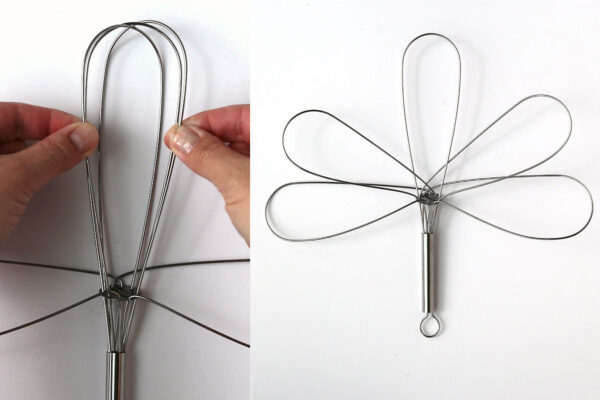
Pull the loop you are holding in your right hand to the right and the loop you are holding in your left hand in the left. You’ll see that they criss cross in the back. Pull each loop down until it’s perpendicular to the handle, as shown in the photo below. You can also twist the loops a bit to make the wings flat.

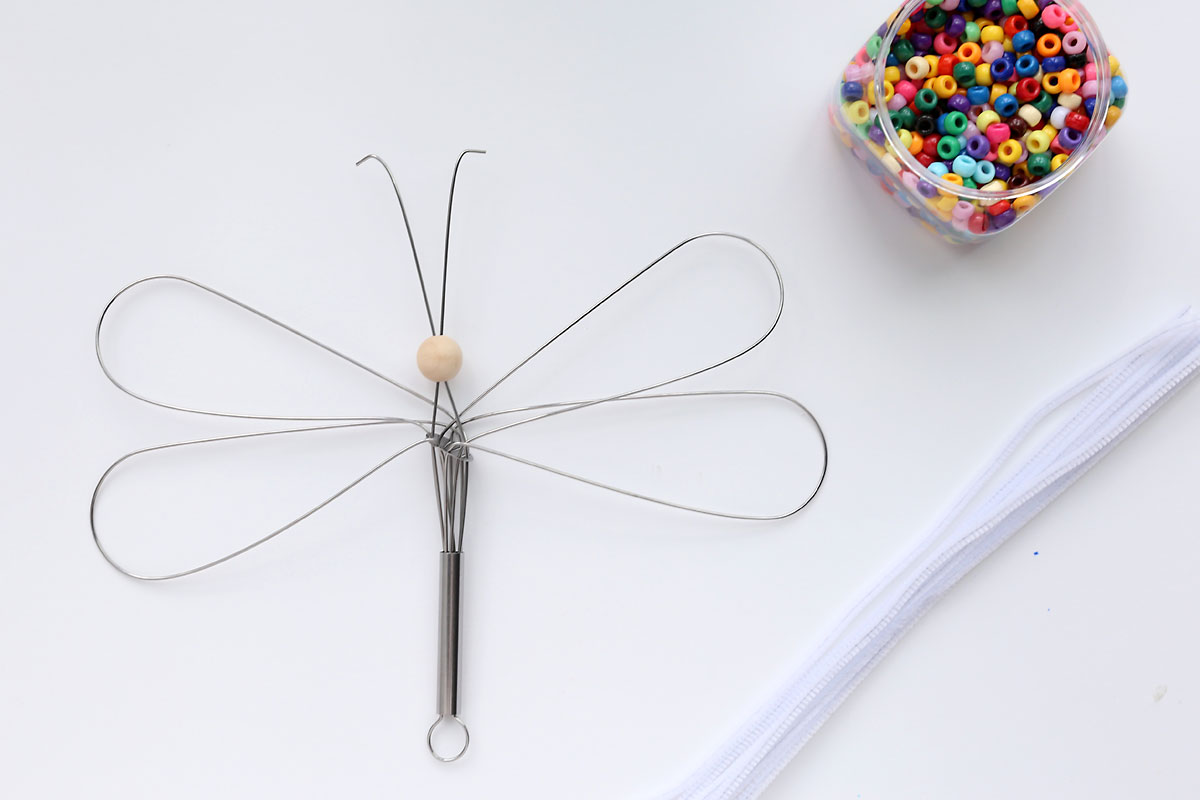
Then grab the next two wire pieces, and pull those loops out to the sides in the same way to make a second set of wings. You’ll have one loop remaining upward.
Create the head + antennae
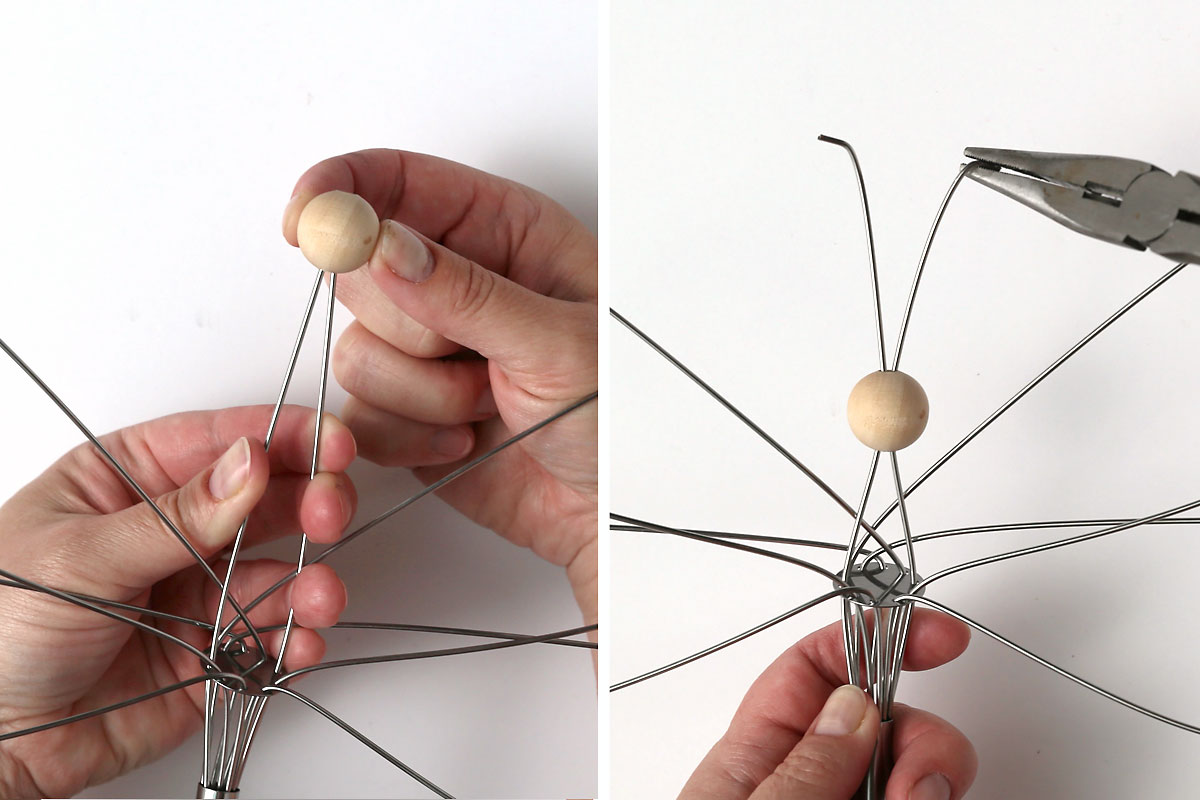
Grab your pliers and use them to snip off the curved portion of the remaining center loop. This will leave you with two straight wire pieces that will be the antennae. If either of these pieces crosses behind a wing, bring it forward through the wing.

Grab a wood bead and thread both straight wire pieces through it. Push the bead down. The wires will cross as you do this. Push the bead down until it seems secure. Use the pliers to bend the ends of the antennae.
Decorate
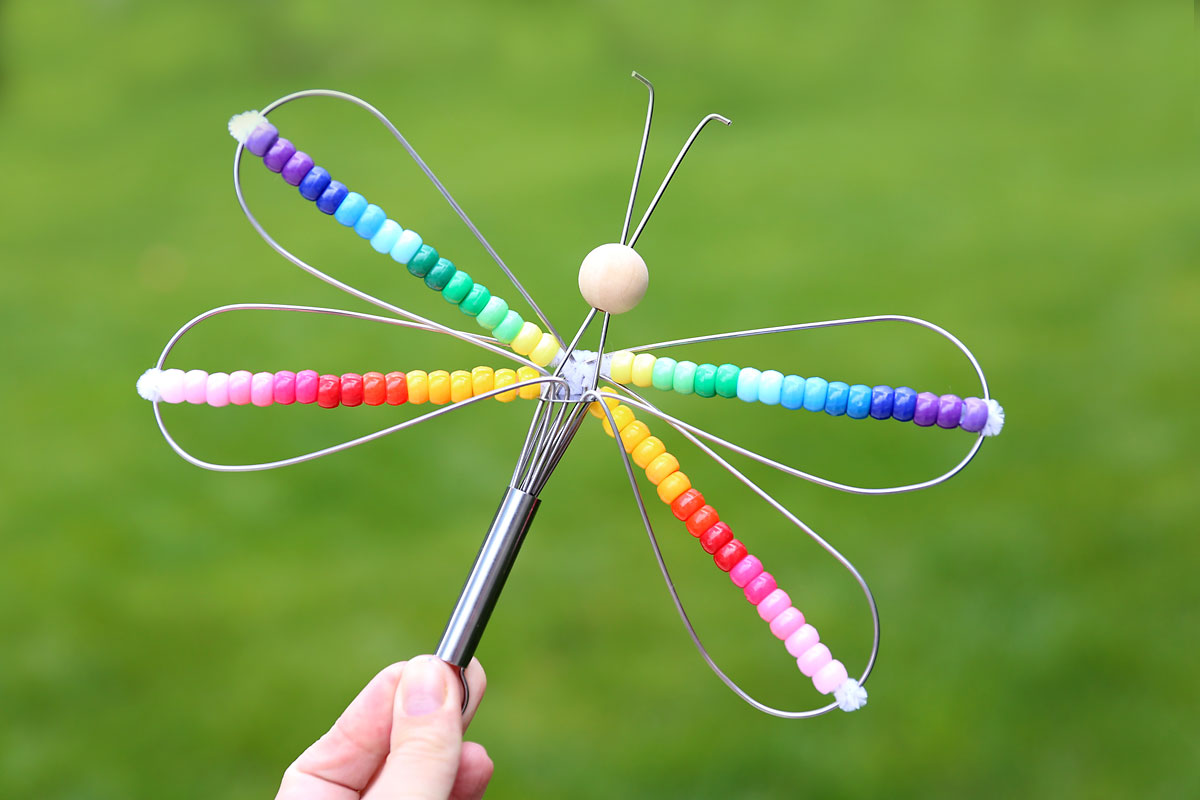
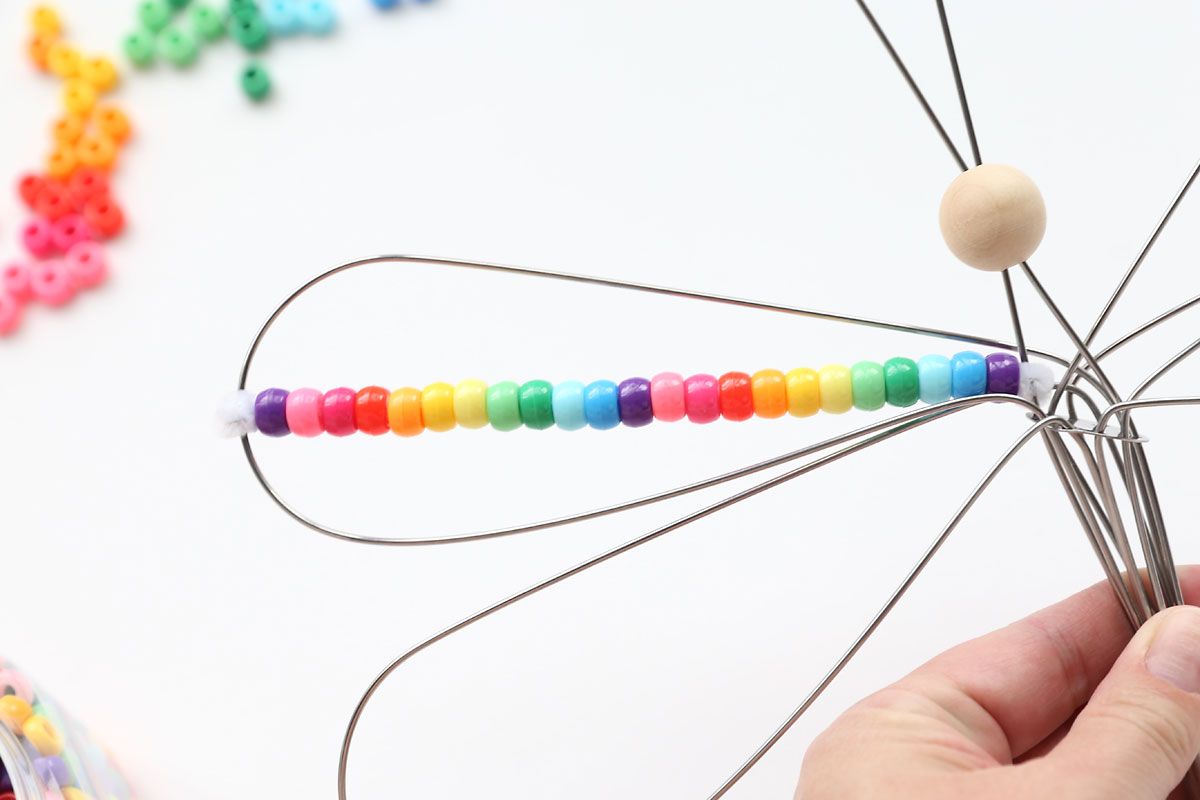
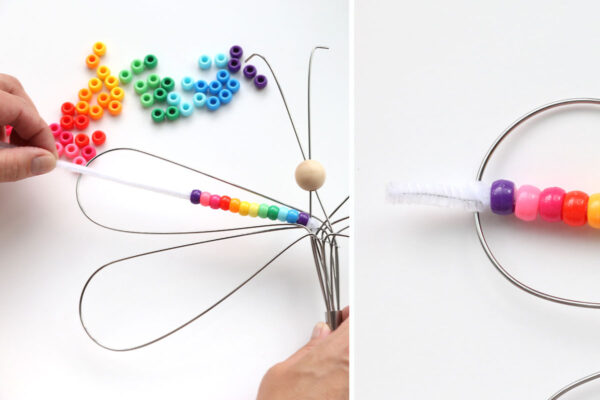
At this point the body of the dragonfly is complete. Now it’s time to decorate! There are lots of options for decorating: you could use different colorful pipe cleaners and wrap them around the wings. Kids could cut out colorful paper and glue it behind the wings. We chose to use pipe cleaners and pony beads to add a string of colorful beads to each wing.
To do this, grab a pipe cleaner and twist it around one of the center wires to secure it.

Thread on beads in any pattern you like, until you get to the outside of the wing. Wrap the pipe cleaner around the outer edge of the wing a couple of times, then clip off any excess pipe cleaner.
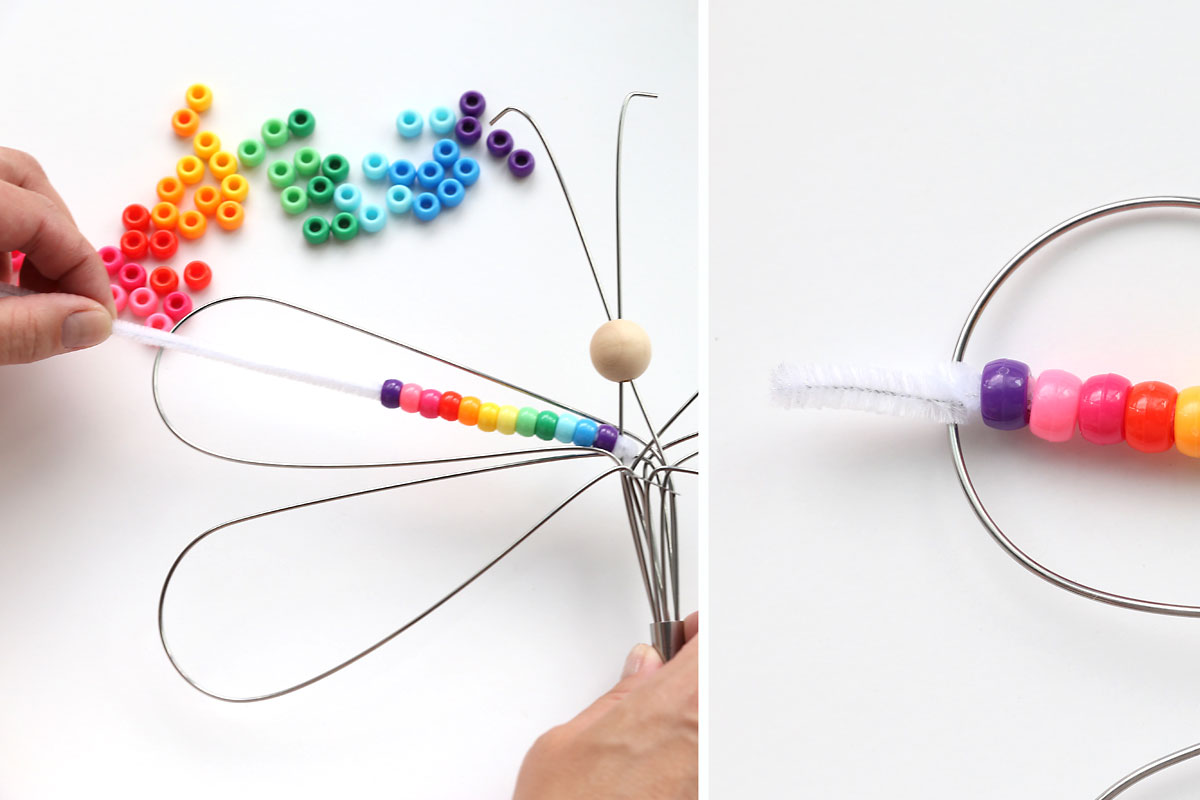
You can use a small dot of hot glue to keep the pipe cleaner in place if you’d like. If you help your child wrap the pipe cleaner pretty tight you won’t need any glue. Repeat with all four wings. Use the same design on each wing or mix it up and make each one different!
Whisk Dragonfly
Supplies
- Wire Whisk with five loops
- Needle Nose Pliers with snip section
- 3/4 inch Wood Bead
- Pipe Cleaners
- Pony Beads
Want more project ideas? Sign up to get my favorite easy crafts and recipes straight to your inbox!
Instructions
- Turn the whisk until you can find the place where the two top loops come down right next to each other to hook into the handle. Grab those two loops as shown.

- Pull the loop you are holding in your right hand to the right and the loop you are holding in your left hand in the left. You’ll see that they criss cross in the back. Pull each loop down until it’s perpendicular to the handle.
- Then grab the next two wire pieces, and pull those loops out to the sides in the same way to make a second set of wings. You’ll have one loop remaining upward.
- Grab your pliers and use them to snip off the curved portion of the remaining center loop. This will leave you with two straight wire pieces that will be the antennae. If either of these pieces crosses behind a wing, bring it forward through the wing.
- Grab a wood bead and thread both straight wire pieces through it. Push the bead down. The wires will cross as you do this. Push the bead down until it seems secure. Use the pliers to bend the ends of the antennae.
- To decorate, twist a pipe cleaner around one of the center wires to secure it. Thread on beads in any pattern you like, until you get to the outside of the wing. Wrap the pipe cleaner around the outer edge of the wing a couple of times, then clip off any excess pipe cleaner.


Debbie says
I’ve the dragon fly. Going to make one then have my 2 granddaughters try it. Thanks for great instructions
Susan Phalstaf says
I love dragonflies and I’m going to do this. I can’t wait to start making them. They look so beautiful. I hope mine comes out like yours.🧚
Nancy says
thank you for sharing this brilliant idea. I will definitely be trying it with a little different spin. Keep crafting.
Nanette says
Made the dragon fly for my niece she loved it thanks for the ideas.