
In today’s post: Learn how to make your new favorite, casual skirt. Download my free pattern or learn how to create your own!
Today I’m sharing a pattern for an easy to sew, casual skirt, often called a “weekend” skirt. I’m just calling it The Favorite Skirt because I’ve only had it for a week and it’s already my favorite thing to throw on with a t-shirt. It’s more comfortable than jeans and looks even cuter. My printable pattern is a women’s size L/XL, meant for approximately 42 inch hip; HOWEVER it’s a super easy pattern to modify and I will show you how to adjust it to your own measurements.
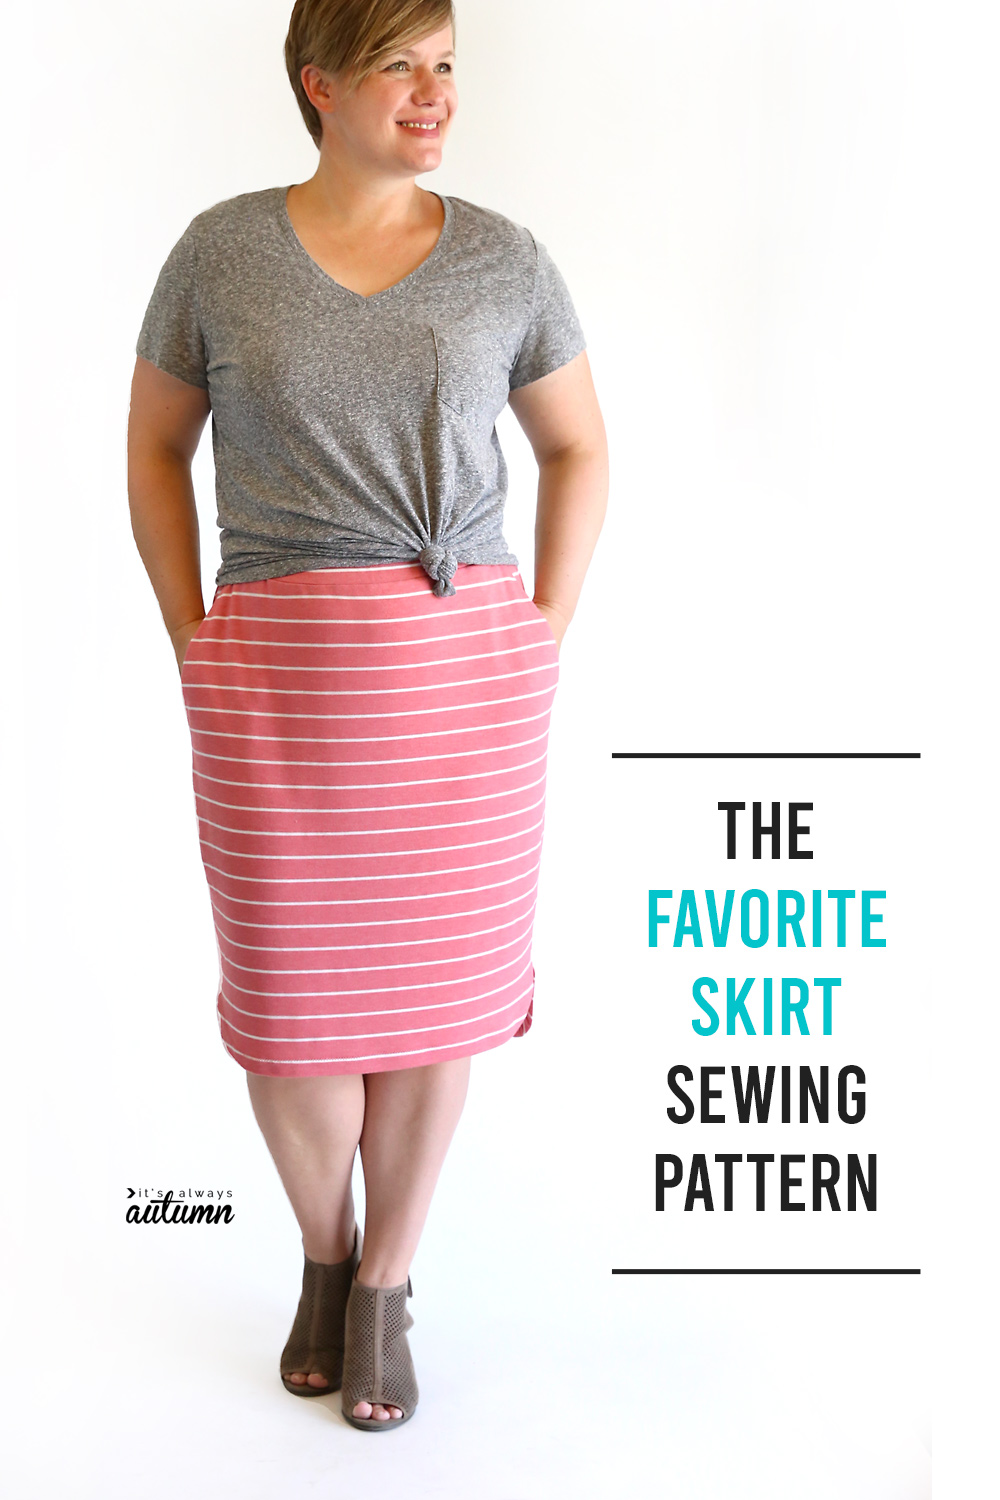
This skirt is made from knit fabric, which stretches, so it’s nice and comfortable (elastic waistband for the win!). And hey, it has POCKETS!!
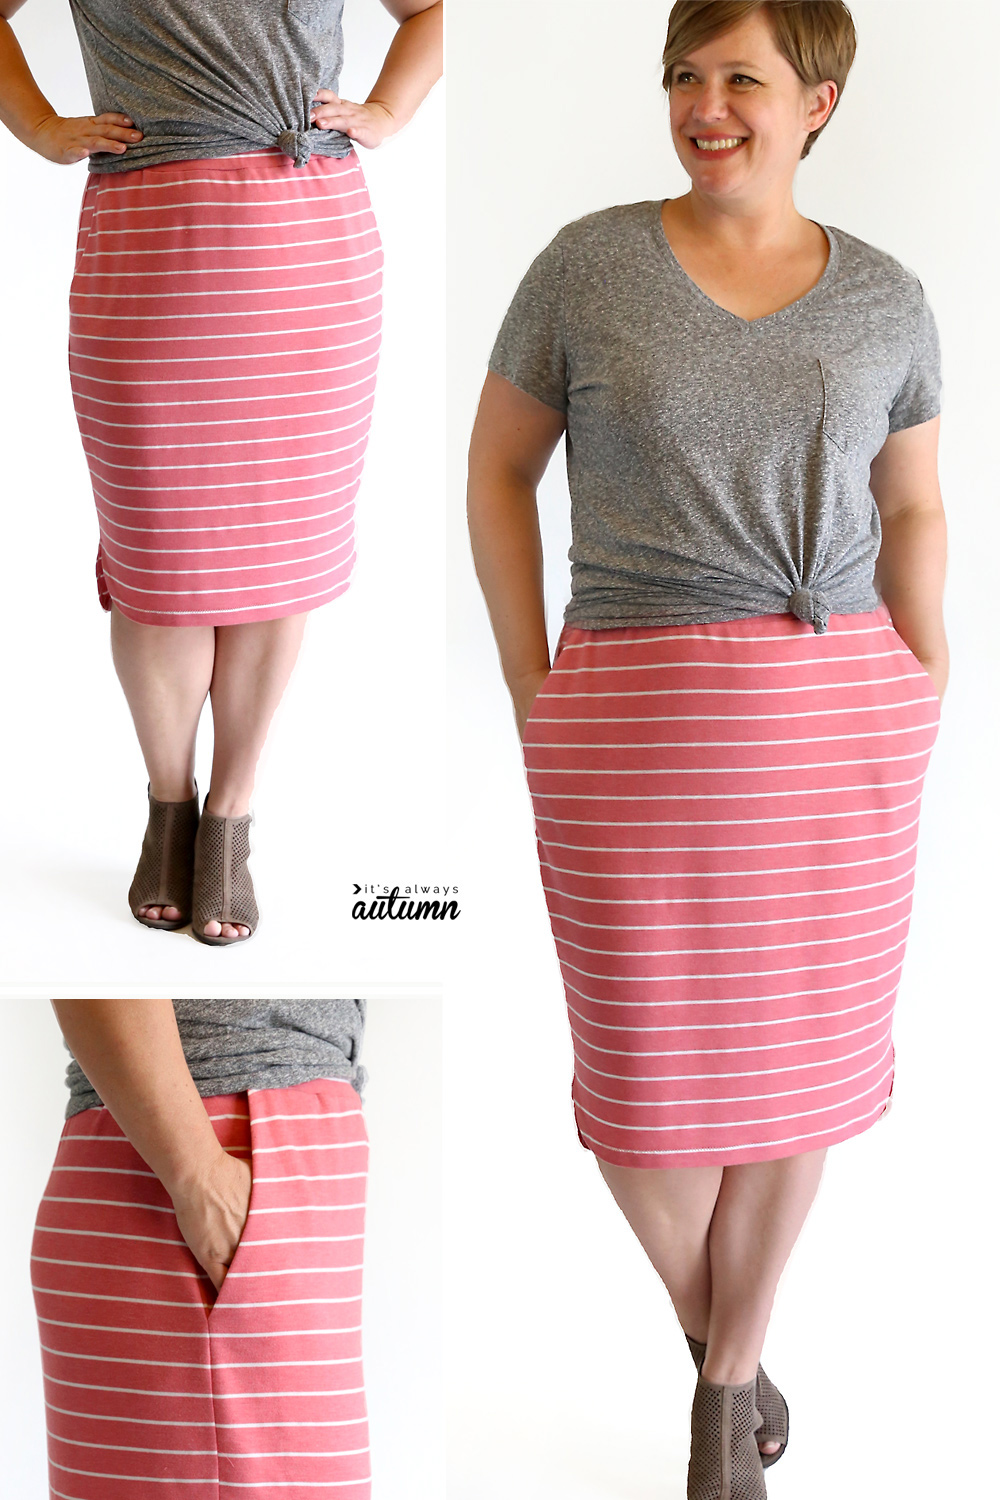
You can make this knee/midi length skirt with just one yard of 55-60 inch wide knit fabric. I prefer medium to heavy weight fabrics for skirts, since they do a better job camouflaging my mommy tummy. A ponte or interlock knit would work well, or a french terry. I used a french terry from Girl Charlee (looks like the stripe is sold out, here’s the solid) – it’s extremely soft and really beautiful, but when I make the skirt again I’ll use a slightly heavier fabric. Be sure to wash and dry your fabric before you begin.
You will also need 1 yard of 1 inch wide elastic.
The Favorite Skirt Pattern
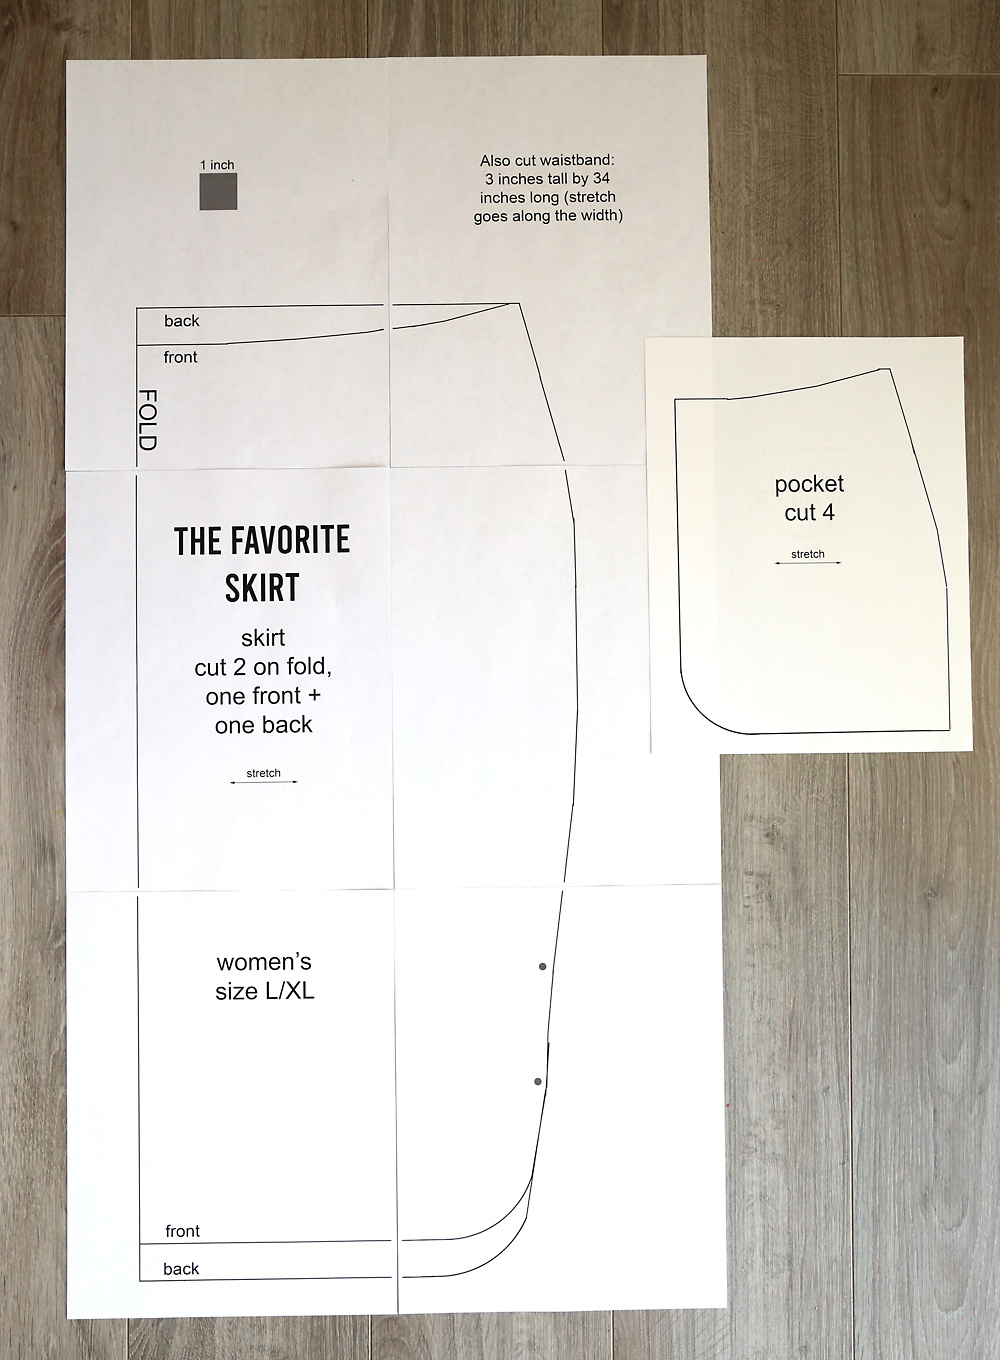
Click here to download my pattern. It prints on 6 sheets of 8.5×11 paper. Be sure to print it at full size or 100%. Print page 1 first and measure the test square to ensure you’re printing at full size. The test square should measure exactly 1 inch.
Butt the pages together and tape them without overlapping. The printed pattern will look like this:
My pattern is created to be slightly roomy for a 42 inch hip. If you are a different size, it’s pretty easy to modify this pattern to fit you.
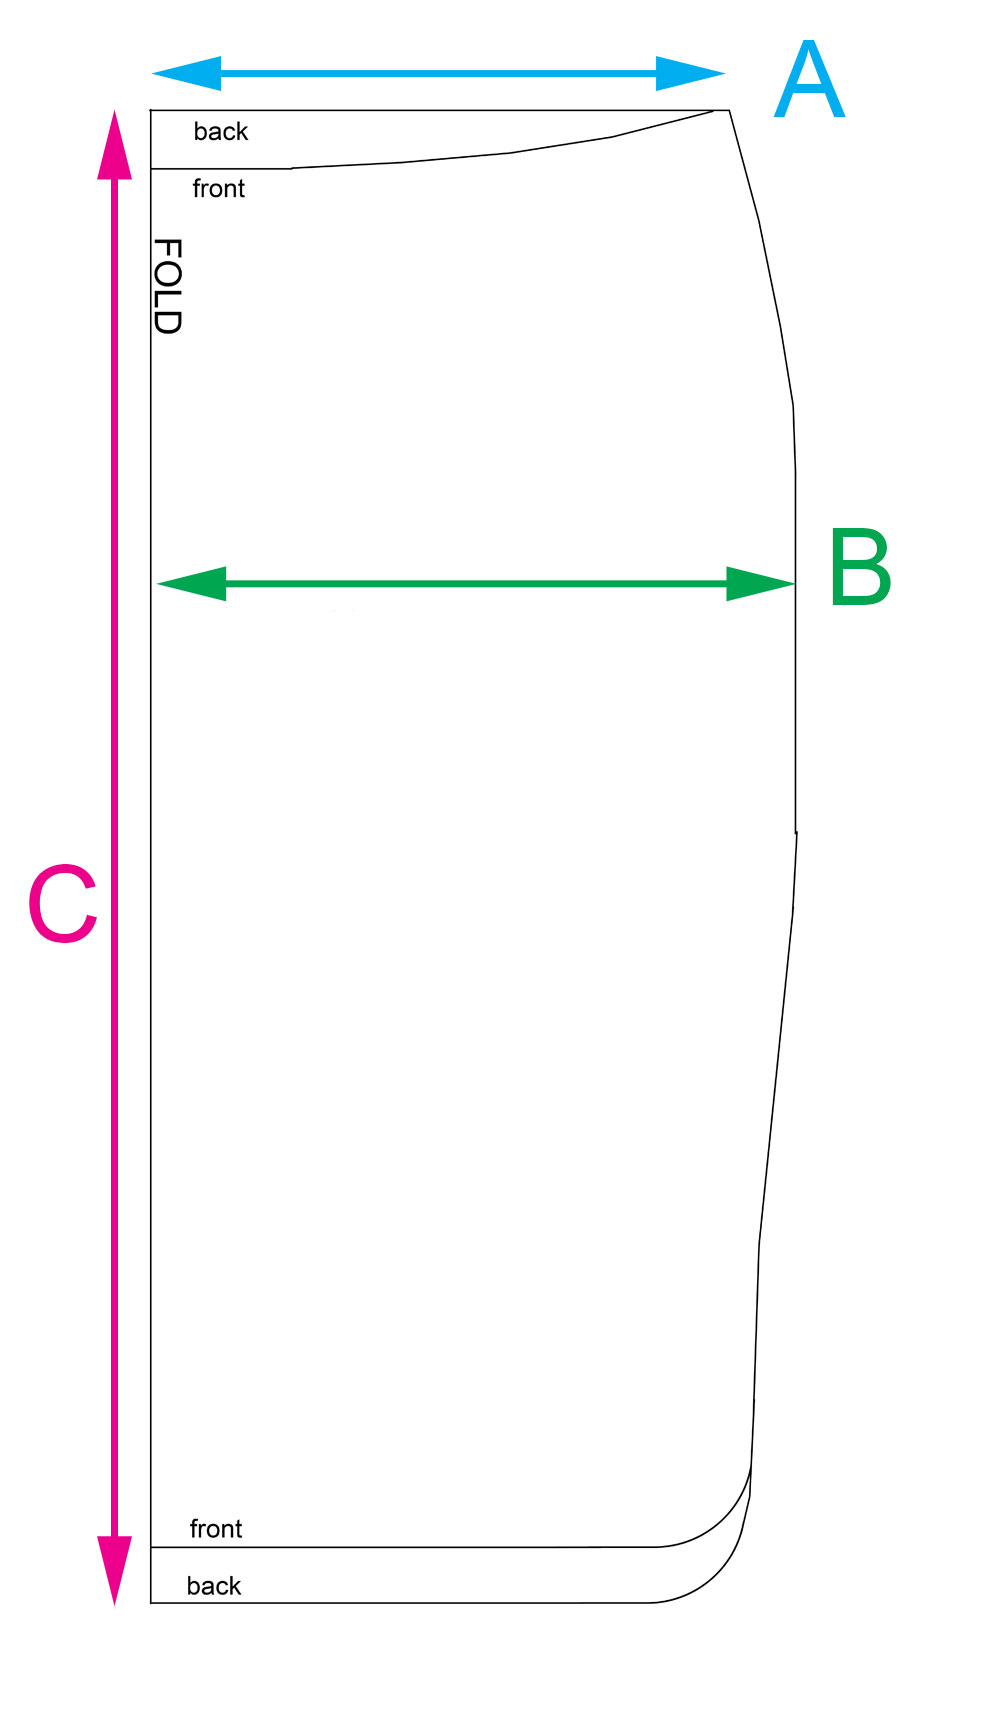
To create your own favorite skirt pattern, start by taking some measurements. First, measure around your waist at the point you want the skirt to sit (this may not be the smallest part of your waist). Next, measure around you hips at the widest point. Finally, measure from your waist down to the middle of your knee (or whoever you’d like the hem to hit).
Take your waist measurement and divide it by 4, then add 1. If your waist is 36 inches, that will be: 36 / 4 = 9 + 1 = 10. That’s measurement A.
Take your hip measurement and divide it by 4, then add 1. If your hip is 42 inches, that will be 42 / 4 = 10.5 + 1 = 11.5. That’s measurement B.
Then take your length measurement and add 3 inches. That’s measurement C.
Print out my pattern and using it as a reference. Mark the measurements you came up with as shown on the image below, and then go ahead and draw new lines to connect them all, following the general shape of the printed pattern. (Note that the front waistline is 1 inch lower at the fold than the back waistline is. I’ve also made the back hem 1 inch longer than the front hem.) It’s ok if your pattern isn’t perfect; we are going to do some fitting once we start sewing this skirt together.
Fitting the Favorite Skirt
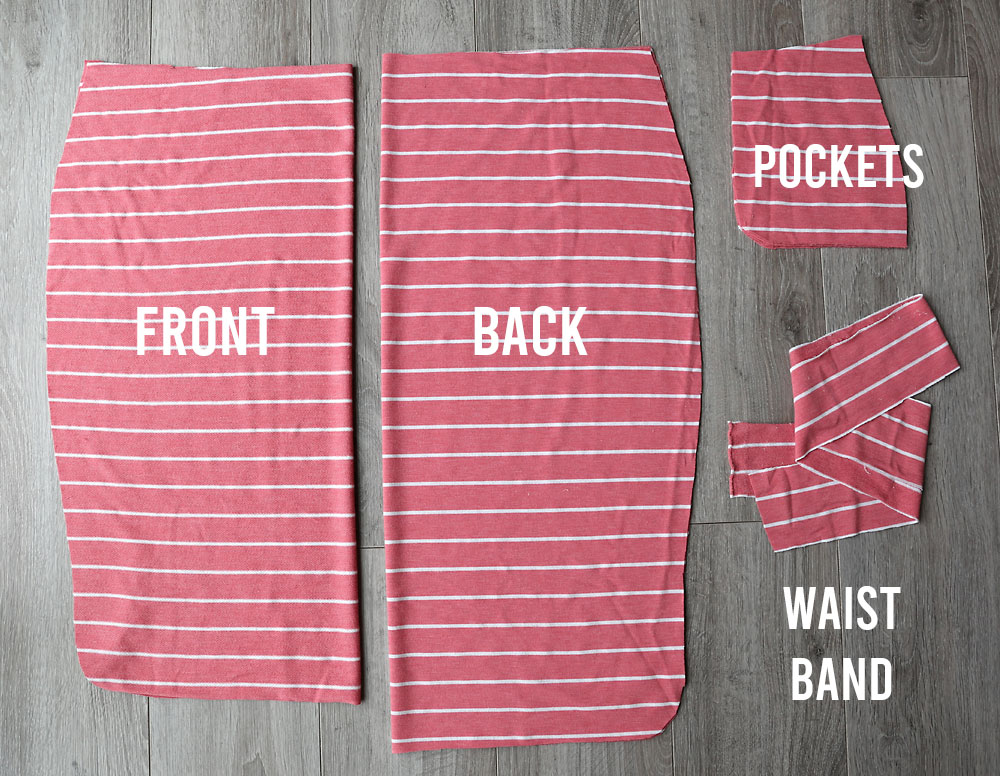
Start by cutting out your pattern pieces. You will have a skirt front and a skirt back (shown folded), four pocket pieces, and a waistband piece.
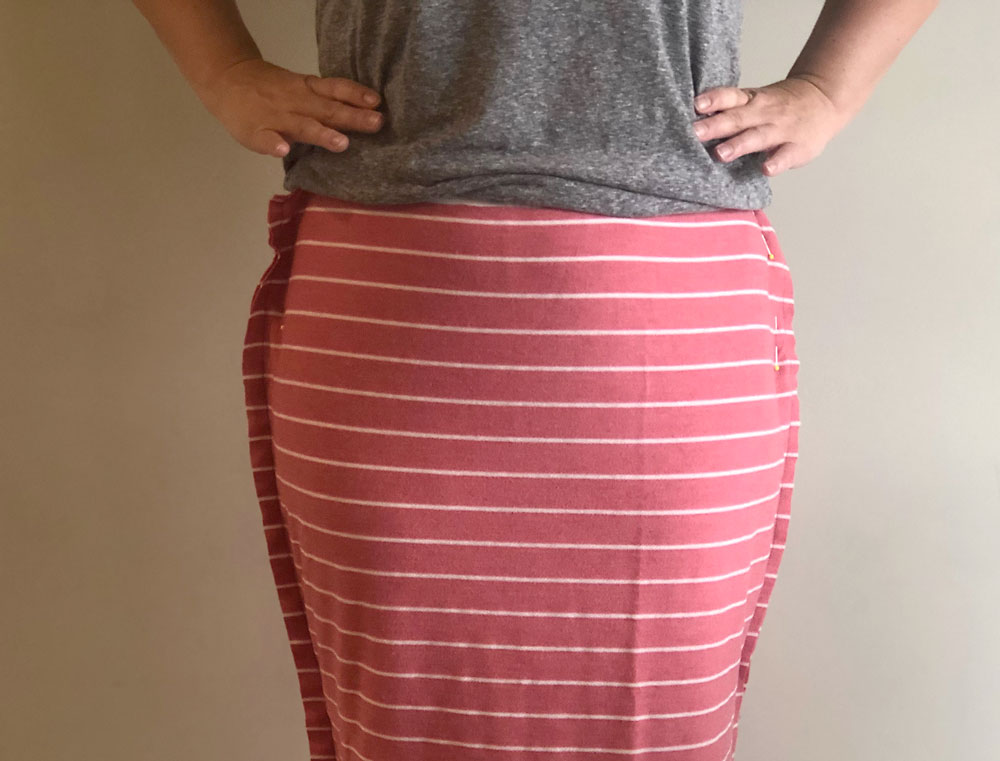
You’ll start by placing the front skirt piece and the back skirt piece right sides together. Pin down the side seams. To get a good fit, we are first going to sew these side seams USING A BASTING STITCH. Make your stitch length long and your stitch tension low. This allows you to easily pull out this seam once we’ve checked the fit.
Sew the side seams using the basting stitch and then try on the skirt. If you’d like the skirt tighter anywhere, mark a new seam line with pins, making sure to take in the same amount from both sides. Remember, we will be adding an elastic waistband so the skirt doesn’t need to be tight.
Lat the skirt flat and trim any excess from the sides, remembering to leave a 1/2 inch for seam allowance. Pull on the lower thread of both side seams to pull them out so we can add pockets.
Adding pockets to the Favorite Skirt
Place the skirt front piece down, right side facing up. Match one pocket piece to the upper right corner, right side down (if you took the skirt in along the side here you may need to trim the pocket piece to fit).
Pin a diagonal line across the pocket as shown. It should start about 2 inches in from the right edge and go to 1 inch above the bottom edge of the pocket. Sew along this line, then trim the seam allowance to 1/2 an inch.
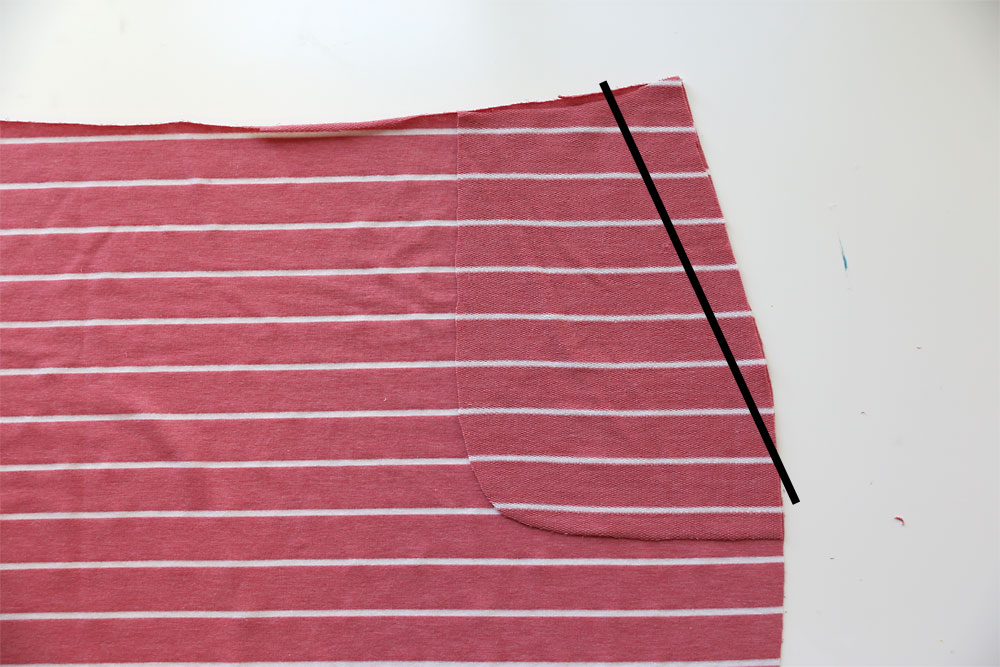
Iron the seam allowance toward the pocket, and topstitch, as shown.
NOTE: It’s really important that the fabric not get stretched out when sewing this seam and topstitching it. If the fabric gets stretched you will end up with pockets that poke out instead of laying flat. To make sure the fabric doesn’t stretch here, try one or more of these things:
- Use a longer than normal stitch length
- Adjust the differential feed
- Use a walking foot
- Gently push your fabric under the presser foot as you sew
- Press the seams with lots of steam after sewing
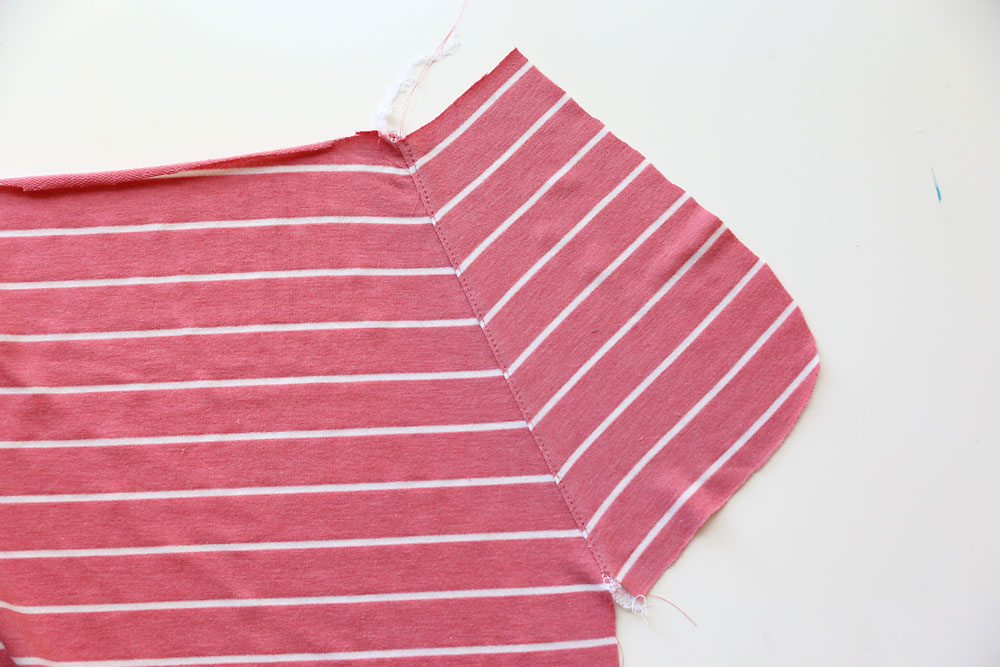
Next, flip the pocket so it’s facing the wrong side of the skirt piece. Lay another pocket piece on top of it, matching up the curved edge (right sides together). Sew the two pocket pieces together along the entire curved edge of the pocket.

Your pocket is now attached. Press it well, then pin and sew along the lines shown below to ensure to pocket and skirt are firmly connected.
Repeat with the other pocket
Sewing the Favorite Skirt Together
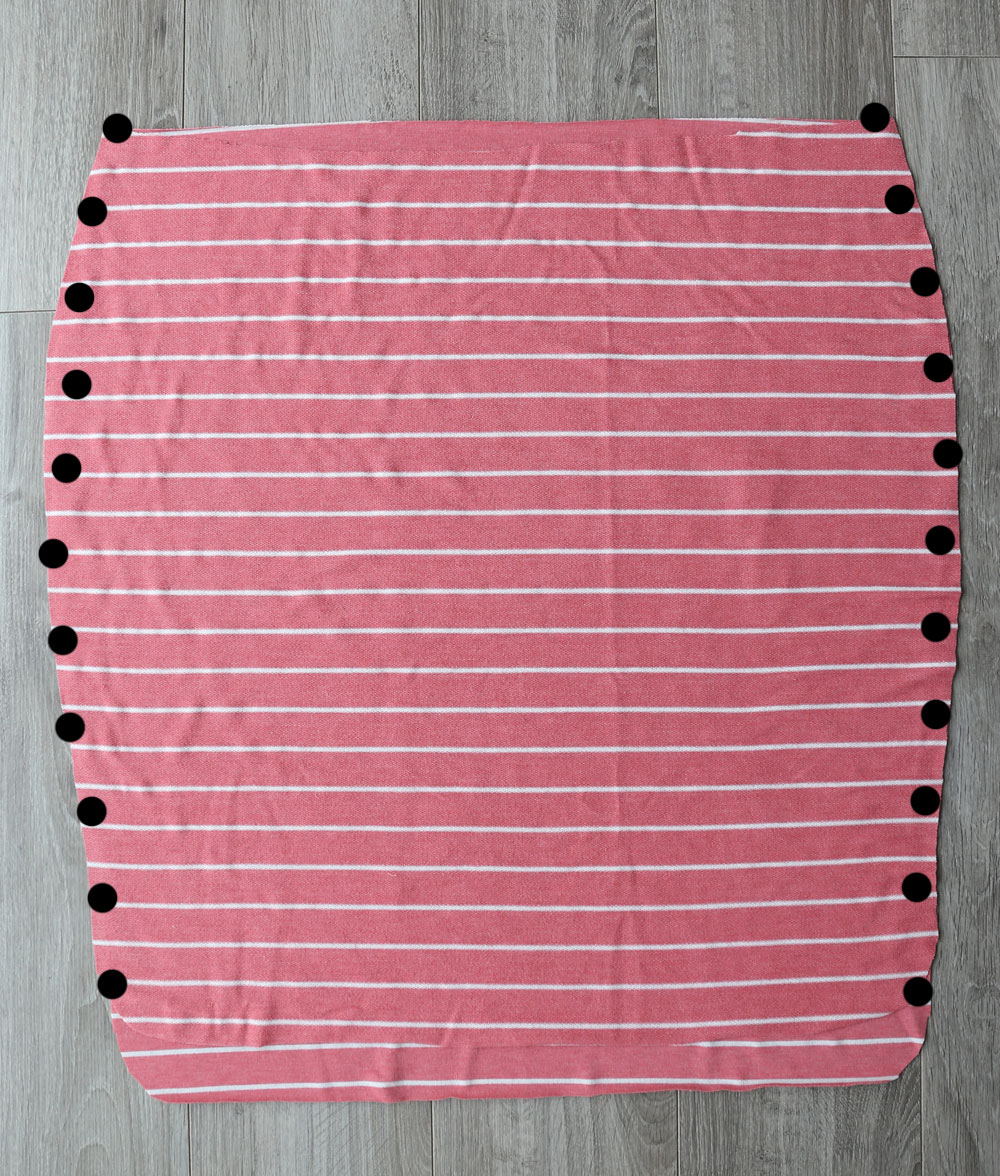
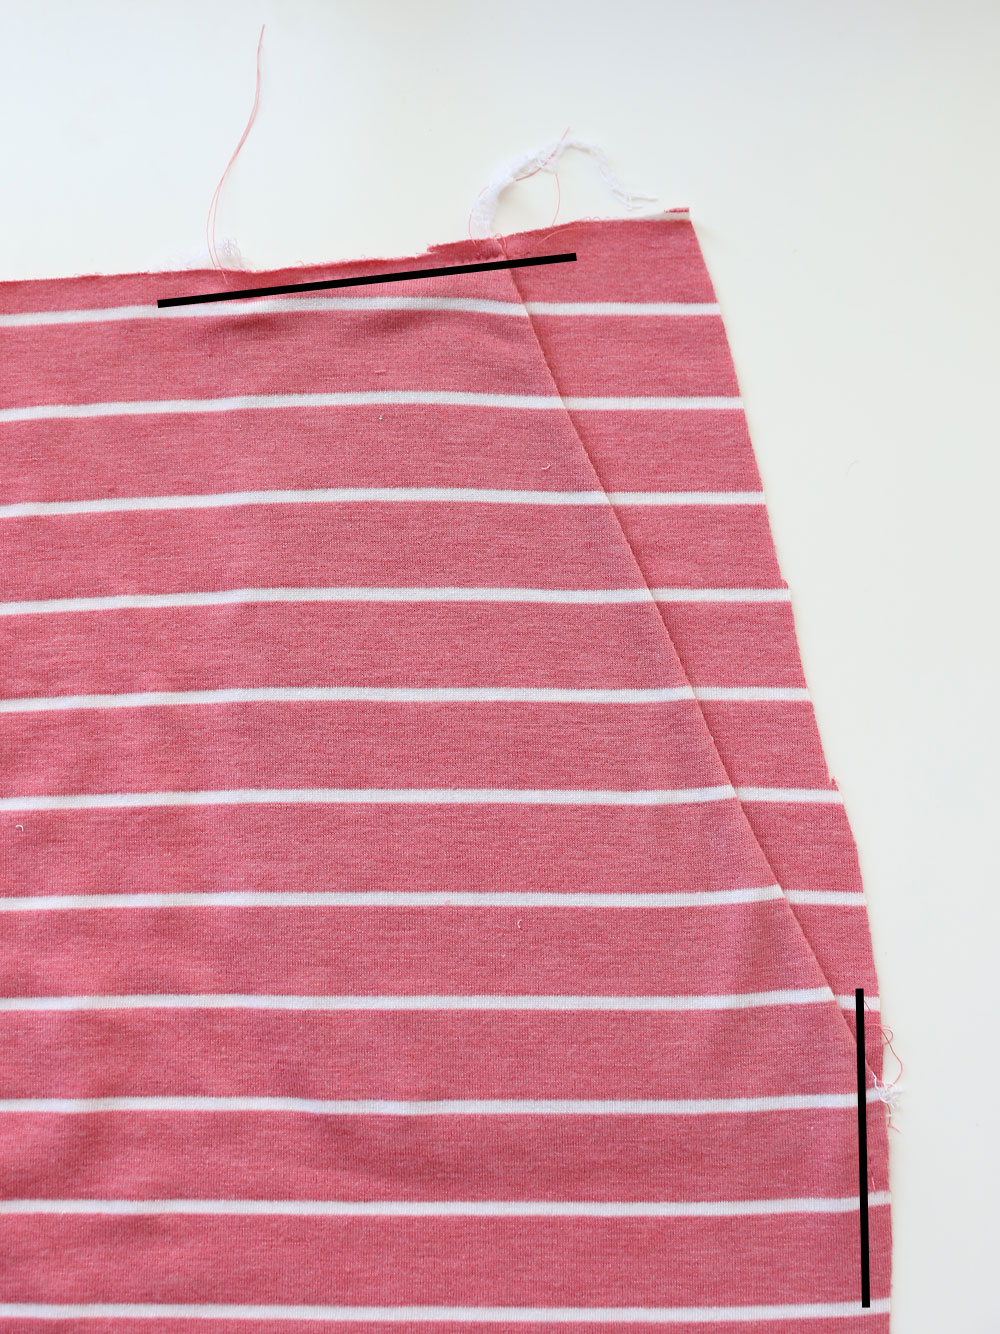
Ok, that hard part is done! Now you’ll place the skirt from and back right sides together and pin down the side seams. Sew down the side seams, using a 1/2 inch seam allowance, until you reach the first dot marked on the pattern.

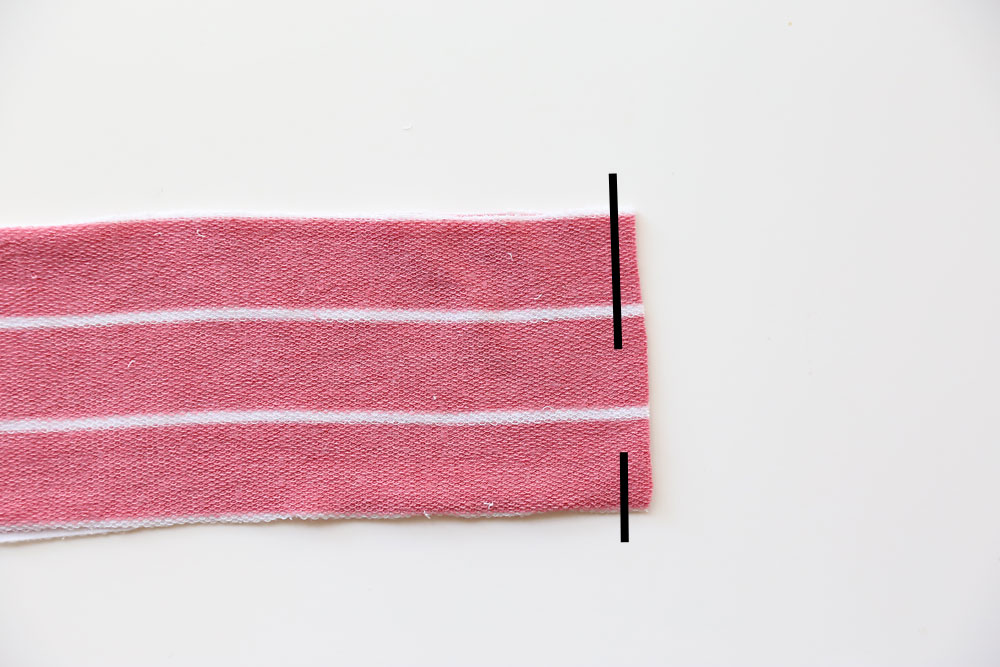
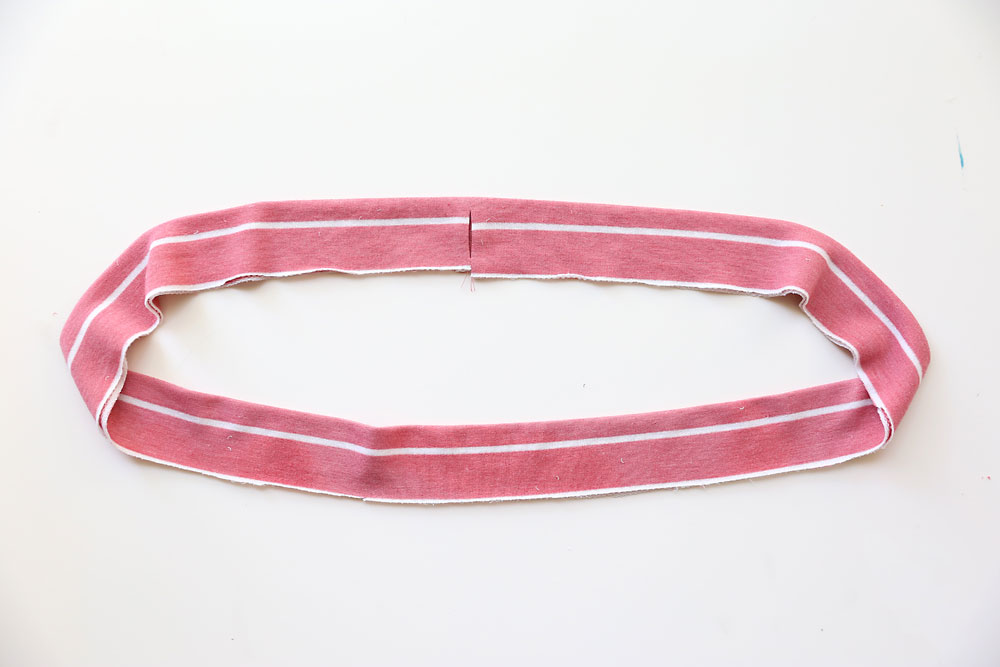
Now it’s time for the waistband. Grab the waistband piece and wrap it around your waist. It should sit flat against you waist when stretched just a little, so trim it in length if needed.
Match up the two short ends of the waistband, right sides together, and sew them together as shown below, leaving an opening that’s just under 1 inch long. Be sure to backstitch at the start and end of your stitches.
Fold the waistband in half, wrong sides together, and press. You’ll have a long circle of fabric now that has a hole on one side of the seam.
Make sure the skirt is turned right side out. Place the waistband around the top of the skirt and match the raw edges. Match the seam in the waistband with one of the side seams of the skirt. Pin the waistband to the skirt, all the way around, stretching it slightly to fit if needed. NOTE: The hole is the waistband must be facing out, away from the skirt, at this time.
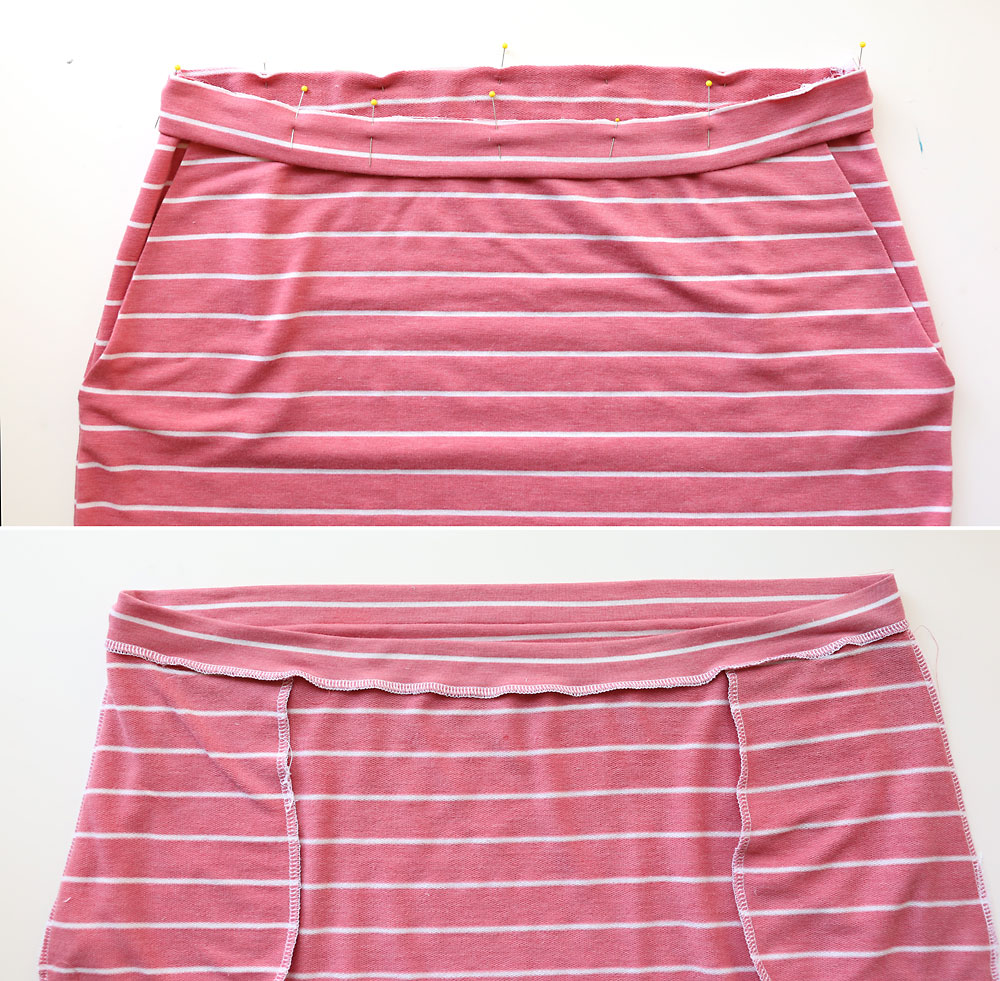
Sew the waistband to the skirt, using just under a 1/2 inch seam allowance. Make sure to use a stitch that has some stretch to it, like a serger stitch, a stretch stitch, or a narrow zigzag. Flip the waistband up and press the seam allowance down toward the skirt.
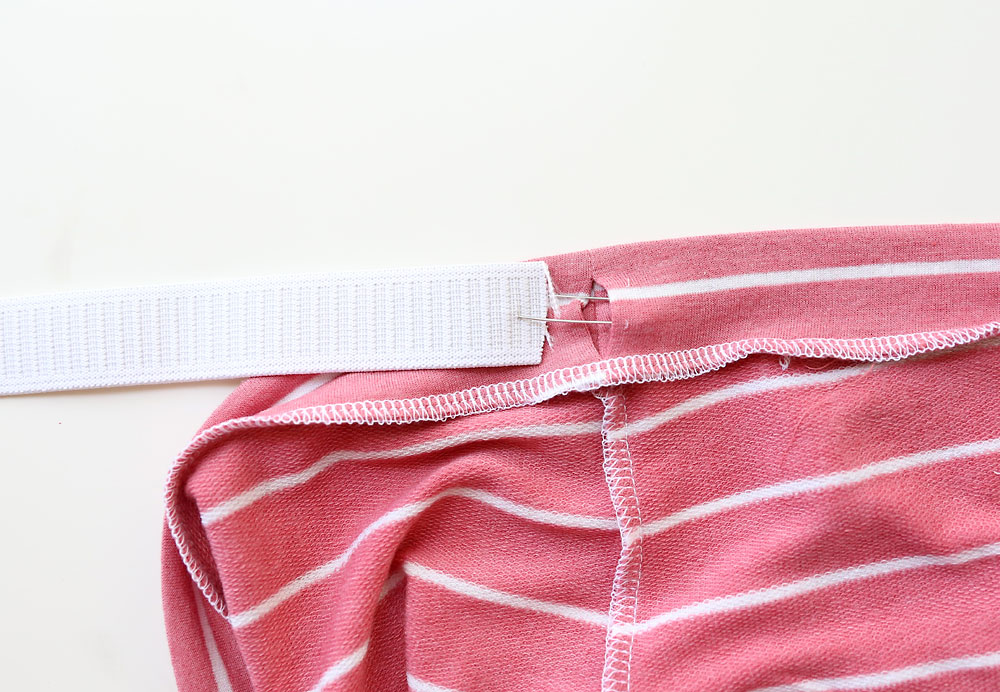
Now you can grab your 1 inch wide elastic. Use a large safety pin to thread the elastic through the waistband. Try on the skirt and pull the elastic as tight as you’d like it, then sew the ends of the elastic together. Trim any excess, and your waistband is done.
Hemming the Favorite Skirt
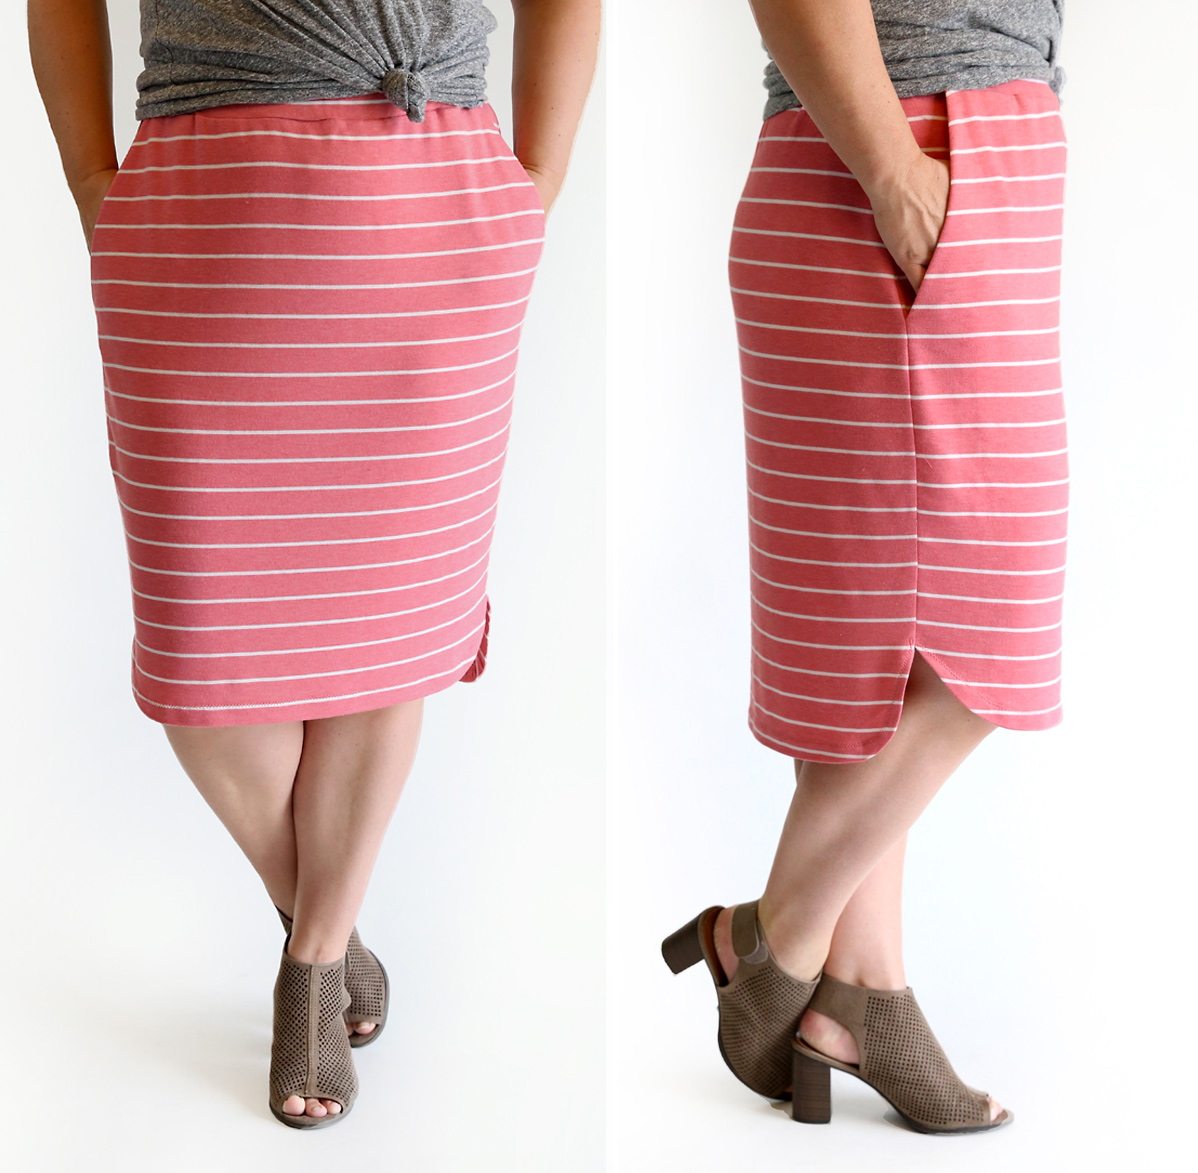
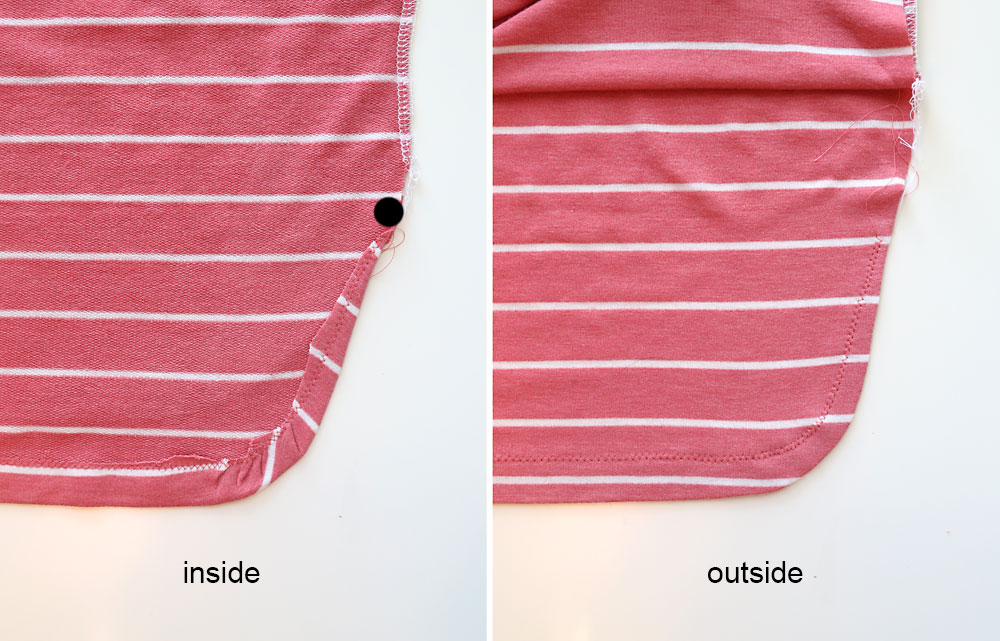
All that’s left now is the hem. The lower dot on the pattern marks the spot where you should begin folding in the hem on the curved edges of the skirt’s lower edge. Carefully press the hem up around the curves, as shown in the first photo below. Along the straight part of the skirt’s lower edge, your hem should be about 1 inch.
(It can be helpful to run a gathering stitch about 1/2 inch from the edge along the curved parts of the hem. Then you can pull gently to gather it up, making it easier to press a tidy looking hem along the curve. This is optional, however.)
Sew the hem with a zig zag or double needle stitch.
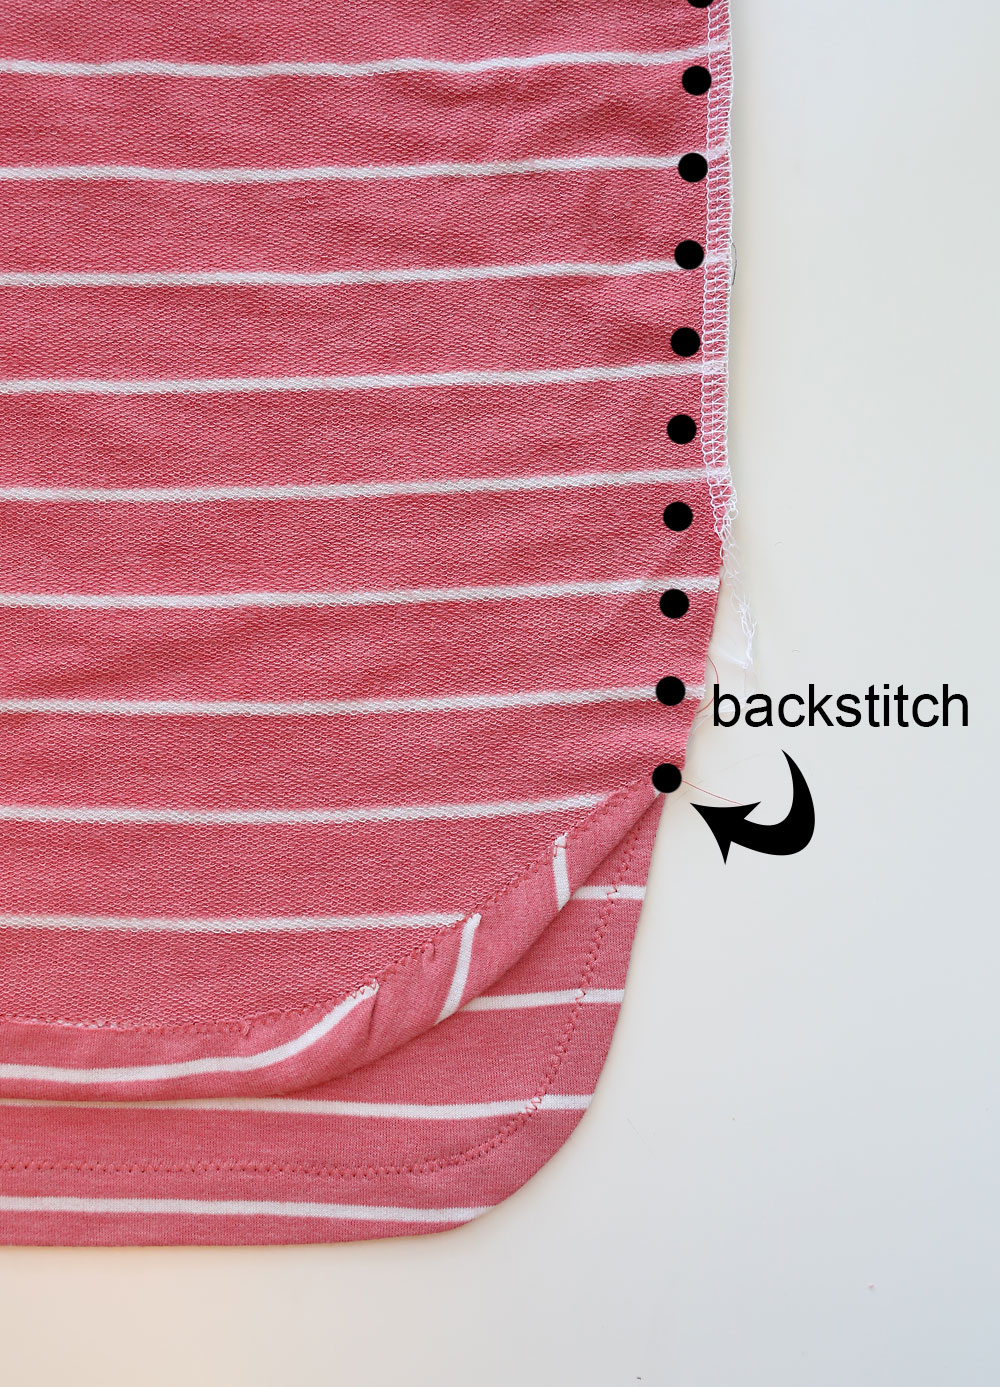
Once the hem is finished and pressed, you can finish your side seam. Begin an inch or two above where the side seam currently ends, and sew down to where the curved front and back hems meet. Be sure to backstitch here. Press the seam open or to one side. If you want, you can tack the seam down at the bottom if desired.
As a final step, if you wish you can fold a long strip of fabric like double fold bias tape and sew it shut. You can use this to tie a bow and sew to the front of the waistband if you wish. Alternately, you could tie a bow with cord or ribbon and sew that on instead.
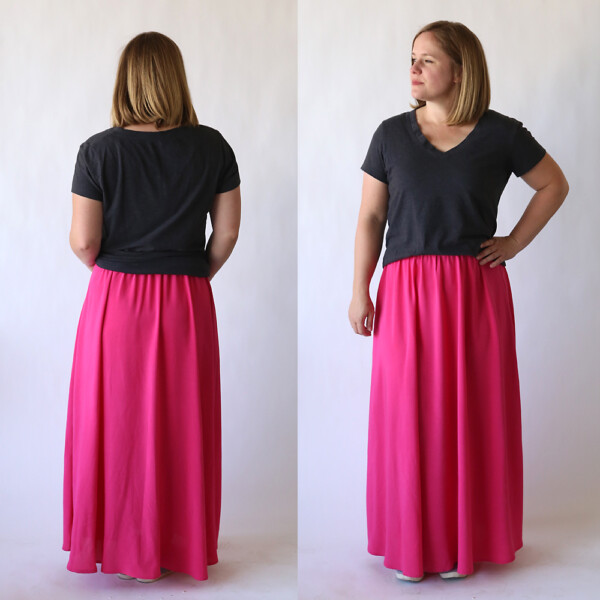
Your new favorite skirt is complete!
Looking for more sewing tutorials?
Find all my sewing tutorials here

Denise Brown says
Love this! Now I’ve got to stop being lazy and make it!
Ash S says
Love this tutorial. I’ve never been brave enough to try pockets on stretch fabric but your tips might just give me the courage I need!
Thanks and please keep up the tutes 🙏
Edna Mae Walker says
I’ve seen this skirt on LOGO and on independent patterns. Glad to have it now. Thanks.
Darlene M Walls says
I love this skirt. Looks so comfy.