
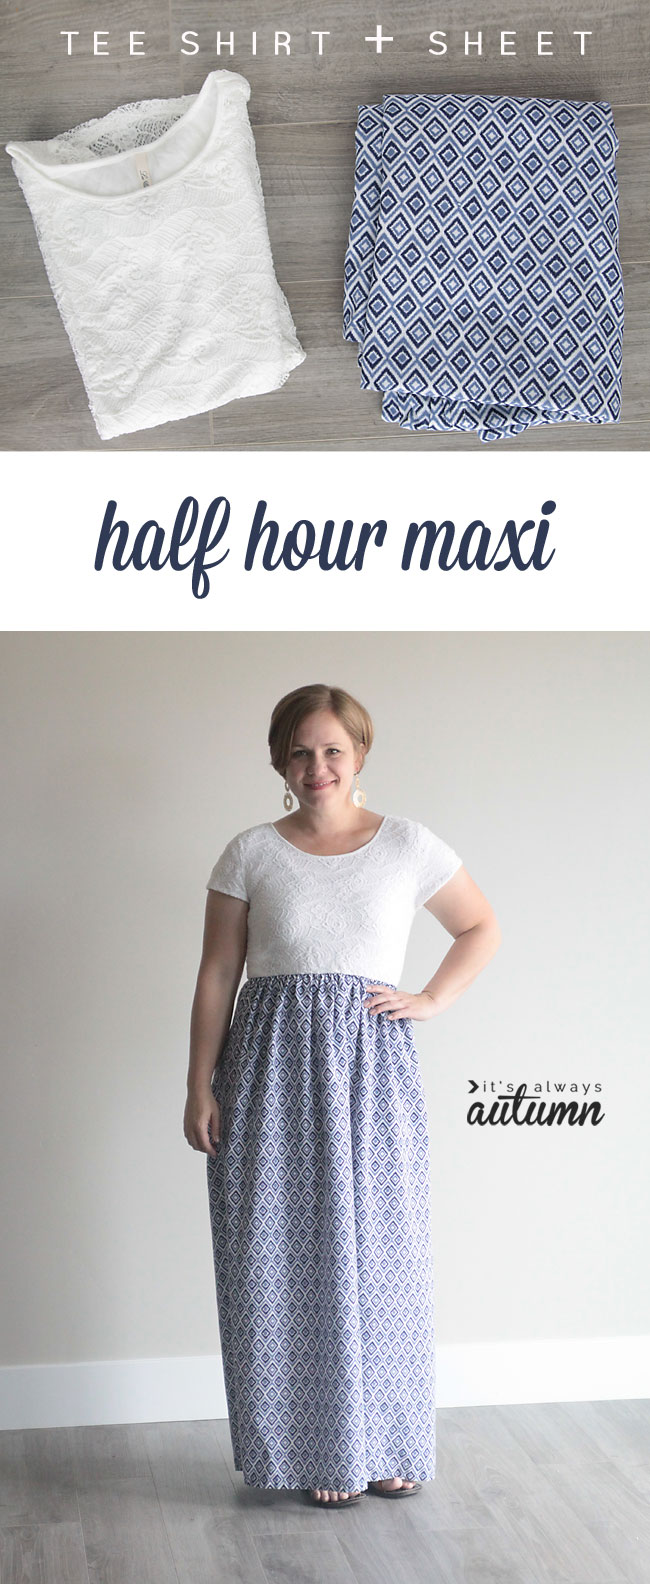
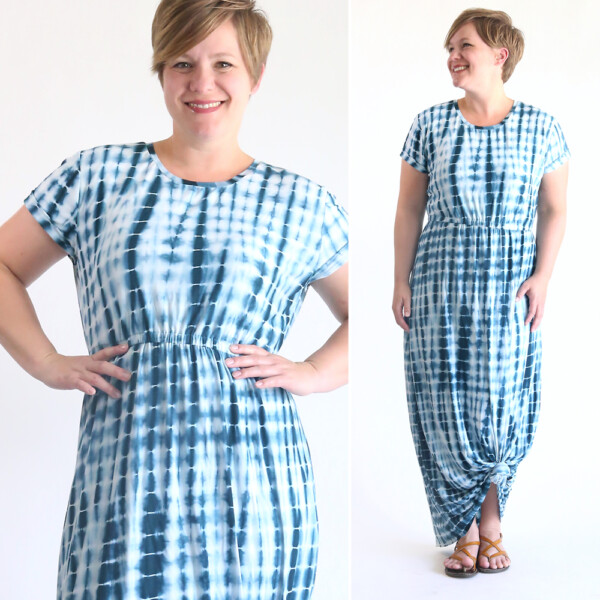
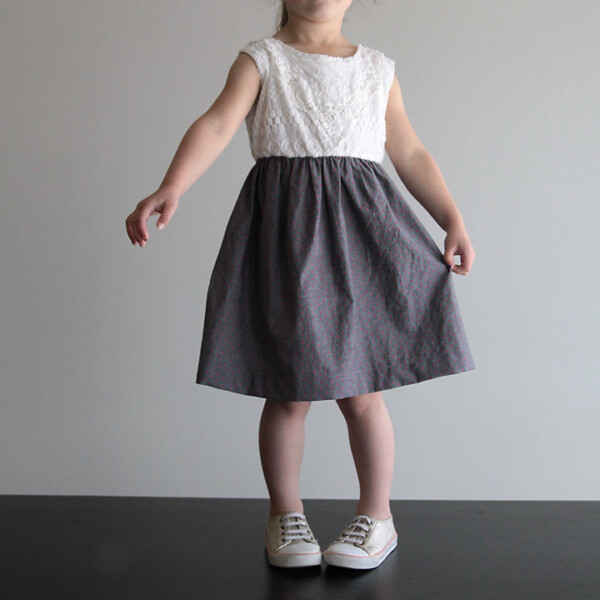
A few weeks ago I shared a simple girls’ dress made from an existing tee shirt and some fabric – it was so easy and turned out so cute I wanted to try the same process on a dress for me. So I found a pretty tee and a patterned sheet for the skirt, and put together a cap sleeve maxi dress in about half an hour.
As I mentioned in the little girl’s version of this dress, you’ve probably seen this idea before – a t-shirt dress with a gathered skirt is nothing new. However, most sewing tutorials for this type of dress that I’ve seen leave out one crucial step: adding elastic into the waistband.
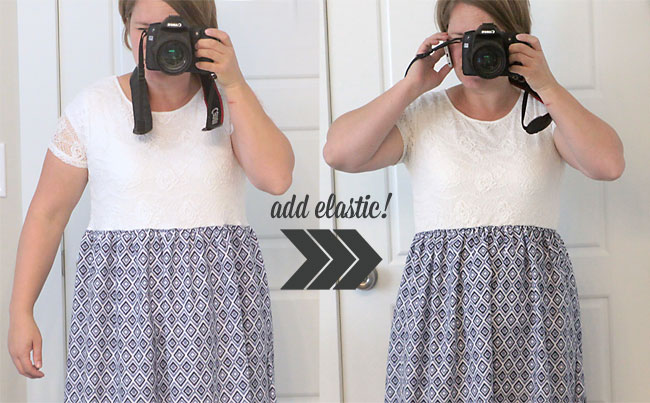
If you don’t add elastic to the waistline, the gathered skirt will almost always stretch out the bottom of the shirt, leaving you with a shapeless sack dress that must be worn with a belt or sash to pull the waistline back in. Adding elastic keeps the shape of the dress and gives it a much more professional appearance. Check out the difference it makes:
I don’t have a tiny waist. In fact, sometimes it feels like I don’t have any waist at all. The last thing I need is a dress that hides any hint of a waistline completely. Luckily, adding in elastic is VERY simple, and you can include that step and still make this cap sleeve maxi in about half an hour. Here’s how.
You want to start with a slim fitting stretchy t-shirt and a flat twin bedsheet (if you don’t want to use a sheet that’s fine, you’ll just need to hem the finished dress so it will take a few minutes longer). You can use a tank if you want, but I like sleeves and it’s hard to find maxi dresses with sleeves, so I love being able to start with a cap sleeve t-shirt. I found this pretty top at Costco and the cute printed sheet at Walmart.
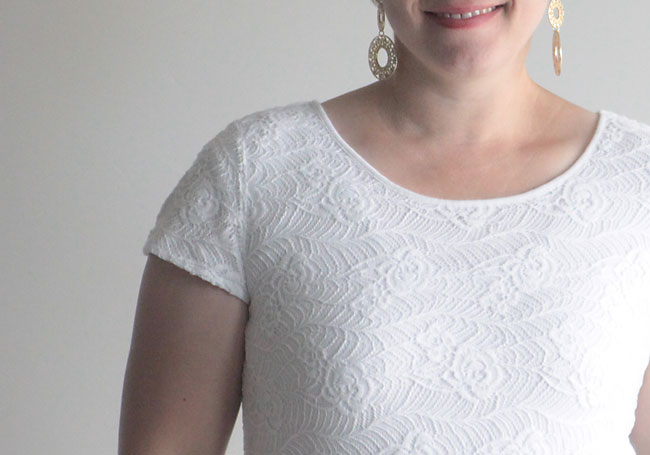
(Note: I did line the sleeves of the tee, so if you get a similar one at Costco the sleeves will not be opaque, as you can see below. Also, if you use a sheet you’ll want to soften it first. I soaked mine in salt water, then rinsed and soaked in white vinegar, then washed and dried 2x as usual to soften it up.)
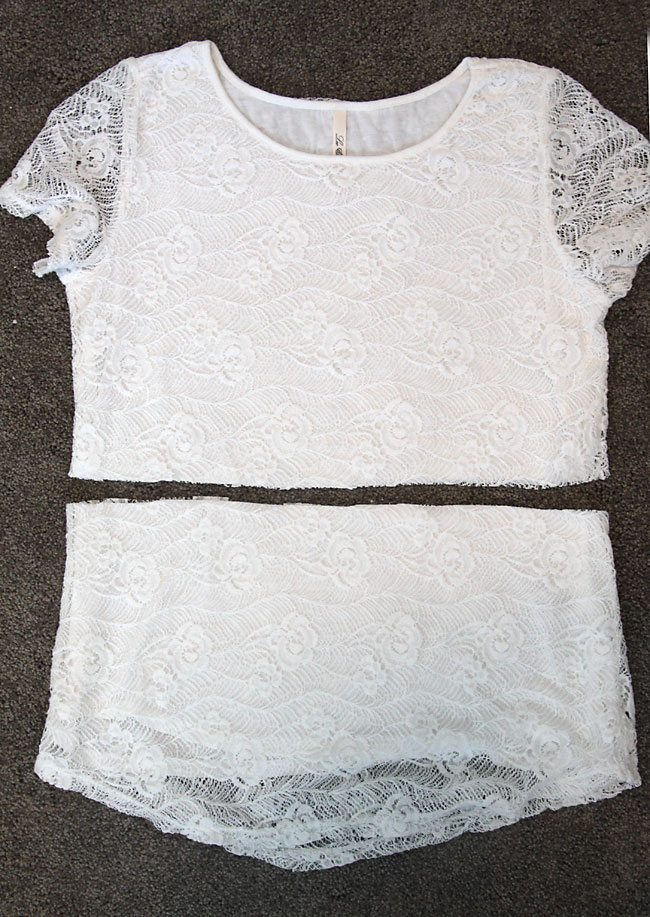
Begin by trying on your shirt and deciding where you want the skirt to attach. Mark that point and cut off the bottom of the shirt 1/2 an inch below your mark. I chose to have my skirt attach kind of high, around my ribcage, because I have plenty of mommy tummy that I wanted to keep covered. You can certainly make the shirt portion longer if you have less to hide in that area.
Next, measure how long the skirt should be the from where the cut off shirt ends (I made mine go to about an inch above the ground so I don’t trip on it). Add an inch, then cut that length from the flat sheet. Be SURE not to cut the skirt too short! You can see the bottom of the shirt and the sheet/skirt in the photo below. The hemmed portion of the sheet will be the hem of the dress.
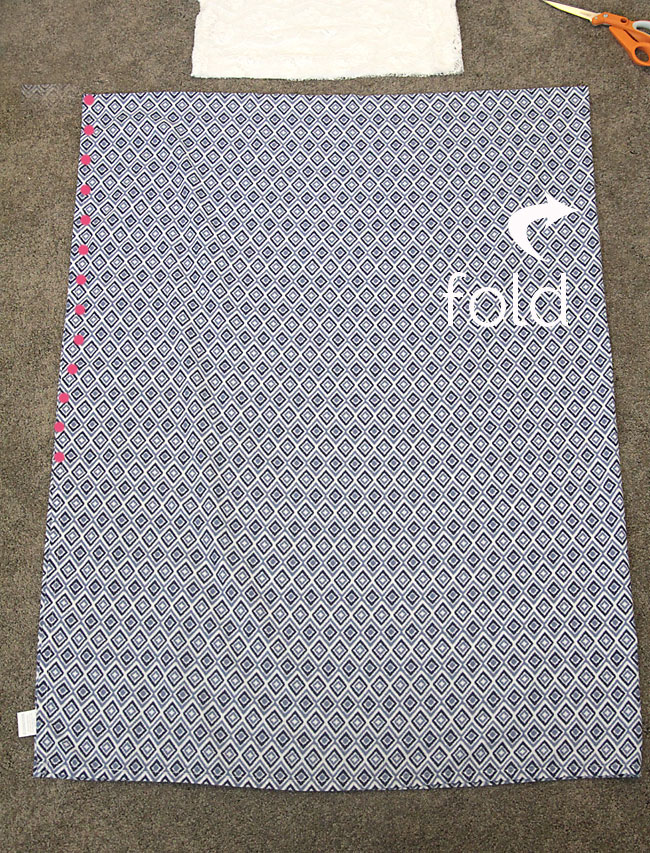
There will be a fold on one side and two finished edges of the other side. I sewed the finished edges together halfway down to leave a slit for walking.
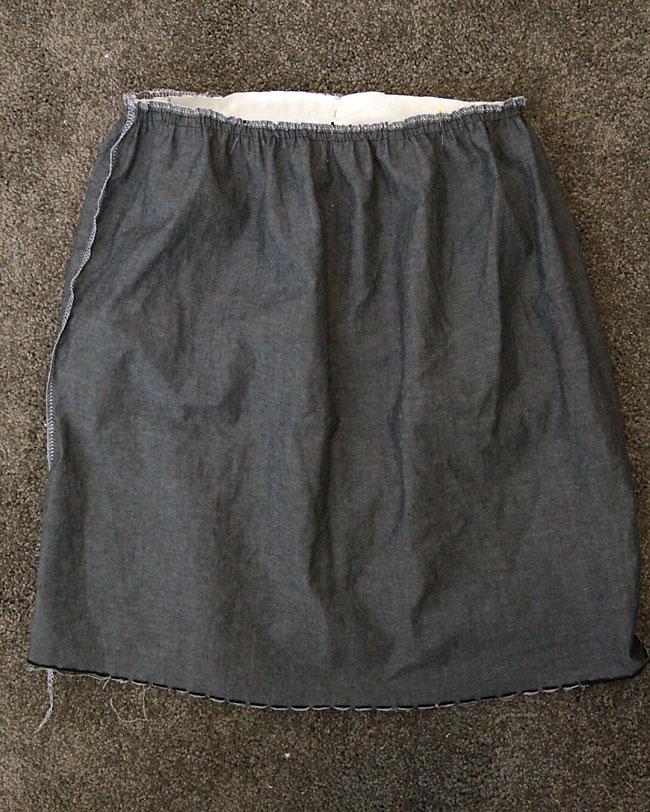
Next you’ll need to gather the top of the skirt until it’s the same width as the bottom of the shirt. If you want more detailed instruction on this, visit the girl’s version of this dress.

When the skirt is all gathered, place the shirt right side out inside the skirt, which is inside out, and sew them together using a stitch that will stretch (zig zag, stretch stitch, serged stitched). Photo below is from the girl’s version.
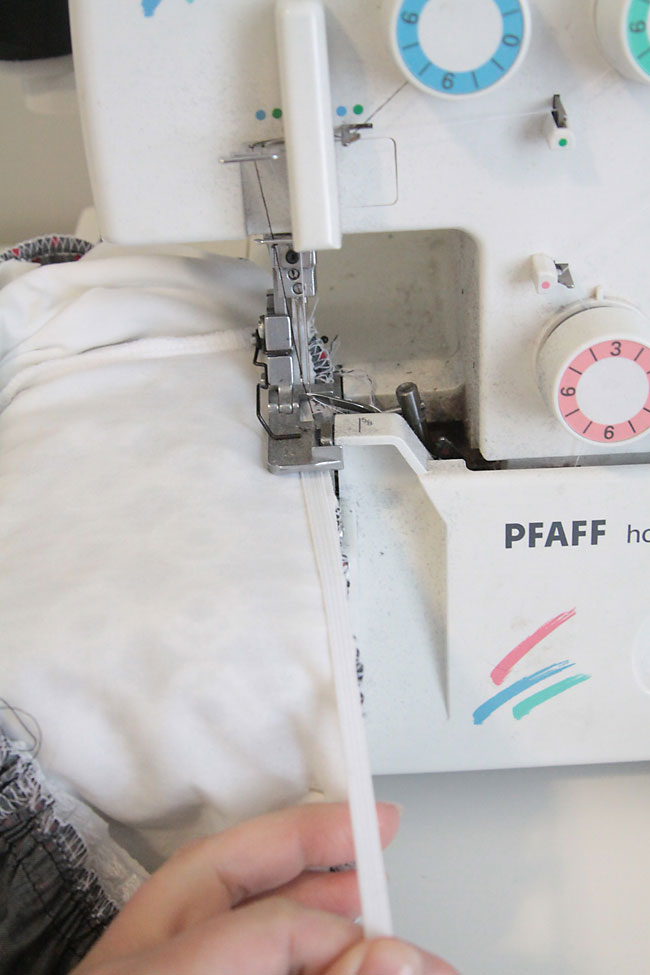
If you turn the dress right side out, it will look like you’re done since the skirt is already hemmed. But remember we need some elastic in the waist! I use 3/8 inch elastic in a length that’s a little longer than my waistline. We’re going to sew the elastic right into the seam allowance of the seam we just sewed. Place the same seam under your presser foot and tuck the elastic right on top. Start sewing, giving the elastic a good pull as you sew. Sew all the way around, overlapping the elastic when you get back to the beginning and then trimming the excess. Make sure to give the elastic a good pull as you sew, and to again use a stitch that will stretch.
Here’s how the waistline looks with the elastic sewn right in:

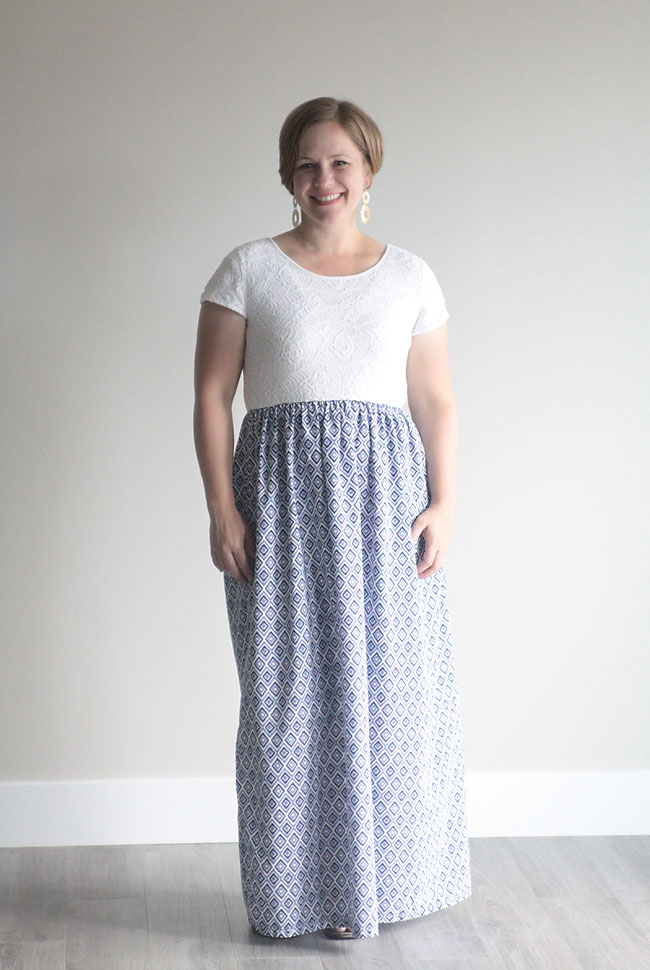
Now when you try the dress on, it will sit nice and flat against your waist:
Here’s the comparison again:
Easy!
You might also enjoy:


Mary says
This looks great! I’ve always fancied a maxi but I’m a bit short and they’re always too long! Thanks 🙁
Janet Ward says
Going to use this to make Christmas PJ’s for my family. I made t-shirt dresses for my girls 30 years ago, it is sew easy. 😉
arija says
I can’t wait to try this out with some vintage fabric i have 🙂
alice says
that is so beautiful. Sometimes my elastic puckers and makes me so mad. Do you have any idea why??
Leah Vogel says
I am so excited about this. I have a couple of dresses that my mother made for me when I was small, the skirts of which I’ve wanted to pair with t-shirts for color block type dresses for years. Now I know how. I have a question though; when I get done attaching the shirt to the skirt and am ready to add the elastic, do I sew the elastic over the whole seam allowance, or am I supposed to tuck it between the shirt and skirt? I know it can be hard to put this kind of thing in writing, so if that doesn’t make sense, never mind.
Thank you for the tutorial!
Janet Ward says
I sew the elastic to the skirt fabric. Match at 4 points, front, sides, and back. Then I stretch the fabric to pull the elastic and t-shirt to the same length to sew. If the t-shirt will not stretch enough. I let the skirt elastic relax until it fits. Once you sew it together press the seam up so that the t-shirt fabric is folded on the seam and I add another row of stitching with the fabric stretched as much as possible again. Then I add ribbon or lace on the right side of the dress to cover the stitching and add decoration. I have also made them with draw string ties so they can be tied. I will post pictures as soon as I get them made.