Easy DIY
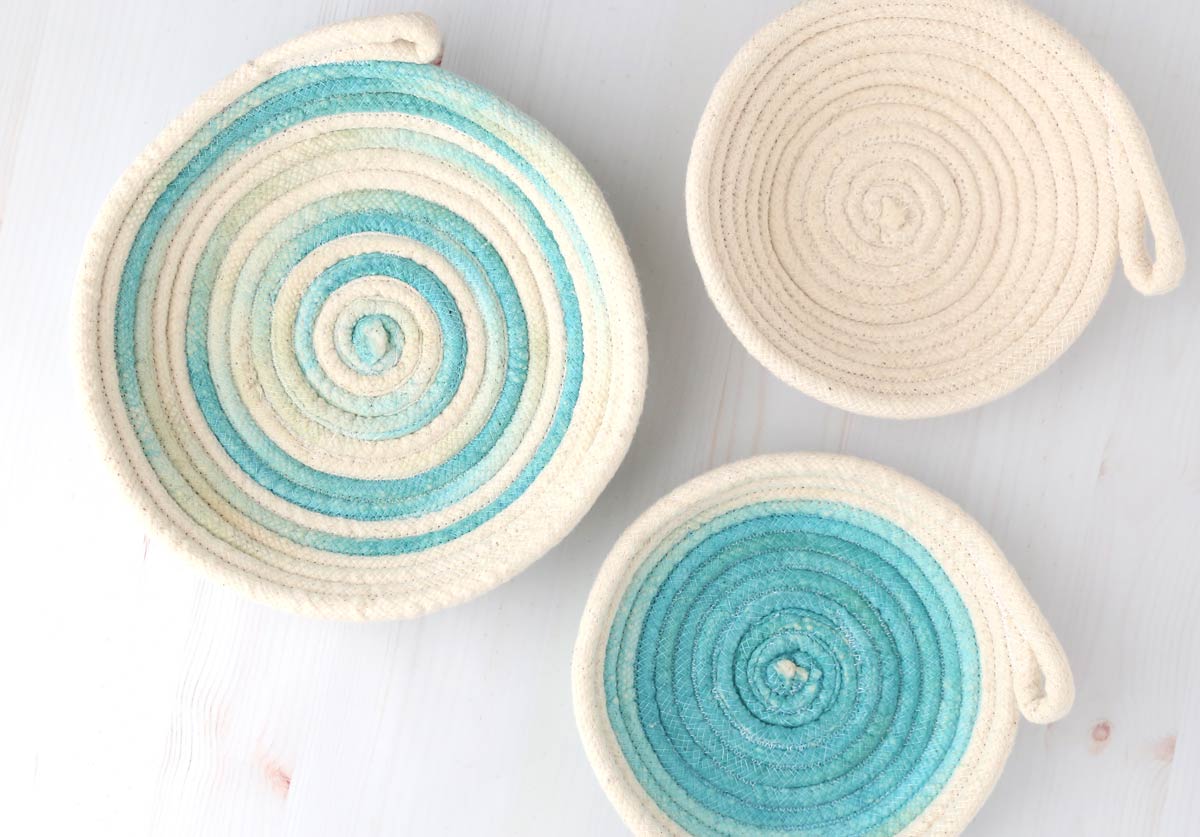
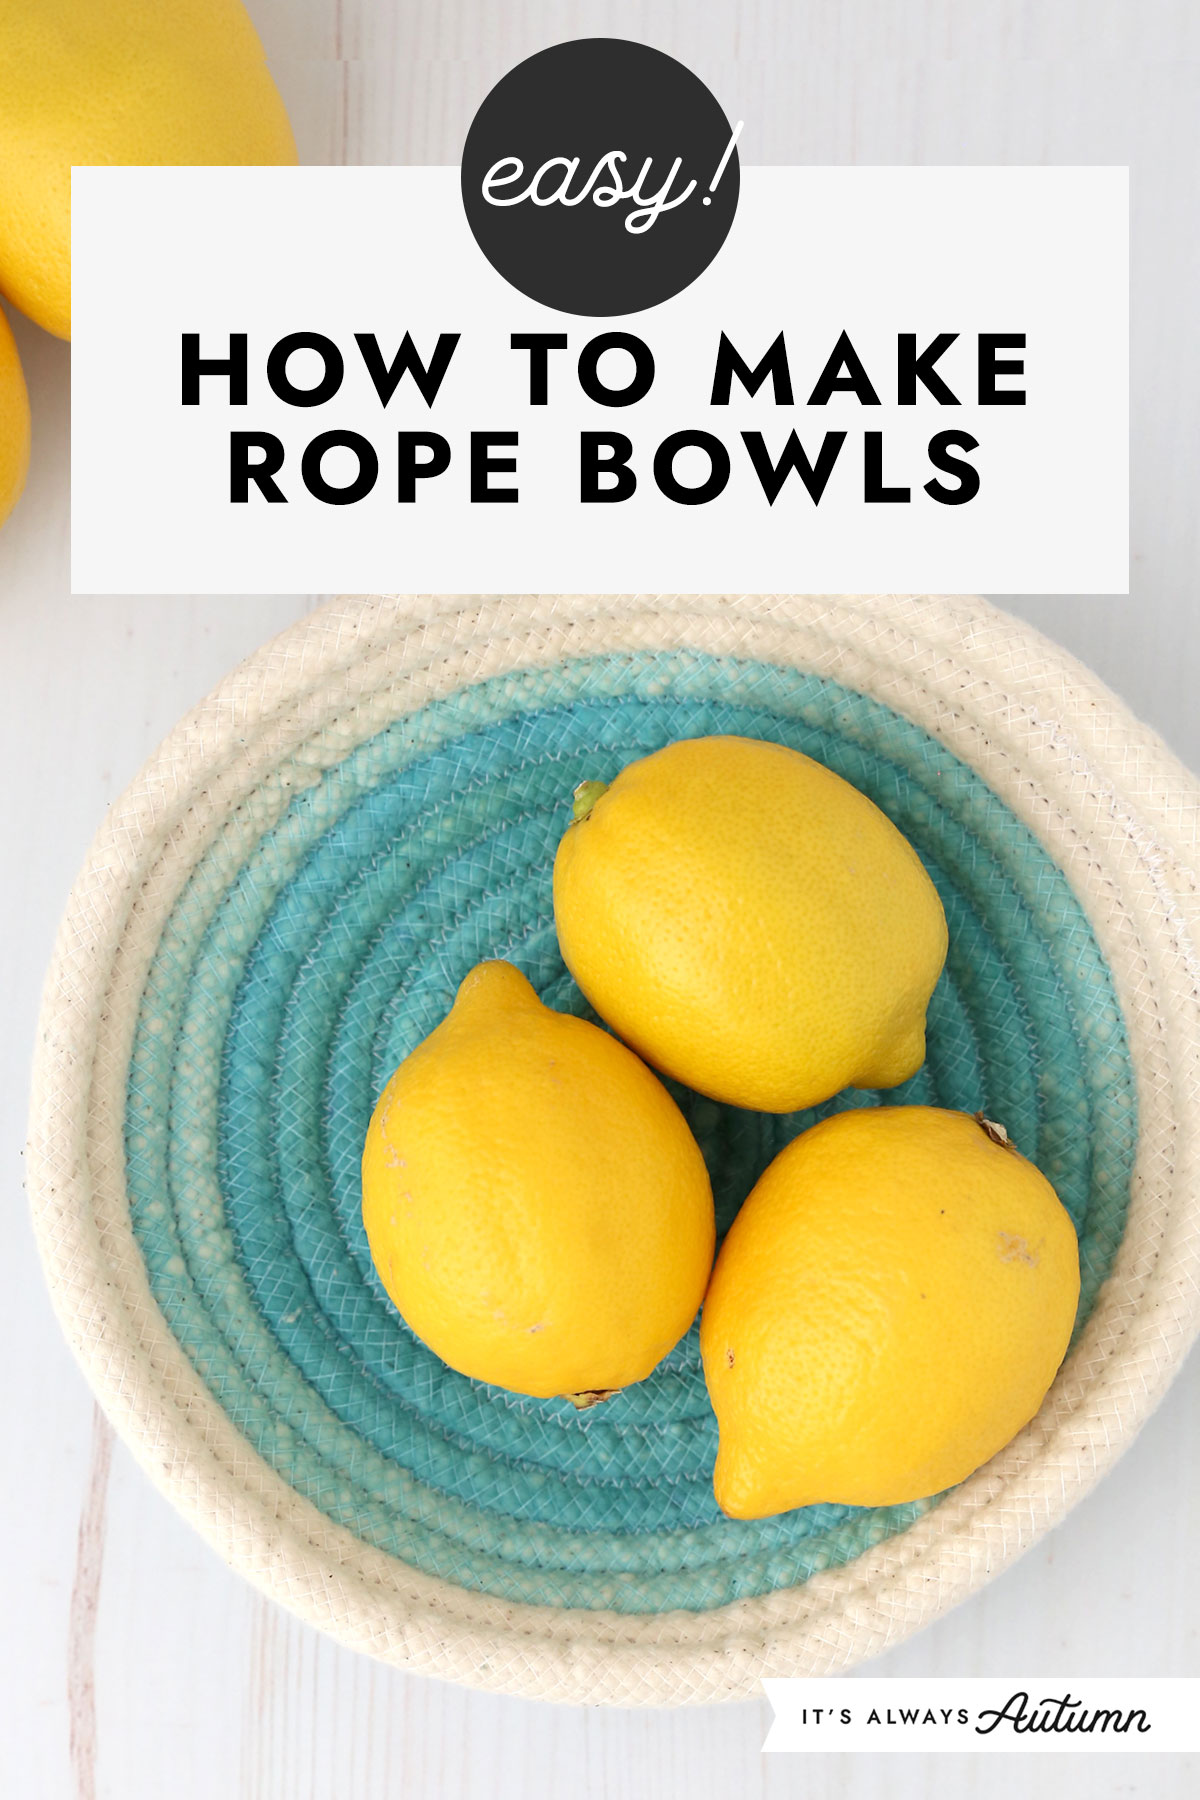
Making rope bowls is one of those projects that seems intimidating but is actually crazy easy! If you can sew (even a little bit!), you can make one of these cute bowls or baskets in under half an hour. If you can’t sew or don’t have a sewing machine, you can use the same technique with hot glue instead. However, I prefer the look and feel of a sewn bowl, so that’s what I’ll show you how to make today. Don’t be intimidated – you can do this!
Supplies
You only need four things to make a rope bowl:
- Cotton rope or cord
- A sewing machine
- A microtex sewing machine needle (size 80 12) or a universal needle (size 90 14)
- Thread
I used standard white thread for all of my bowls, even when I had dyed the rope, except for one where I used turquoise thread to give it a different look. As for needles, I found that super sharp microtex needles work best, but if you don’t have one you should be fine using a heavy weight universal needle (90 14 size or even a denim needle).
What Type of Rope Should I use?
It can be confusing trying to figure out which type of rope to use when making a rope bowl. I tested a variety of different ropes so I could share my favorites with you.
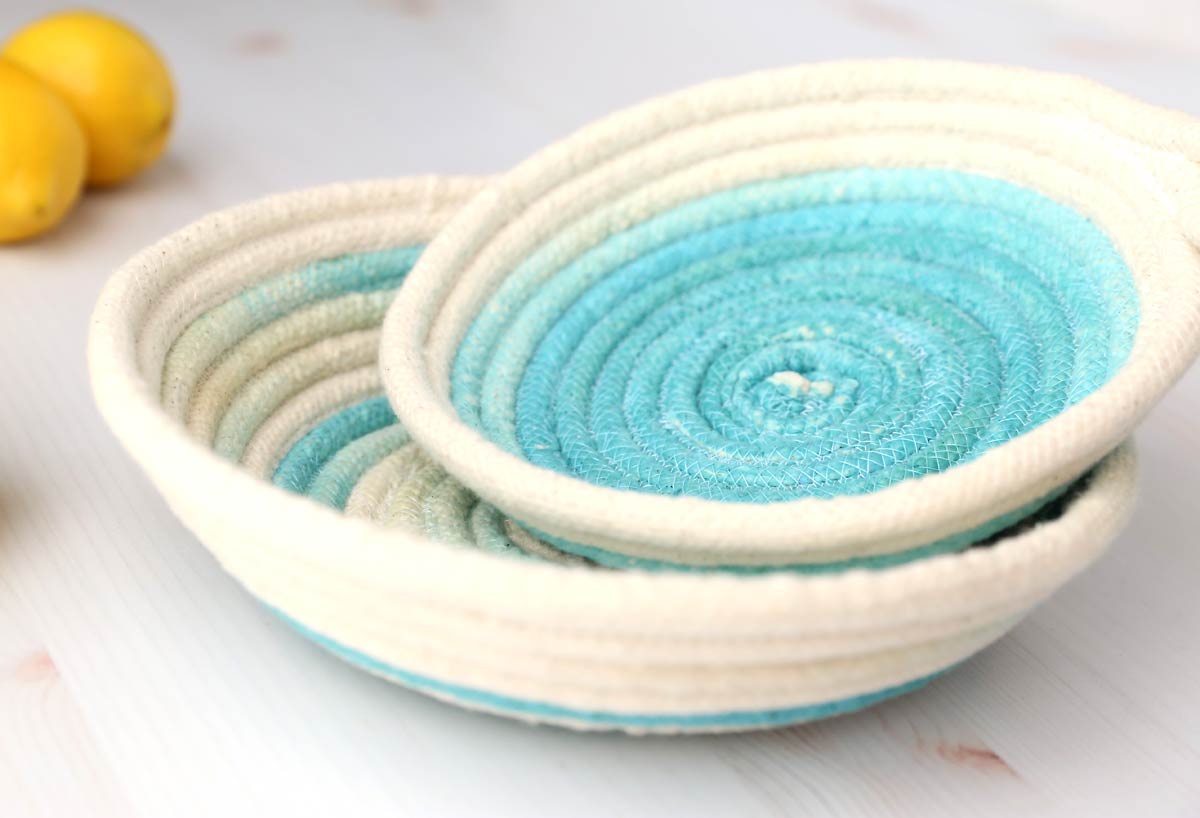
My favorite rope is actually not technically rope; it’s cotton cording (also known as cotton piping or cotton piping filler). I used 3/8 inch cotton cording for most of the bowls you see in my photos. It’s nice and thick, so you use less yardage for each bowl, and the bowls work up very quickly. It’s thick enough that it’s a bit of a squish getting it under the sewing machine’s presser foot, but it’s soft enough that once you get started the machine should handle it nicely. You can order a 100 yard roll on Amazon. That’s enough to make 10-15 small or medium bowls so it’s very economical. It would be a good option if you wanted to make larger bowls as well. Just remember that these rope bowls are somewhat soft so don’t plan to use them for heavy or bulky items.
If you’d prefer to use rope instead of cording, you’ll want to choose a 1/4 inch rope, like a clothesline or even a macrame cord. A 3/8 inch rope will be too bulky for most home sewing machines. I used this 1/4 inch cotton rope from Amazon and it worked up nicely, but because it’s quite a bit narrower than the cording it takes more yardage per bowl and takes longer to sew up. The photo below shows two bowls that are similar sizes (approximately 7.5 inches in diameter and about 2 inches tall). The one on the right was made with 5 yards (15 feet) of the 3/8 inch cotton cord, while the one on the left is just a bit smaller and was made with 8 yards (24 feet) of 1/4 inch cotton rope.
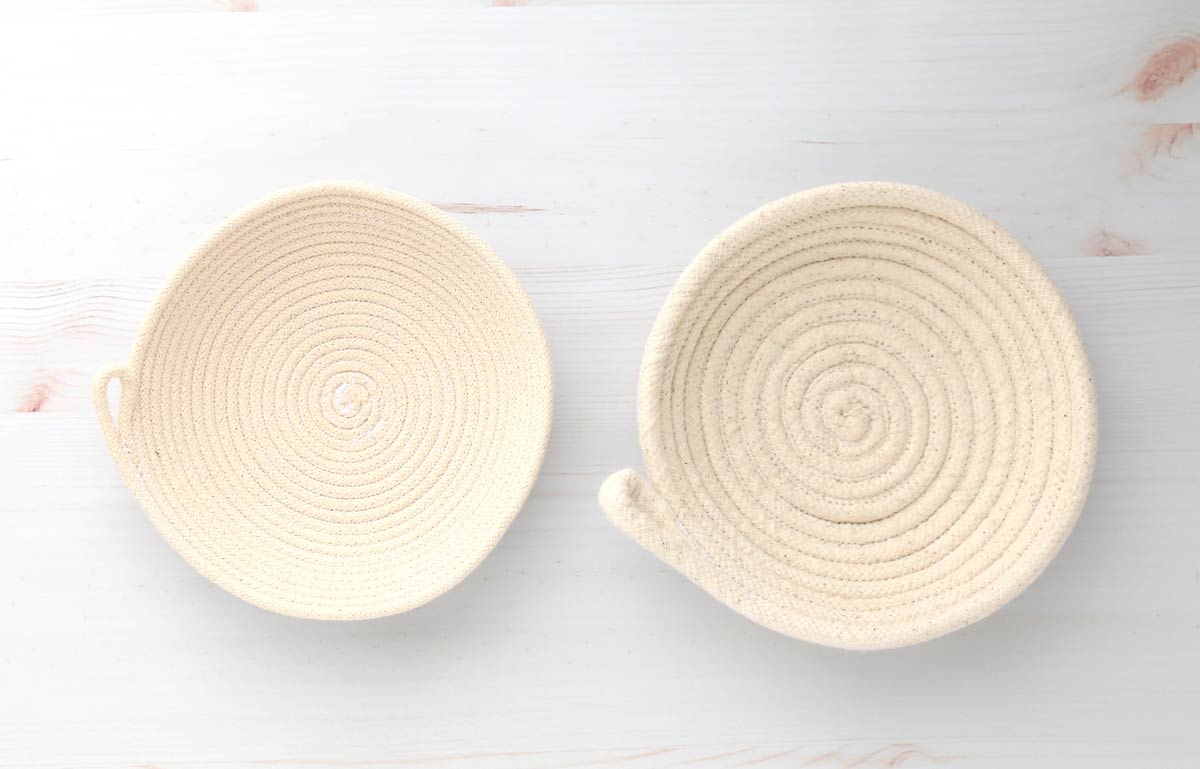
Note: I used braided cord and rope. You can use twisted rope for added texture, but I think the braided kind is a little easier to work with.
How Much Rope Will I need?
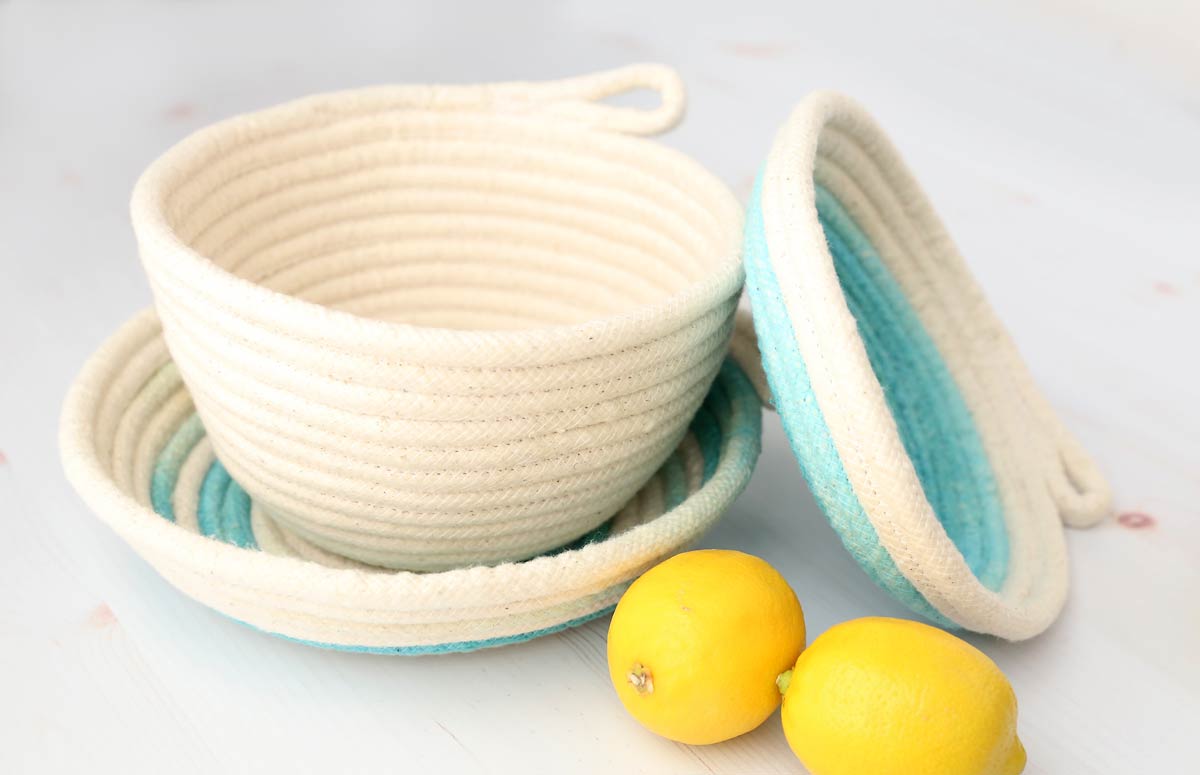
How much rope you’ll need will depend on the size of bowl you’d like to make. I made most of my bowls quite shallow because I think they look pretty that way. Here’s a comparison of bowl sizes and how much 3/8 inch cording it took to make them (remember that if you choose to use 1/4 inch rope you’ll need nearly twice as much).
Shallow bowl 8 inches in width and 2 inches high: 5 yards of cord
Shallow bowl 10 inches wide and 2 inches high: 7.5 yards of cord
Medium bowl 8 inches wide and 5 inches high: 10 yards of cord
Instructions
Here you’ll find detailed instructions for how to make a rope bow. Below these instructions you’ll find a printable tutorial card that includes a video tutorial if you prefer to watch that. Please note that if you’d like to dye your cord you’ll want to do that the day before you plan to sew the bowl so the cord will have plenty of time to dry. I’ve included a few tips on dying at the very end of the post.
Starting the Bowl
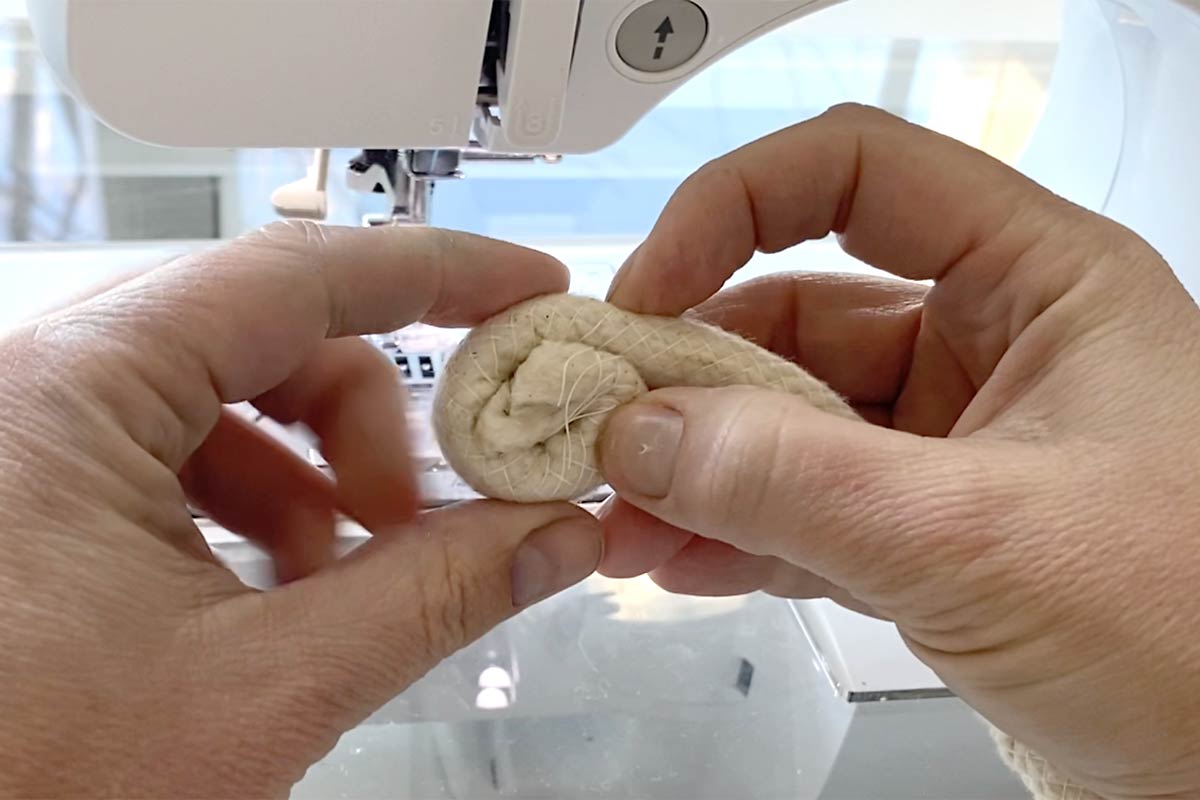
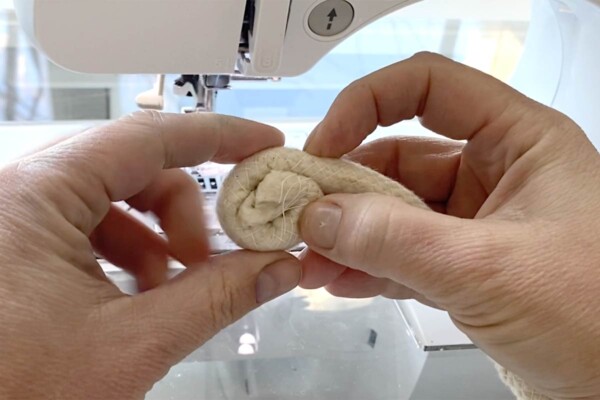
If you have a good idea how much cord you’ll need, you can begin by cutting your cord to that length. Otherwise, you can leave the cord attached to the roll for now and cut it when it gets to a size you’re happy with. If the end of the rope is quite frayed, trim it before you begin. Then curl that end of the rope into a flat spiral as you see below.
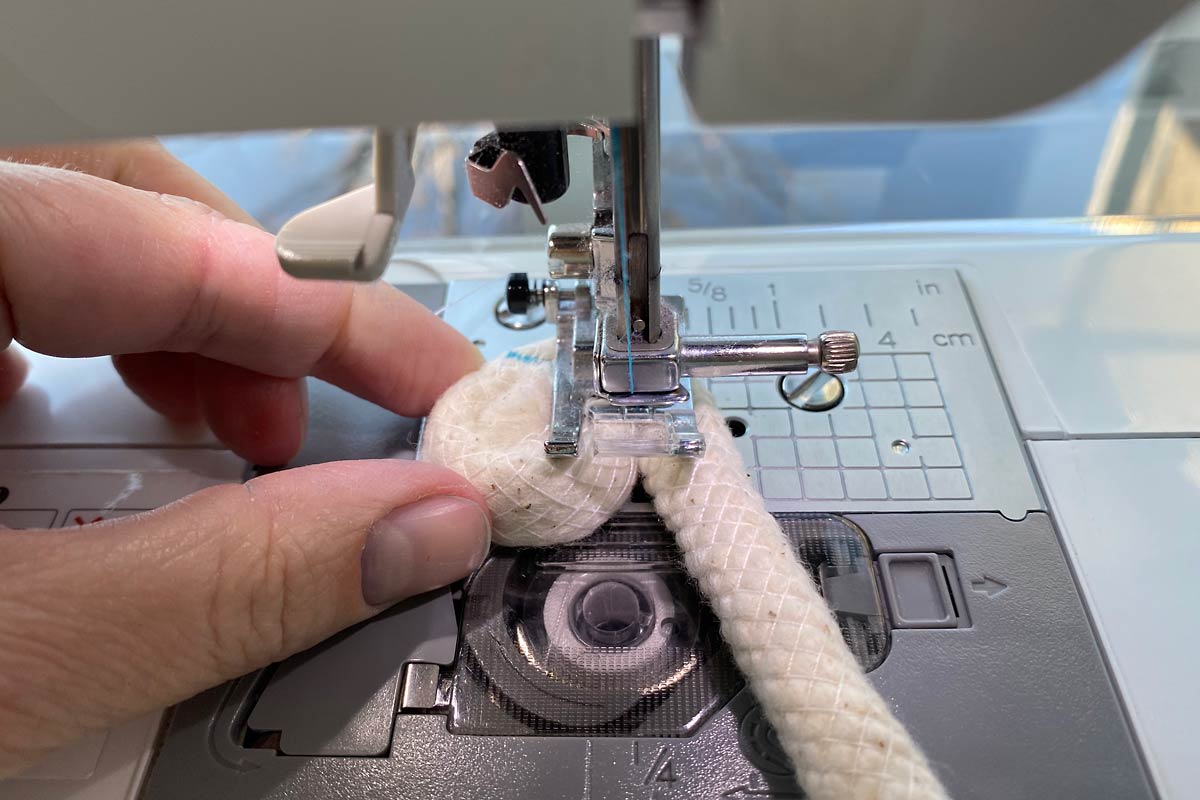
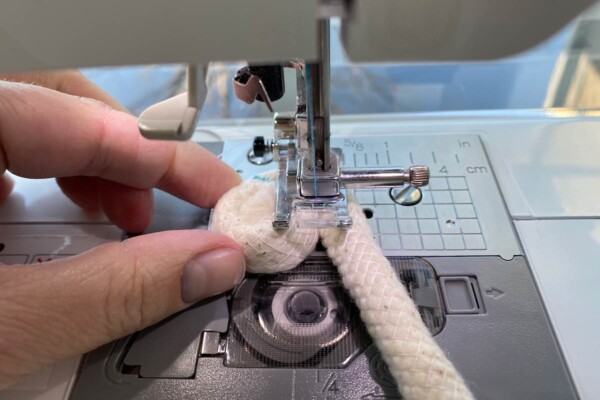
Place the spiral under the sewing machine presser foot with the tail of the rope coming toward you on the right.
Make the Base
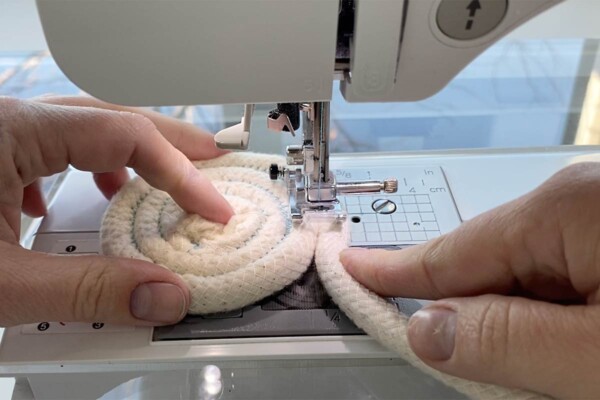
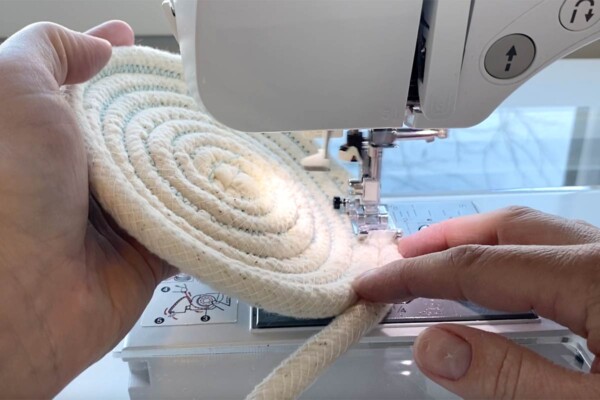
Switch to a zigzag stitch on your machine. Set it to a long stitch length and a fairly wide stitch width. Begin sewing the tail of the rope to the spiral, catching both the tail and the spiral in your zip zag stitch. The first couple of turns will be the most difficult as it can be hard to maneuver the spiral when it’s still very small. You will need to stop sewing every couple of stitches and rotate the spiral of sewn cord under the presser foot so you can keep sewing in a tight circle. As you continue sewing more cord and adding more coils to your flat spiral, it will become much easier to turn the spiral with your left hand and you won’t need to stop to reposition.
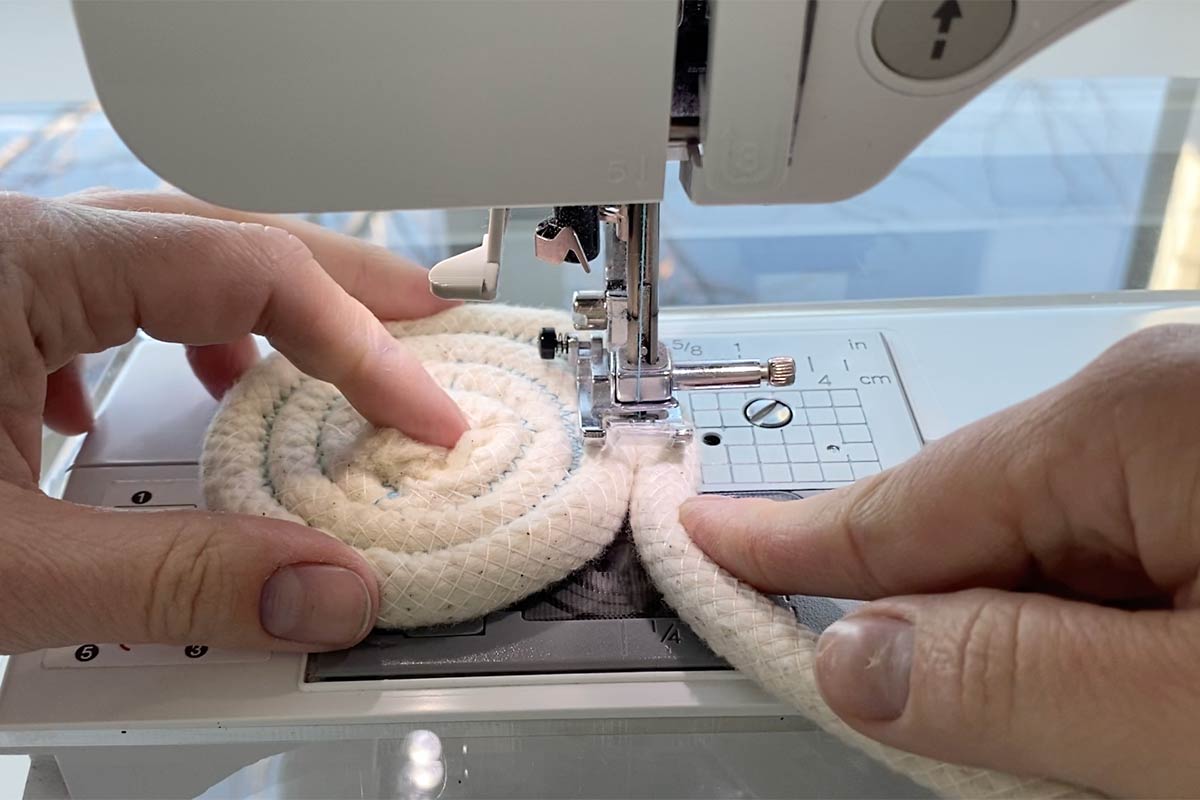
Keep sewing, creating a flat spiral base for your bowl. Your left hand will be turning the spiral base, while your right hand will be holding the new rope close to the spiral. Make sure that you are feeding the new rope so that where it meets the spiral is right in the center of your zigzag, see photo above. Continue sewing until the base is the size you’d like (remember, the top of your bowl will be wider that your base). If you’ve already cut your rope, use a little less than half of it for a shallow bowl, or a little less than a third of it for a taller bowl.
Sewing the Sides
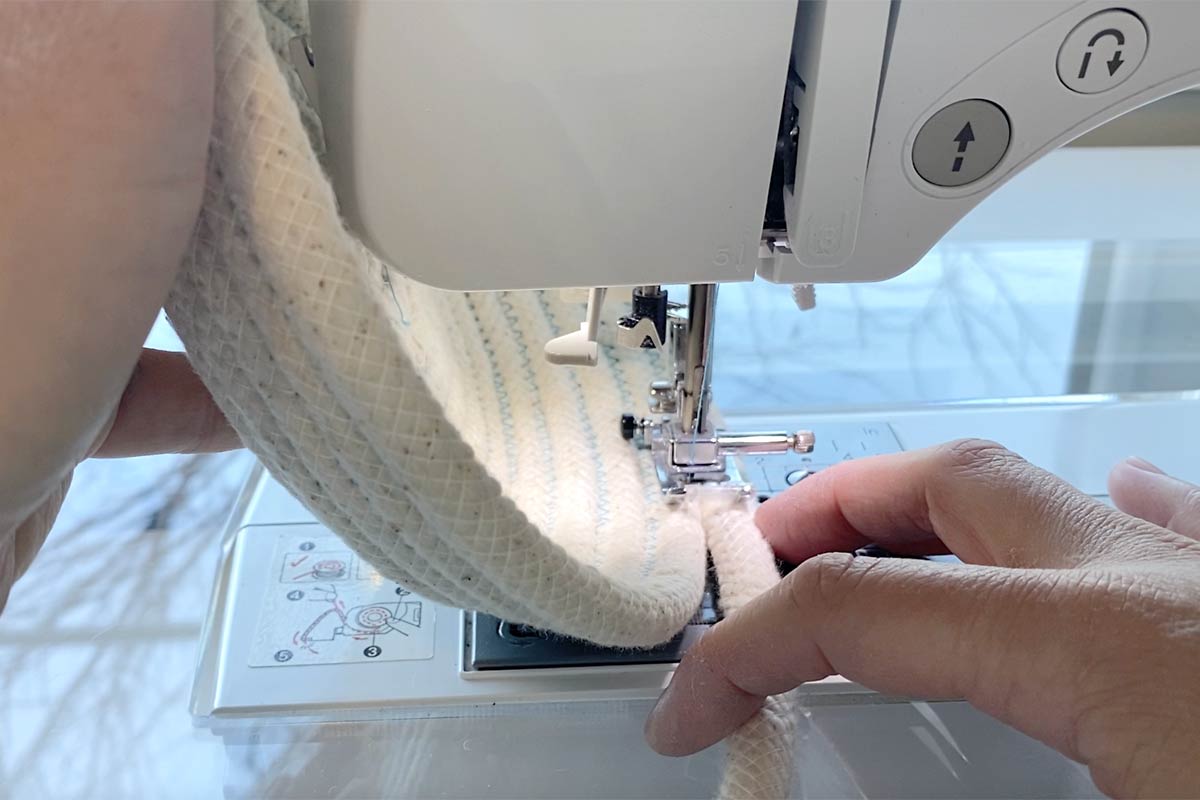
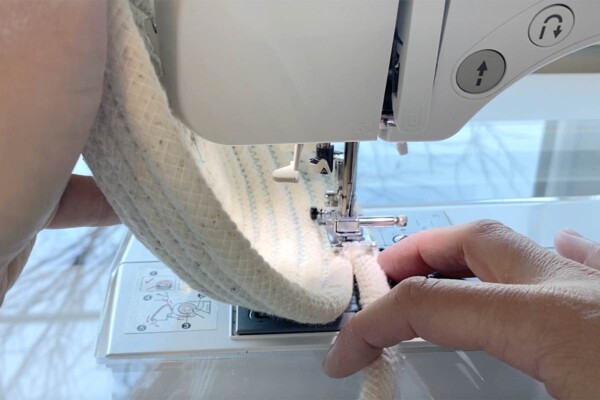
Once your base is sewn, it’s time to start sewing the sides of the bowl. Do this by holding the base of the bowl at an angle with your left hand as you continue to sew more rope onto the bowl. For a shallow bowl, hold the base at a 45 degree angle for a couple turns around the base.
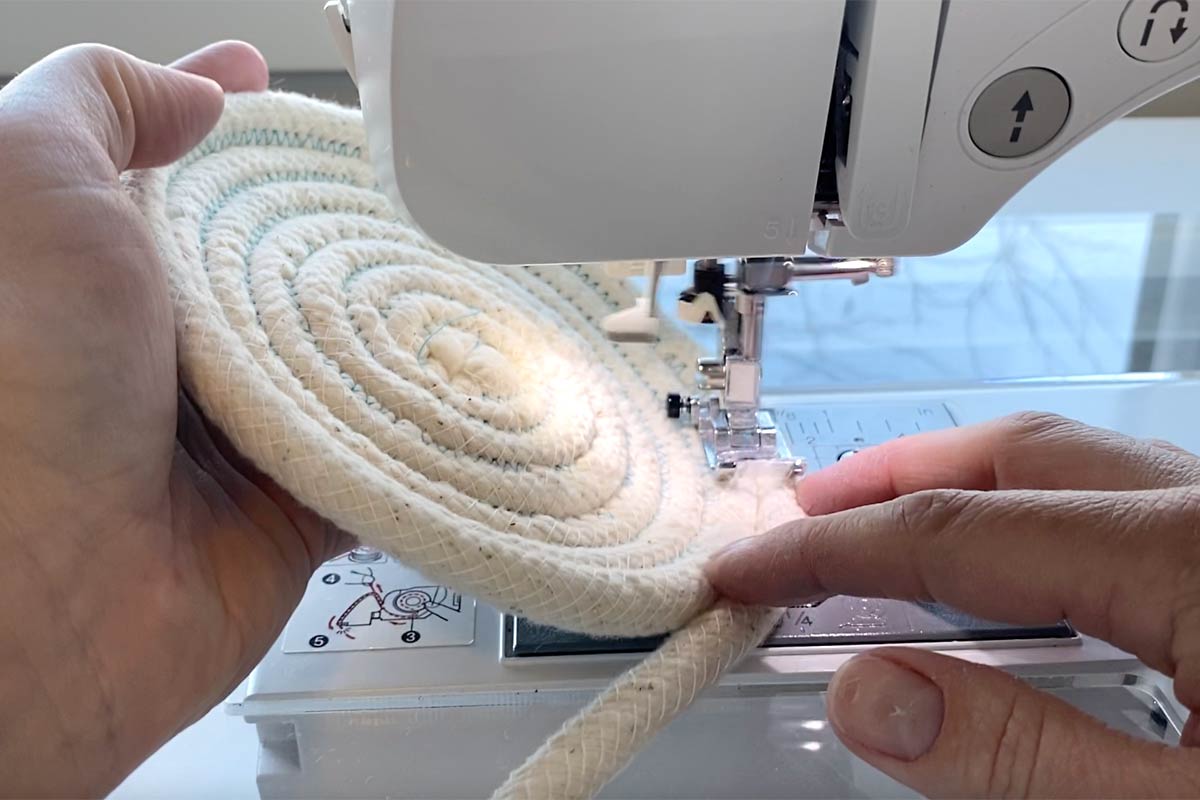
Then lift the base higher until it’s as far vertical as you can make it. Alternately, you can skip the turns at 45 degrees if you’d like the sides of your bowl to be less rounded. Please note that the only way to make very straight sides is to sew a bowl with a large base, so that when you start the sides you can lift it up completely vertical and the sewing machine won’t be in the way.
Finishing the Bowl
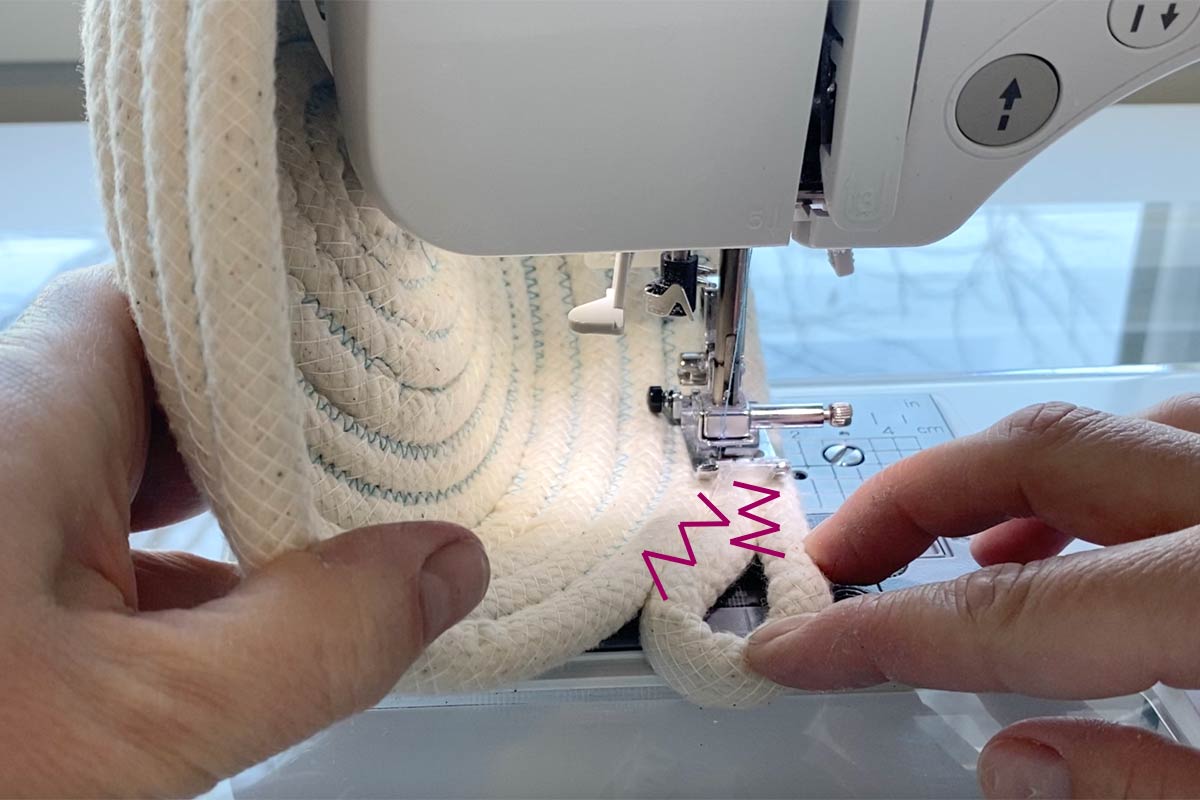
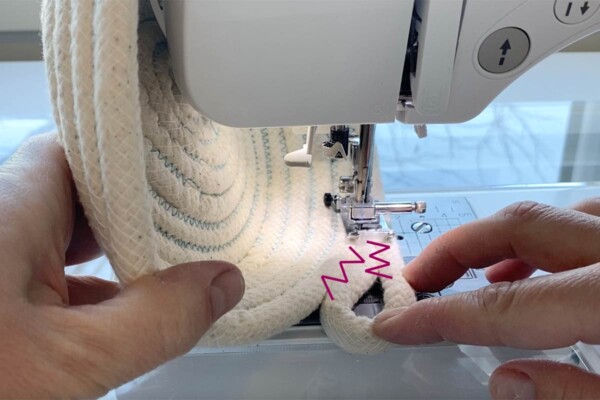
Continue sewing until you have about six inches of cord left. Alternately, sew until the bowl is as large as you’d like and cut a six inch tail of cord. Cut the end of the cord at an angle, and then sandwich it up between the cords at the presser foot to create a small loop. Continue to zig zag down the end of the sewn bowl, this time catching the looped cord, until it’s secured to the side of the bowl. Zig zag backward until you’re past where the loop tucks in. Sew forward again, this time going to the right, to secure the other side of the loop. Sew backward again. (The zig zag lines on the photo below show where to sew to secure the loop.) When the loop is secure, backstitch with a straight stitch to secure your thread, then remove the bowl from the machine.
Troubleshooting
Getting the spiral started can be a little tricky. Be sure to sew very slowly as you begin. Your machine may jam or the thread may break a time or two. Don’t stress about it. Just pull the spiral off the machine and rethread it if necessary. Then start sewing again from where you left off. Once the base gets a little bigger the sewing will become much easier and you’ll be able to finish the bowl very quickly.
Rope Bowls
Supplies
- Cotton Rope or Cord
- Sewing Machine with Heavy Weight Needle 90/14 size needle or 80/12 microtex needlee
- Thread
Want more project ideas? Sign up to get my favorite easy crafts and recipes straight to your inbox!
Instructions
- Roll the end of your cotton cord into a small spiral, as shown.
- Place the spiral under the presser foot of the sewing machine, with the tail of cord coming toward you on the right. Set the machine to a long, wide zig zag and begin to sew, securing the tail of the cord to the spiral.
- Step every few stitched to rotate the spiral under the presser foot. You are sewing around in a circle to add more cord to the spiral. Make sure the zig zag is catching both the new cord on the right and the edge of the spiral on the left. As the spiral gets bigger it will become much easier to maneuver and you will not need to stop sewing to rotate it.
- Continue sewing until the base is the size you'd like. Then use your left hand to lift the left side of the spiral (the base) about 45 degrees. Sew all the way around once or twice.
- Then lift the left side of the base as high as you can, until it touches the sewing machine. Continue sewing. This will create the walls of the bowl.
- When the bowl is as large as you'd like, clip the excess cord with about 6 inches left. Cut the end of the cord at an angle, and loop it up, sandwiching it in between the cord at the presser foot. Sew down toward the left, securing the end of the cord to the bowl and creating a loop. Sew backwards, then sew down toward the right, securing the other side of the loop. (Where to sew is marked by pink zig zags on the photo.) Backstitch to secure the thread, then remove the bowl from the machine and clip any threads.
Tips
Video Tutorial
Dyeing the Cord
You don’t need to dye your cord for these rope bowls; they look lovely in the natural cream color. You can also use colored thread in both the top and bobbin thread to give the bowls a pop of color. But if you want lots of color, dyeing the cord is the way to go.
Look for powdered or concentrated dye at the craft store or big box store. I found it was easiest to mix up a very small batch of dye in a plastic food storage container. Cut your cord to the approximate length you will need first, and get it wet, then coil it up and place it in the small batch of dye. I used two different dye techniques:
- For some of my bowls, I placed about a third of the cord in the dye and left it for 15-20 minutes. Then I added another third of the cord to the dye bath and left it 1 minute. Then I rinsed the cord in the sink until the water ran clear and left the cord out to dry. This gives an ombre effect so the bowl has dark color in the center, lighter color near the edges, and then no color on the sides. Note that rope will sink into the dye bath, but the cotton piping floats so you may need to use something to weigh it down.
- For other bowls I just wanted a hit of color here and there, so I looped the cord back and forth, making some loops larger than others. I put a rubber band a few inches from the tops of the loops, then just dipped the tops of the loops in the dye and left it for about 30 minutes.
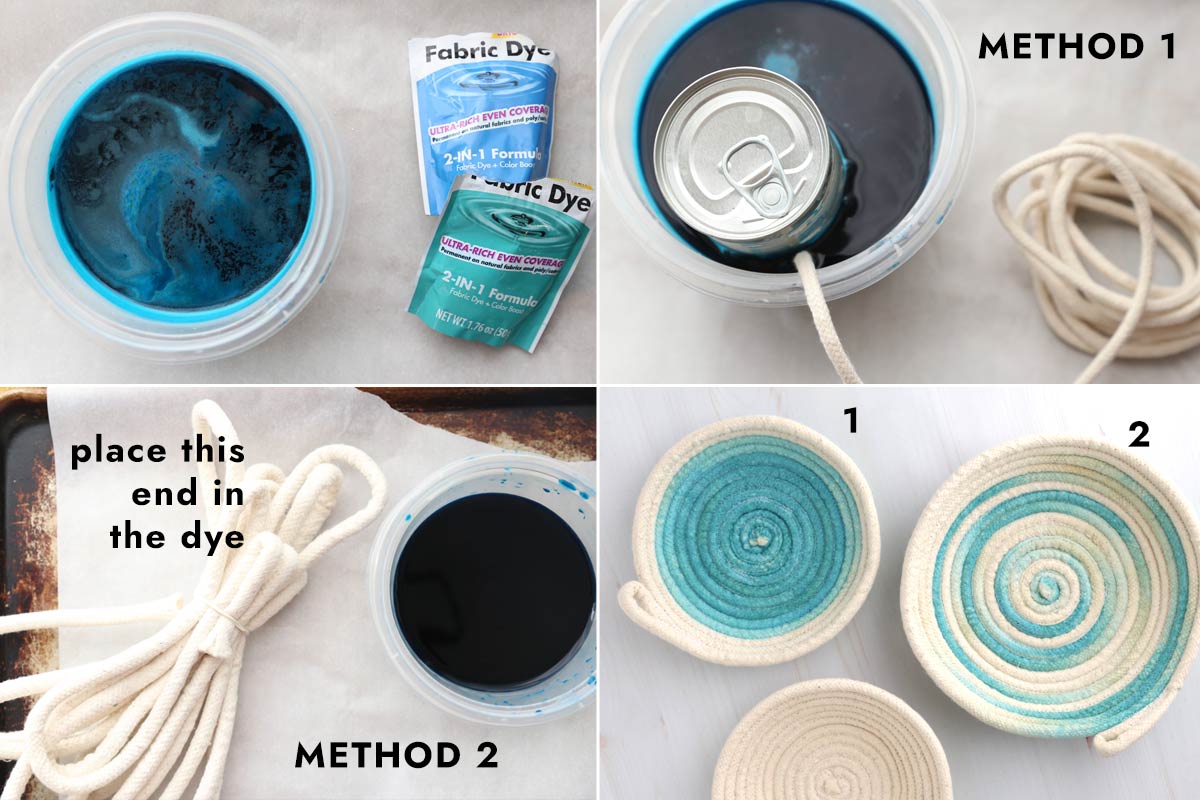
Regardless of the dying method you use, make sure the cord is completely dry before you try to sew it. Sewing on damp cord will break your needles. You can let the cord air dry overnight, or toss damp cord into the dryer for a while.



Susan says
Can u wash these bowls?
Autumn says
You should be able to, although I’d hand wash them to make sure they don’t get pulled out of shape.