
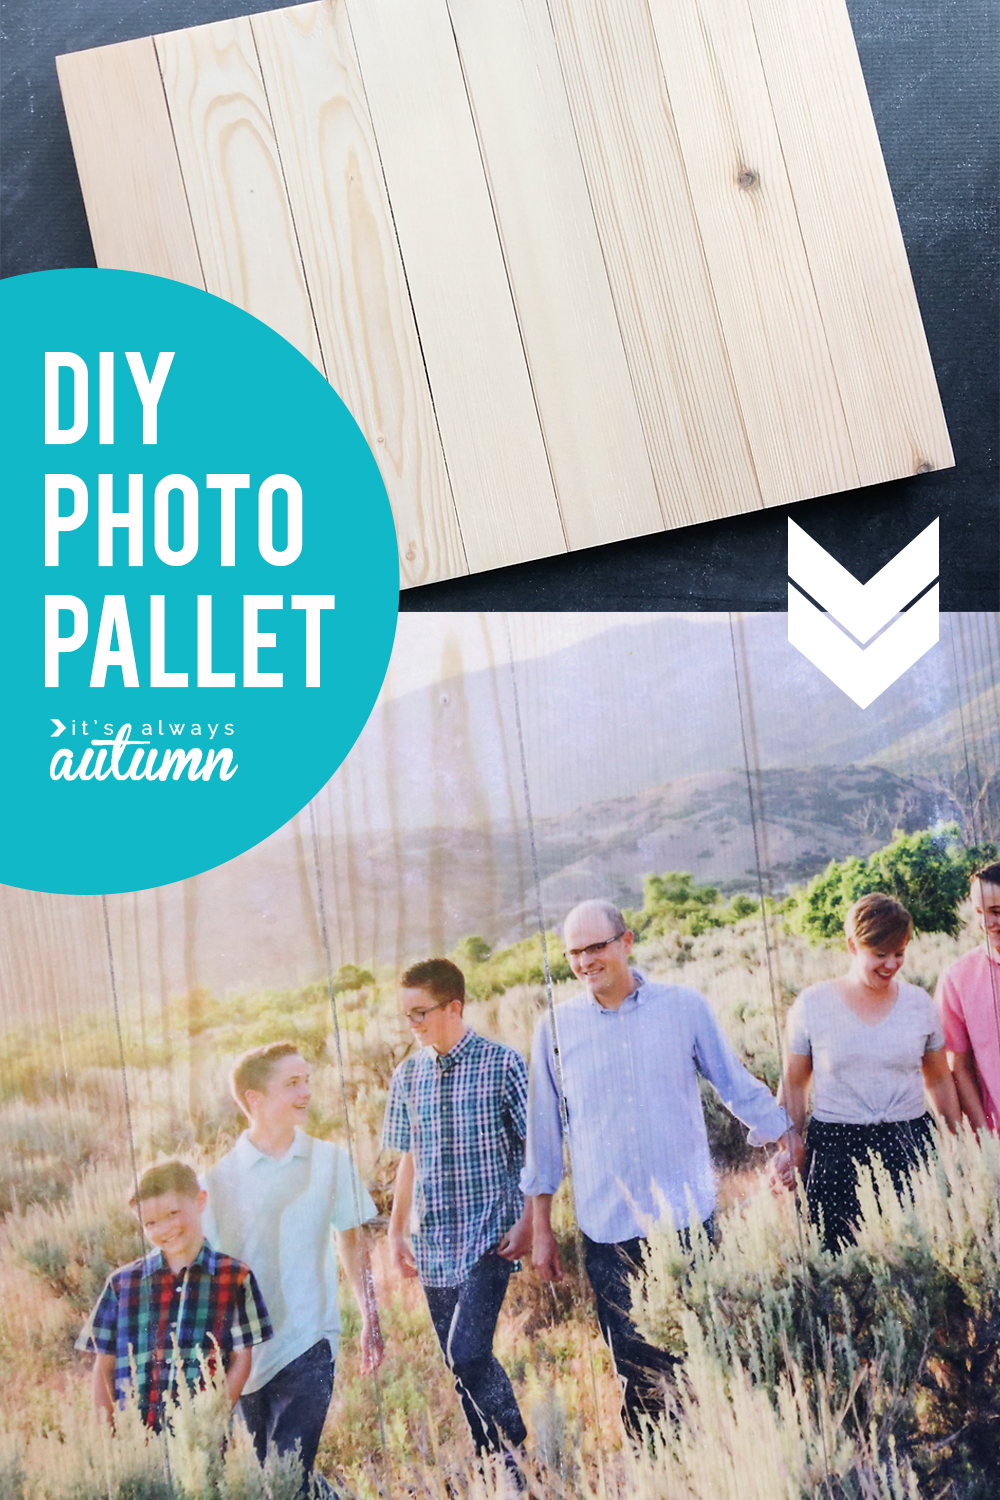
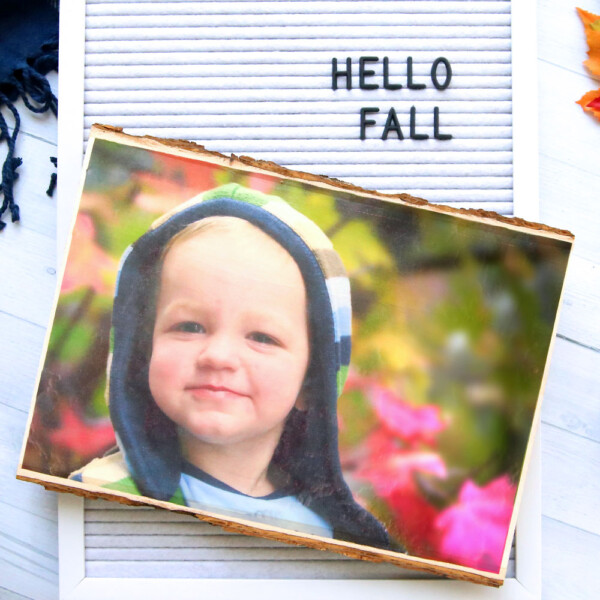
In today’s post: Learn THE BEST (and fastest) way to do a mod podge photo transfer and put one of your favorite pictures on a wood pallet!
Chances are you’ve seen tutorials that show you how to use Mod Podge to transfer a photo onto wood before. And maybe you’ve even tried it. If you have, you realized that it’s a bit of a fiddly process – it’s not the fastest thing in the world and it’s pretty easy to mess up, and maybe you were even frustrated enough that you gave up. Or threw your project across the room. It happens.
Today I’m sharing a foolproof method for a mod podge photo transfer. Follow these simple steps to create your very own artwork!
Well, I’m a little obsessed with transferring photos to different surfaces and figuring out which methods work best. And I’ve had a breakthrough when it comes to the mod podge photo transfer that makes it faster, easier, and just about foolproof!
Frustration Free Photo Transfer
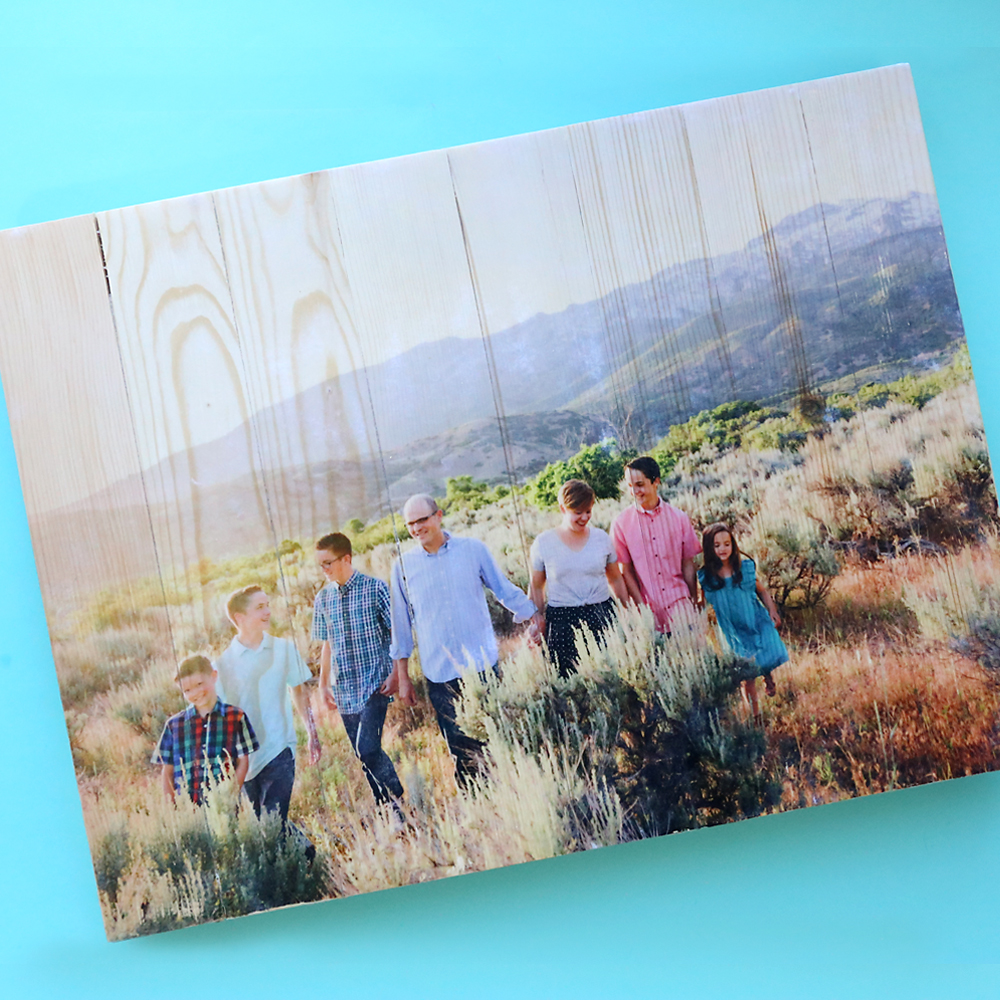
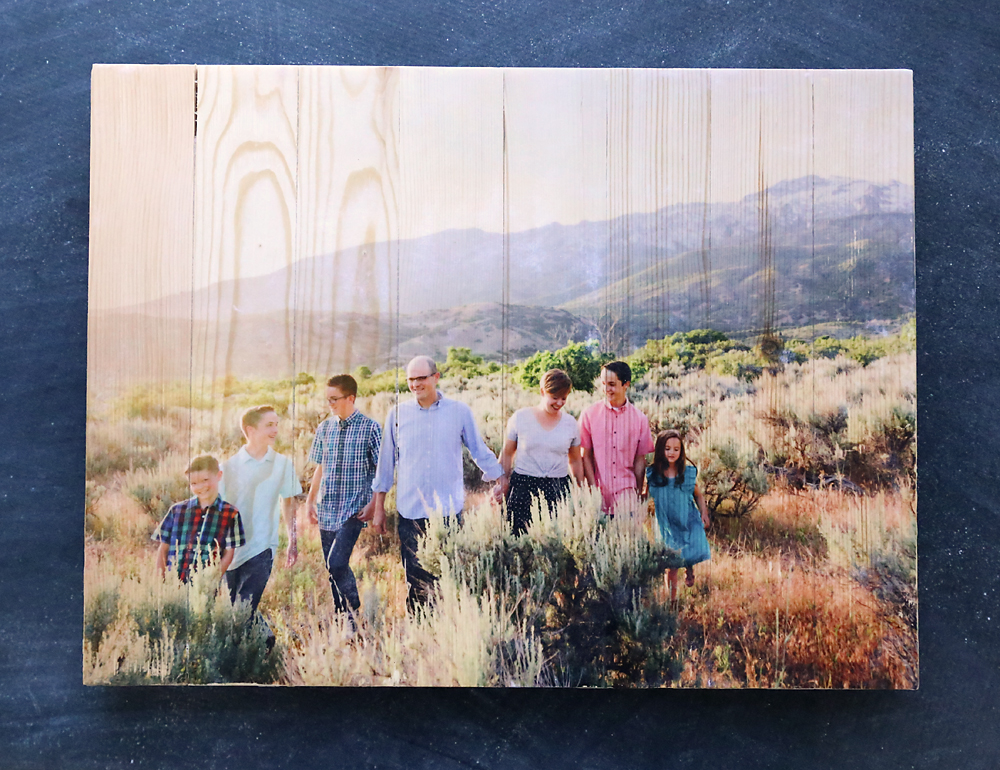
Here’s the main idea: you start with a color copy of your photo and a wood plank or pallet. Paint the wood with mod podge, place the color copy down on it, and let it dry. Then get the paper wet and rub it off, leaving the ink behind. Your photo is magically transferred onto wood with the pretty wood grain showing through. So cool!
However, this project can be frustrating: as you’re rubbing off the paper you have to be very careful to make sure you don’t also rub off the ink. That means you have to go slowly and carefully, and hope you don’t rub anyone’s head right out of the project, because that will ruin the entire thing. But don’t worry, I have a simple trick that solves this problem.
The Trick that Makes This Easy
Most tutorials for this project recommend you let the Mod Podge dry for about 8 hours before beginning to rub off the paper. However, if you let the photo dry on the wood for a full 72 hours, the ink transfer is much more permanent. That means when you start rubbing the paper fibers off you can go much faster without risk of damaging the project. It ends up being easier and faster. I was able to remove all the paper from this large 12×16 inch wood pallet in about 45 minutes, which is just one episode of whatever show I happen to be binge watching. Not too bad for how pretty it turns out!

Supplies
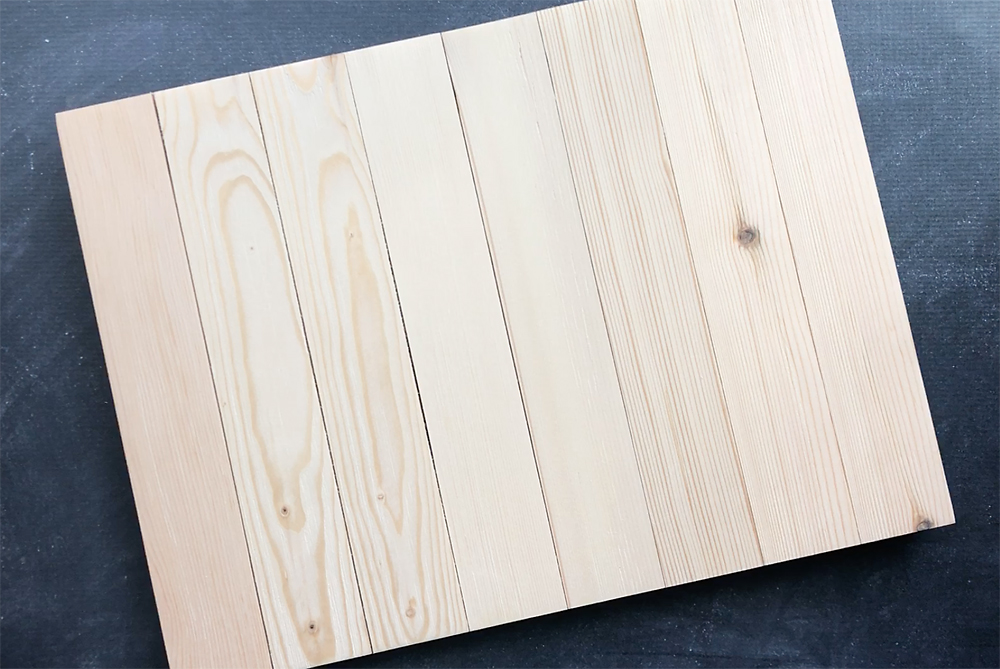
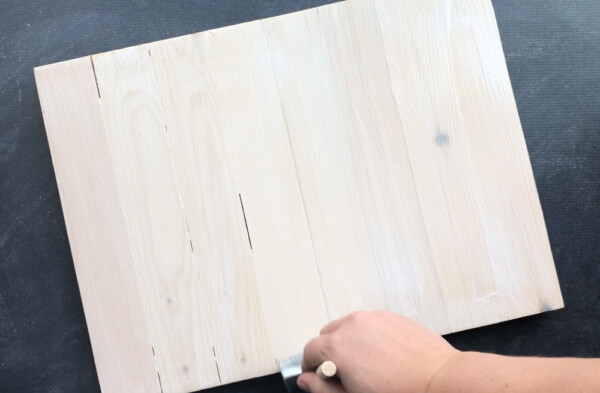
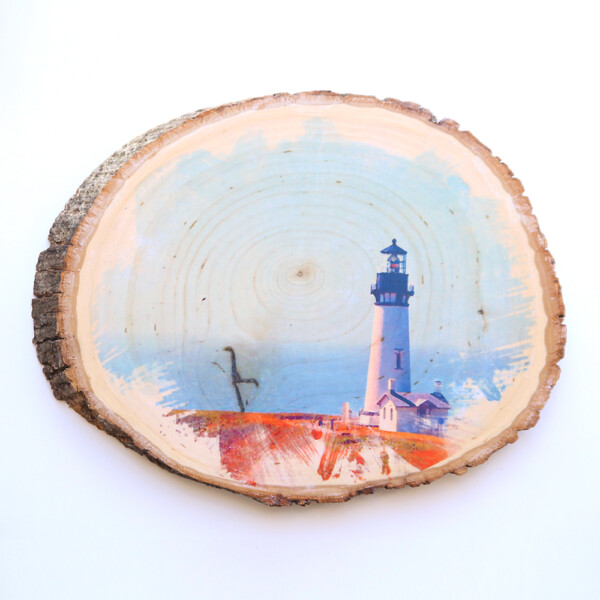
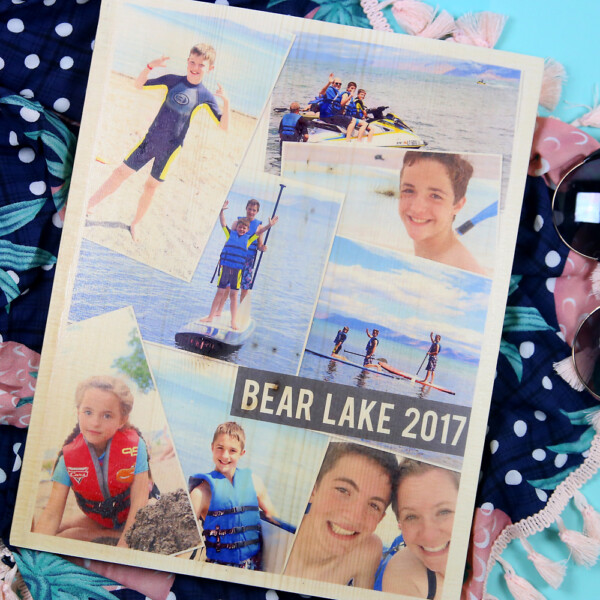
First you will need a piece of wood to transfer your photo onto. You can use a variety of wood surfaces: plain piece of wood, a wood slice, or a piece that looks like a pallet (this technique works on canvas too!). I found this 12×16 inch wood pallet at Walmart. Sand it until it’s nice and smooth, then wipe off any dust.
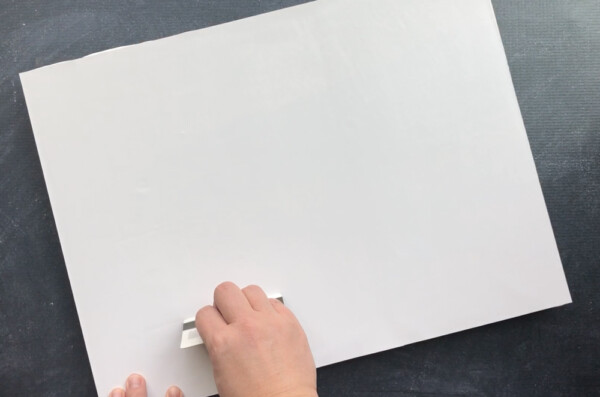
You’re also going to need a laser print of your photo. It should be printed on regular printer paper (not photo paper) and must be reversed. My local copy shop can print color laser prints on normal paper up to 13×19 inches in size – check with your local copy shop (Kinko’s, Office Max, etc) to see what size they can print at before your purchase or make your wood piece. Be sure to crop your photo to the size of your wood piece, and then send it to the printer. Remember your print must be printed:
- on a laser printer or as a laser color photocopy
- on normal paper
- as a reverse image
- the size of your wood piece (mine is 12×16)
The copy shop should be able to do all of that for you. Be aware this project will not work with actual photographs or with a picture printed on an inkjet printer.

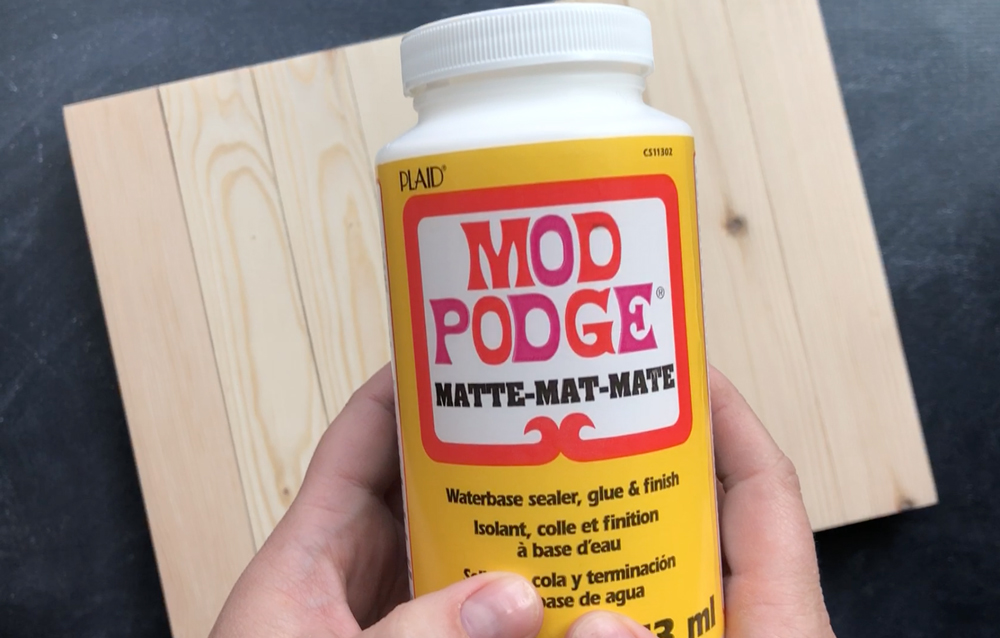
Finally, you will also need Mod Podge. Some wood photo transfer techniques use gesso or another type of gel medium, but I just use Mod Podge matte. It’s easy to find in any craft store and most big box stores.
NOTE: there is a Mod Podge Photo Transfer medium made specifically for photo transfers, but I prefer NOT to use it. The photo transfer mod podge will transfer the whites in your photo, whereas using normal mod podge turns the whites in your photo clear, allowing the wood grain to show through any white space.
Paint the Piece with Mod Podge
You may want to protect your work surface with newspaper or a plastic tablecloth. Begin your mod podge photo transfer by painting an even layer of mod podge on your wood pallet. Use enough medium to completely cover the entire wood piece. I used a cheap foam brush to do this.

Adhere the Photo
Immediate place your printed photo with the image face down on the wood pallet. Use a credit card or brayer to smooth the paper down, smoothing out any air bubbles. Wipe off any excess medium that squeezes out the sides.

Dry for 72 Hours
Ok, here’s the important part: Leave the piece to dry for 72 hours. Most photo to wood transfer tutorials recommend waiting 8-24 hours at this point, but the next step is much easier if you wait three full days!
Remove the Paper
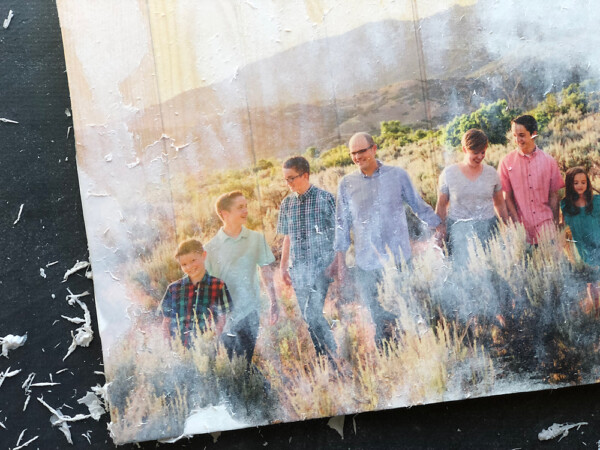
After 72 hours, you can start removing the paper to reveal the mod podge photo transfer. To do this, you’ll begin by spraying the piece with water or dampening it with a wet sponge. As the paper gets wet, you will be able to see the picture through the paper.
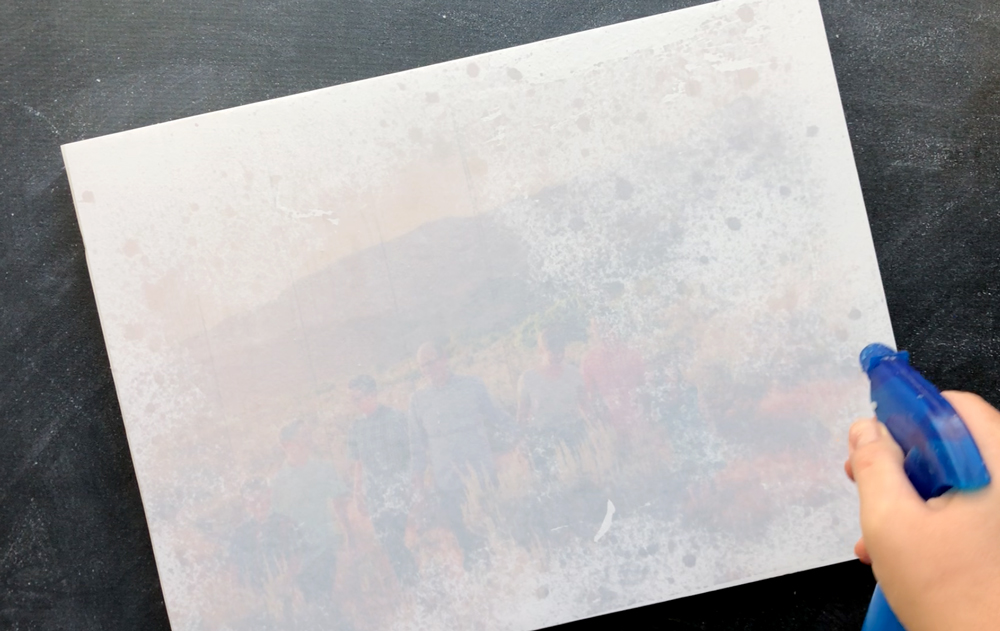
Start rubbing the paper with your finger or a damp towel. The paper fibers will begin to roll up and you’ll be able to peel them off.
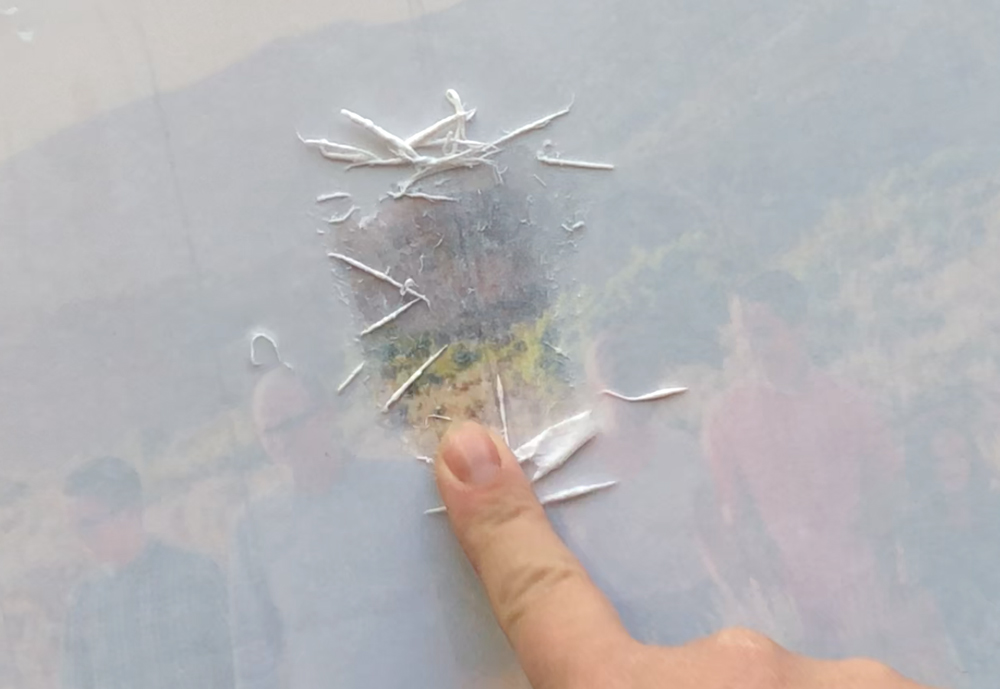
Continue to rub and peel off paper. As the paper dries, you’ll need to spray it again and keep rubbing off fibers.
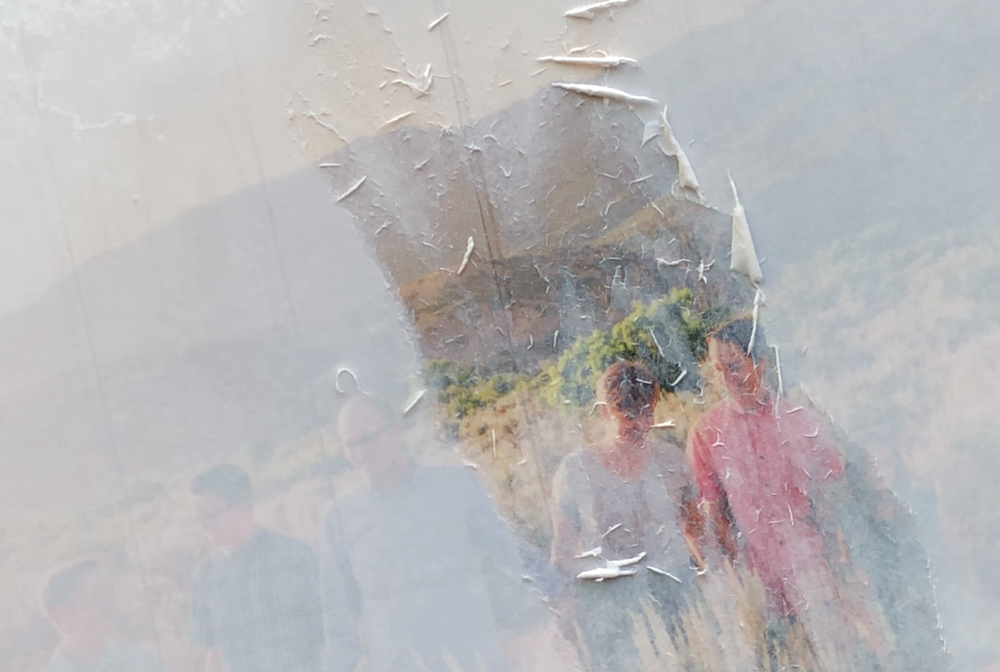
As you rub off paper, you’ll see more and more of the photo. But as the photo dries it will get hazy again, showing you where some of the paper remains. Spray any hazy spots again, and rub them off. You’ll have to repeat this process 3-4 times. If you’d like to see a video that shows this process, click through to this post.
If you did not let your project dry for 72 hours, you run the risk of rubbing the ink off during this process, and have to be very careful not to do so. But letting it dry for a full 72 hours makes the ink transfer fairly permanent and so you can get all the paper fibers off more quickly. Just pay attention to what you are doing, though, because I cannot guarantee none of the ink will come off if you are rubbing really hard.

So just be careful and continue the process until all the paper fibers are gone. It’s so much fun to see the photo transfer appear!
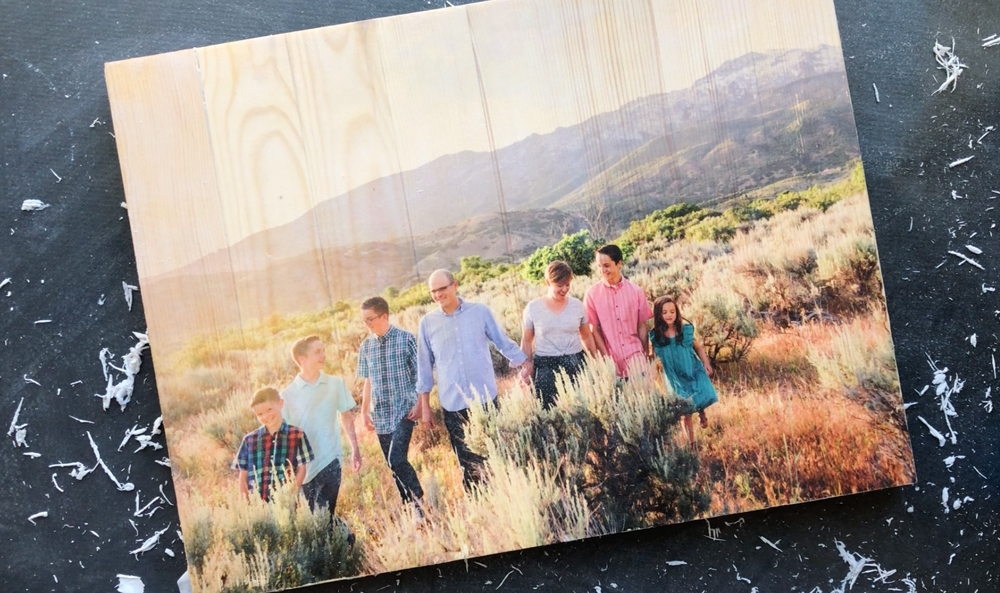
Seal with Mod Podge
As a final step once all the paper fibers are removed, paint a thin coat of mod podge over the entire image and allow it to dry. Then your final project is ready to display!

Mod Podge Photo Transfer
Supplies
- Laser Printed Photo on normal paper, reversed
- Wood Surface
- Regular Mod Podge Matte
- Foam Paintbrush
- Spray Bottle or Sponge
Want more project ideas? Sign up to get my favorite easy crafts and recipes straight to your inbox!
Instructions
- Paint an even layer of Mod Podge across the entire wood surface.

- Place the printed photo face down onto the wood. Smooth it out using a credit card or brayer and wipe off any excess mod podge that squeeze out the edges.

- Allow wood piece to dry for 72 hours.
- Spray the back of the photo with water or dampen it with a sponge.

- Gently start rubbing the wet paper. Paper fibers will rub off under your finger. Continue rubbing gently. When the paper dries, get it wet again and keep rubbing.

- You will begin to see the photo showing through. As it dries, it will get cloudy again. You will have to repeat the process, wetting and rubbing across the entire surface of the photo, 3-4 times.

- Wait a few minutes to see if any cloudy spots appear. If they do, get them wet and gently rub away the rest of the paper. Once the photo is clear, paint a thin layer of mod podge over the entire surface to seal it.


If you like photo projects, be sure to check out these posts:

Andrea MARTINEZ says
I have a question???? Why is it imperative to print out your photo/image verses not using the photo original to transfer? Btw.. Excellent crafts!! Talent is you! Thanks
Autumn says
Hi Andrea! You need to print out the image for two reasons: 1) the image needs to be reversed, and 2) you will be dissolving the paper it’s printed on as part of the craft – this works great on a plain piece of paper but does not work well with photo paper which is made not to dissolve. Thanks!
Connie says
So after MANY failed attempts to get the paper off without dislodging some of the picture, I ordered water soluble laser printer paper. I printed off my picture, did the mod podge coat, applied the picture, left it to dry overnight – then put the piece in warm water and watched the paper dissolve….just like magic! IT WORKED! It’s very thin paper to work with, cutting out the picture was trickier – but the ease was worth it.
Autumn says
I’ve never heard of water soluble laser printer paper but it sounds like I need to check it out! Thanks for the tip!