
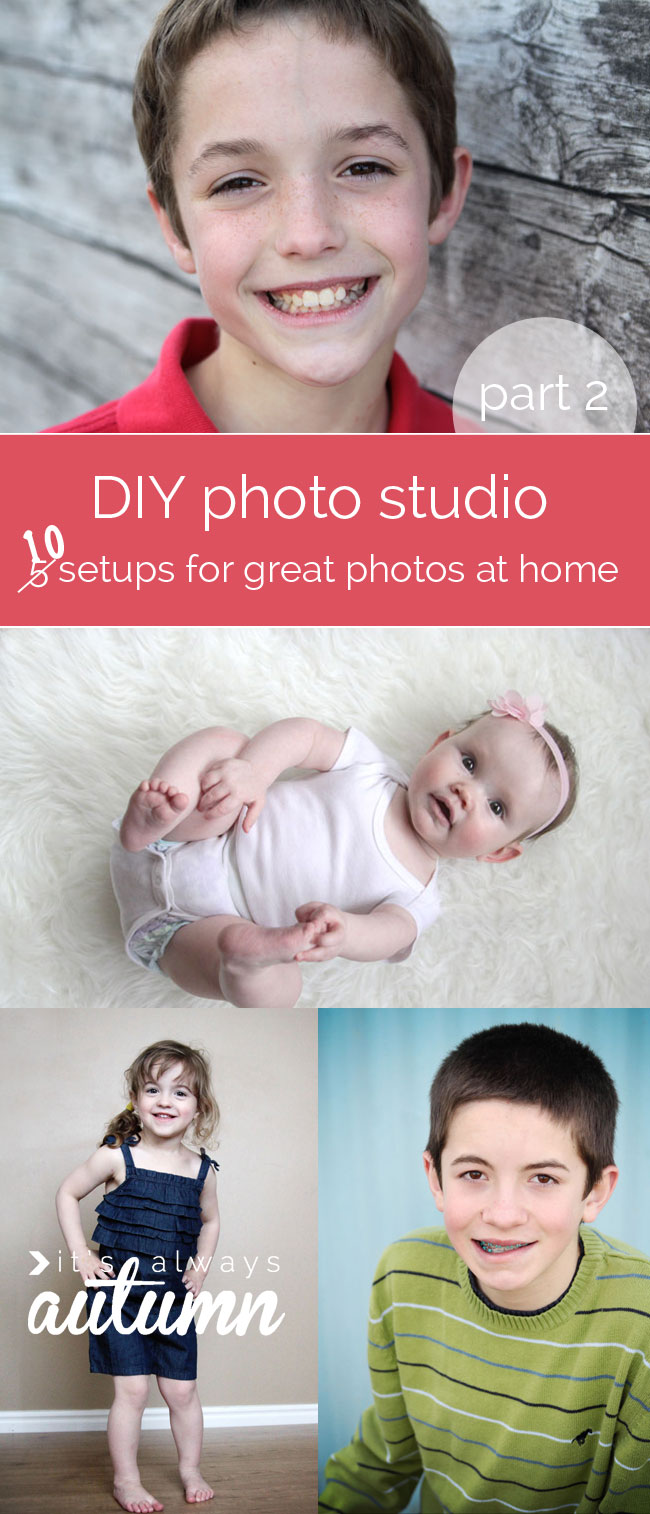
When I was a kid my mom collected coupons from all the neighbors for the $7 portrait sessions at JC Penny. We hated going there – the photographer always made us say “I like boys” in an attempt to get us to smile – but how else was my mom supposed to get nice portraits of 6 kids every year on a budget? Luckily, times have changed, and these days we can get great photos of our kids at home. In yesterday’s post I explained how easy it is to set up a DIY home photography studio. I shared 5 different easy setups for photos, and today I’m sharing five more – giving you 10 different photo backdrop/background options for taking great pictures of your kids. Click here for part 1 of this post, which covers DIY photo studio setups #1-#5.
(As I mentioned in part 1, all the setups in these posts involve IKEA products, but feel free to substitute other items you already own!)
PLEASE NOTE: YOU MUST ENSURE THAT ANY DIY BACKDROP IS BEING USED SAFELY. For example, any time you are taking pictures of a baby, you MUST have a spotter that stands near the baby at all times. Additionally, any “backdrop” should be secured so it won’t fall over. Please always have a second adult nearby to ensure safety.
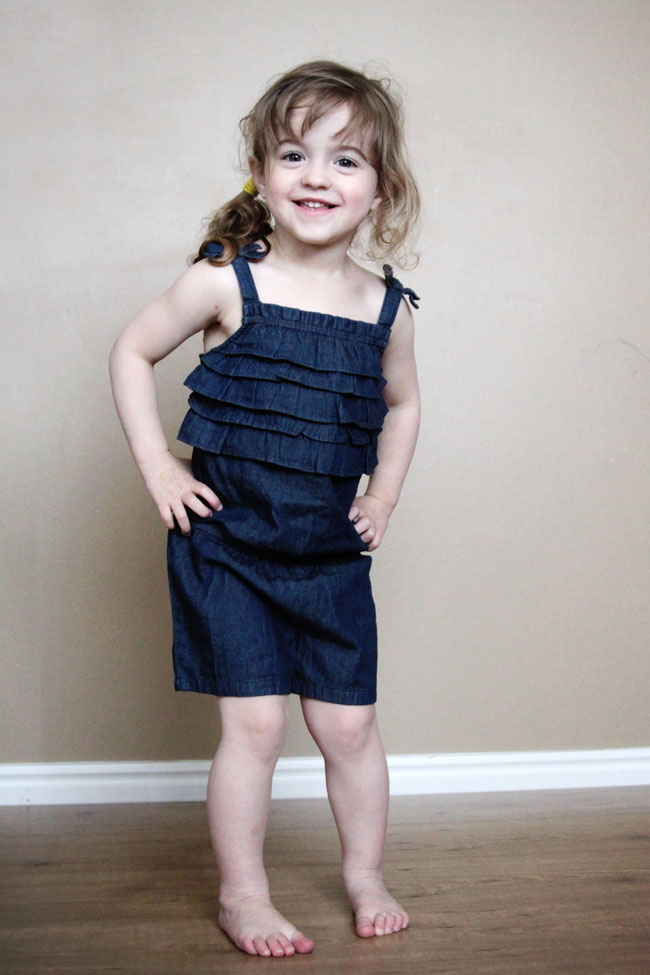
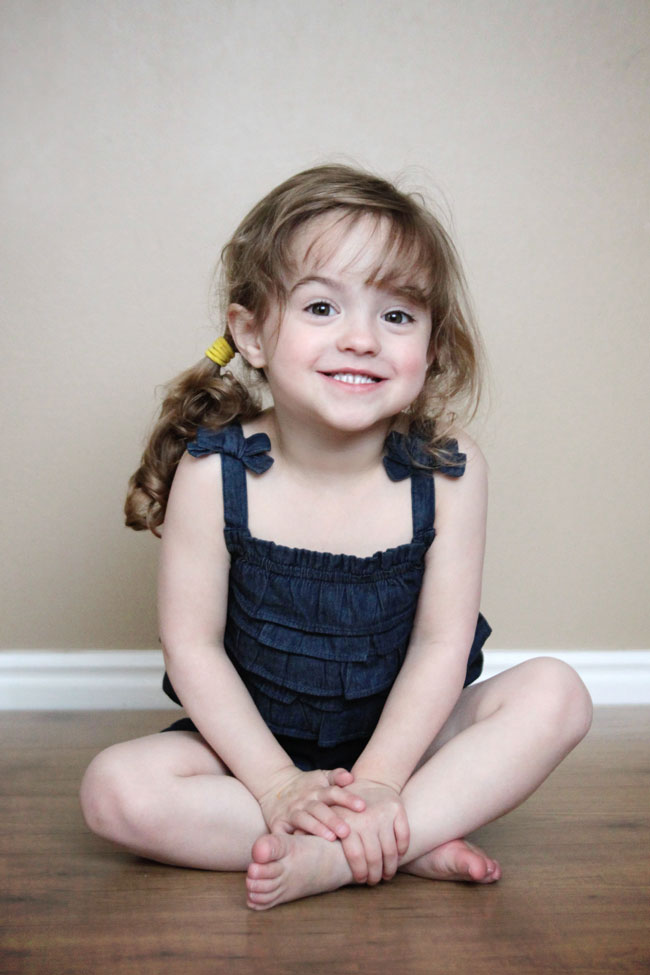
DIY photo studio setup #6: plain painted wall and laminate “floor”
If you have a plain wall in your house that gets good light, you already have the easiest photo backdrop ever. Pair the wall with a wood or laminate floor, and you have a very popular home studio setup, where you can get photos like these:
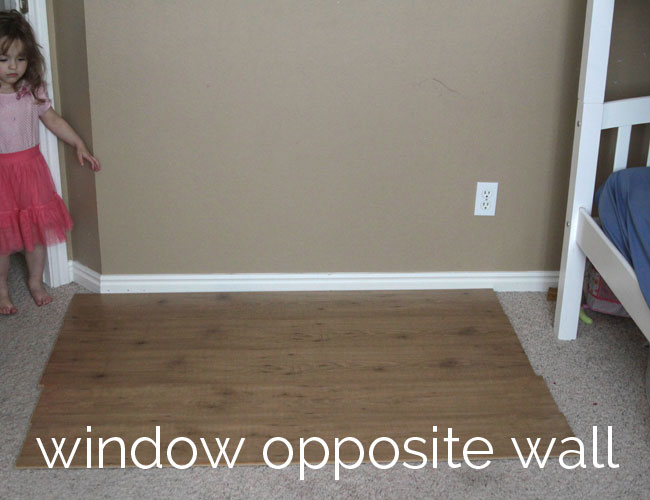
But say the wall you want to use is in a carpeted room – what then? This is when a single box of laminate flooring comes in handy. You can snap together five floor planks in two minutes, slide them up against the baseboard, and you’re set. I used the Tundra laminated flooring in the antique color finish, but I think darker finishes look even nicer. One box is about $30 and contains 9 planks – you’ll only need 4 or 5 of them for this setup.
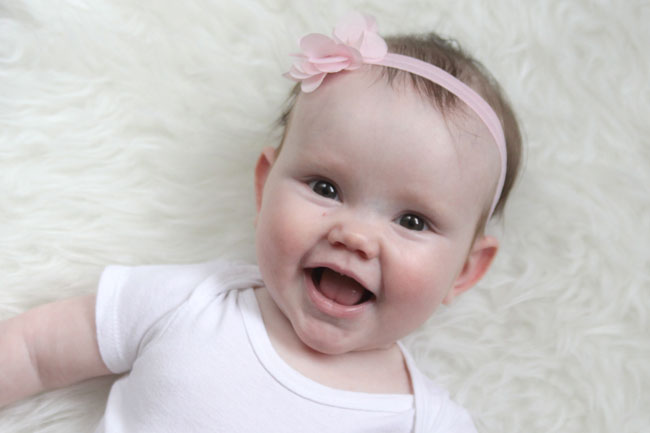
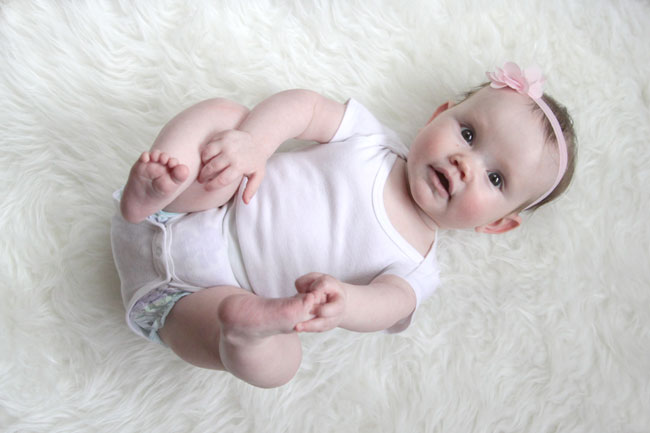
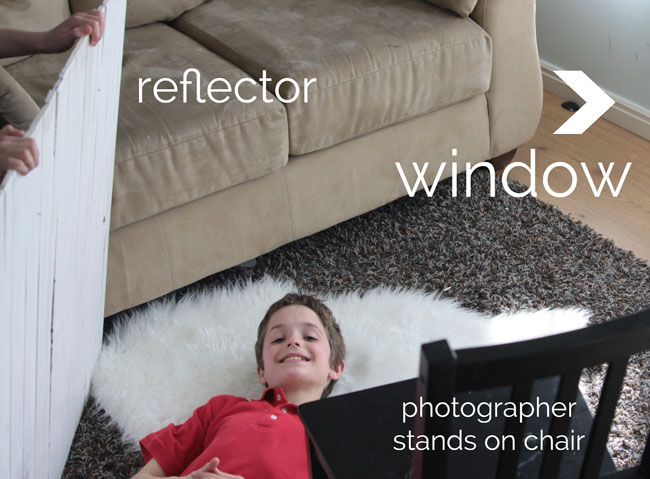
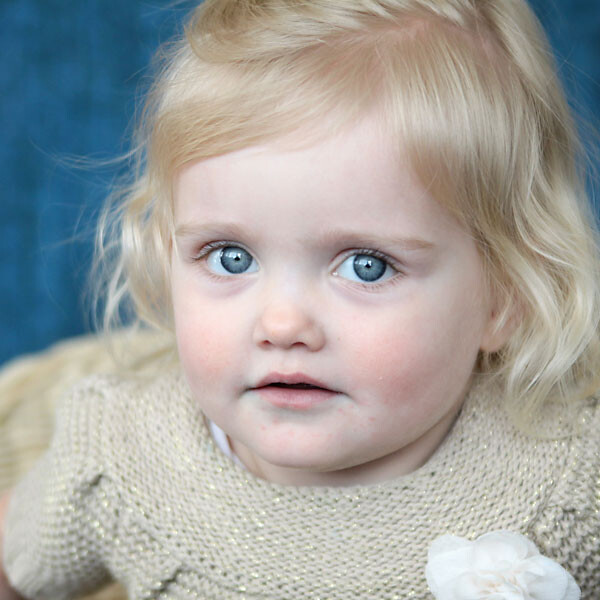
DIY photo studio setup #7: faux sheepskin rug
Rugs can make great backdrops when the person you are photographing is lying down and you’re standing on a chair so you can shoot from directly above. It’s perfect for photographing babies who don’t sit up yet:
And works well for older kids too:
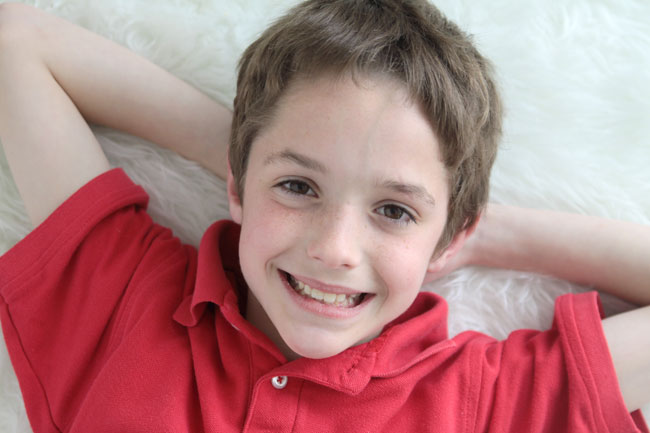
I used the Tejn faux sheepskin, which is only $10 (my kids are in love with how soft this thing is). When your subject is on the ground, the side of his face that is furthest from the light source (window) will be a little dark, so use a piece of white poster board or foam core board to reflect a little extra light onto the dark side of his face.
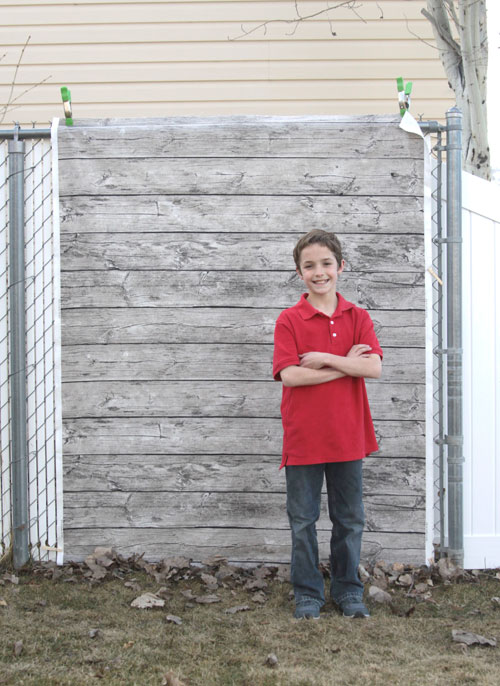
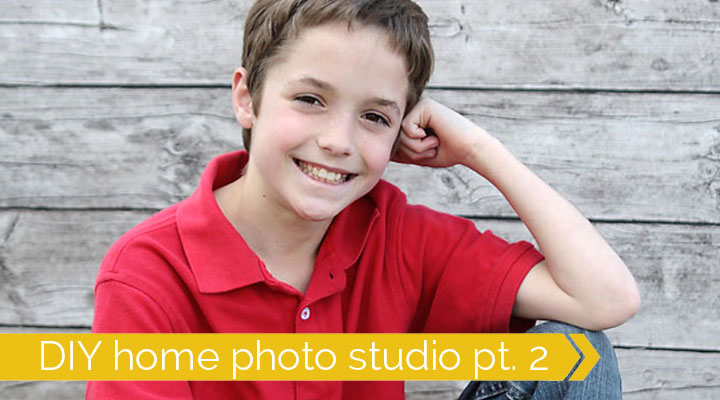
DIY photo studio setup #8: barn wood fabric used outside
A home photo studio setup really should include areas in your yard, where you can get great lighting, especially on cloudy days or near sunrise or sunset. My yard, however, doesn’t offer much in terms of nice background for photos, so I used to go searching for cool textured walls. No more! I took these fun barn wood photos right outside my house:
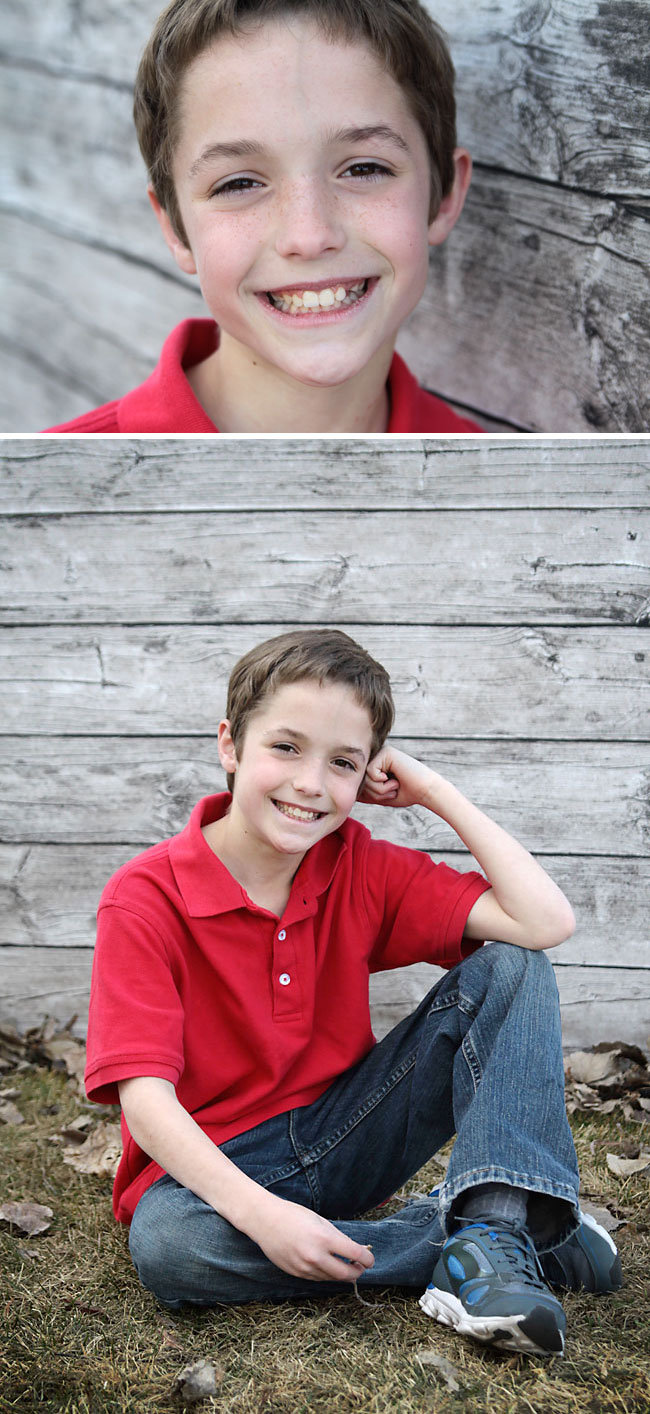
The secret is IKEA’s new Lisel wood-effect fabric, $14 for 2 yards. I just clamped the top of the fabric to our fence, and tucked the bottom of the fabric underneath some dry leaves from my yard. Instant rustic photo backdrop! Note: this fabric comes in two varieties – normal and plastic coated – DO NOT get the plastic coated or it may appear shiny in photos. For more info on getting good light outside, check out this post.
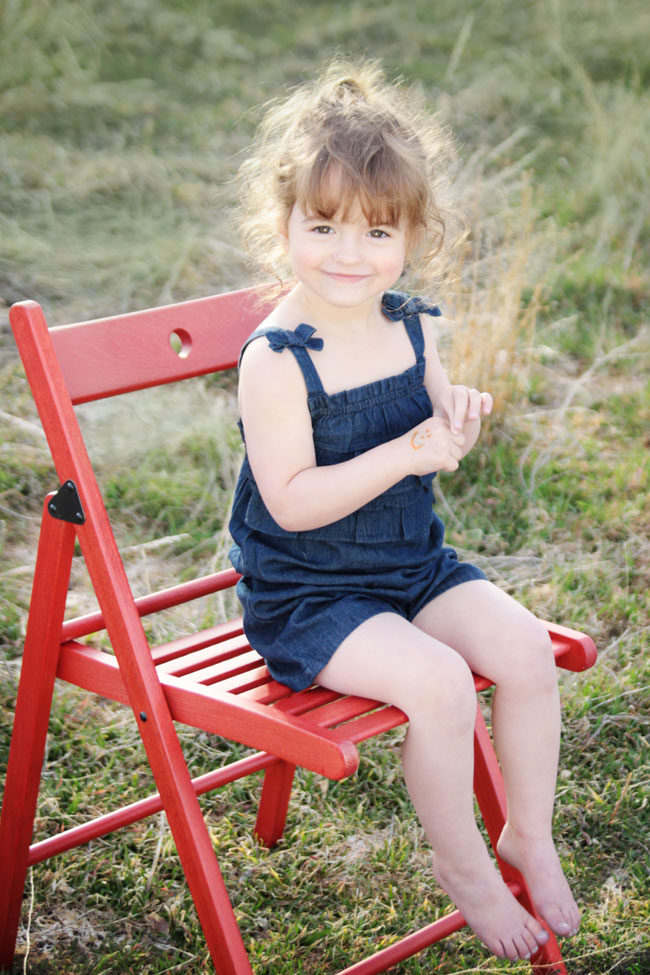
DIY photo studio setup #9: wicker chair on grass
One thing I do have in my yard is grass, and plain old grass can make a beautiful photography backdrop, even when it’s not terribly green:
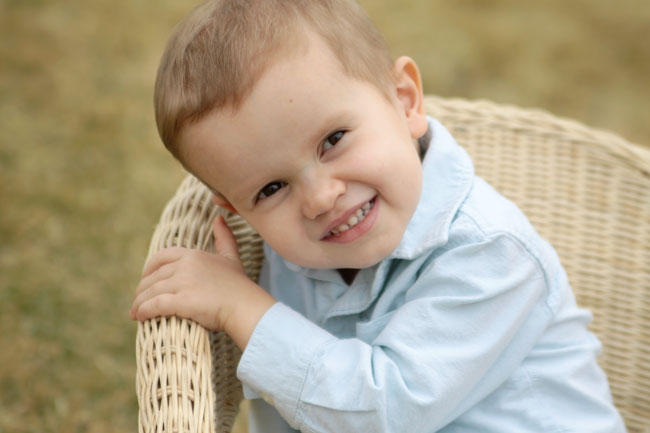
But when you’re photographing small kids, it’s almost impossible to convince them to stay still once you’re outside. This is where a cute kids’ chair can save the day! Plop the chair right where you want your child to be and there’s a good chance the kid who’s been ignoring your requests to sit still for a photo will hop right in. (Small chairs are helpful for indoor photos too!)
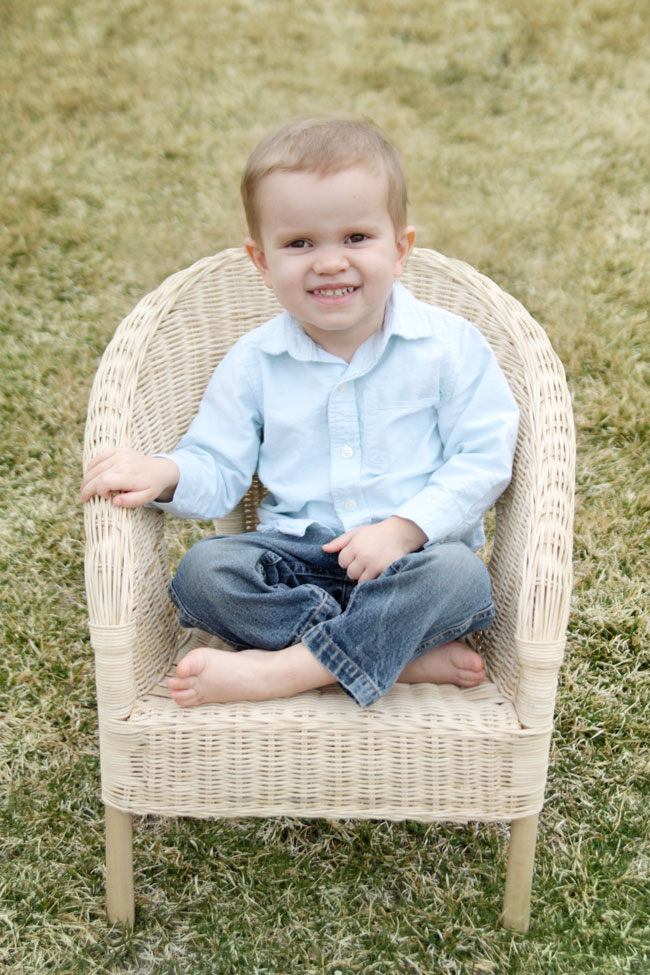
The key is using a child size chair – big people chairs aren’t nearly as enticing. I used the Agen children’s chair $20. It’s small and lightweight, looks good in a natural setting, and doesn’t distract from the photos.
DIY photo studio setup #10: folding chair used ANYWHERE
If you would like to extend your home photo studio setup to include some cool places in your neighborhood, a folding chair comes in really handy. It’s easier to get a relaxed, natural-looking pose from older kids when they are sitting rather than standing, and a folding chair means you can have your subject sit even if it’s wet or muddy out. Additionally, you can use a chair to change up your pose options a bit: have them sit front, to the side, or even straddling it backwards for variety.
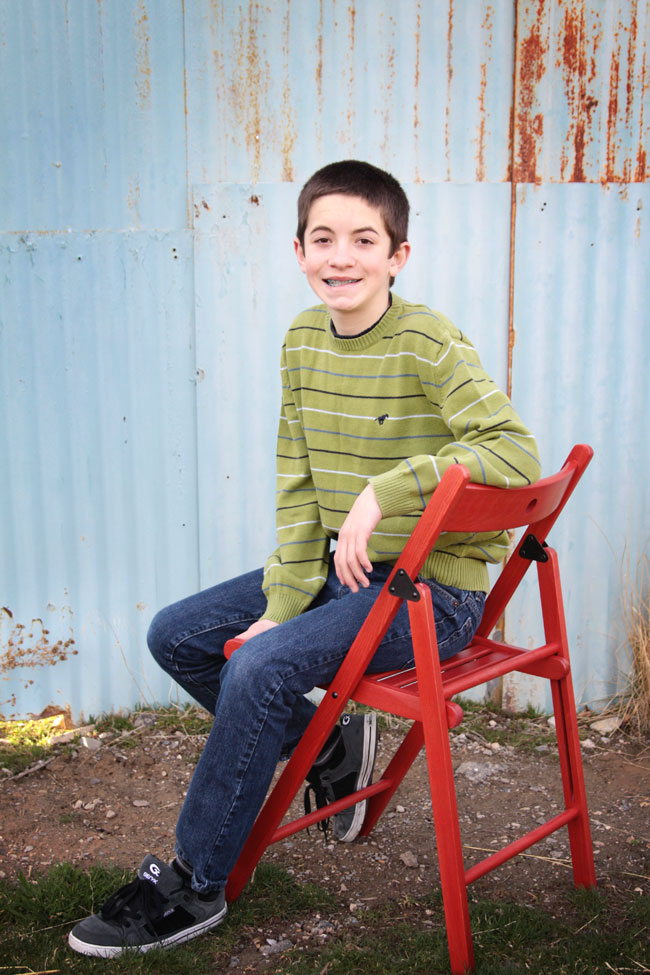
I used the Terje folding chair , which is $17. It folds completely flat, making it easy to transport, and comes in a couple different colors. It’s perfect for adults and teens, but works for younger kids too, as long as they are old enough to sit steadily on their own.
That’s it! Ten different easy setups for a DIY home photo studio. If you want even more ideas for photography backgrounds and backdrops, you can check out my DIY background board tutorial, or 20 DIY photography backgrounds. (Remember you can find home photo studio setups #1 – #5 here.)
alice ware says
i do photography and am getting a lot of great ideas i will try out. thank you for sharing
Gill Finch says
Love your ideas definitely getting the lovely ikea throw for photos with my baby
Erica says
Wow you have no idea how helpful this is to me.! And the money I’ll save!! God Bless you for putting the time in to making these tutorials. May all that you have given come back to you.
Connie says
These are great tips! They are very helpful.
Thanks for sharing