
Today is the second installment of Eight Steps to Better Photos on AUTO. Most people think the only way to really improve their photos is to learn to shoot on manual mode, and it’s true that using manual gives you the most control over the finished photo. But what if you don’t have the time or energy to invest in learning about exposure and aperture and all the other details of manual? That’s where this series comes in. There are plenty of things you can do to greatly improve your photos even when shooting on auto, and every Friday for the next eight weeks I’ll share one of them with you. Step one | Step two | Step three | Step four | Step five | Step six | Step seven | Step eight
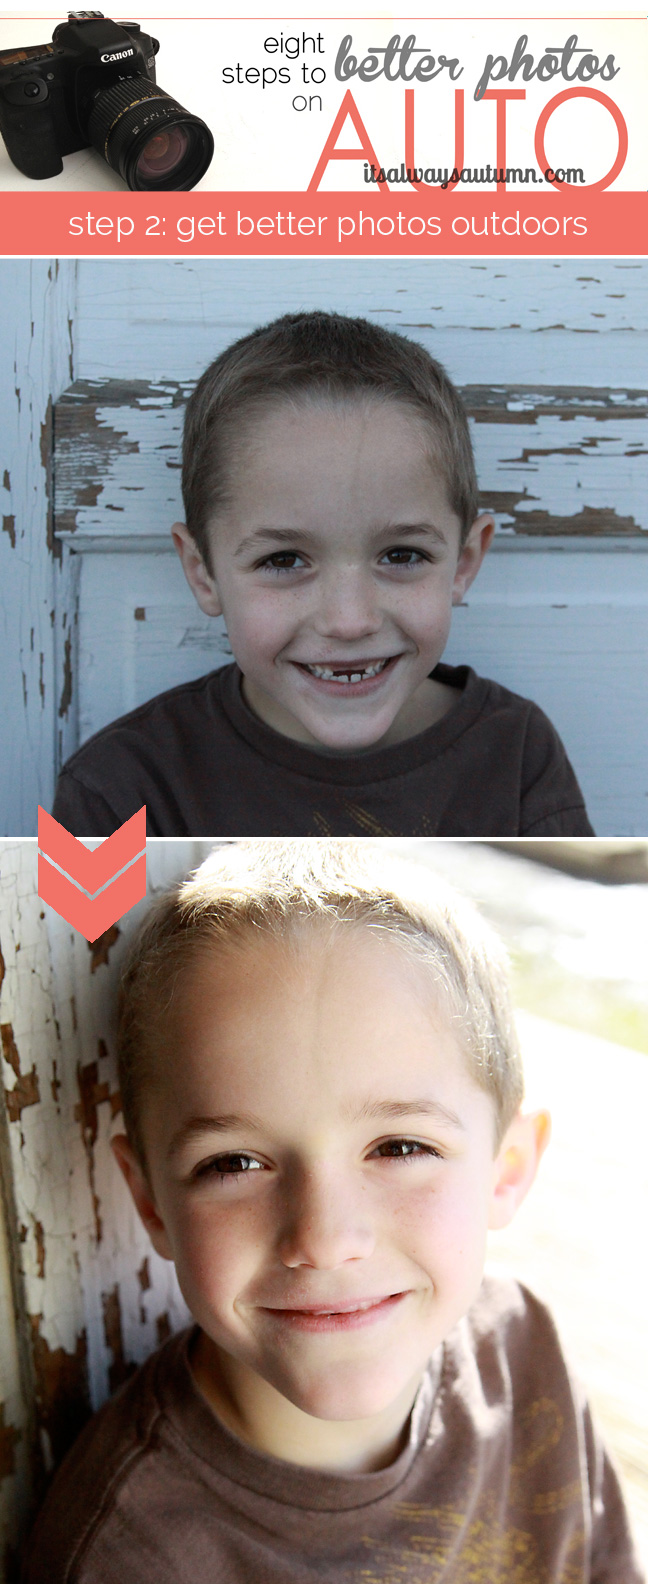
Hi everyone! So last week I told you to turn off your flash and use natural light to get better photos. Click over if you missed it – you’ll be amazed at the difference it makes in your photos. Today I’m going to talk about taking photos outdoors, because that’s the best way to get natural light (i.e. light from the sun and sky as opposed to artificial lights). Outdoor lighting makes everything look better – just take a look at these cookies for proof:

The photo on the left was taken in the kitchen, right after they came out of the oven, while the photo on the right was taken out on the porch – can you believe how much better the outside picture looks?
I take as many photos as I can outdoors to get the very best light (if I want to shoot inside, I take photos near a large window or in my garage.) However, it’s not as simple as walking outside and snapping photos. You can run into a number of lighting problems outside:
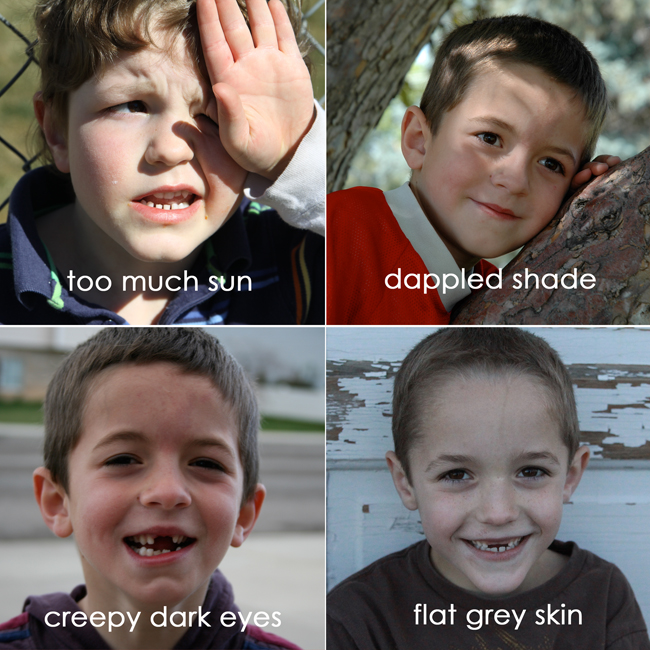
Directly sunlight results in harsh highlights and shadows as well as squinted eyes. Moving into the shade can help, but if it’s dappled shade (like from tree leaves) you’ll still end up with weird splotches of brightness. Full shade is often a good idea, but too much shade can leave skin flat and grey, and cloudy days can sometimes result in super dark zombie eye sockets. So how do you navigate sun and shade to get the great outdoor light I’ve been talking about?
1. Shoot on a day with high clouds for gorgeous light. For the simplest way to get great outside light, wait for a day when there are high white clouds in the sky (the clouds should look far above you). This softens all the light so there’s no harsh highlights and shadows, but a high white sky (as opposed to low grey clouds) still gives off plenty of light so skin and eyes will still look bright.

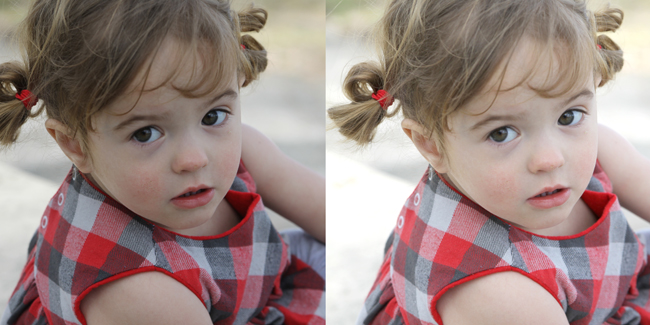
2. On sunny days, move your subject into the shade. Sometimes moving your subject a few inches to the left or the right can have a huge impact on your photo. In the first photo below my daughter was in direct sun, which resulted in shadows on her face from her hair and shadows on her chest from her chin. I looked at the picnic table she was sitting on and saw that a few inches away was a shady patch, so I scooted her over and took another photo with her in the shade – it make a huge difference (both photos taken on auto).
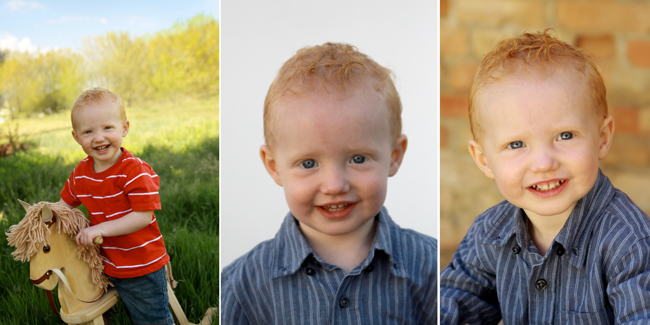
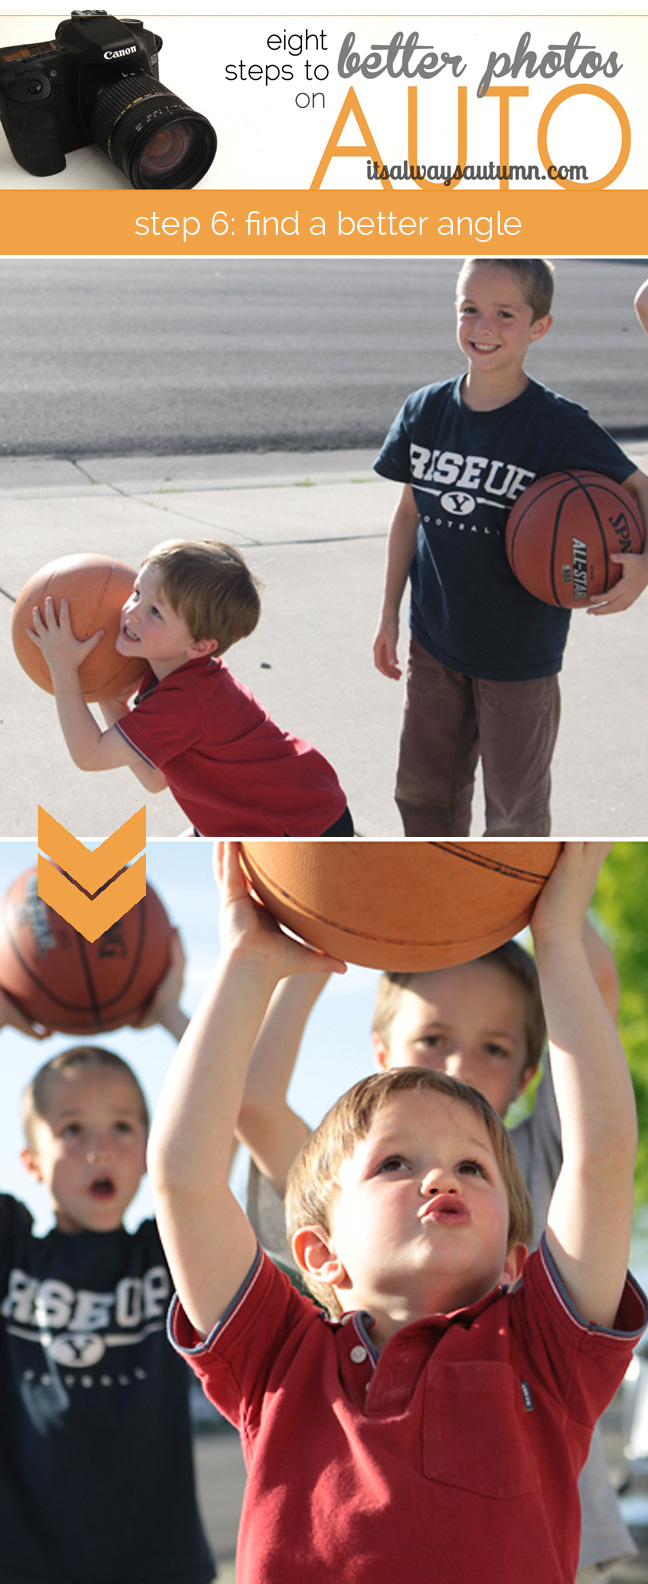
3. Position your subject in the shade, but looking out toward the light.
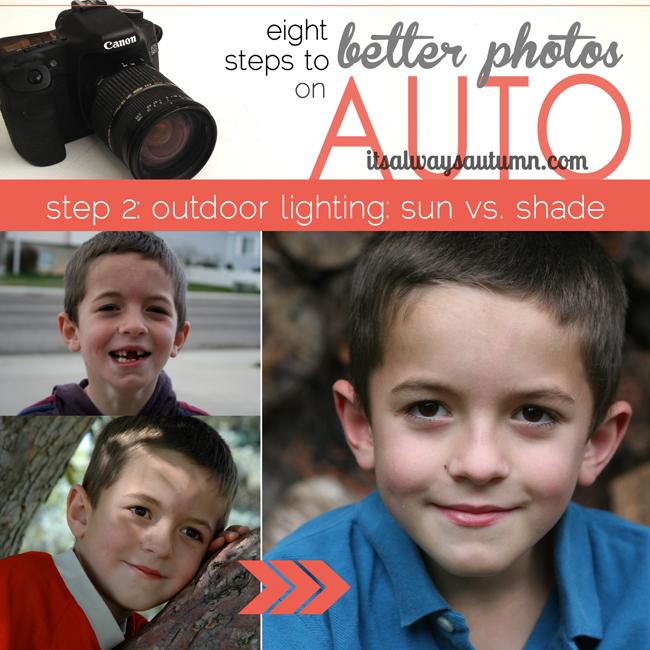
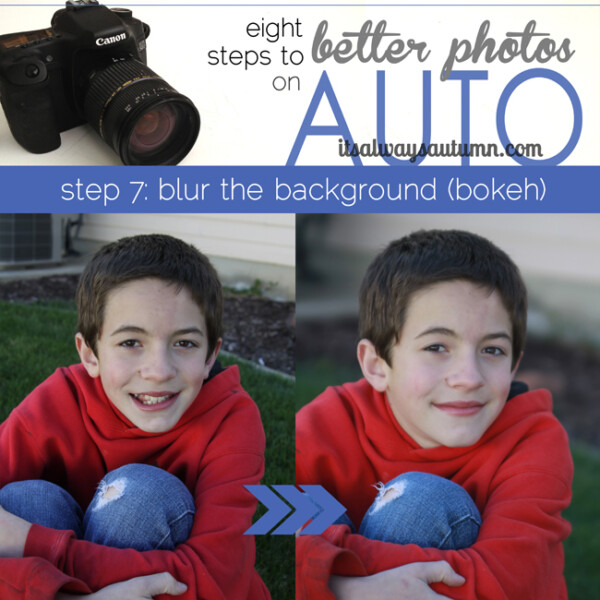
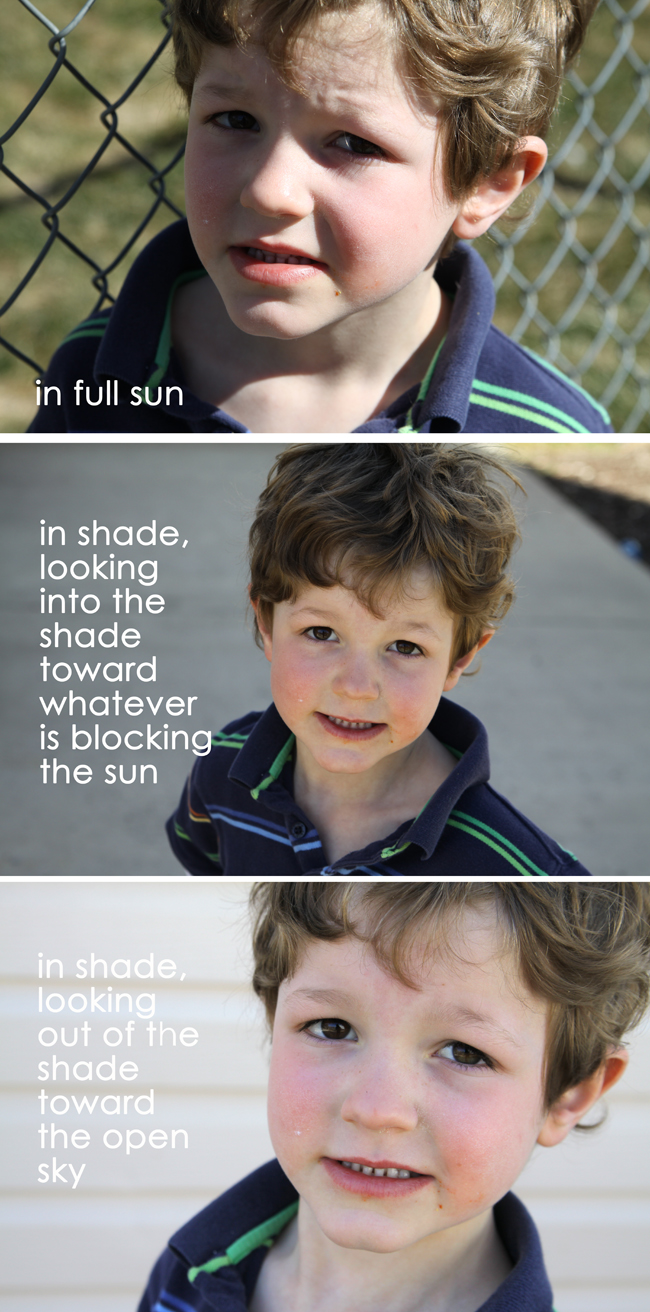 Where your subject stands in the shade makes a big difference as well. Obviously, the full sun photo isn’t great. The second photo, while better, still isn’t as good as it could be because the boy’s eyes are dark. That’s because he’s standing in the shade and looking into it (toward the wall or tree, or whatever else is blocking the sun). This makes the light on his face even, but not very bright. In the third photo he’s still in the shade, but now he’s facing out of the shade, toward the open sky. There are now small catchlights in his eyes (white spots) that brighten up his face, making an even better photo.
The difference between photo #2 and photo #3 isn’t super dramatic here because these pictures were taken on a very sunny day, but if it’s cloudy out it’s even more important to be sure your subject is facing out of the shade toward the open sky for a nice bright photo.
(I personally think almost all photos of light-skinned people taken on AUTO can use a little brightening. Check out this post for more info.)
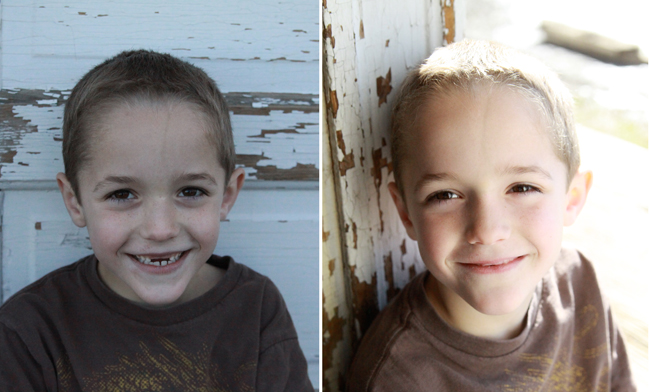
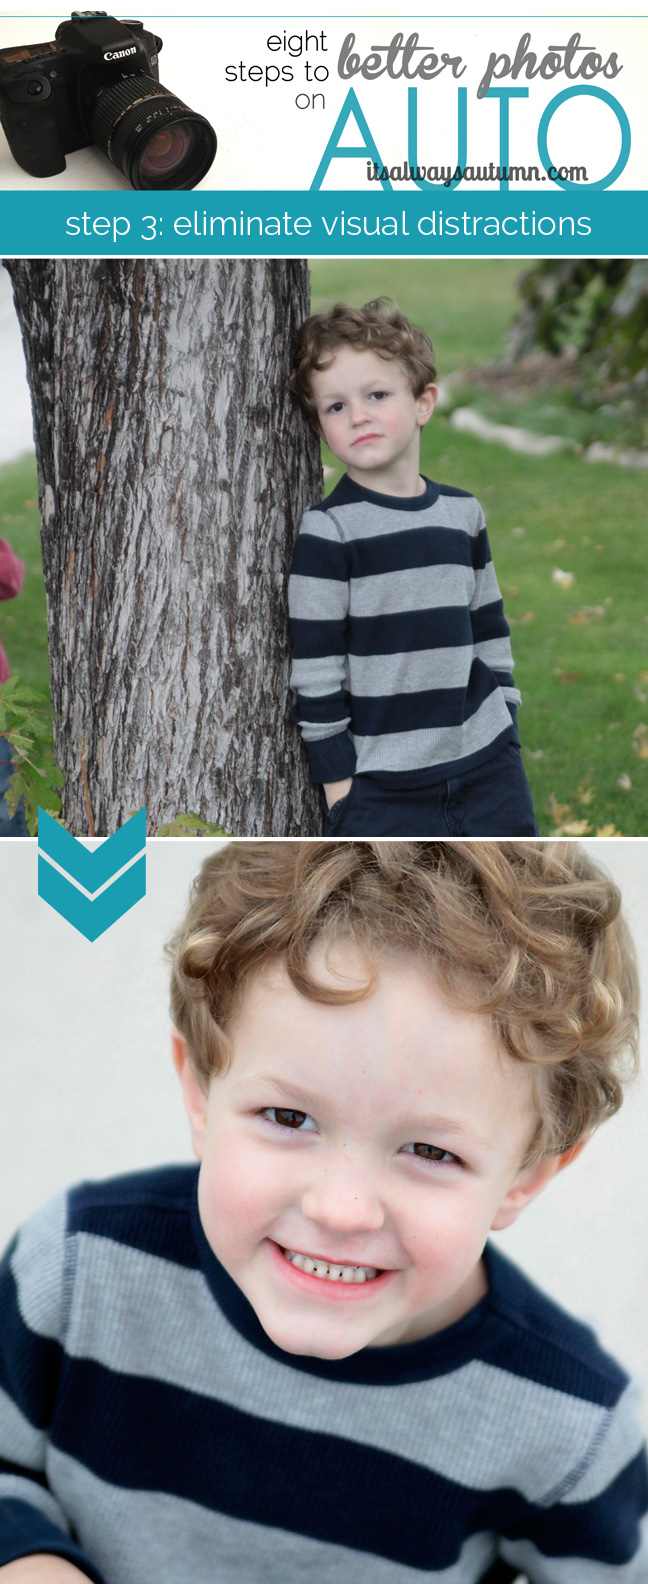
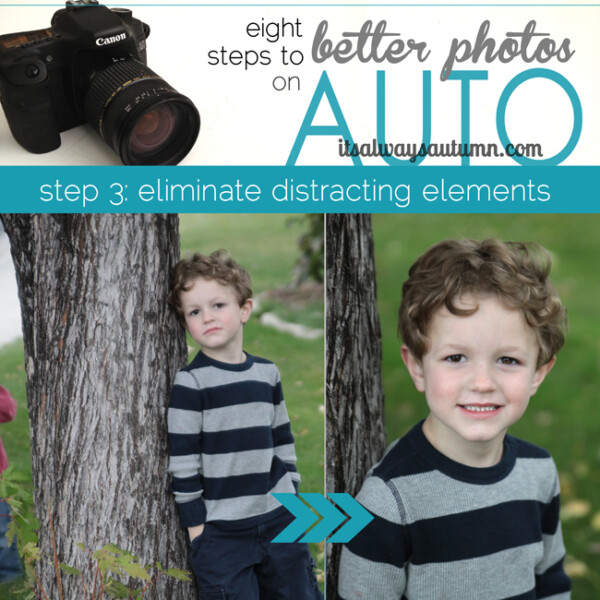
Here’s another example. In photo #1 the boy is looking into the shade, making his face dark. It also means that the background is half shady and half bright, which is kind of distracting. Photo #2 is better, but we were in an alley with buildings on both sides of us, so it’s still a little dark. Photo #3 is the best of this group; the boys’ eyes are tilted up toward the open sky and are now a much brighter blue.
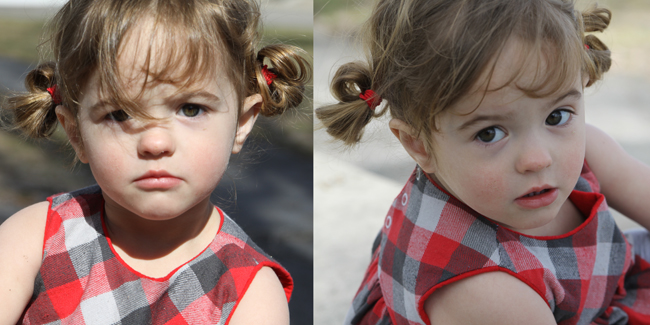
4. If there’s no shade to be had (or if you can’t move your subject) turn their face away from the light for an evenly lit photo. In the photo below my daughter was on the toys at the park, and she wasn’t about to walk away from them into the shade for me to get a better picture. In picture #1 the sun hit the side of her face and gave her the harsh highlights/shadows problems we’ve discussed. But when I moved a few feet to one side and called to her to look at me, her head turned far enough away from the light to eliminate the problem. (This is called backlighting, when the light source is behind your subject, and can occasionally be tricky for your camera on auto. Take a lot of pictures so you’ll be able to choose the best one, and brighten as needed.)

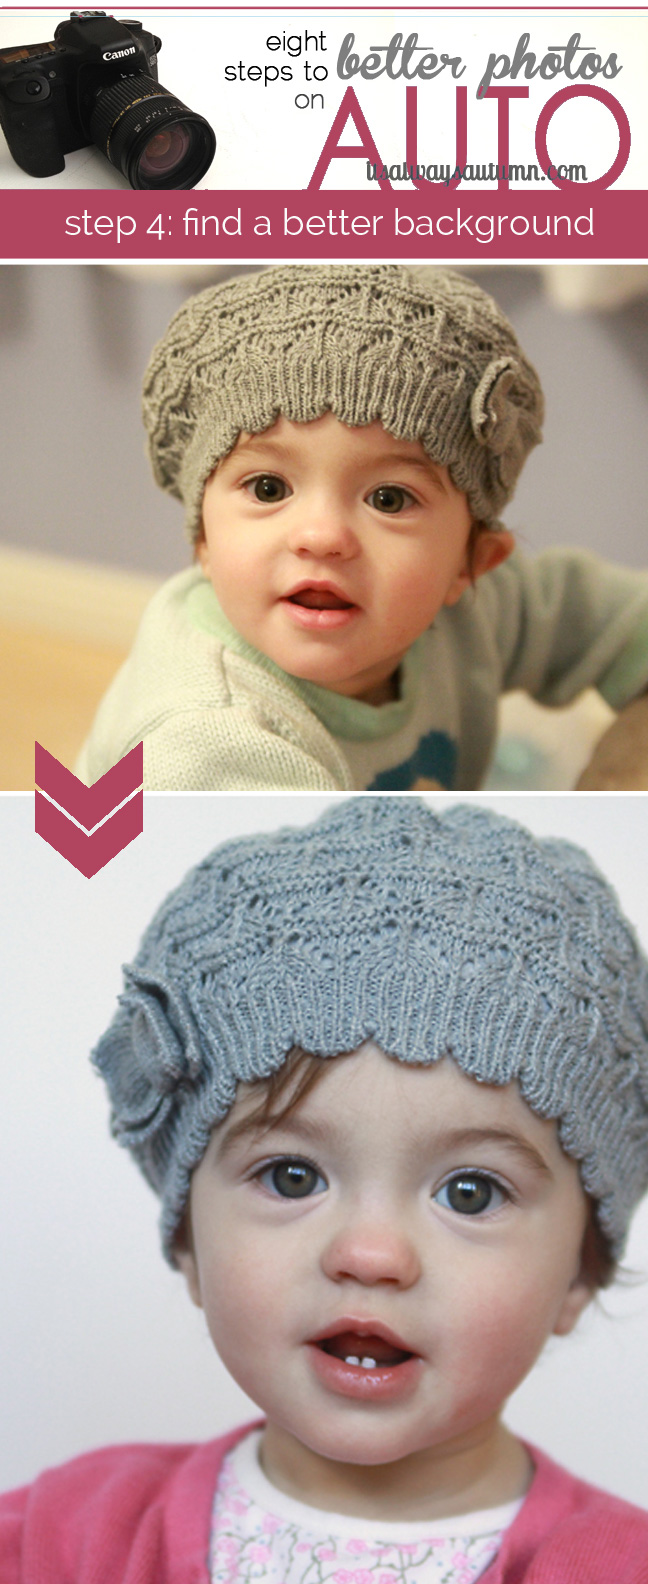
5. Avoid shady areas on a cloudy day. Now, when it’s cloudy out, it can be pretty hard to tell what’s “in the shade” and what’s not – since everything looks like it’s in the shade. However, there are still areas where the light from the sky is being blocked by something, and on a shady day those areas will be extra dark. If you put your subject in one of these areas you’ll get flat, grey photos, like the first photo below. For soft pretty shadows and highlights like you see in the second photo below, you’ll need more light than you can get in the shade on a cloudy day.
On cloudy days (with a high white sky, so there’s still plenty of light) I like to position people like this:
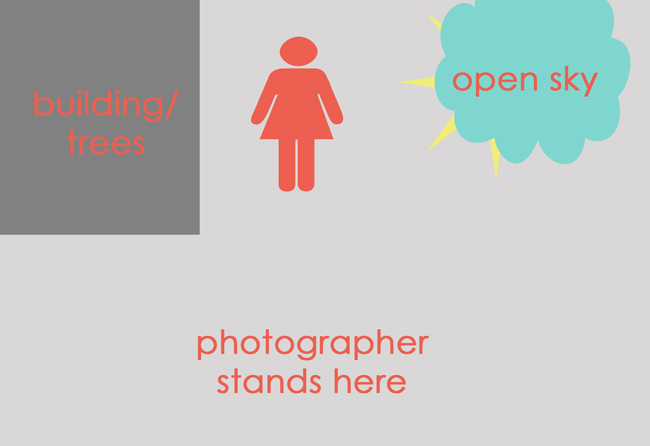
Have the person stand so there’s something blocking the light to one side of them (house, trees, etc.) and open sky on the other side. This will highlight the sky side of her face while gently shadowing the shade side (this is DIFFERENT than the harsh highlights and shadows we got above with full sunlight because the transition from bright to dark is gentle here, not a harsh line). It makes for very beautiful, flattering lighting:
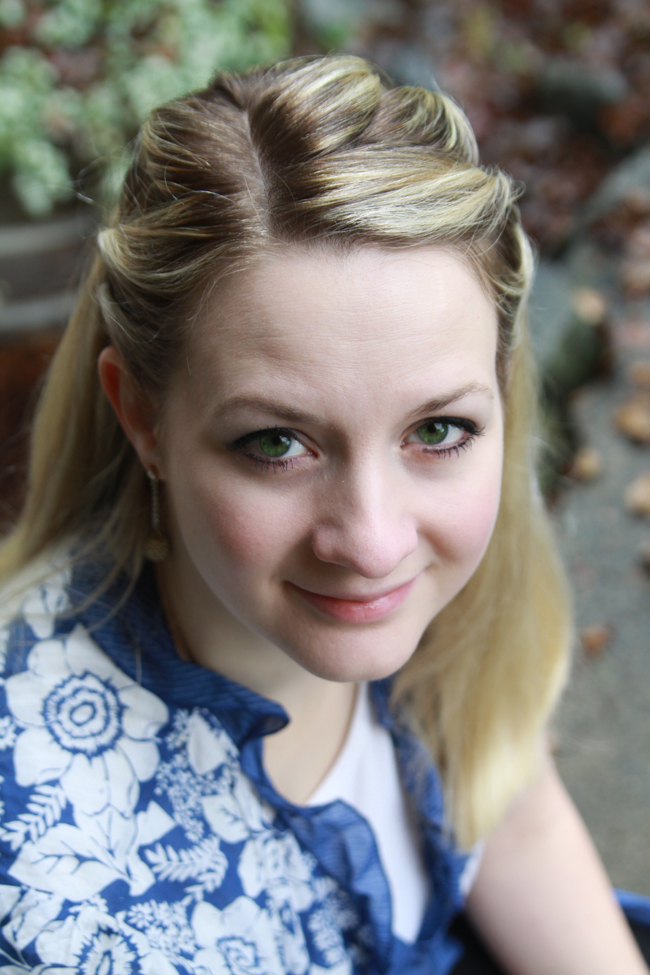
(That’s one of my five gorgeous sisters.)
So that’s it! Practice taking photos in different areas of your yard, sun and shade, to get used to where you should position your subject for great photos outside using beautiful, natural light.
That should be the end, but since we’ve all figured out by now that I am INCAPABLE of writing a short post, I have a few last things to mention. First, sometimes you have to be careful about direct sunlight even when you are inside. If the sun is streaming right in your window you can still end up with those pesky harsh highlights and shadows. Move your subject away from the window, out of the directly sun, for better photos (more on using window light here).

And lastly, I mentioned that photos of light-skinned people taken on Auto almost always need brightening – that’s just because of how you camera chooses the exposure (photos of dark skinned people sometimes turn out too bright on auto). Take a look at the difference a little brightening can make:
Alright, I’m finally finished, but don’t forget to check back next Friday for the next installment!
The rest of the series (click each photo to go to the post):


Samantha says
Another great post.
Jacqueline says
Thanks. I love the simplicity of your tips!