It's Always Autumn

creative tutorials for everyday life

  • Holidays
  • Holidays
    • back to school
    • birthdays
    • Christmas
    • Easter
    • Halloween
    • July 4th
    • Mother’s Day/Father’s Day
    • teacher appreciation
    • Thanksgiving
    • Valentine’s
  • Crafts
  • Crafts
    • crafts + DIY
    • handmade gifts
    • photo crafts
    • kid crafts + activities
  • Recipes
  • Recipes
    • bread
    • dessert
    • main dish
    • side dish
  • Sewing
  • Sewing
    • free sewing patterns
    • sewing for women
    • sewing for kids
    • how to sew
    • gifts
  • Photography
  • Photography
    • beginning photography tips
    • posing tips
    • photo editing tips
  • Tips
  • Tips
    • parenting tips
    • travel tips
    • books I love
  • FAQ

beginning photography tips photography
March 7, 2014

how to set up a DIY photo studio in your home {part 1}


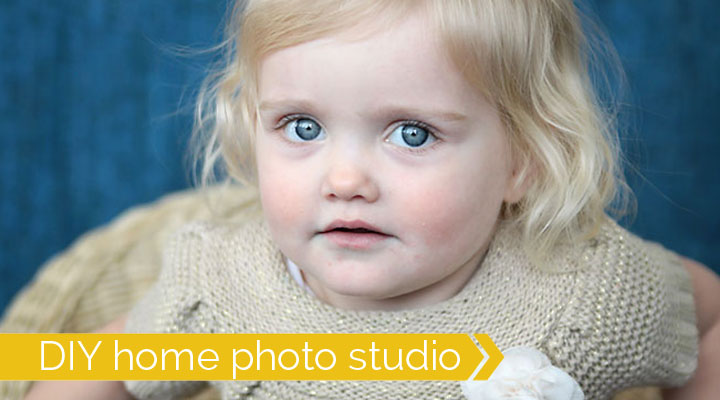
I’ve said it before and I’ll say it again: taking photos of your kids at home is better in just about every way than relying on school portraits or  the “photo studio” attached to a large retailer, where the photographer often spends more time trying to upsell your portrait package than she did taking pictures in the first place. You can get professional-looking photos at home with a simple DIY home photo studio. I’ve talked before about how to get great photos at home, but in this post (and tomorrow’s post) I’m going to walk you through 10 different setups for a DIY home photo studio. Each setup uses a different backdrop or background, giving you lots of variety, but all of them are quick and easy to set up and use items you can store in a closet or your basement. (Part 2 is now available here!)

How to set up a home photo studio! Get great photos in your own home with these easy photo set ups.

There are lots of example photos coming up – so many that I had to split this post into two parts, so be sure to click here for the rest of the post.  I do want to note that all props in this post are from IKEA. I approached IKEA about using their products in this post because their stuff is good quality at a great price, and they have just about anything you’d ever need. However, don’t feel like you need to buy everything you see here in order to setup your own home photo studio – you may already have items in your home that will work. {IKEA provided the items shown in this post to me free of charge.}

One more thing before we get to the photos: you WILL NOT get good photos unless you pay attention to the light. Please read this post for an explanation of what you’re looking for when it comes to using natural light inside your house. Alright, here we go!

DIY photo studio setup #1: Use a curtain as a backdrop

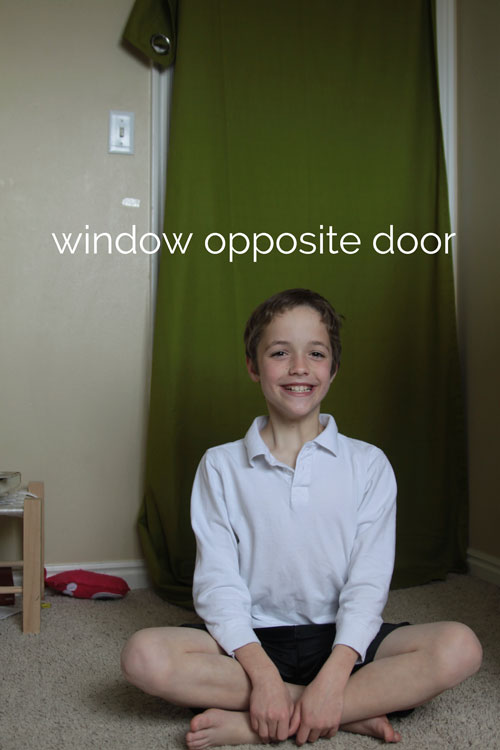
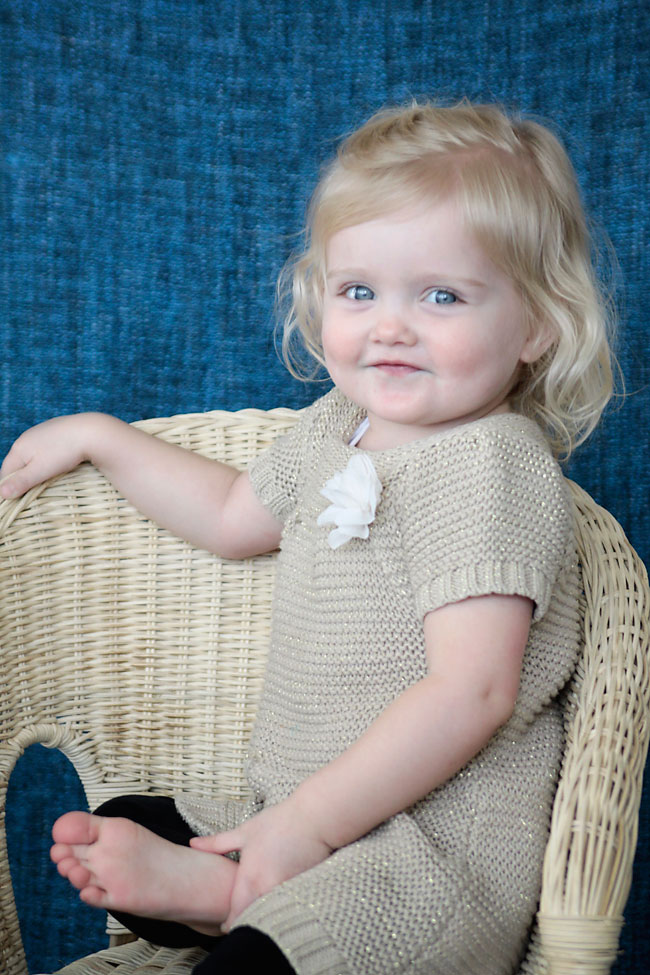
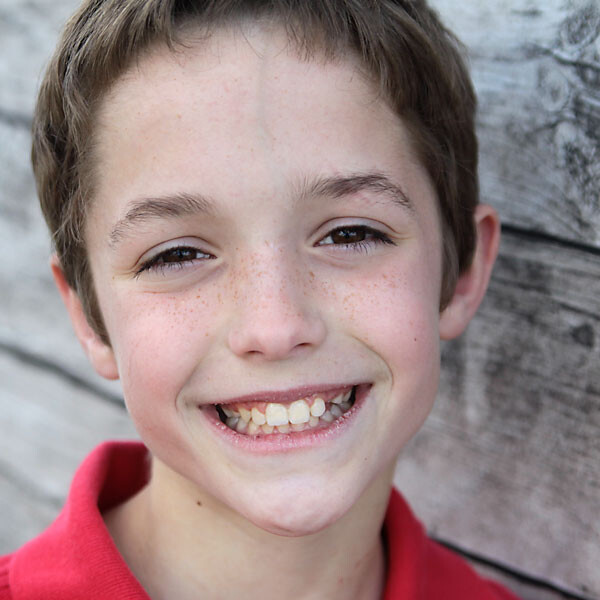
Curtain panels are very convenient for use as a backdrop – they’re nice and tall, generally at least 4 ft wide, store easily, and are available in just about any color you could want. You can use curtain panels with a DIY PVC backdrop stand or an adjustable backdrop stand from amazon (affiliate link). Or, you can make life really simple and just tape or pin the panel to a wall, clamp it to a bookshelf, string it up in a doorway, or throw it over the top of a door, which is what I did for this photo:

A young boy who is smiling at the camera in front of a green background  

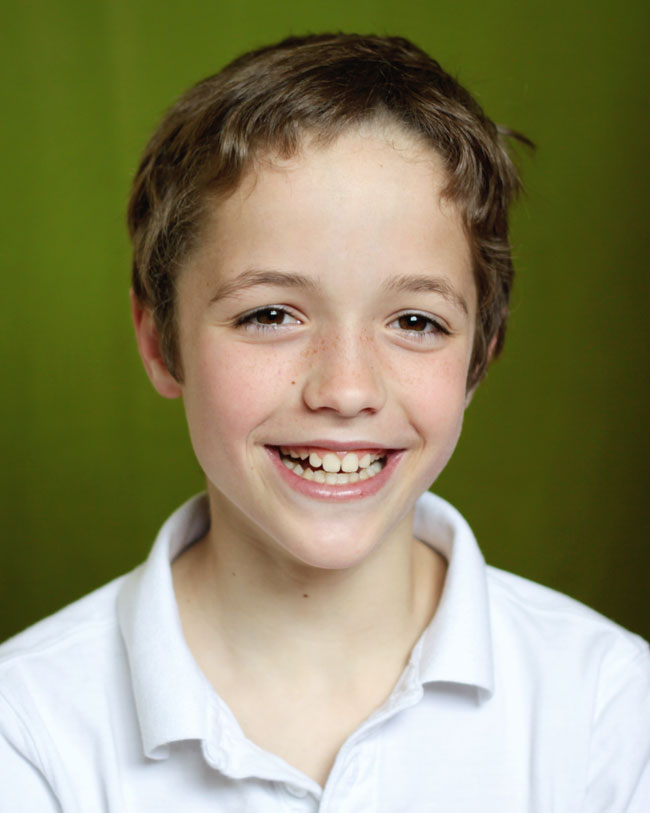
The curtain I used was found in the as-is section at IKEA for a few dollars, half of a Mariam curtain pair, and made a great background in a pretty color (imagine how great this would look if your child has bright green eyes!). Plus the entire setup + picture taking took less than 15 minutes.

Little boy sitting in a bedroom with green curtain panel hanging on a door behind him

DIY photo studio setup #2: Blanket or throw

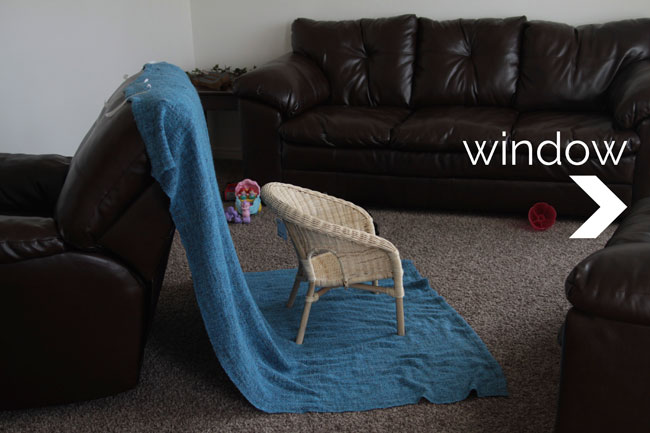
Blankets are usually not quite as tall as curtain panels, but their main advantage is that they don’t show wrinkles. You might have to iron a curtain panel before use (or toss in the dryer), but blankets, especially those with some texture, can generally be taken straight from the couch or basement and used immediately. To use as a photo backdrop, just tape the blanket to the side of a crib, the back of a chair or couch, or directly to a wall and position your child in front of it for photos like these:

A little girl sitting on a chair in front of a blue blanket

A little girl in a wicker chair smiling

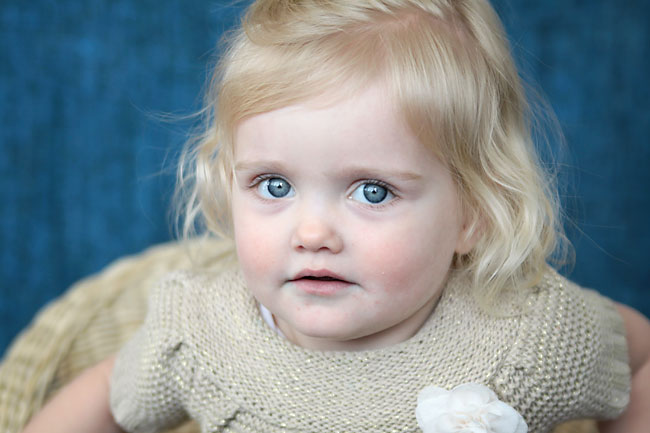
Here I used the gorgeous Gurli turquoise throw that’s only $13 and draped it over the back of a chair that I turned around so it would be facing a large window.

A wicker chair set up across from a window with a blue blanket draped behind it

DIY photo studio setup #3: Textured blanket in newborn baby setup

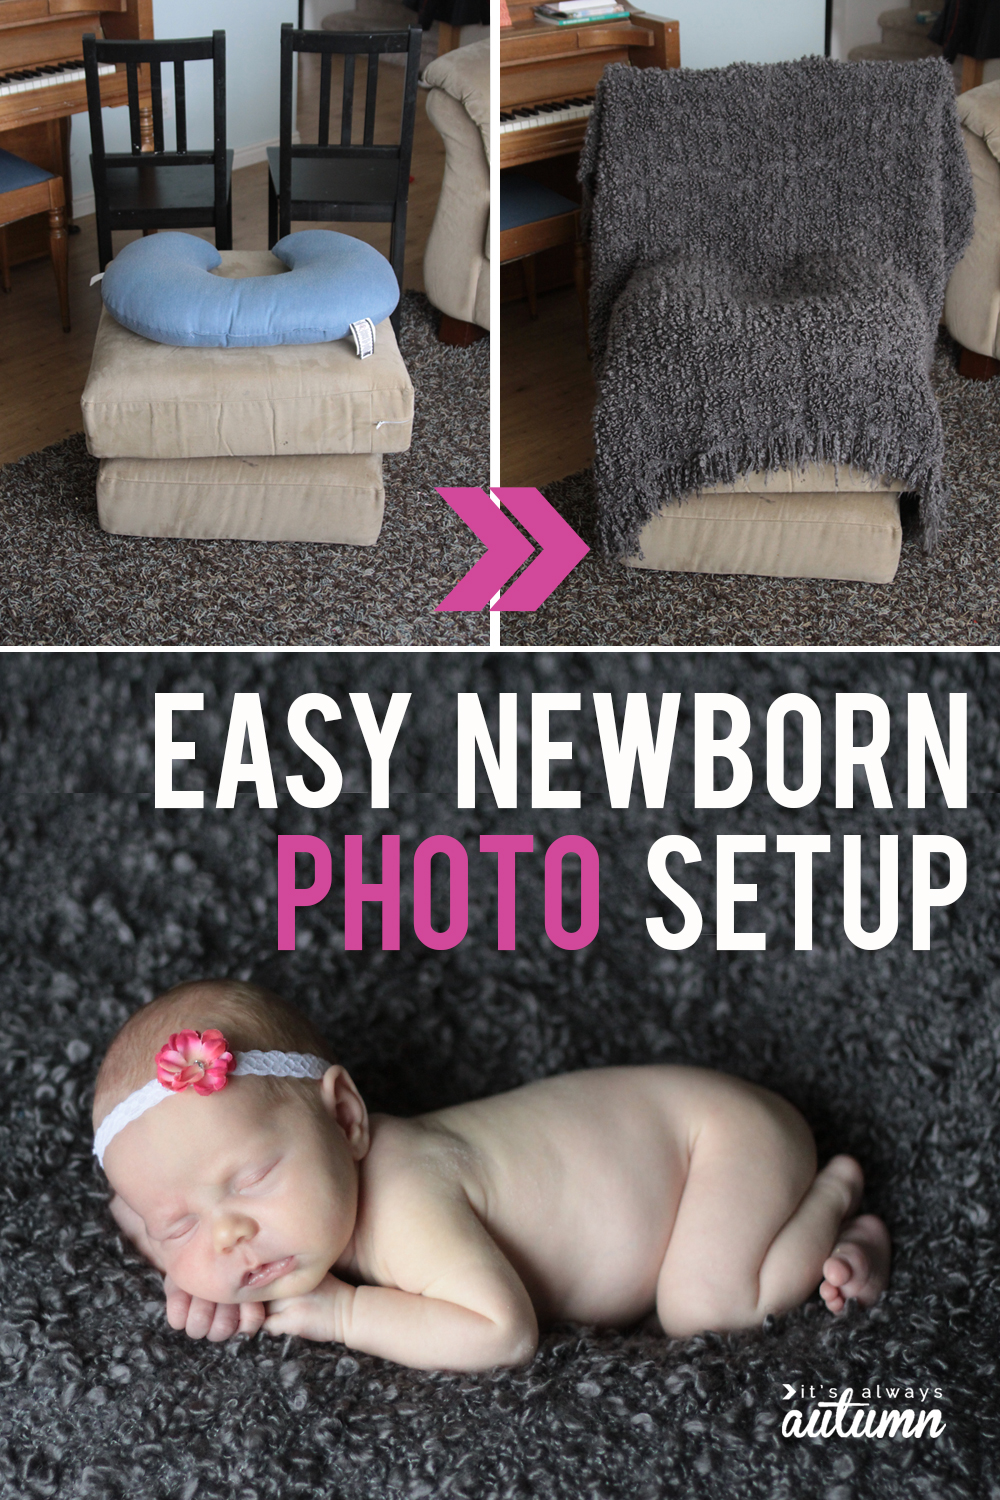
I love newborn photos that are very simple, allowing the baby, rather than the pose or the props, to be the focus of the picture:

A newborn baby asleep on a grey blanket

The basic setup for newborn photos is really simple: grab cushions off your couch, chairs from your kitchen, and a boppy or other pillow, then cover it all with a pretty textured throw that doesn’t show wrinkles:

How to set up a home photo studio! Get great photos in your own home with these easy photo set ups.


Instant newborn photo studio setup! I used the Grey Ofelia throw, $30. It’s quite large and could easily be used in setup #2 for an older child. For lots more tips, tricks, and info regarding newborn photo shoots, click here.

DIY photo studio setup #4: Blanket used with an adult for babies 

When babies are awake it can be extremely hard to get them to stay still and happy for a photo. How you do you get a great photo when your baby’s feeling a little fussy?

A baby wrapped up in a textured white blanket

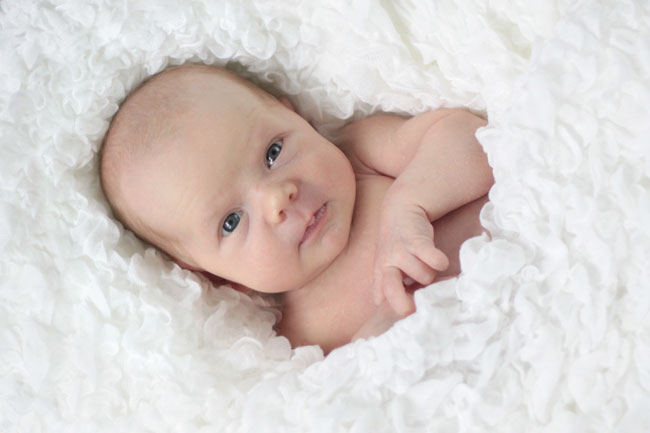
Grab a helper and have her sit in a chair, then cover her with a large blanket. Set the baby in the crook of her elbow (make sure baby is not sinking into her elbow, but propped on top), then wrap part of the blanket around baby to make it appear she’s swaddled. The adult will be able to hold baby’s arms and legs tight and keep her calm without being visible in the photo.

Mom covered with textured white blanket, holding baby wrapped in blanket

I used the White Ofelia blanket, $20. It’s very popular for use photographing babies – it’s large, soft, and stretchy so it’s easy to position however you’d like, and the dreamy texture means wrinkles are never an issue. You can even dye it any color you’d like.

DIY photo studio setup #5: Roller blind for a flat, seamless background

For a very professional look, a wide roller blind can be hung behind a child and then draped onto the ground he’ll stand on. It’s called a seamless background because there’s no “seam” or change in material between the wall and the floor.

A young boy looking at the camera with flat gray background

how to set up a DIY photo studio in your own home for amazing photos

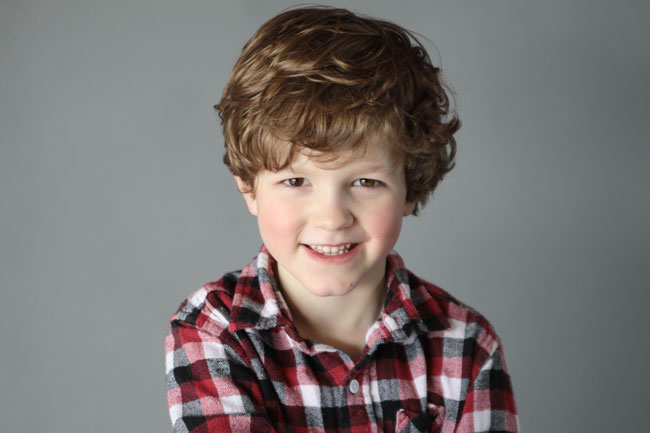
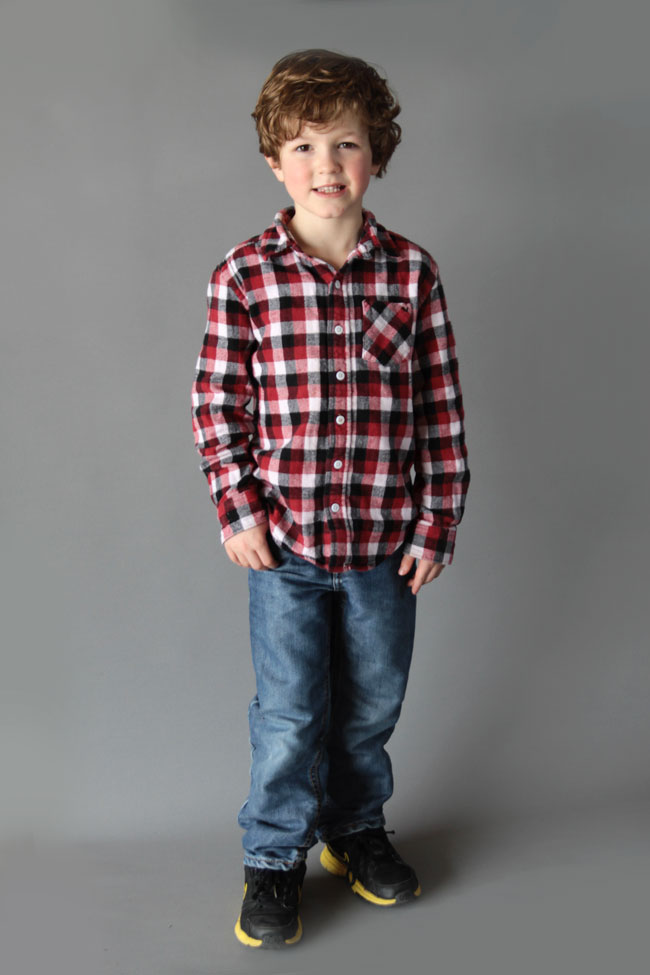
I set mine up in my garage, tucking the end of the blind under items on a shelf:

A grey window shade hanging from a shelf in a garage

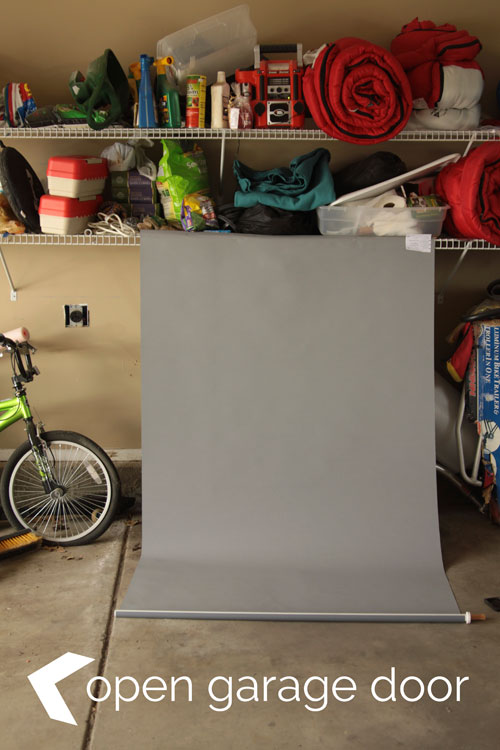
The Tuppler blackout roller blind (47 wide at $25) gives a great, flat background (I used the back of it). You’ll need to be quite careful not to wrinkle it while using, but since it rolls up it stores beautifully. It’s large enough to use for full-length shots for kids up to 5 years old, and can be used for closeups or half-body shots for older kids or adults. The flat look makes it very easy to edit, so even if you do end up with a wrinkle or two, don’t sweat it – you’ll be able to clone them out very easily.

Remember check out part 2 of this post for five more DIY home photo studio setups, including more setups that accommodate older children.

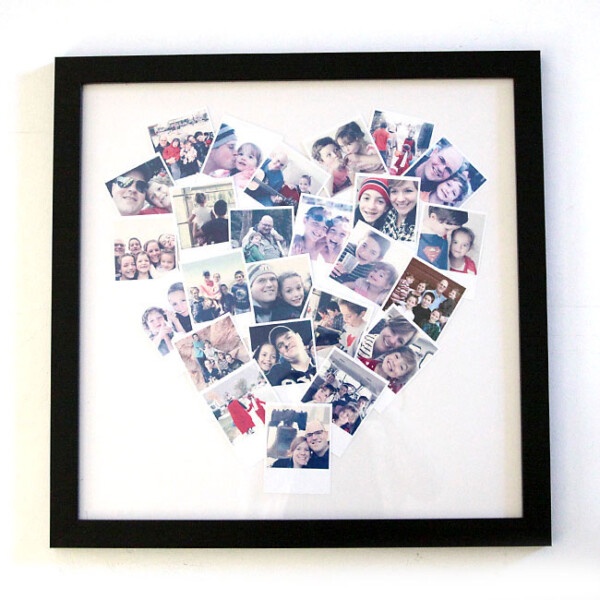
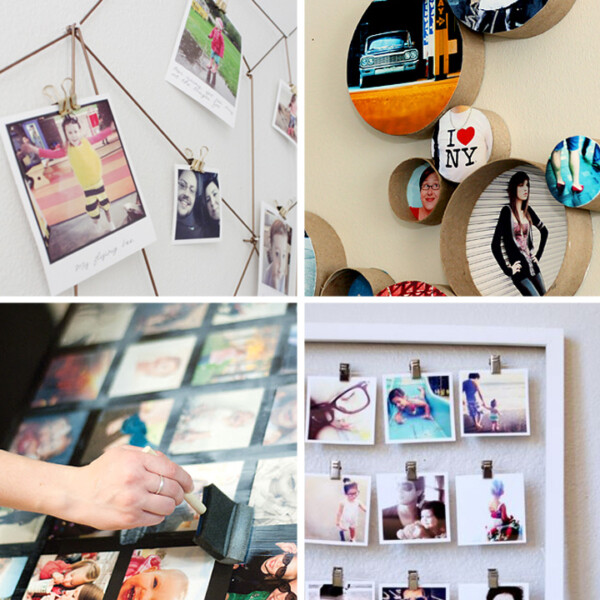
And for even more great backdrop ideas, visit this post: 20 genius DIY backdrops

One last note before I go: I’m not trying to tell anyone you should never hire a photographer, or that all you need to be as good as the pros is a camera and a background. I just want everyone to know that with practice and some basic background options you can get great photos of your own kids at home. Thanks!

A close up of a little girl looking at the camera

Want more photography tips?

Understanding focal length for more flattering photos

DIY newborn photos

How to get great photos on AUTO

Share this:

  • Tweet
  • Print

Home » photography » beginning photography tips » how to set up a DIY photo studio in your home {part 1}


58 Comments

free email series

NO FAIL CRAFTS + RECIPES

Get my favorite EASY craft and recipe ideas straight to your inbox!

« decadent double chocolate banana bread recipe
how to set up a DIY photo studio in your home {part 2} »

Comments

  1. Deanna {sewmccool} says

    March 7, 2014 at 7:27 am

    Such great advice, and I love the “pro photos” vs. the actual set up. Who knew that gorgeous gray backdrop is set up in a garage, hehe! 🙂 Pinning to my new “photography tips” board on Pinterest.

    Reply
    • Nana says

      May 28, 2015 at 8:43 am

      Kudos to you! My granddaughters were in the studio once a month for the first year of their lives. How much more fun and special it would have been had this Nana done the photo sessions myself!!!! I was behind the scenes directing things (the photographers had set poses they were to do, but “tolerated” -allowed – me to take creative license). Wish now I had completely done it ALL myself. THANKS ever so much for sharing!!!

      Reply
  2. Sara says

    March 7, 2014 at 1:14 pm

    I’m glad my daughter semi cooperated for you!! You take amazing pictures!!

    Reply
    • autumn says

      March 10, 2014 at 3:39 pm

      Thanks! People keep asking me who that gorgeous blue eyed girl is 🙂

      Reply
  3. Claudia Massie says

    March 12, 2014 at 10:35 am

    Thank you for the wonderful tips. It didn’t appear that you had good natural light in any of your set ups. What kind of lighting did you use?

    Reply
    • autumn says

      March 12, 2014 at 7:35 pm

      All the photos used only natural light – I tried to show in the pullback shots show where the window (or open door) was in relation to the subject. I shot in rooms with large windows (and my garage with the door open), so there was plenty of light. Someday I’d love to get a studio lighting setup, but we don’t really have room in our house right now, so I just make do with the windows!

      Reply
      • Igor says

        April 25, 2014 at 9:09 am

        Hi atum how are you My name is Igor hi. Cana you ask some think

        Reply
  4. Amanda says

    March 15, 2014 at 9:34 pm

    Wow, this is just perfect for me! I love taking pictures of my kids (who doesn’t?) but I sell things on-line too and I’m always looking for ways to make my pictures better. Thanks for the ideas!

    Reply
  5. Sherry says

    March 16, 2014 at 3:02 am

    I love this post!! Such simple ideas. I really struggle to get great indoor photos as I don’t have any blank walls. This post solves that problem. I’ll be pinning it so I don’t forget 🙂
    If you get a chance I would love you to check out my newly started blog and follow if you wish 🙂
    http://sewitsherry.blogspot.com.au/

    Reply
  6. Donna says

    March 19, 2014 at 8:54 pm

    Thank you so much for the wonderful tips.

    Reply
  7. mulika says

    May 3, 2014 at 6:47 am

    grate photos, but I would like to know witch camera? and your camera setup

    Reply
  8. Lynn says

    May 14, 2014 at 4:45 pm

    I wish I found this article when my son was a newborn. It would have been a big help since my husband didn’t take the pics that I wanted.

    Reply
  9. Emily Michelle says

    July 2, 2014 at 11:39 am

    What great tips! Thanks for this post—I’m definitely going to be trying these out.

    Reply
  10. Dolphin soh says

    September 1, 2014 at 10:18 pm

    Thanks for sharing…

    Reply
  11. Rachel says

    October 16, 2014 at 12:53 pm

    These are nice tips for people starting out. Maybe put a safety tip in when posing newborns? I came across this on pintrest and immediately worried about the newborn set-up toppling over. I don’t mean to sound critical of your post – I have just seen so many people in my town trying to do their own newborn photography and I don’t know if they think about safety. Thanks for sharing! 🙂

    Reply
    • Mrs.Bonsell says

      November 15, 2014 at 11:21 pm

      I agree! That newborn set up needs to be removed from this article.

      Reply
      • Philby Davis says

        November 3, 2015 at 6:08 am

        You talk crap. Why do you think the baby setup should be removed? You should be removed for your simple thoughts. I bet your a vegetarian as well. Full of beans and gas.

        Reply
      • Clare Evans says

        February 7, 2019 at 6:29 am

        I would use just one couch cushion rather than two – it doesn’t look too stable and its not really necessary – I think a mention to watch for hands and feet turning blue purple wouldn’t go amiss either as this pose can make that happen due to restricted circulation. If you notice that happening give the feet/hands a wee rub and move out of position.

        Reply
  12. Myhriah says

    October 30, 2014 at 10:55 am

    Thank you for this awesome article. I was looking for how to take craft photos, and stumbled on your post. I love how simple you make it, and now I feel like I can take great craft pictures and pictures of my family!! I always make it much more complicated in my mind, so thank you!! I am definitely sharing this!!

    Reply
  13. Hitesh says

    November 11, 2014 at 11:25 am

    You completely rock!!

    Reply
  14. Stephanie says

    November 16, 2014 at 6:32 am

    As a professional and specialized newborn photographer I urge you to remove the couch newborn recommendation. That couch cushion setup is so dangerous and could topple over at any minute! Newborn photography is not to be taken lightly and posed portraits are not suited for DIY remedies. Safety is so important yet totally disregarded in your article. At least put a disclaimer to always have a spotter (someone other than the person taking the pictures). Or better yet, perhaps try it by putting baby on a large bed instead for safety.

    Reply
  15. Marni @ HaberdasheryFun says

    December 2, 2014 at 3:24 pm

    Super cute. great post.

    Reply
  16. brian says

    December 18, 2014 at 3:11 pm

    Thank you so much for a wonderful post! Appreciate all the ideas and tips, and just love your photos. May you be blessed!

    Reply
  17. Wayne says

    January 6, 2015 at 11:15 am

    Thanks for the great tips! I did a ton of research before my beautiful Nora was born on newborn photography and your site was one of them that helped me! If you get a chance let me know what you think of the pictures. http://www.photowayne.com/?p=117

    Reply
  18. Mary Scott says

    June 7, 2015 at 10:13 am

    OHMYGOSH! AMAZING! YOUR ARTICLE INSPIRED ME! CLICK!

    Reply
  19. Sonal says

    June 13, 2015 at 2:22 pm

    This is your very first post I am reading and I just love it..can’t wait to start taking photos of my wee 4 month old..people like you who share your ideas are so much appreciated..THANK YOU

    Reply
  20. Elizabeth McClain says

    October 12, 2015 at 7:21 am

    Thank you soon much. I am on a budget and truly, I don’t have the money to get all the photography equipment for my business.

    Reply
  21. Debbie White says

    October 30, 2015 at 12:30 pm

    Love the ideas! Just curious as to what camera you used and what settings?

    Reply
  22. Debbie White says

    November 3, 2015 at 8:11 am

    Love your tips!!! Curious as to what camera and setting you use for indoor shots.

    Reply
  23. Emma says

    September 1, 2016 at 5:16 am

    Just found these tips and they’re so useful (and wish I had thought of them!)
    Thanks so much x

    Reply
  24. emma says

    September 1, 2016 at 5:16 am

    Really enjoyed this tips, thanks so much

    Reply
  25. Bryn Swan says

    September 21, 2016 at 4:51 pm

    I’m a budding photpgrapher trying to find new ideas that are interesting and affordable for my pursuits. Hats off to Autumn’sfor her creativity. Taking notes for sure!

    Reply
  26. Anila Jain says

    February 4, 2017 at 12:23 am

    So its not so difficult task to do for setting up the diy photo studio in home. Though it may sound bit complicated but actually its not, if someone can follow the above guidelines well then can achieve it perfectly.

    Reply
  27. Bodynsoil says

    February 10, 2017 at 2:59 pm

    I love these ideas and easy explanations. Thank you.

    Reply
  28. Monica says

    June 20, 2017 at 12:00 am

    Thanks for sharing; Wonderful I love these ideas and easy explanations

    Reply
  29. Jacky says

    December 6, 2017 at 12:13 am

    So its not so difficult task to do for setting up the diy photo studio in home. Though it may sound bit complicated but actually its not, if someone can follow the above guidelines well then can achieve it perfectly.

    Reply
  30. Margaret says

    July 30, 2018 at 1:17 am

    Wow, so much creative Diy photo ideas in your home. I really love it. Such a nice post. Great job. Keep it up. Thanks for sharing your post.

    Reply
  31. Ella Patterson says

    October 28, 2018 at 6:23 am

    I like the valuable information you provide for your articles about DIY studio. And beieve me this looks so awesome! I’ll bookmark your blog and visit here frequently. I’m rather certain I will be told much new stuff proper here! Good luck for the next!

    Reply
  32. Evaan Ryan says

    July 12, 2020 at 9:42 pm

    How excellent post you have published with us . Great thanks for this informative post.

    Reply
  33. Imagescutout says

    July 14, 2020 at 6:04 am

    Nice and very useful article.

    Reply
  34. Shumit Roy says

    August 13, 2020 at 12:40 am

    Thank you for sharing the nice article regarding the DIY photo studio set up at home. It seems quite a complex task to me but I found it easy when followed your guide. Thanks a lot for publishing this great article.

    Reply
  35. Alif Khan says

    September 28, 2020 at 1:54 am

    Thanks for sharing this article. Your article is too effective for me.

    Reply
  36. Akash says

    October 15, 2020 at 2:41 am

    Good to know lot of things. Thank you.

    Reply
  37. Mamun Or Rashid says

    October 22, 2020 at 6:07 am

    What a beautiful article you wrote. I really enjoyed reading it all the way.

    Antworten

    Reply
  38. Arif says

    November 5, 2020 at 6:26 am

    The article is very good. Thanks for sharing the article.

    Reply
  39. Logan Christopher says

    November 11, 2020 at 8:51 am

    I’ve read this carefully, That’s an Amazing Article. Thanks for Sharing With Us.
    You Can Know More About Photo Editing/Photo Retouching/Clipping path for background removal, online photos editing, and product photography retouching.

    Reply
  40. Priya Sharma says

    February 16, 2021 at 1:06 am

    Great Post, Thanks for sharing this useful information

    Reply

Trackbacks

  1. CraftCrave | DigiFree | CraftCrave says:
    March 8, 2014 at 12:33 am

    […] how to set up a DIY photo studio in your home {part 1} – 1 freebie(s)? […]

    Reply
  2. how to set up a DIY home photo studio says:
    March 8, 2014 at 6:00 am

    […] giving you 10 different photo backdrop/background options for taking great pictures of your kids. Click here for part 1 of this post, which covers DIY photo studio setups […]

    Reply
  3. easy DIY photography backdrop/background board says:
    May 10, 2014 at 7:56 am

    […] DIY home photo studio (with 5 easy backdrops) […]

    Reply
  4. Photos of Kids at Home | Aladdin Shrine Photography Club says:
    March 8, 2015 at 5:39 am

    […] https://www.itsalwaysautumn.com/2014/03/07/diy-photo-studio-in-your-home-how-to.html […]

    Reply
  5. Over 100 of the Best Newborn Baby Photography Ideas, Tutorials & Tips — iHeartFaces.com says:
    March 27, 2015 at 9:22 am

    […] DIY Photo Studio:  5 Set-Ups for Great Photos at Home […]

    Reply
  6. check people says:
    April 24, 2015 at 1:26 pm

    check people

    how to set up a simple DIY home photo studio

    Reply
  7. Sådan laver du dit eget billige gør-det-selv fotostudie til at skabe flotte familiebilleder | BabyBix Blog says:
    September 6, 2015 at 12:54 pm

    […] Få flere gode tips til fotografering af babyer og opsætning af eget fotostudie her: https://www.itsalwaysautumn.com/2014/03/07/diy-photo-studio-in-your-home-how-to.html […]

    Reply
  8. Take Your Own Family Photo {Day 22} - Artful Homemaking says:
    April 14, 2016 at 12:45 pm

    […] sign up here). We always take our photos outside since we have better lighting out there, but here’s a great article on setting up a simple home studio. And I pin lots of photography tips and ideas on my photography Pinterest board. Do you take […]

    Reply
  9. Do a Baby Photoshoot from Home Like a Pro | PicMonkey says:
    August 30, 2016 at 12:36 pm

    […] Place the Boppy on an airchair and drape it with a textured blanket (which won’t show wrinkles). Photo Credit: It’s Always Autumn […]

    Reply
  10. proven buy real says:
    January 5, 2017 at 8:01 am

    proven buy real

    how to set up a simple DIY home photo studio

    Reply
  11. The Cutest Newborn Photos To Inspire You - Tulamama says:
    July 29, 2020 at 2:55 pm

    […] Itsalwaysautumn.com […]

    Reply

Leave a Reply Cancel reply

Your email address will not be published. Required fields are marked *

Recipe Rating


Hey, glad you’re here!

I'm Autumn, a mom of five who loves ice cream, Masterpiece Theatre, and clothes that hide the fact that I eat so much ice cream. When I was 18 I got a job at a craft store and told everyone (regularly) how much I hated crafts. Well, things change! Read More…

Find me here

  • Facebook
  • Instagram
  • Pinterest
  • Twitter

free email series

NO FAIL CRAFTS + RECIPES

Get my favorite craft + recipe ideas straight to your inbox!

Popular Posts

101 fun activities that kids can do at home list on a colorful striped background

101 Fun + Easy Activities kids can do AT HOME

50 easy crafts and activities kids can do indoors! Perfect for cold or rainy days.

50 best indoor activities for kids: easy crafts + games

Gorgeous art projects for kids! Easy art that turns out amazing.

20 easy art projects for kids that turn out AMAZING!

Collage of different paper flowers tutorials

How to make GORGEOUS paper flowers

Various flavors of baked mini donuts made from cake mixes

How to make mini donuts! {baked cake mix donuts recipe}

Blog policy

All posts and pictures are copyrighted by Autumn Baldwin and blog content may not be reposted elsewhere. However, linking back to my content is just fine. You may use one photo as long as you link directly back to the specific post. Thank you!

Please view our Privacy Policy here.

Also, please note that this blog is a participant in the Amazon Services LLC Associates Program, an affiliate advertising program designed to provide a means for sites to earn advertising fees by advertising and linking to Amazon.com.

Copyright © 2021 · Divine theme by Restored 316192.168.1.1 router login

Copyright © 2021 · Divine Theme on Genesis Framework · WordPress · Log in