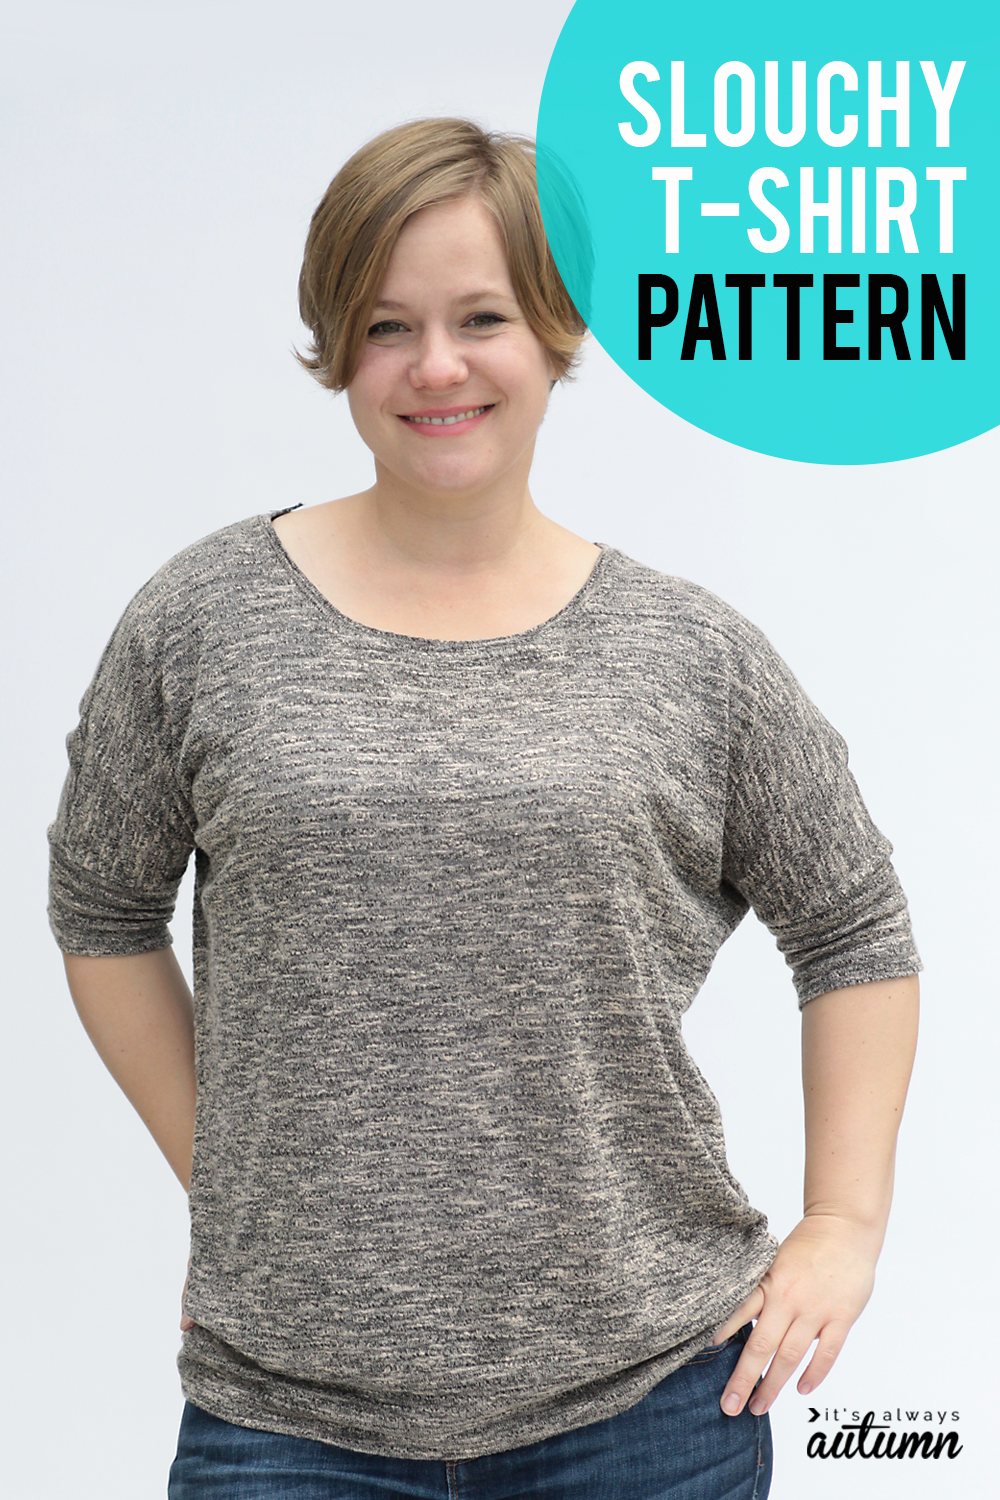
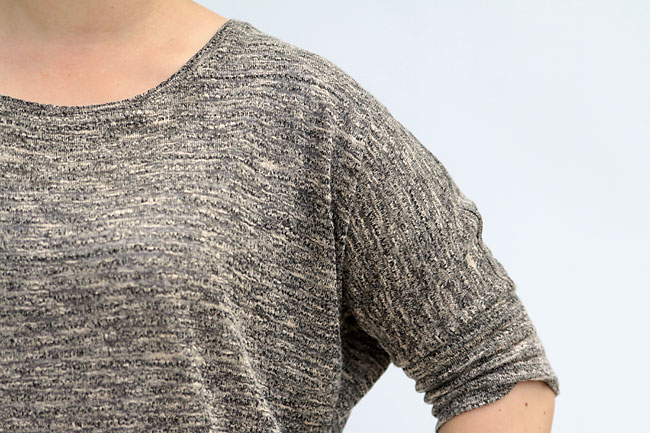
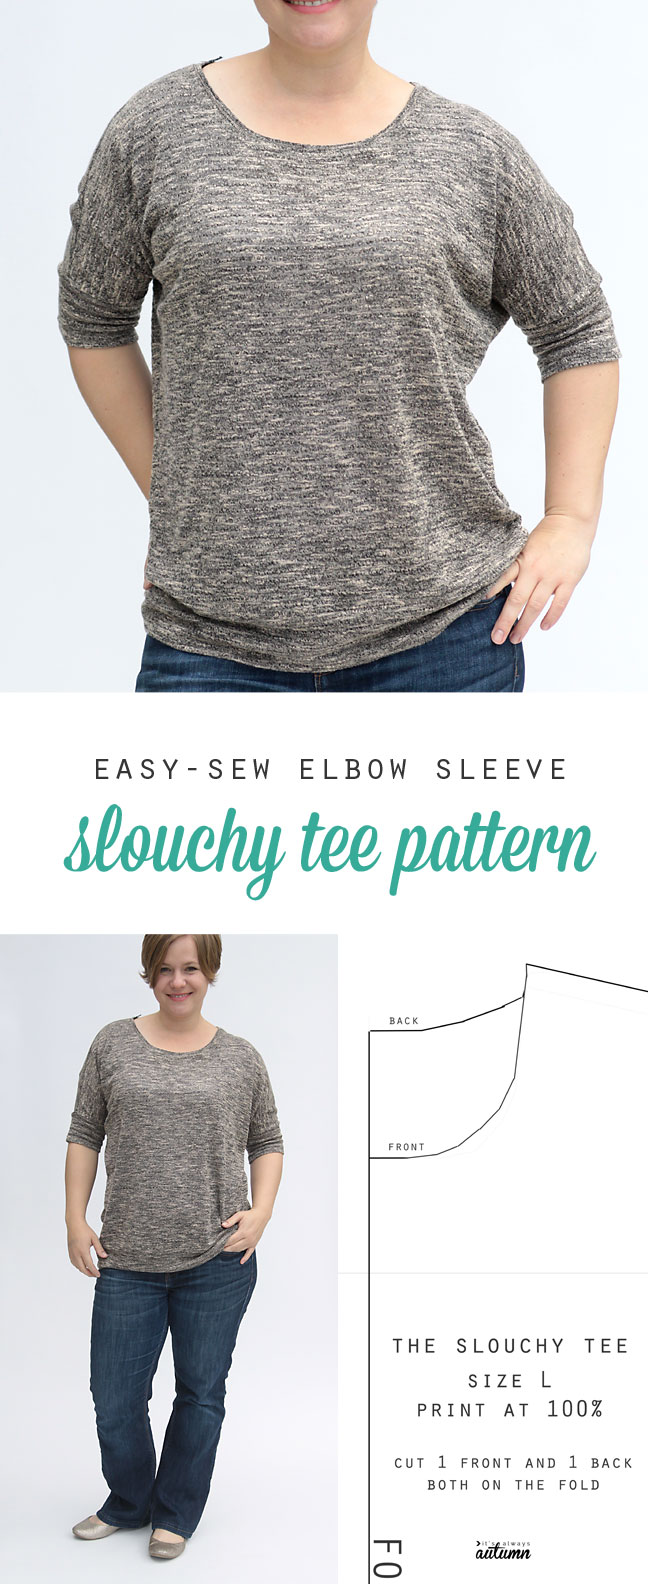
In today’s post: This batwing top pattern is super easy to sew and looks great on all body types!
Hey guys, I have a new, super easy, great free sewing pattern for you today. Here’s why it’s so great: it’s roomy and slouchy, which makes it super comfortable, and there are no set in sleeves or hems, which makes it really easy to sew. In fact, there’s only one pattern piece for the front and back of the shirt and then a few rectangles to finish off the sleeves, hem, and neckline. Here’s why it’s not so great: the pattern is only in a size large. Alas. However, it’s such an easy top to make that you could probably figure out your own pattern in whatever size you need by using this pattern and a t-shirt that fits you as reference.
I shared the easy tee (simplest women’s t-shirt) pattern a few years ago. Like this one, that shirt has no set in sleeves – just faux cap sleeves made by extending the shirt past the shoulder. It’s a super fast sew, and I’ve made quite a few, but in my old age I’m finding that I prefer shirts that cover more of my upper arm. (I’m the choir director at church, and I hate it when I wear a cap sleeved top on one of the Sundays we sing for the congregation ‘cuz I’m up there waving my arm away like I just don’t care – when in fact I do care, more than I should, about the crazy amount of jiggling going on under my arm.)
Anyway, sometimes a nice elbow-length sleeve is just a good thing.
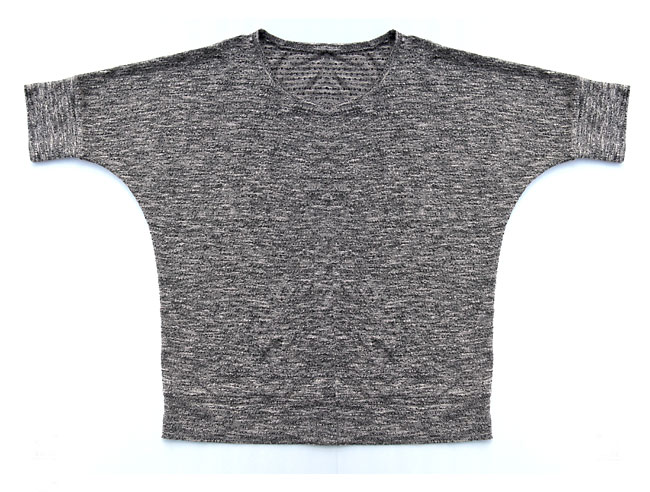
This shirt is actually a pretty weird shape when it’s not on. It looks like this – hence the term batwing top:
Odd, I know, but it works…as long as you sew it up in a soft, drapey, stretchy knit fabric. Anything with too much body will probably end up looking dumpy. But something delicate and drapey will give you the slouchy, relaxed look we’re going for. Plus I gotta say that I love not having material right under my arm. Makes my pits nice and breezy. Not that I’m normally a sweaty person, but you know, chasing kids around all day can give anyone’s deodorant a workout.
Alright, now that you all think I’m a stinky person, let’s see how easy it is to make this top.
Women’s batwing top pattern
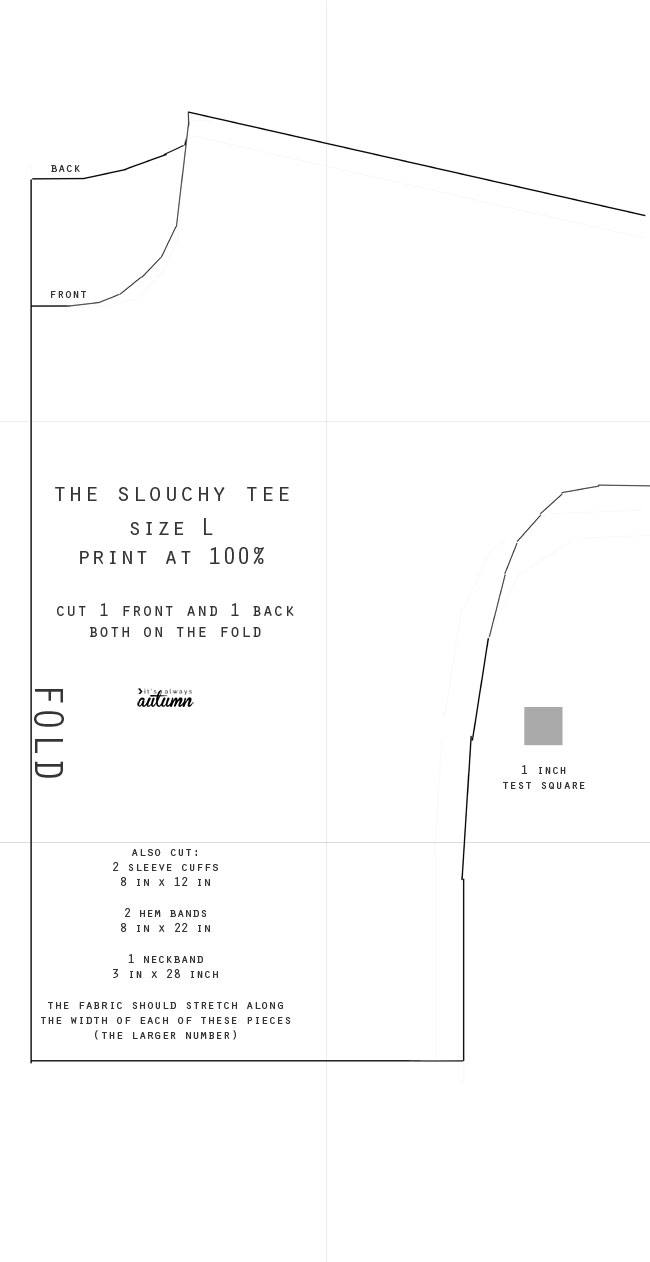
Download the free slouchy tee pattern in women’s size L by clicking here. Print it out at 100% and check that the test square measures exactly 1 inch. There are six pages and you’ll want to tape them together so they look like this:
Do not trim the margins off the pages! Just butt the pages up against each other, tape, and cut. Where the arm goes off the page, just cut right to the edge of the page. You’ll need 1.5-2 yards of 55-60 inch wide knit fabric to make this top (depending on how you cut out the pattern pieces). Because you need to cut 2 of the main piece it may be helpful to print 2 copies of it so you can figure out how to best fold and lay out your fabric.
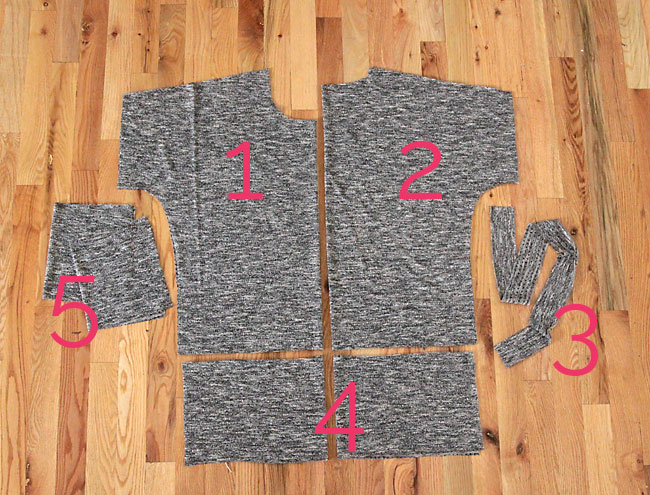
Cut 2 of the main pattern piece from your fabric, BOTH ON THE FOLD. Cut one with the higher “back” neckline, and one with the lower “front” neckline. You’ll also see dimensions on the pattern to cut a neckband, sleeve cuffs, and hem bands. Once everything is cut out, you’ll have the pieces you see below:
1. Shirt front (shown folded)
2. Shirt back (shown folded)
3. Neck band: 3 inches tall and 28 inches wide (fabric should stretch along the width)
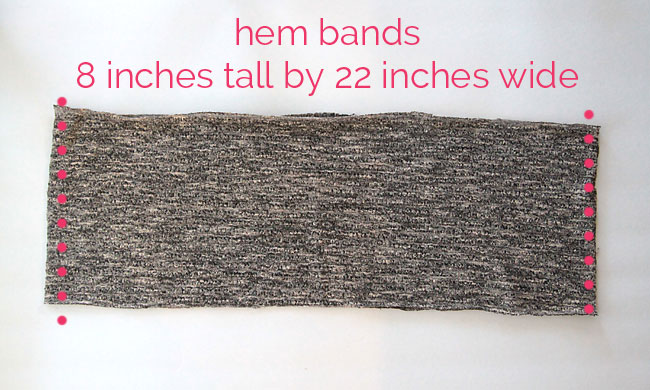
4. 2 Hem bands (shown folded): 8 inches tall and 22 inches wide (fabric should stretch along the width)
5. 2 Sleeve cuffs (shown folded): 8 inches tall and 12 inches wide (fabric should stretch along the width)
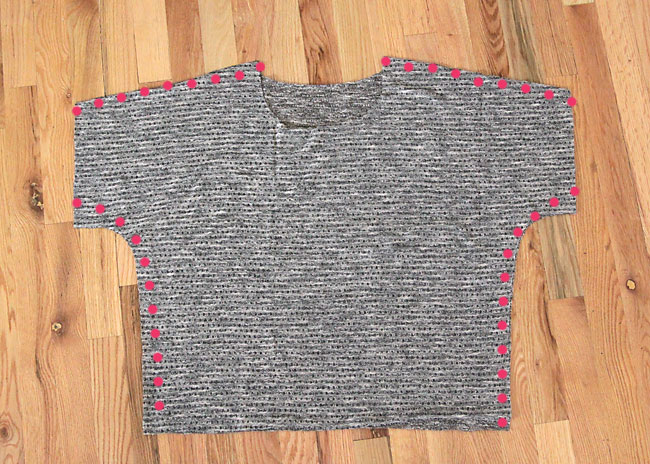
Start by placing the shirt front and shirt back right sides together. Sew across shoulder seams and down side seams, as shown below. Please use a stitch that has some stretch in it, like a narrow zig zag, stretch stitch, or serger. If you just use a straight stitch it may pop once you put the shirt on, especially under the arms. If you are using a very stretchy or delicate knit, you may want to reinforce the shoulder seams (see an example of that in this post). Use 1/2 inch seam allowance on all seams.
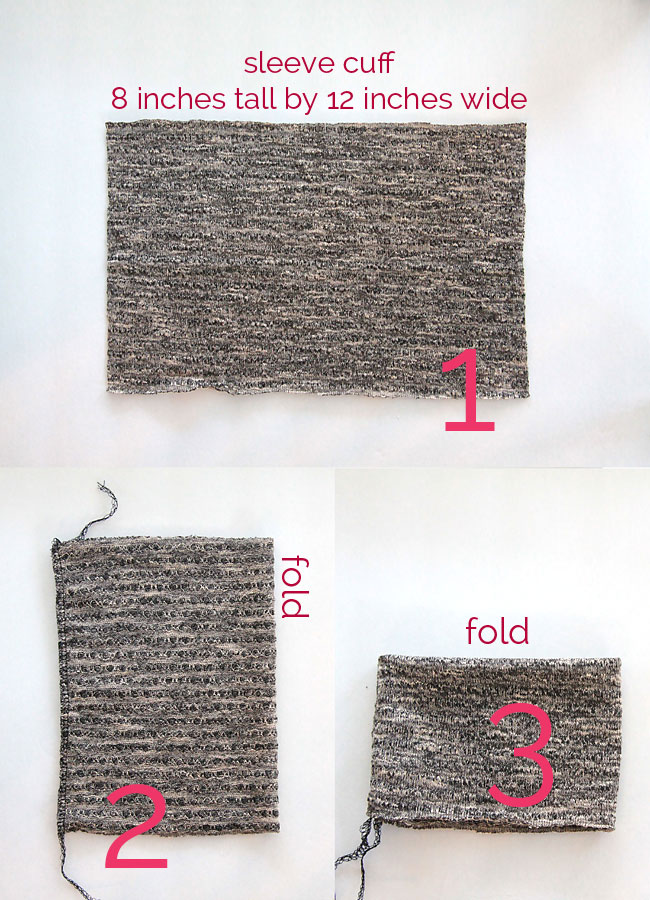
Next we’ll add the sleeve cuffs. Follow the photos below:
1 – Place sleeve cuff down flat. 2 – fold one side over to match the short ends, right sides together. Sew. You now have a circle of material. 3 – fold again, the time with the wrong sides touching, to form a cuff. At this point you want to stop and try the cuff on. When you slide it up above your elbow it should be just tight enough to stay there by itself. Depending on how stretchy your material is, there’s a good chance you’ll need to take it in and resew the seam from step 2.
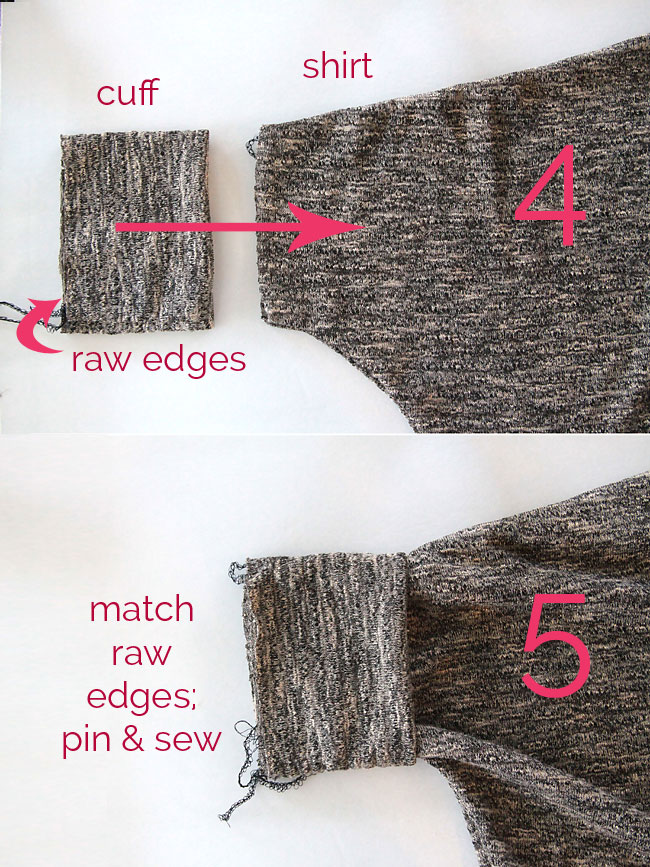
4 – Lay the shirt down flat, right side out. Slide the sleeve cuff over the sleeve portion of the shirt, with the fold of the cuff in toward the body of the shirt. 5 – Match the raw edges of the cuff to the raw edges of the shirt sleeve, then pin and sew. The cuff will be a little smaller than the shirt sleeve, so you’ll want to stretch it gently as you sew to make it fit.
Once it’s sewn on, flip the cuff out and press. Repeat with the other sleeve.
Next, you’ll finish the neckline. Your neckband piece is cut to 28 inches, but it will likely need to be trimmed even shorter. The correct width here really depends on how stretchy your fabric is. 24 inches is probably good for material with a medium stretch (the fabric I used was very stretchy so I went with 22 inches – for something with less stretch you’ll probably want to use about 26 inches). You’ll sew the short ends of your neckband together to make a circle. Then fold the band in half all along the circle and press.
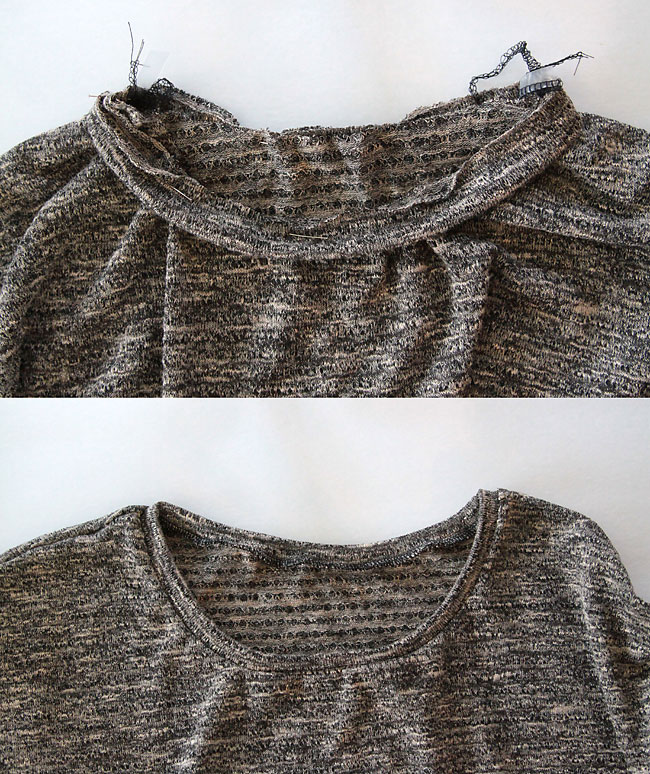
Pin the neckband to the neckline of the shirt, matching the raw edges (so the folded edge of the neckband is down and the raw edge is up). The band will be shorter than the neckline, so it will need to be stretched slightly as you pin and sew.
Sew the neckline to the neck (again using a stitch that will stretch!), and then flip the neckband up. It may look wonky at first, but once you press it with some steam it should lay nice and flat. (For a few more photos of this process, visit the original easy tee post.)
Finally, you’ll add the hemband. This is the exact same process you used with the sleeve bands. Sew the two hem band pieces together, right sides together, along the short ends. Fold it in half so the wrong sides are together and seams are hidden.
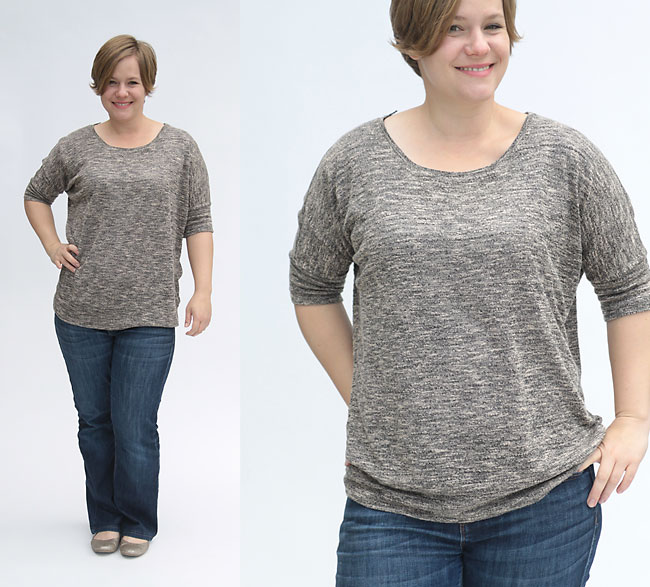
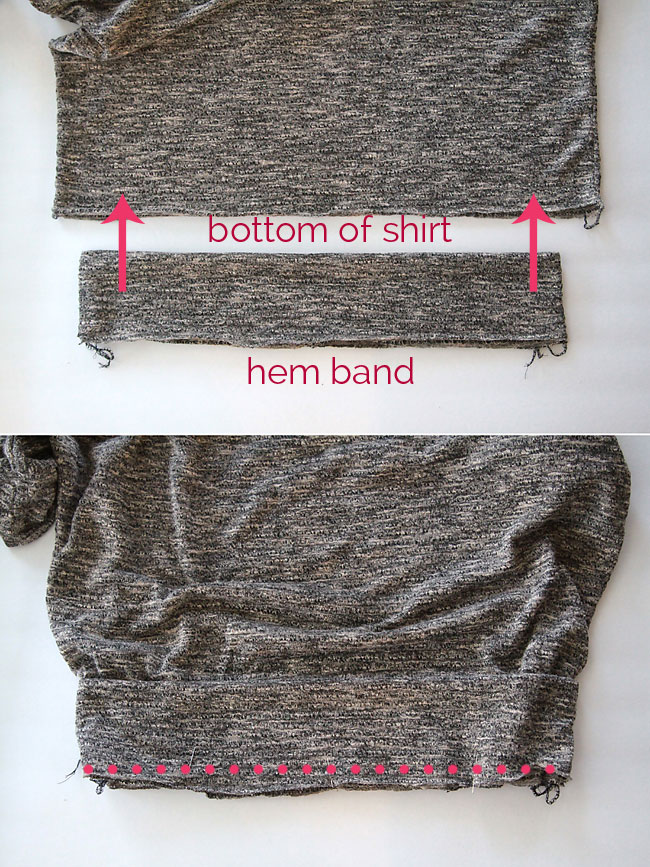
Stop and try it on! You may want the band to hug your hips, in which case you’ll probably need to take a little width out. If you decide to do that, decide if you also want to narrow the bottom of the shirt a bit. If you don’t, and the hem band is much smaller than the bottom of the shirt, the shirt will blouse or puff out slightly where it meets the hemband (which can be a good thing depending on the look you’re going for).* If you don’t want the shirt to blouse out at the bottom, taper the sides of the shirt until the bottom of the shirt is the same width as the hemband. Alternately, you can leave the hemband the original width and the shirt will be straight and roomy at the bottom.
Just like you did with the sleeves, slide the hem band up over the bottom of the shirt, matching raw edges and pinning. Sew together, stretching the hem band slightly as needed to fit. Flip it down and press well.
*You may notice that the hem band was smaller than the shirt in these photos, but it doesn’t hug my hips much when it’s on – it almost just hangs completely straight. That’s because the fabric I used is very stretchy without much recovery, meaning the hemband ended up stretching out to the width of the shirt.
Ok, that seems like a lot of explanation, but this batwing top pattern is really quite a quick sew. Let me know if you give it a try!
Fabric details: taupe black hacci sweater knit from Girl Charlee

Ruth says
Really like your patterns. Already downloaded two tonight. My only wish/suggestion is that your directions would fit in a page or two so I didn’t have to print more pages. BUT, I do like the pictures that follow your instructions. Maybe I should just write the directions out by hand. That would work, just would take me some time. Anyway – thanks for the patterns!!
Lori T says
What a cute top!! You are such an awesome inspiration with all of these ideas on here. Keep bringing us your creative vibes. Keep up the great work!
Katie says
Thank you so much for this pattern. It’s SO cute, easy, and flattering