
So I know it’s not even Halloween, but I’m already thinking about Christmas! Halloween’s fun, but Christmas is my holiday. I’m the ‘listen to Christmas music all year’ kind of person, much to my teenager’s dismay. And my big goal this year is to get my Christmas gifts made or purchased early so I can relax and enjoy the season with my family. Sure, I’ve had the same goal every year for the past 15 years and haven’t actually done it once, but hey, there’s a first time for everything, right?
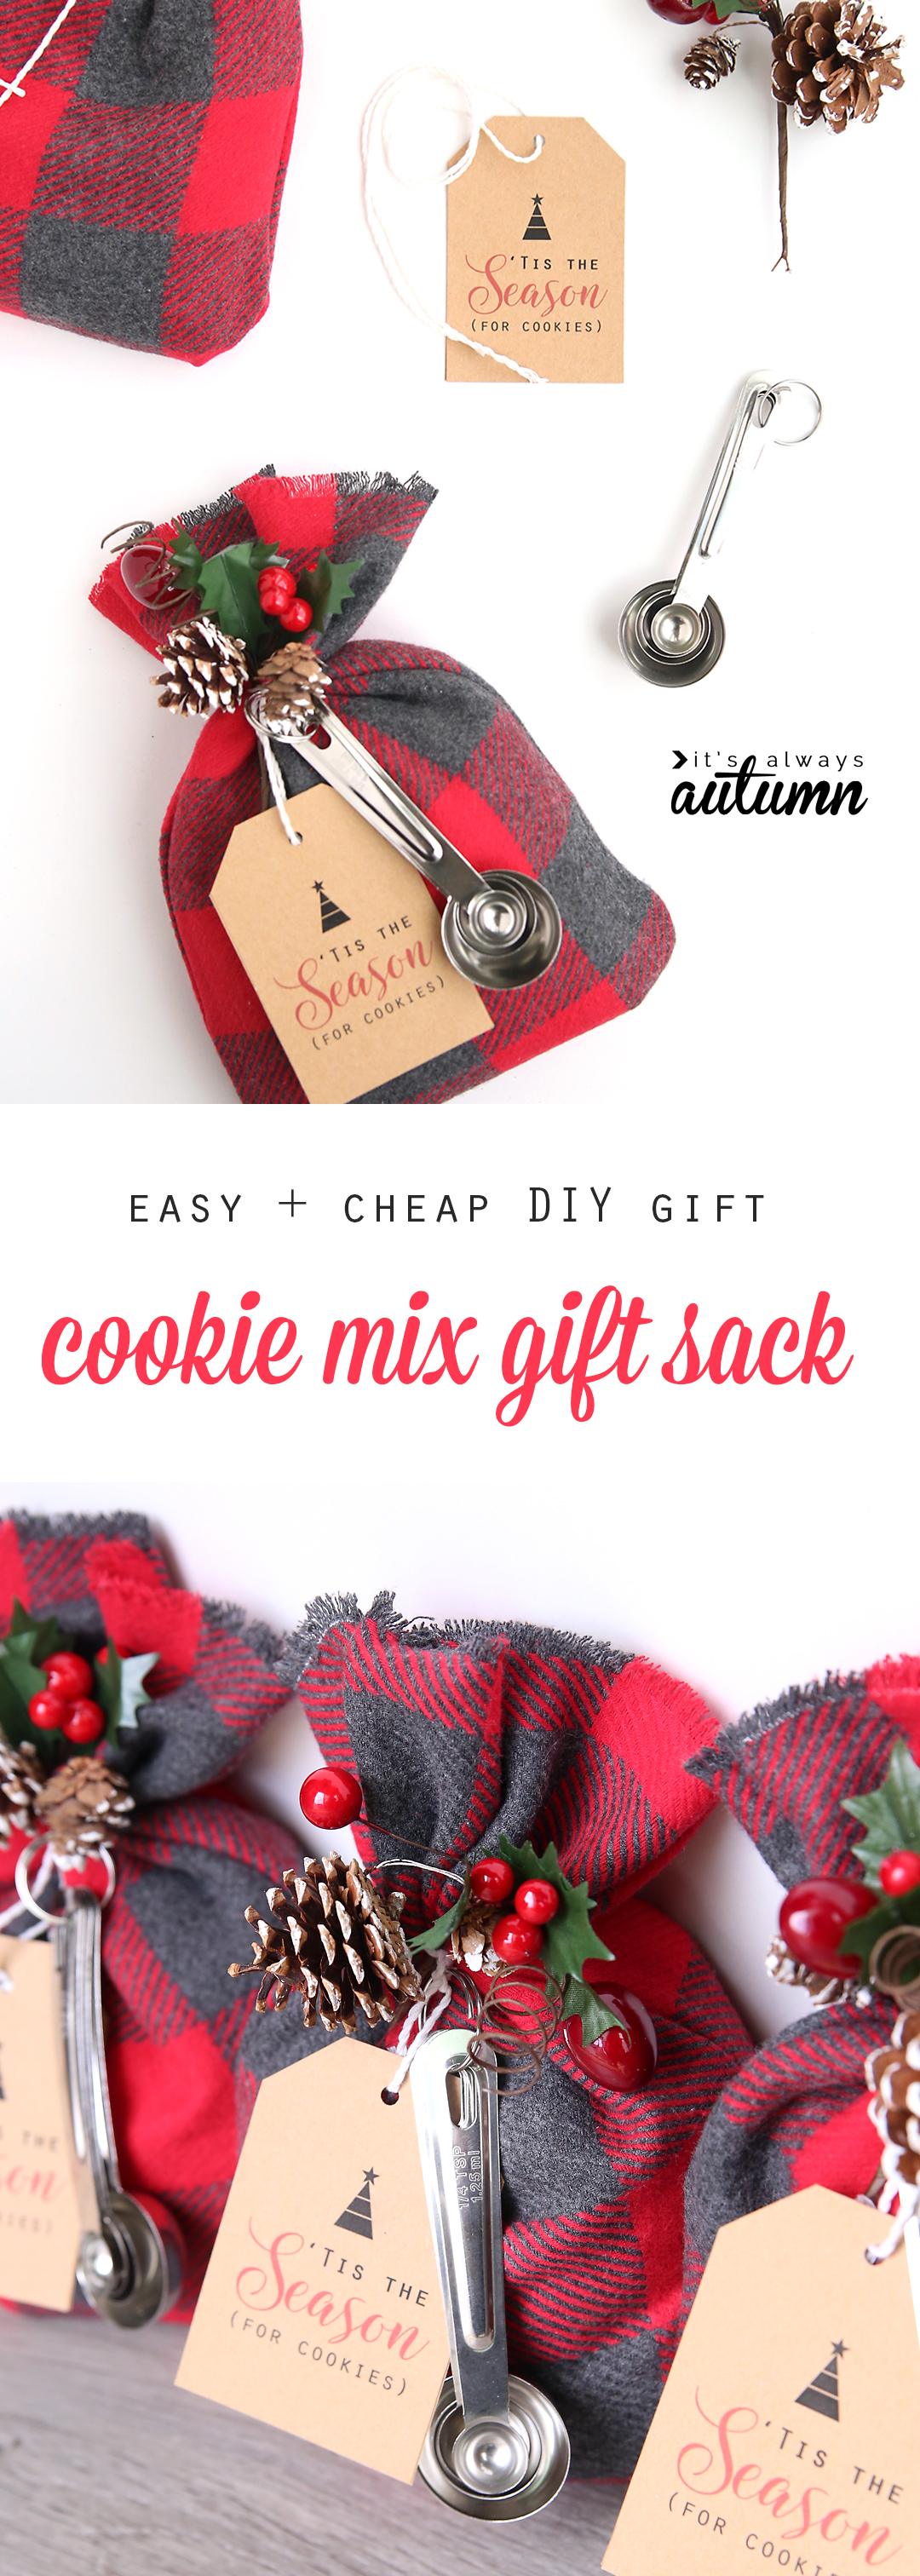
So, here I am, working on Christmas gift ideas instead of Halloween costumes. Today’s DIY gift idea is a cookie mix gift sack, perfect for giving to neighbors or teachers or friends or family (or anyone that’s hard to shop for!)

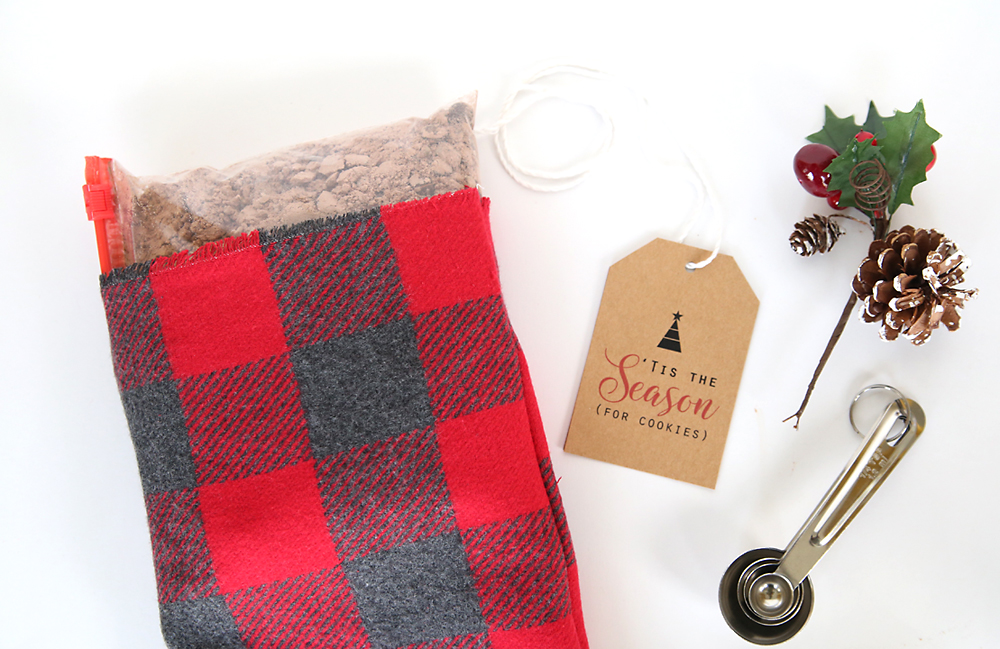
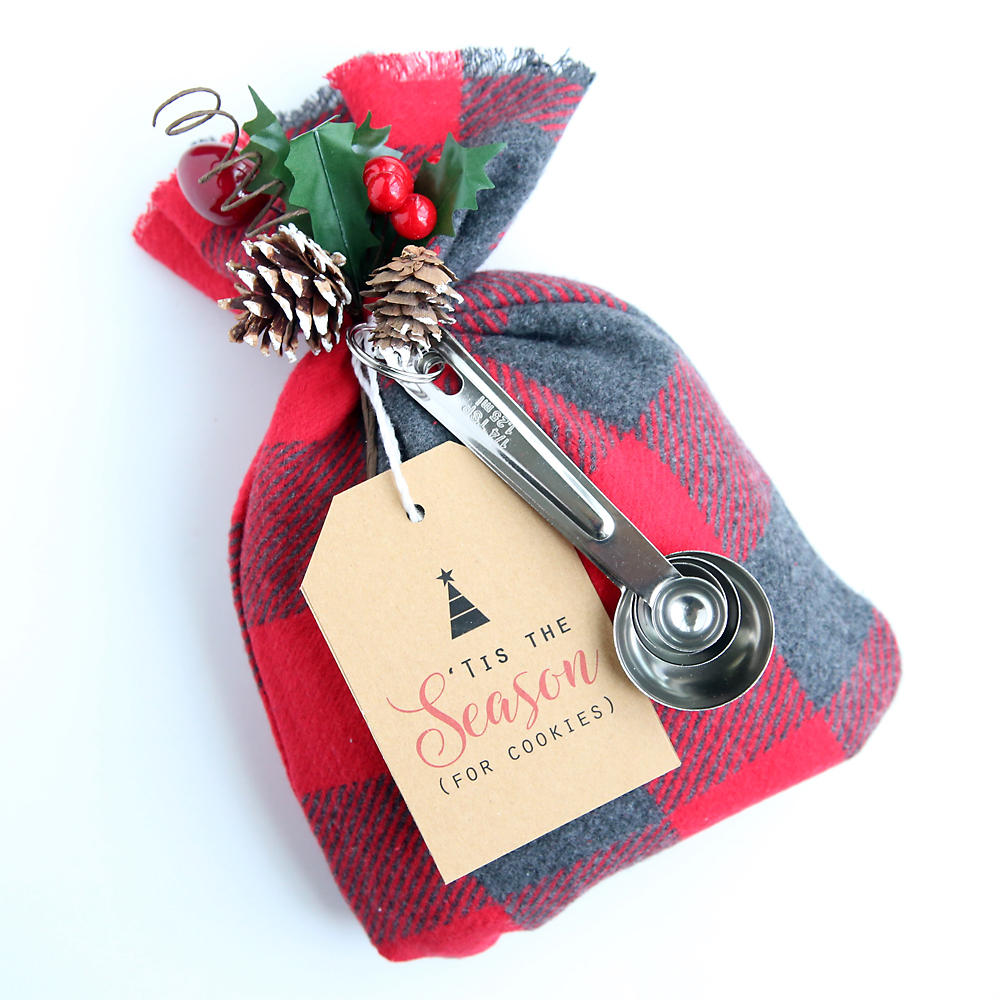
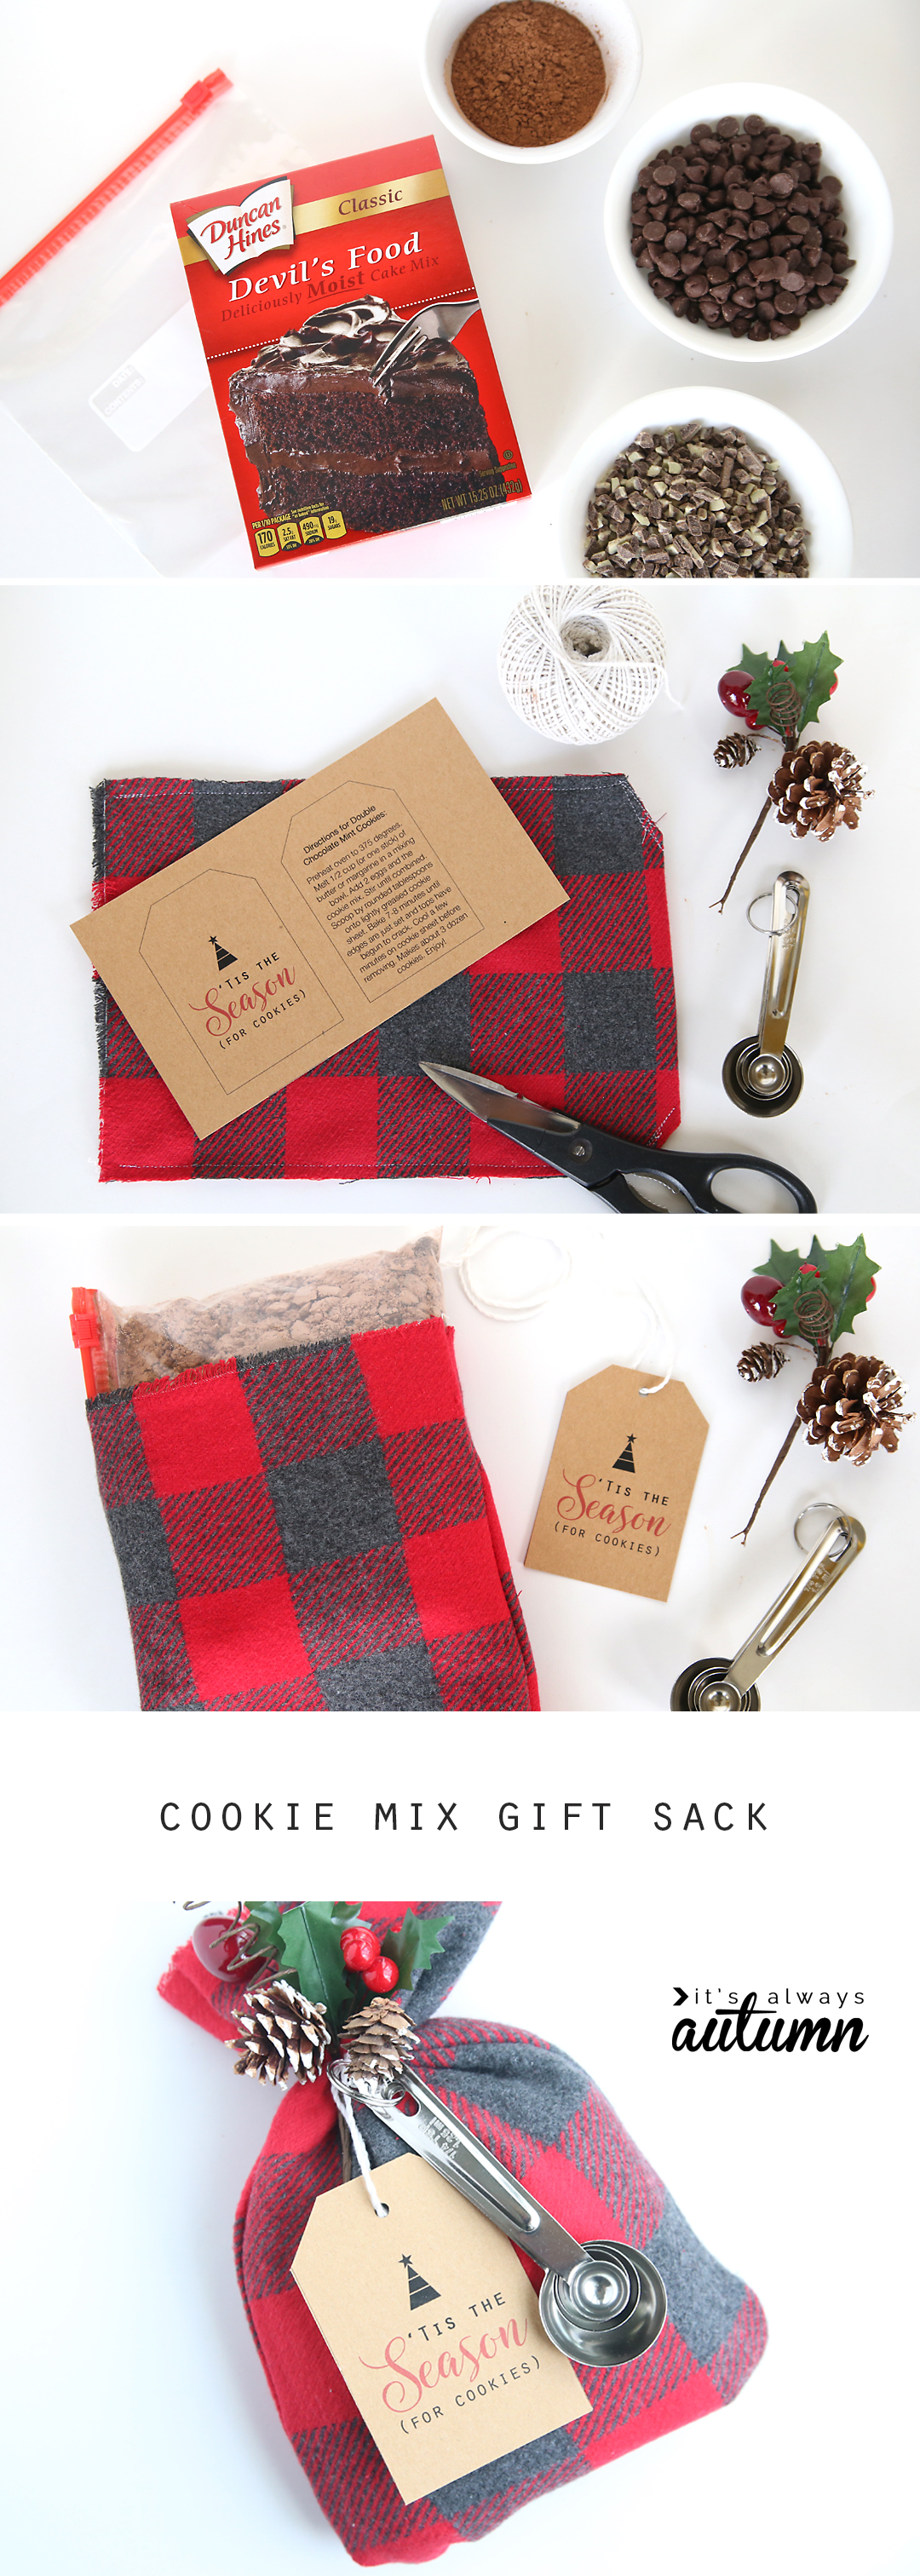
Inside the cute flannel bag is a quart size ziptop bag full of Double Chocolate Mint Cookie mix. These make great gifts for the holiday season because they are relatively inexpensive, and who doesn’t like cookies? Plus, a cookie mix is often more appreciated than a plate of cookies since we’re inundated with treats during the holidays and it’s nice to be able to bake these up later on.
I actually first shared cookie mix gift sacks on my blog four years ago, but they weren’t the cutest things in the whole world. Last year I saw these gift sacks from Celebrate Creativity and I knew I needed to up my game a bit. (Click on over there to see a bunch of different cookie mix gift sack variations!)
Today I’m sharing an easy-to-put-together recipe for a Double Chocolate Mint Cookie mix, instructions for sewing up these cute flannel sacks, and a free printable tag that says “‘Tis the Season (for cookies)” on the front and gives mixing/baking directions for the cookies on the back.
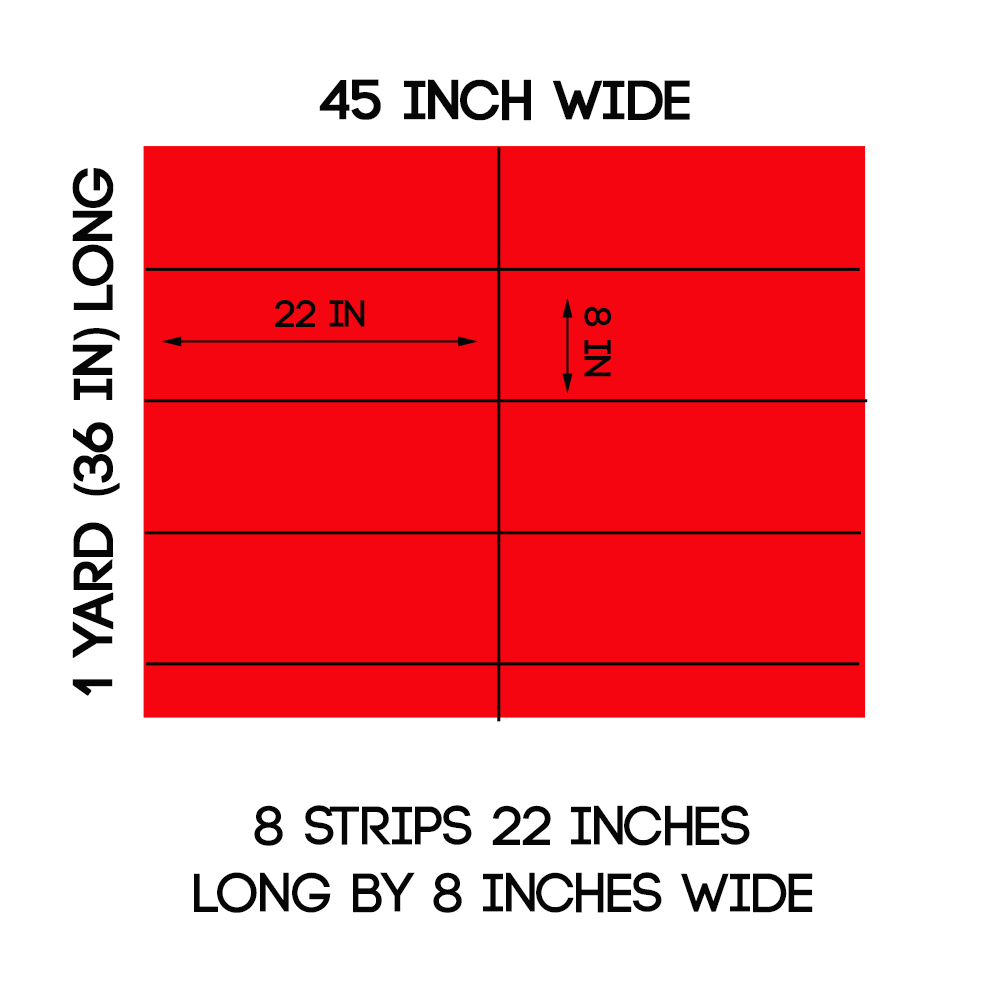
Let’s start with the sacks! I used 1 yard of 45 inch wide flannel, which gave me enough fabric for 8 cookie sacks (these little sacks would be great for wrapping other small items as well!). Cut the fabric as shown in the diagram below to get 8 strips that are each 8 inches wide and 22 inches long.
Once you have your strips, you can fray the short edges by pulling out a few of the cross threads, as shown below.
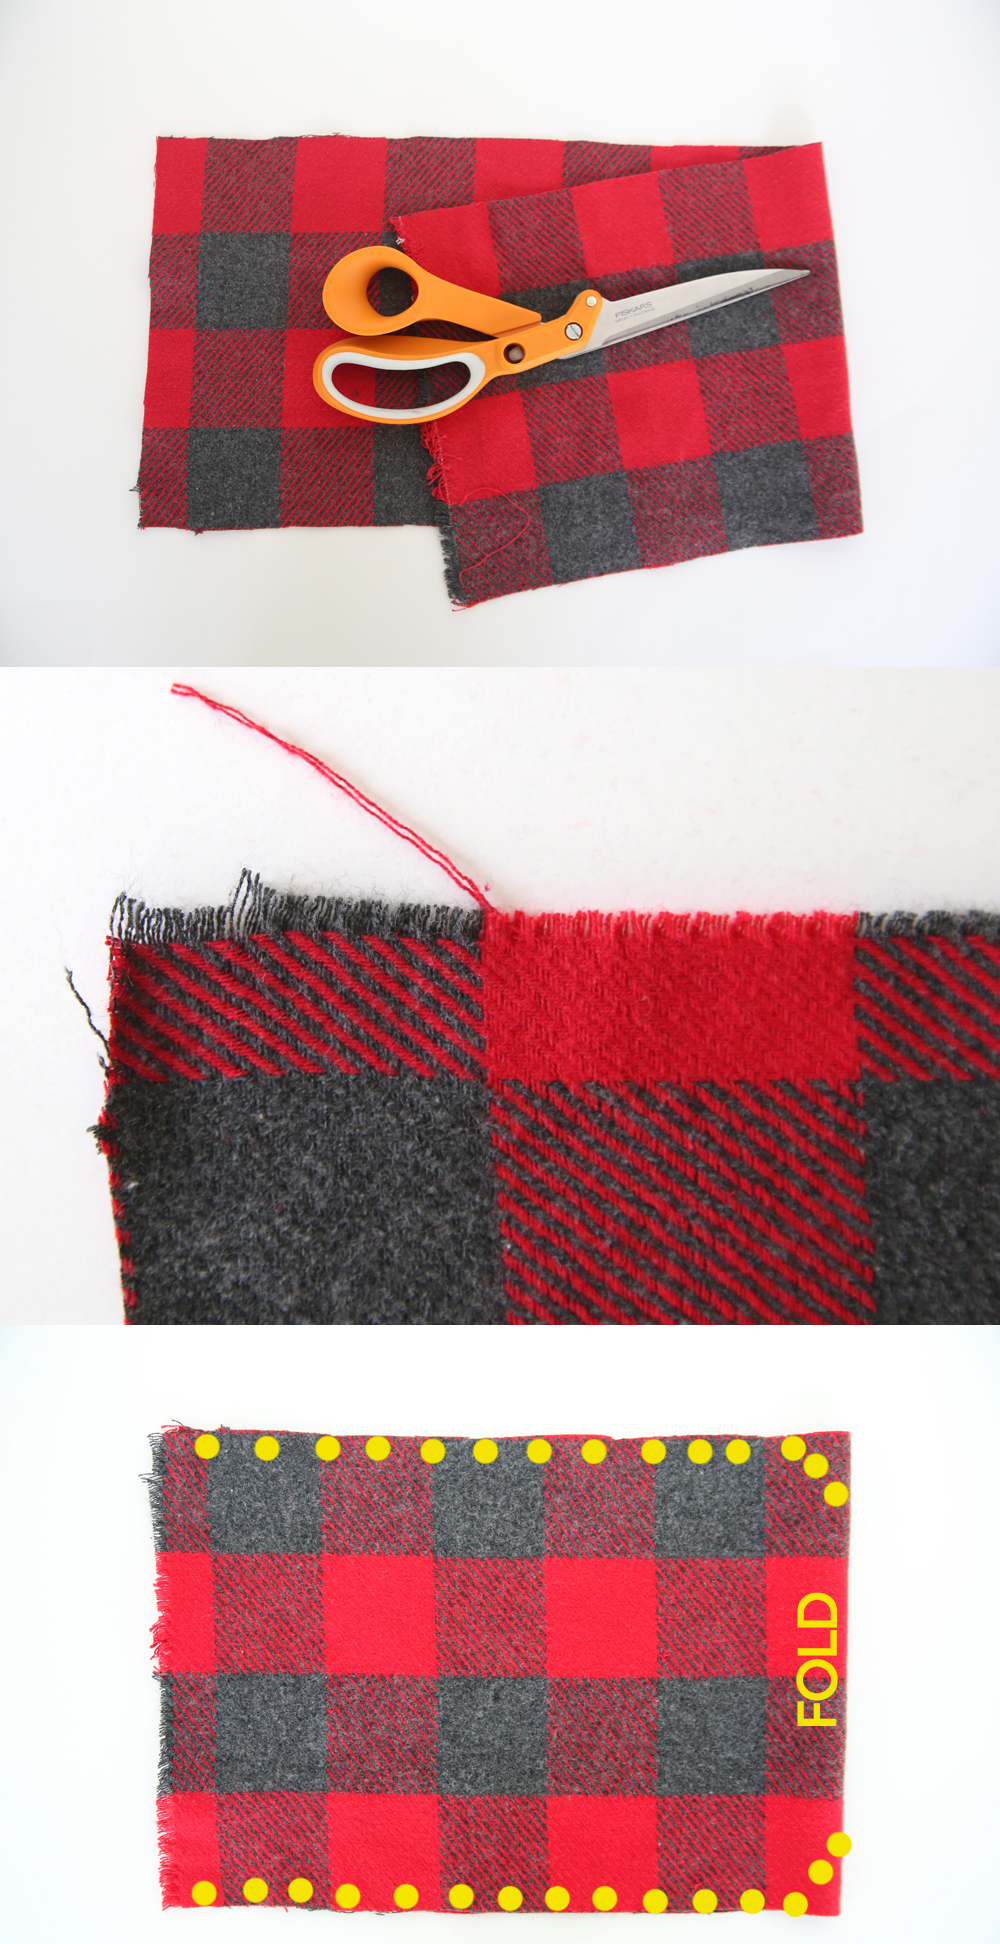
Then fold the strip in half and sew down each side, using 1/2 inch seam allowance, as shown in the photo above. When you get to the last inch before the fold, angle in and sew across at a diagonal, as shown above. Backstitch at the beginning and end of your stitching. BTW, thread color doesn’t really matter (I just used white). Turn the sacks right side out.
Ok, here’s how you make the Double Chocolate Mint Cookie mix. For each mix, you will need:
- 1 quart sized ziptop baggie
- 1 Duncan Hines Devil’s Food cake mix (other brands will work, but I like Duncan Hines best)
- 1 cup of semi sweet chocolate chips
- 3/4 cup of mint pieces (either Andes mint pieces or Mint flavored chips will work)
- 1/4 cup of baking cocoa (optional, but it makes the cookies richer)
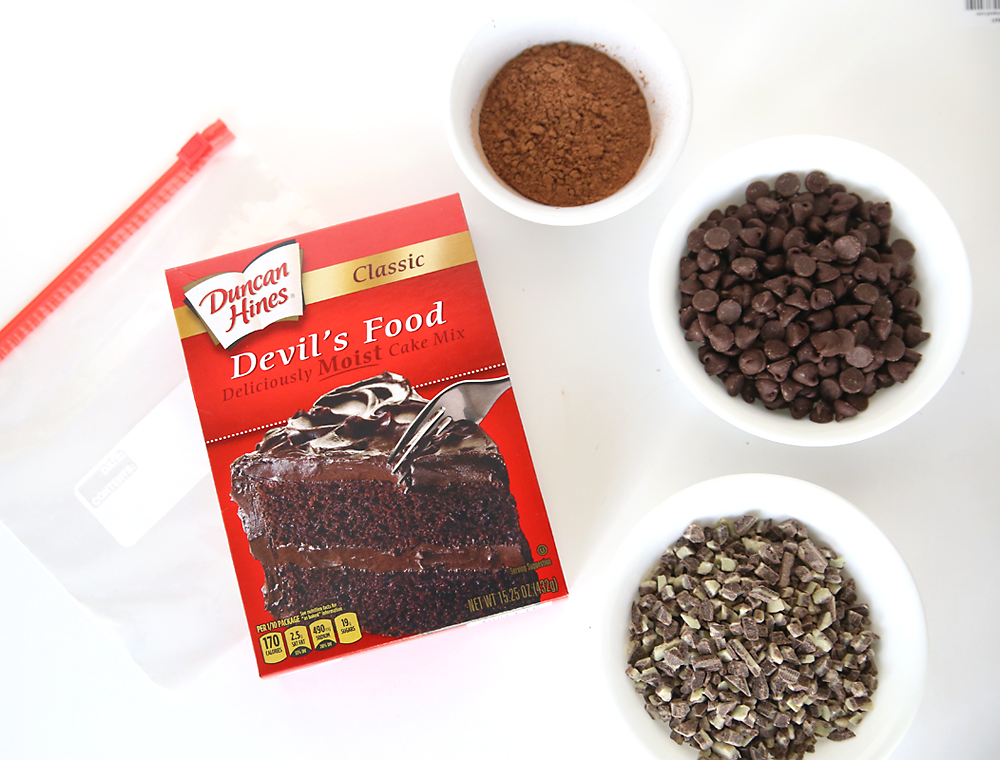
Simply measure out the ingredients and pour them all into your ziptop bag.
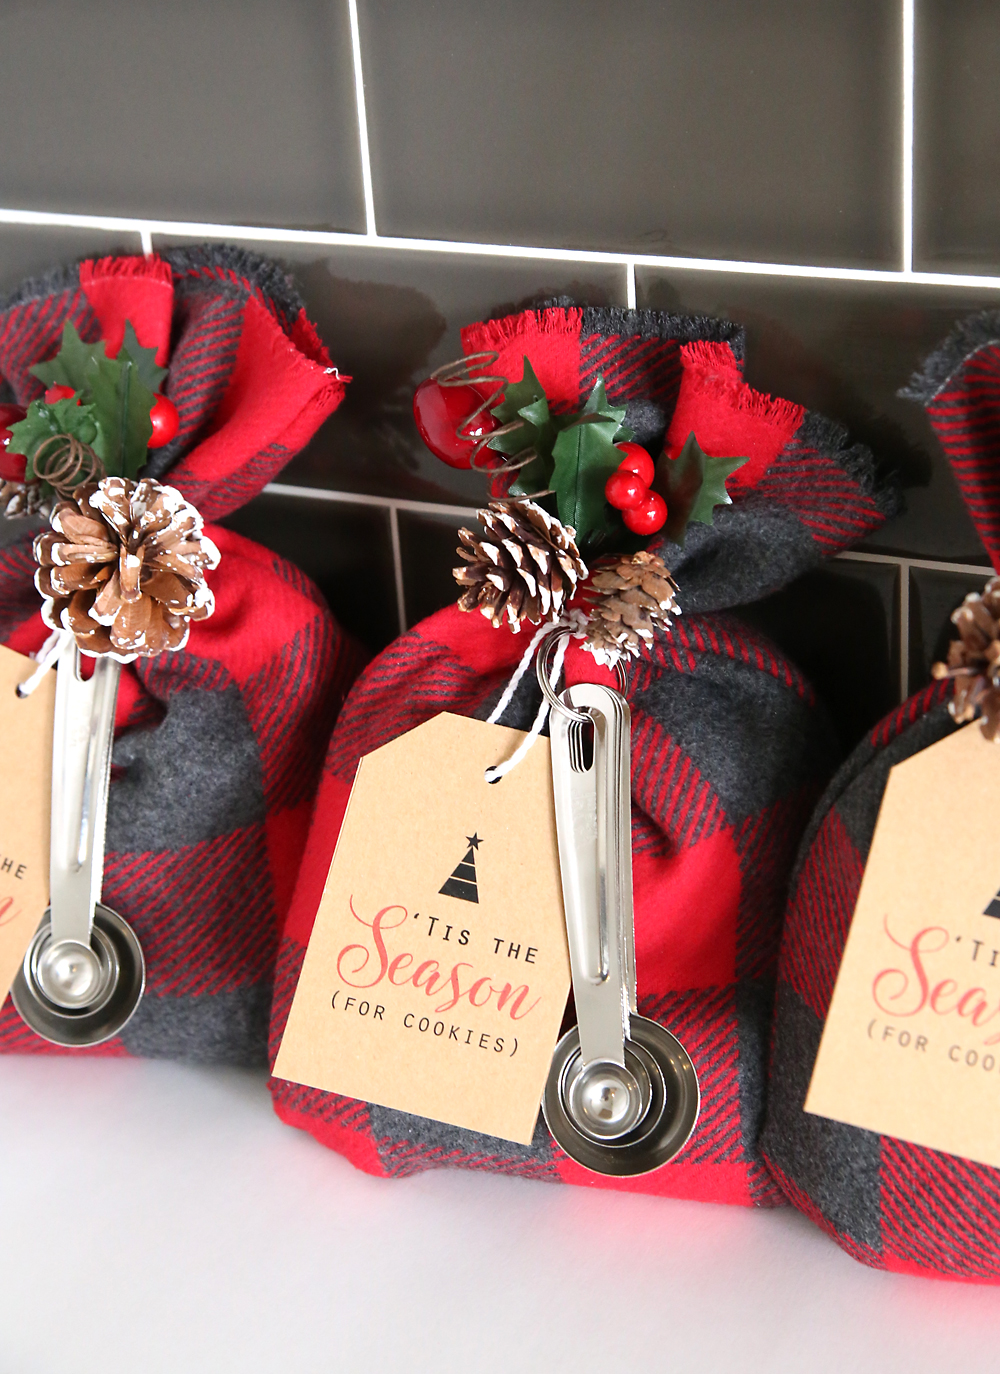
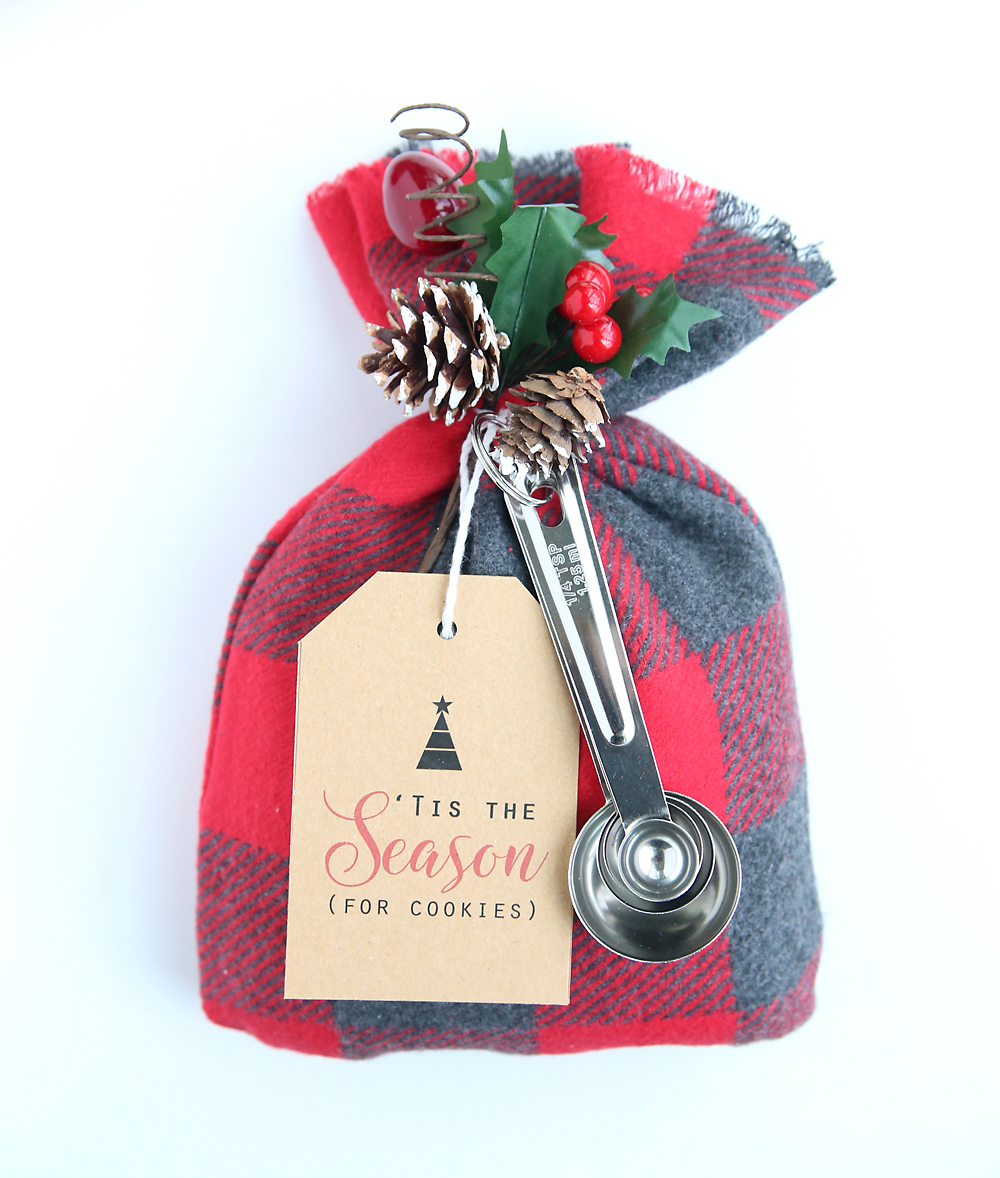
Next, print out the gift tags. Download them by clicking here, and print at 100% or full size. I printed mine onto kraft colored cardstock. You’ll need some twine to tie up the sacks, as well as any other small items you’d like to add (I got measuring spoons for $2 from Winco and a Christmas floral pick for $.75 at Hobby Lobby, but these are definitely optional).
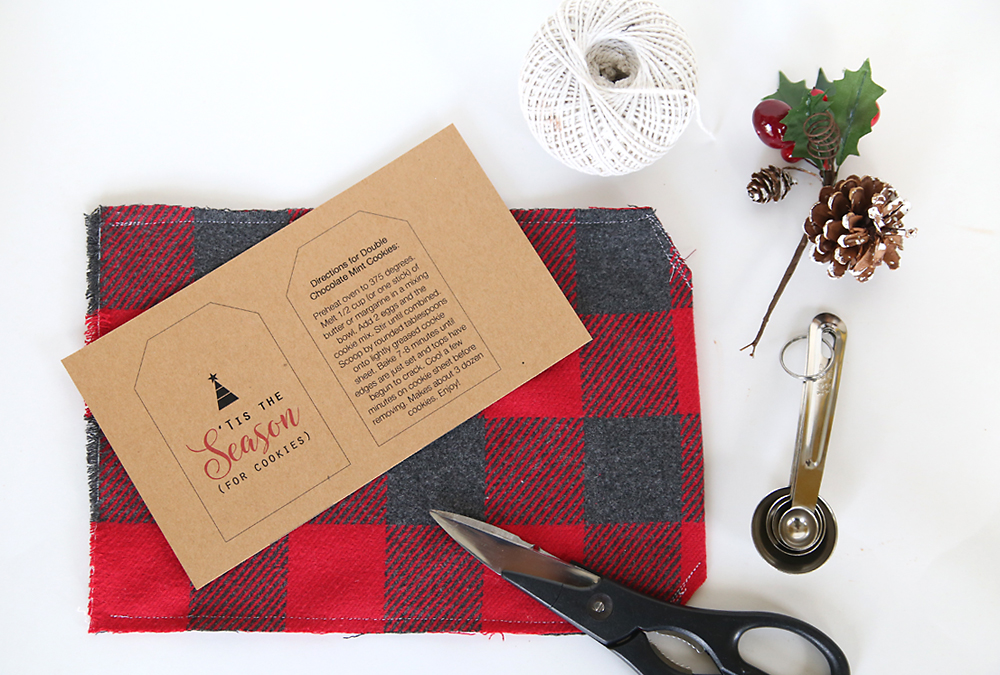
Cut out the tags and glue them together so the saying is on one side and the instructions are on the other.
Here’s a quick video that shows me assembling the bags:
As for cost, these are not dirt cheap, but they’re also not expensive compared to many other handmade gifts. For the cookie mix and sack, plan on about $5 per gift if you’re making multiples. The measuring spoons and floral pick I added brought the total for each sack up to about $8. I think it’s worth it for how adorable they turn out.
Looking for more handmade gift ideas? Check out 25 DIY gifts people actually want.
Looking for more Christmas treats? Check out these posts:
25 adorable Christmas treats to make with kids
Christmas tree spinach dip breadsticks
Easy to decorate M+M sugar cookies
The LEFT RIGHT Christmas gift exchange game (it’s hilarious!)

Marc says
Hey Autumn! I know this was posted some time ago, but I had to tell you what a hit these were in our Christmas platters this year. I cut your recipe in half (to make about 18 cookies) because I was making 10 platters. Everyone loved them! I have been following you for quite some time now and just love you and your content!
Sarah says
Great idea for my college-student grandson and a couple neighbors! I’m going to get a couple of those adorable fleece scarves they sell at Dollar Tree to make the bags…keep the cost down!!
Patty says
Love this tutorial! This would be a great teachers gift!
I’m going to share this on DailyMomBlogs on Facebook on 12/11. I think other moms will love this too!