
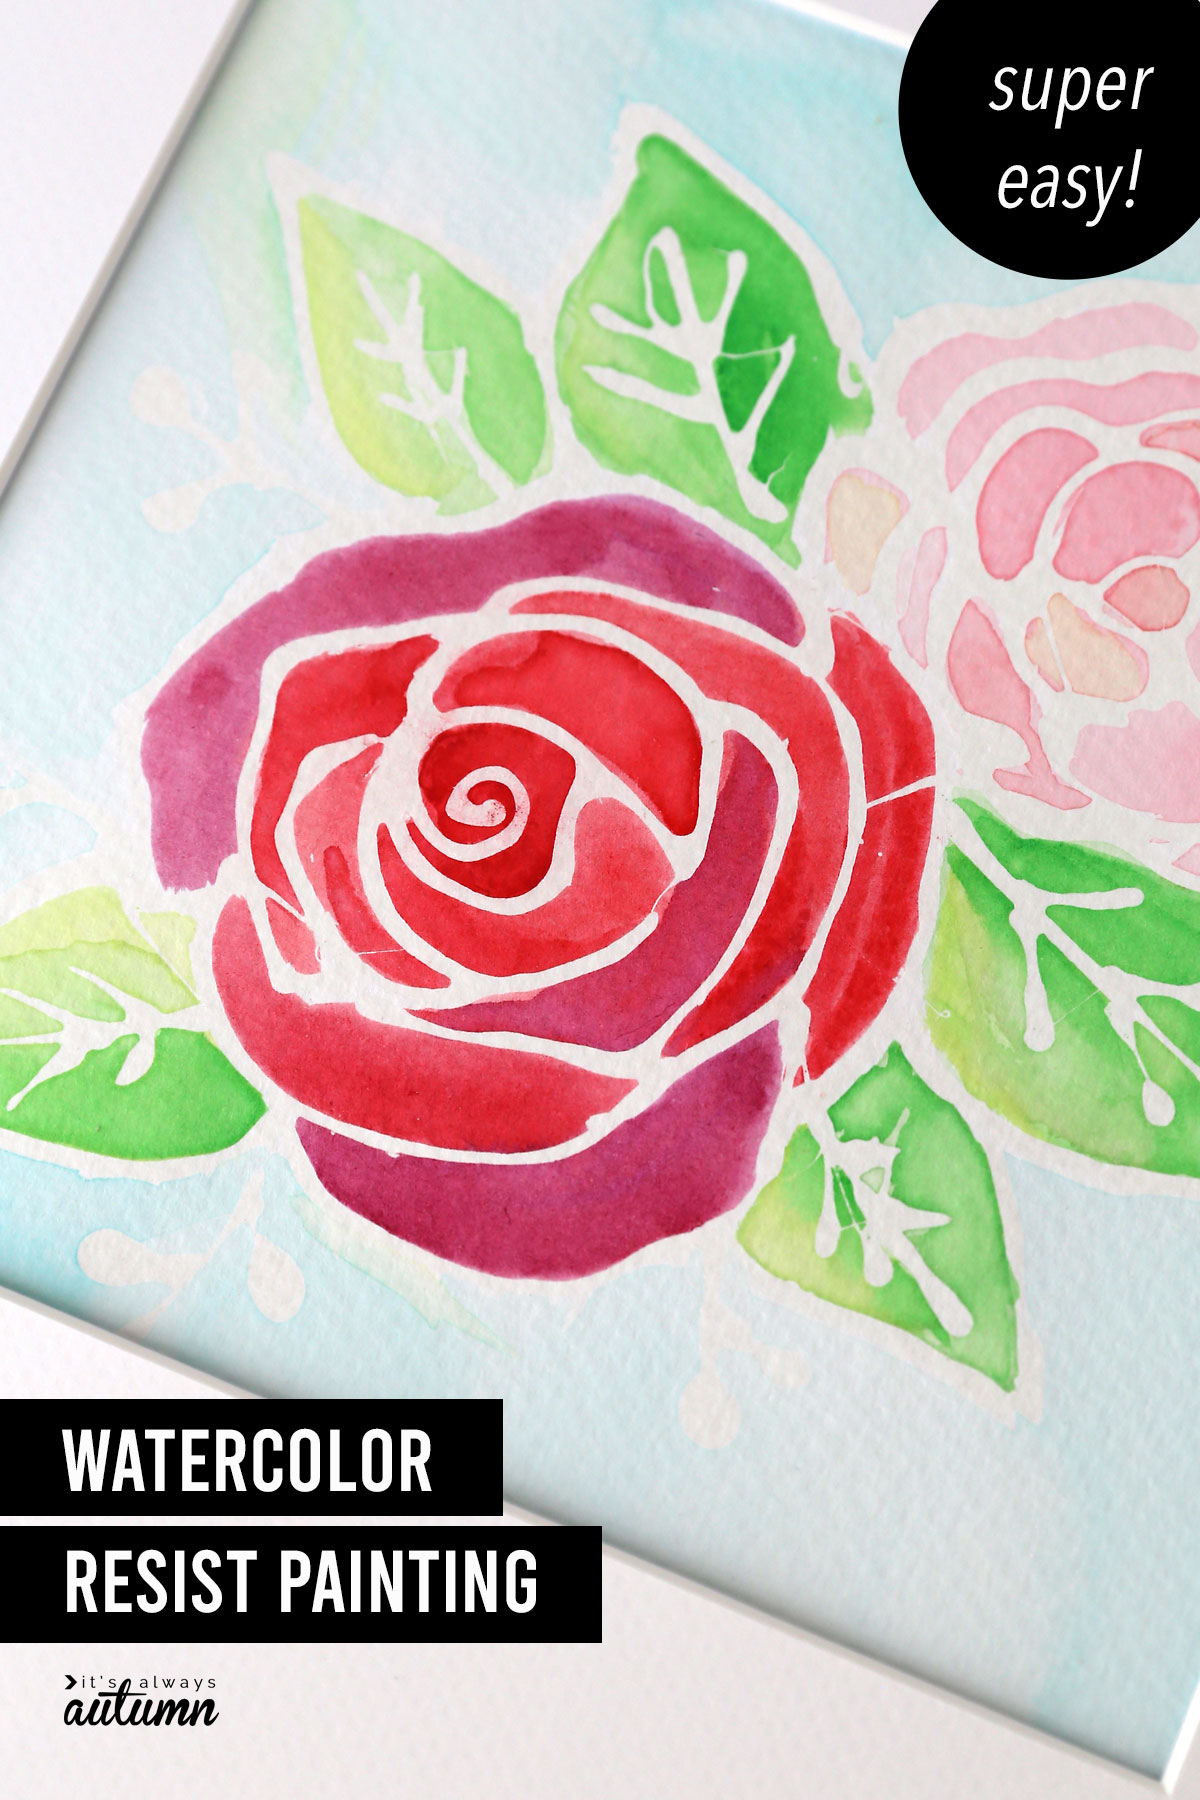
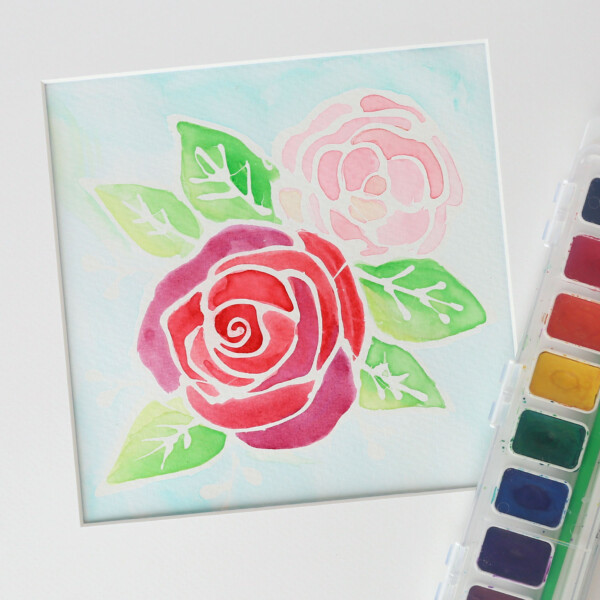
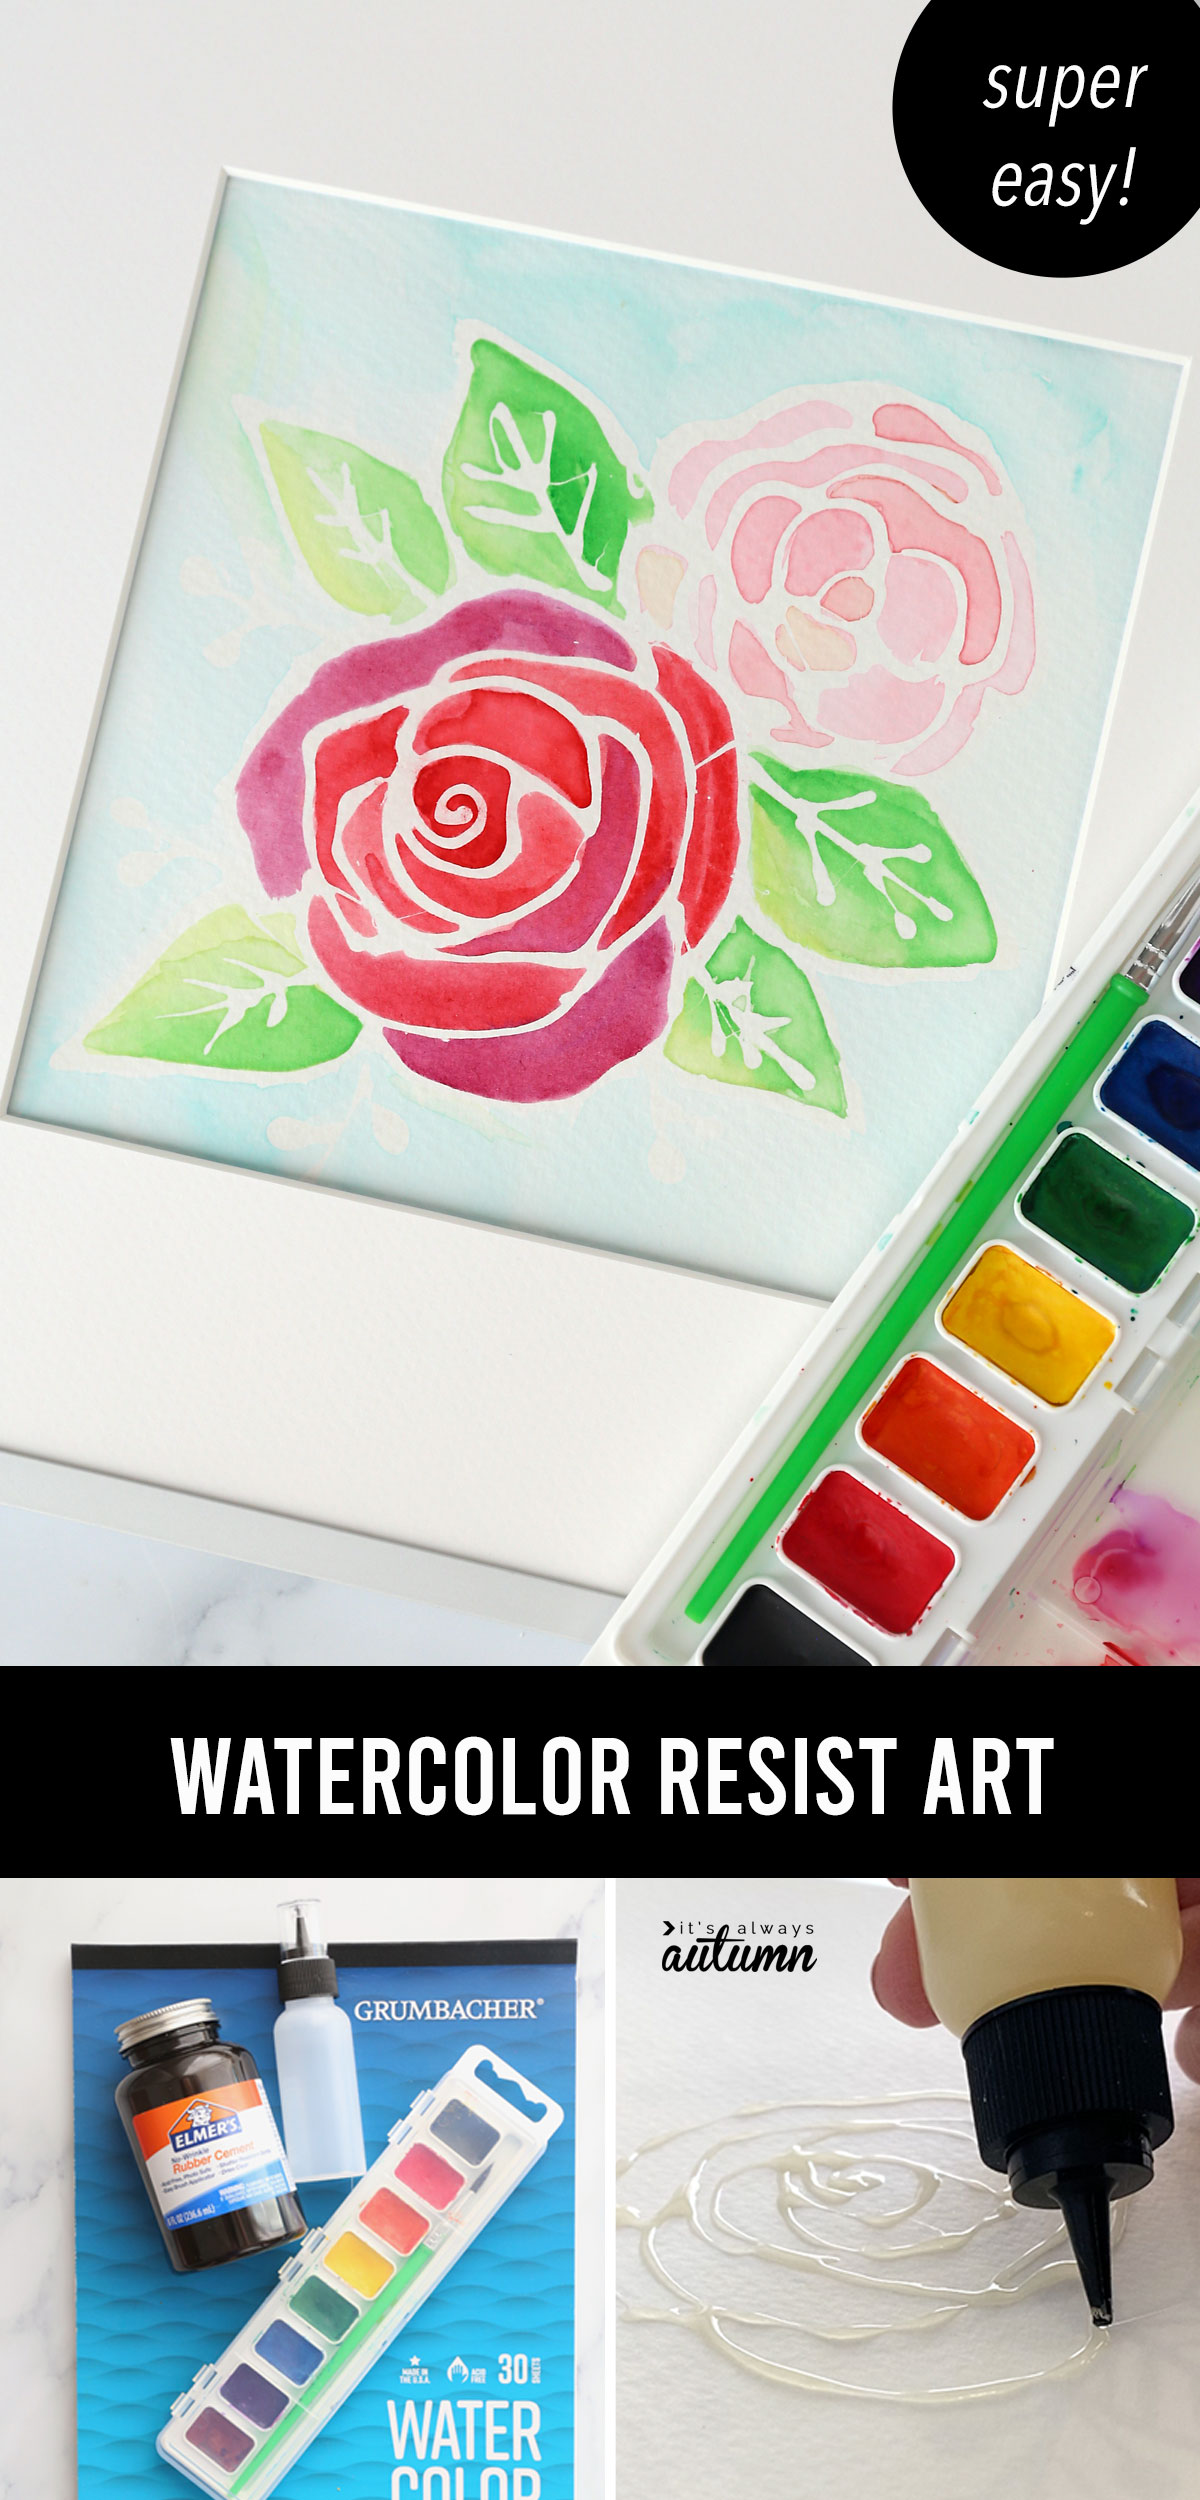
In today’s post: Learn how to make a pretty watercolor painting for beginners – absolutely no experience required! The rubber cement resist technique makes it easy for anyone to paint something beautiful.
Years ago I attended a 90 minute watercolor painting workshop and I thought: I’m going to go to this class and learn a few tips and know how to paint pretty flowers! Turns out, painting with watercolors is not something you can pick up in 90 minutes. It’s actually fairly complicated and involves lots of color mixing and layering and control of your brush, in addition to requiring a fair amount of supplies.
I left the class figuring I’d never try painting with watercolors again!
Watercolor Resist Art
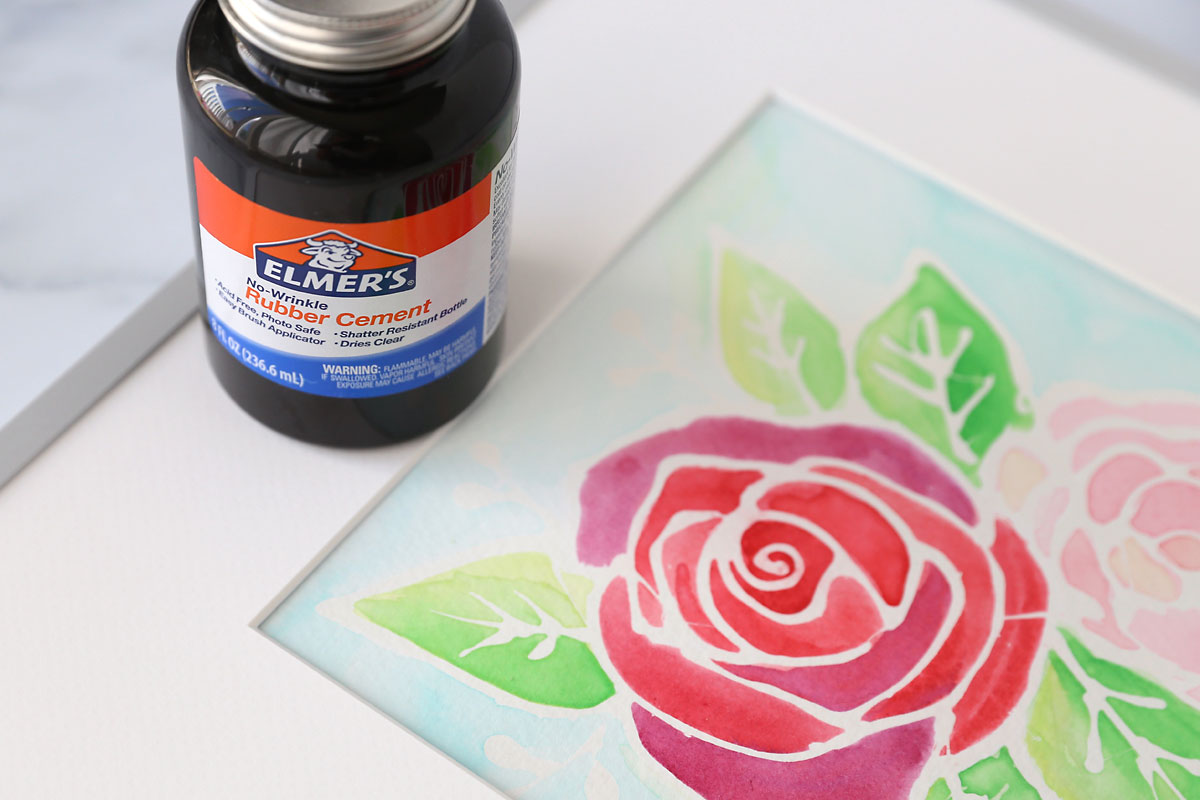
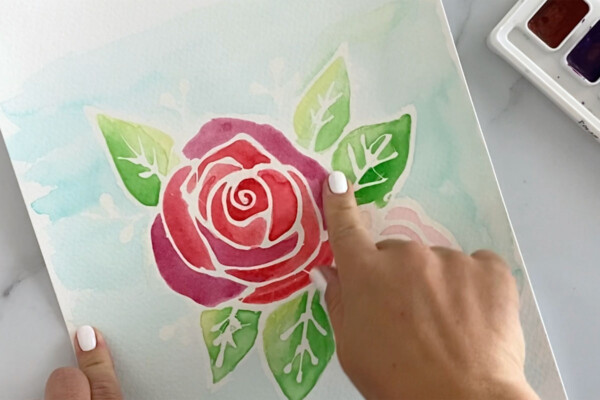
But a few weeks ago I learned you can use rubber cement as a “resist” medium with watercolors. That means anywhere you “draw” with rubber cement can be painted over – and when the watercolors dry you rub off the rubber cement, leaving bright white outlines. I figured if I traced a pretty design in rubber cement and then painted inside the lines I might end up with something halfway decent. And it worked!
Of course, this isn’t going to give you the same look that someone who actually knows how to paint with watercolors can achieve, but for a super easy beginner technique, I think it turns out great. It’s simple enough to be a calming activity for adults and easy enough to be fun for kids as well.
For this project, I purchased a floral outline on Etsy for just a dollar (click here to purchase the same one I used). You may be able to find free clipart online that you can use – search for free coloring pages or free clipart outlines. Etsy is a great resource for finding really beautiful designs to trace, but since these designs are created by designers for sale, please purchase the design you choose to use.
Supplies
To make watercolor resist art, you’ll need the following:
- Watercolor paper (inexpensive paper found at Walmart works great)
- Watercolor paints (the basic Crayola school paints are fine!)
- Rubber Cement
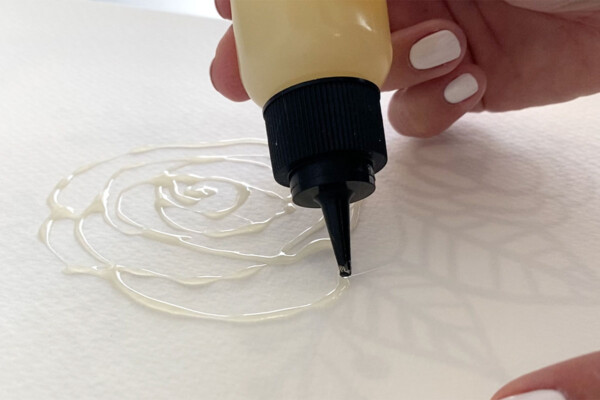
- A small, fine tip squeeze bottle for drawing a more intricate design, like the florals I’m showing today. I ordered this set of small squeeze bottles from Amazon. If you don’t want to order bottles, you could try using a small paintbrush to paint rubber cement over your outline instead.
- Light table or iPad/tablet that you can use as a light table

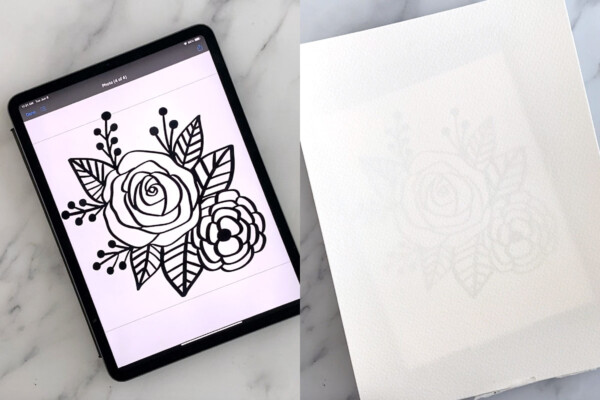
Pro Tip: Use an iPad as a Lightbox!
To trace your design onto the watercolor paper in rubber cement, you will need a Lightbox. If you and/or your kids like art, you might want to invest in one like this inexpensive version. But if you’re not interested in purchasing one, you likely don’t need to: if you have an iPad (or other tablet) you can use it as a Lightbox. Just open an internet window and search for “blank white screen” and then open a blank white screen. Turn the brightness up on the tablet, and you essentially have a Lightbox: you can lay down a printed design, then a piece of watercolor paper over it and you’ll be able to see the design right through it! Or, you can skip the printing part and simply open the design on the tablet. Place the watercolor paper on top of it and you’ll be able to see through the paper to trace the design.
Tips for Success
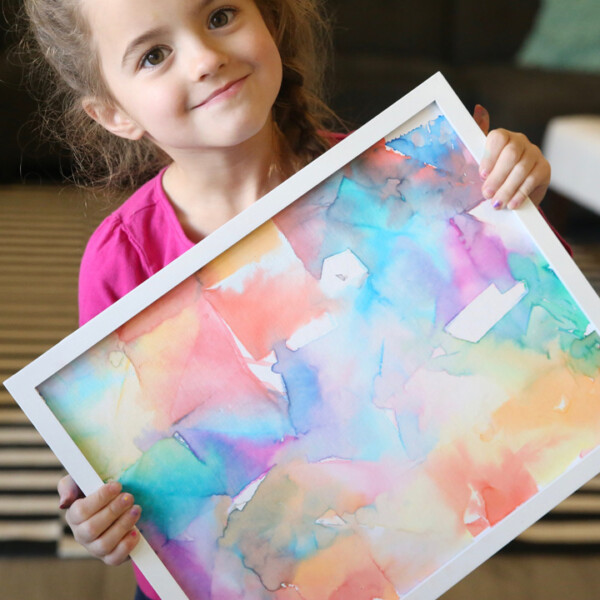
This project is best suited for kids that have the motor control to trace a design (8 and up). However, younger kids can still enjoy making watercolor resist art by drawing an abstract design on a page using a squeeze bottle and then painting over it.
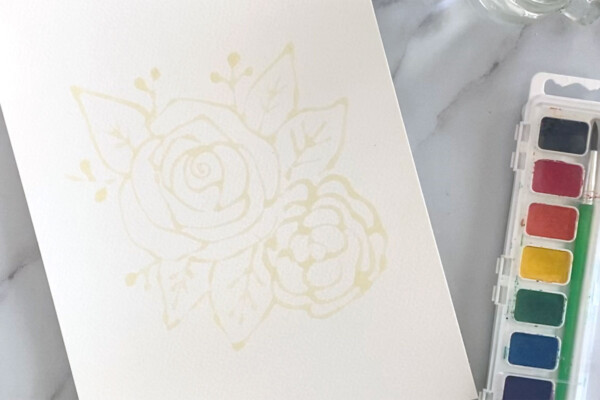
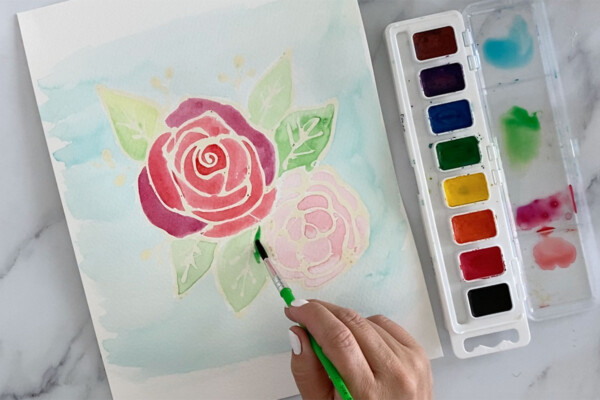
When painting with watercolors, you want to start with a very light paint that’s been mixed with a lot of water. Put that down first in one area, then let it dry while you put a first layer down in another area. Then you can come back to the first area and darken all of it or portions of it, and add some color variation by mixing in other colors. I used red and purple for the larger flower, and just red mixed with plenty of water for the smaller flower. The leaves are made with green and yellow.
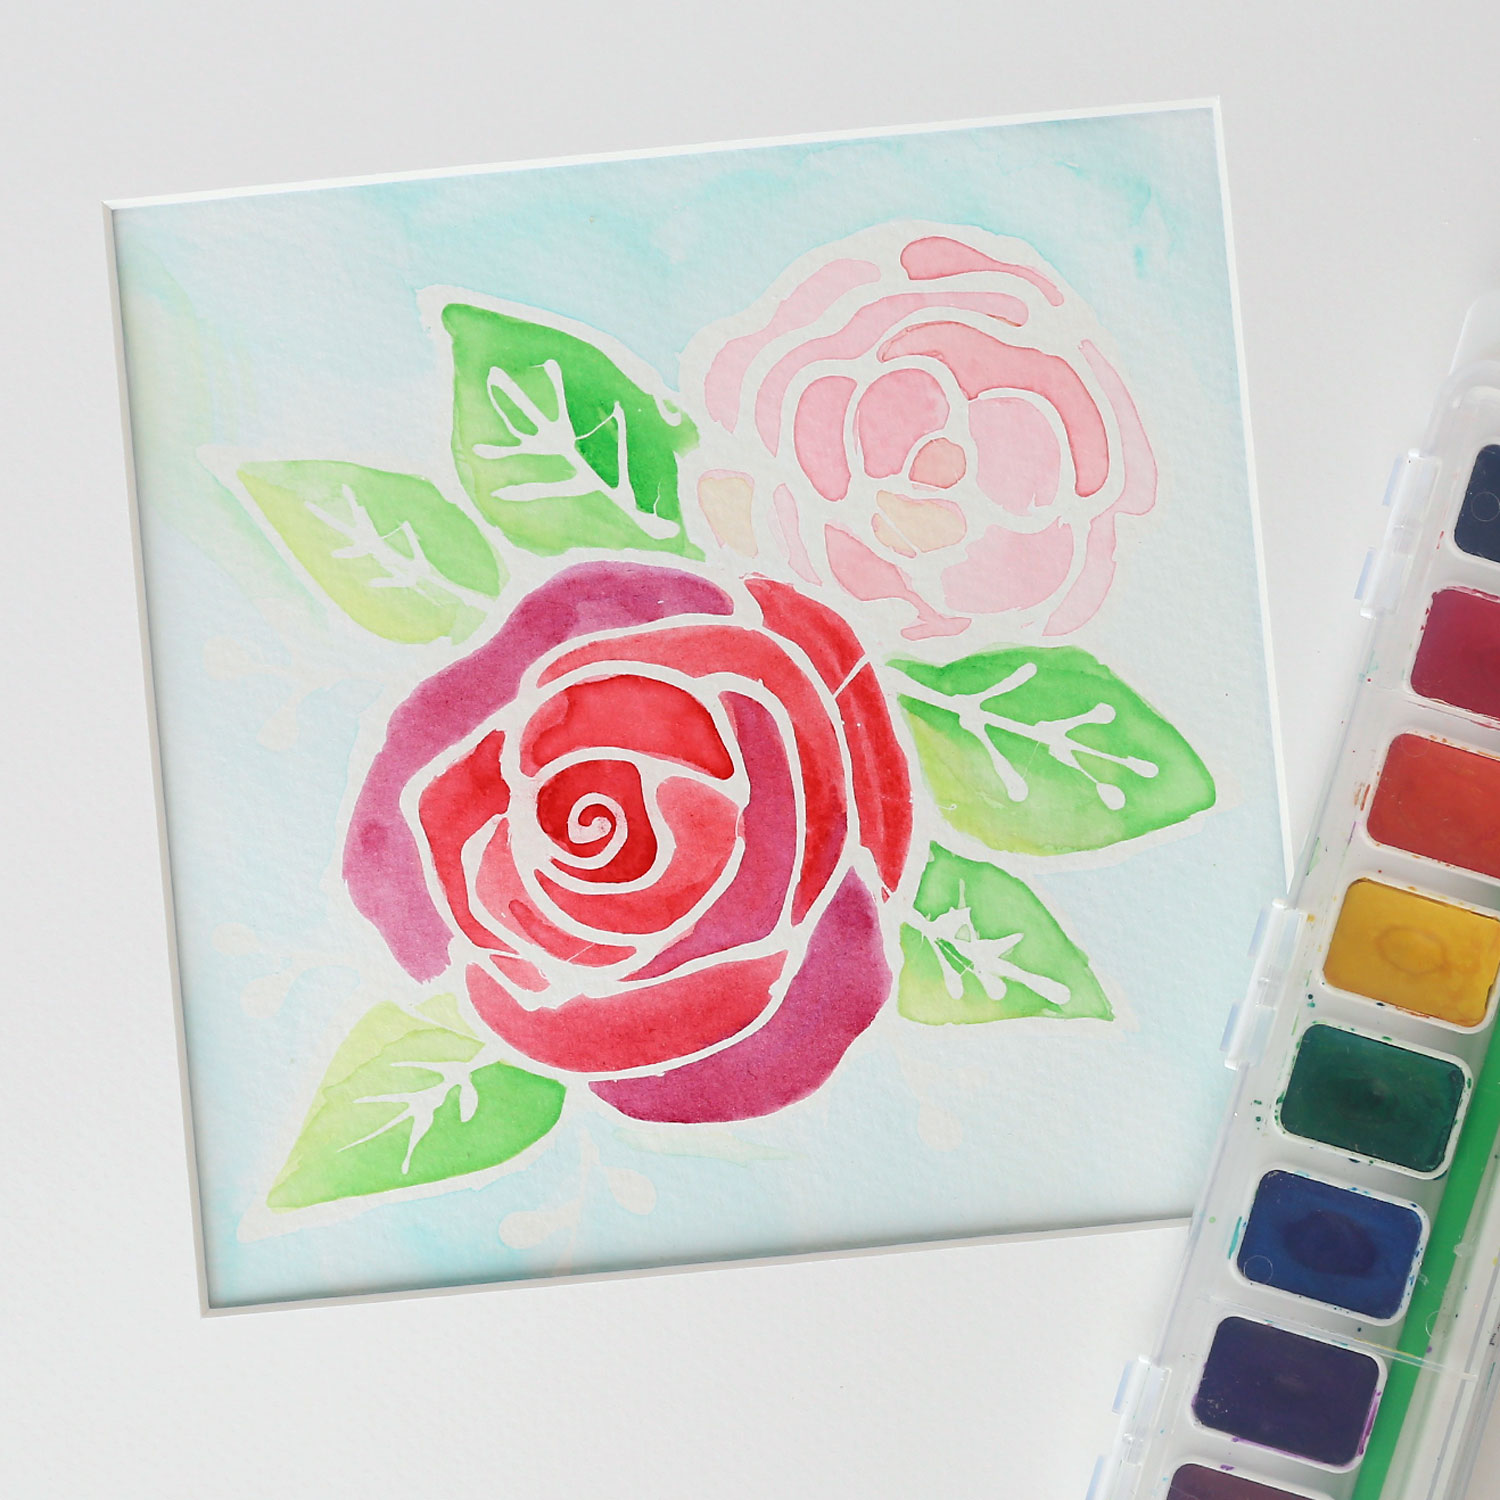
Remember, the beauty of this easy art technique is that the outlining adds all the details, so all you have to do is get some pretty color down on the page!
How to Make Watercolor Resist Art
Watercolor Resist Paintings
Supplies
- Watercolor Paints (Crayola set works just fine!)
- Watercolor Paper optional but looks better
- Rubber Cement
- Small Squeeze bottle
- Light box/light table OR iPad
Want more project ideas? Sign up to get my favorite easy crafts and recipes straight to your inbox!
Instructions
- Print out a design on normal paper. Place the printed design on a lightbox (or a tablet that you are using as a lightbox) and place a sheet of watercolor paper over the design. You should be able to see the design through the watercolor paper.OR, if using a table, you can simply open the design on the tablet, then place the watercolor paper on top.

- Pour rubber cement into a small squeeze bottle with a narrow tip. Trace the design onto the watercolor paper in rubber cement. Squeeze the bottle gently so too much rubber cement doesn't come out at once.If you don't have a squeeze bottle, you could use a small paintbrush to "paint" rubber cement on the outline.
- Allow rubber cement to dry for 10-15 minutes. It will still be sticky, but it should be dry enough not to smear before you begin painting.
- Paint your design using watercolor paints. Paint in layers, starting with light colors (colors with lots of water mixed in). Continue adding layers of paint until you like how your design looks. Allow it to dry completely.
- Use your fingers to rub off the rubber cement - the paper will be bright white underneath it, creating a pretty resist design.
More Easy Art Ideas
Cheater Watercolor Backgrounds using Markers
20 Art Projects for Kids that turn out GORGEOUS


Leave a Comment