
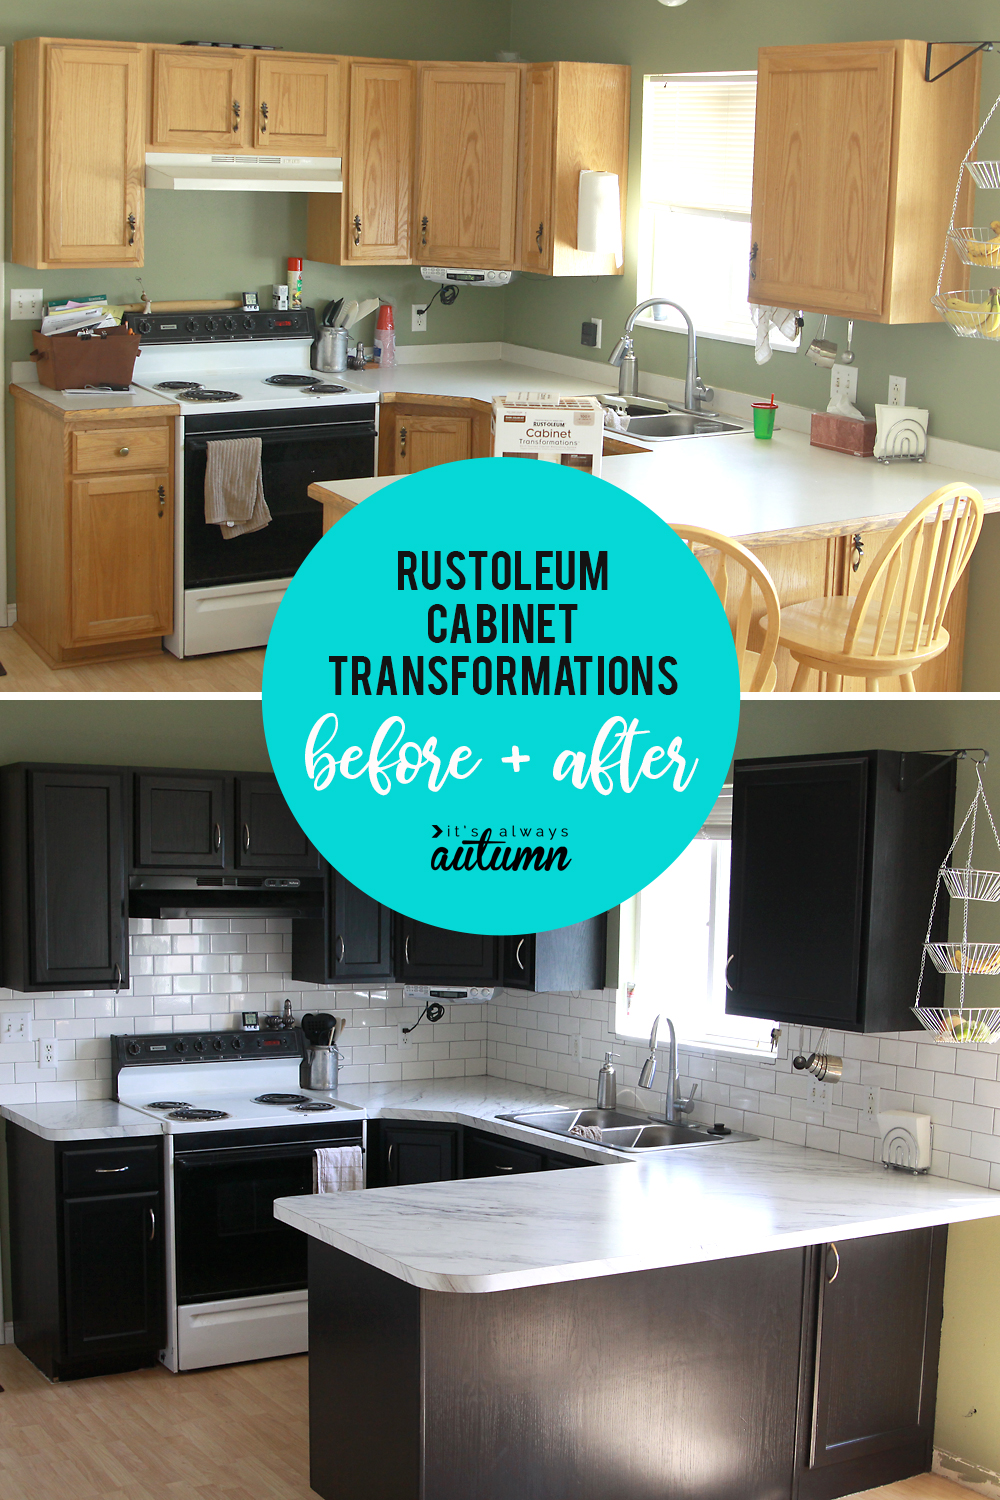
In today’s post: Wondering if you should use Rustoleum Cabinet Transformations to give your kitchen a facelift? Read my full review of the system and check out before + after photos, plus get lots of tips on how to get the best result.
My husband and I both kind of hate home improvement projects. Or rather, he kind of hates them and I occasionally convince myself I like them, only to get halfway through something and remember that, oh ya, I actually kind of hate home improvement projects. It’s just so much work! And when you have five kids running through the area and attempting to help it’s even more work. So we generally consider good enough to be good enough and leave things alone. But I really hated my cheap oak cabinets and wanted a change – without spending much money. So I decided to use Rustoleum Cabinet Transformations and I’m going to tell you all about it in case you’re considering doing the same!
In this post I’ll give you an overview of how Rustoleum Cabinets Transformations works as well as my review of how it’s holding up one year later.
Rustoleum Cabinet Transformations Review: tips + tricks
The small Rustoleum Cabinets Transformations kit was just perfect for our smallish kitchen. It runs about $80 at Home Depot and the like, and it can be tinted to whatever color you want. (Add in nice brushes, tape, tarps, and some rags, and we’ve spent $125 so far on the cabinets.) I originally wanted white cabinets, but I’ve read that most clear topcoats make white cabinets look a little yellow, and I was not willing to go to all the trouble to paint my cabinets and then have the paint chip because I couldn’t topcoat it. So I went the other direction and chose black, which I’m loving already.
If possible, it would probably be easiest to clear your home of children and your schedule of any commitments for a few days and work through this project start to finish (with a helper if possible). I couldn’t clear either my schedule or my house, so I spent one week working on the upper cabinets, one week taking a break, and one week on the lower cabinets. I worked in one to two hour chunks during naptime, after the kids’ bedtime, or when the big kids could keep the little kids out of the way for me. I set up a table in the middle of the kitchen, covered it in a tarp, and used inverted plastic cups to prop up the cabinet doors I was working on. Then I let the doors dry in the garage, on more inverted plastic cups. This was the general schedule:
Day 1. Remove hardware/doors.
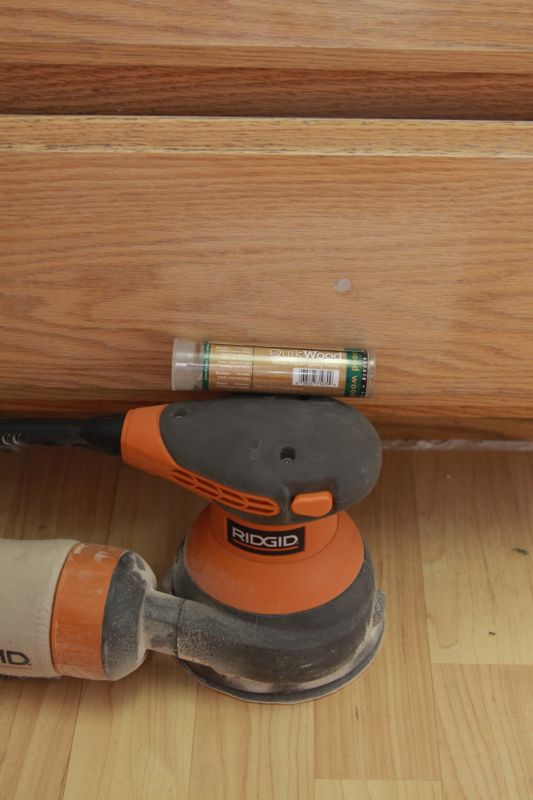
Degloss: You start by using a chemical deglosser to scrub down your doors, drawers, and frames (after taking them all down and removing all hardware). This has not been my favorite step – mostly because I haven’t been enjoying the realization that I’ve been living with really dirty cabinets – but it’s not that hard. It just takes some time. And on the plus side, using a deglosser means you don’t have to sand the finish of your cabinets before you paint.

Fill in holes from old hardware, let dry, and sand down.
Day 2. First coat of base coat (stain-based paint) on backs of doors in the morning. Second coat backs of door during naptime. First coat the cabinet frames after bedtime.
Day 3. First coat of base coat on fronts of doors in the morning, second coat during naptime. Second coat on cabinet frames after bedtime.
Day 4. Clear topcoat on backs of doors in the morning, fronts of doors in the evening.
Day 5. Clear topcoat on cabinet frames.
Day 6. Rehang doors, drill new holes and add new hardware.
Remember, I did this twice, once for the uppers and once for the lowers. If you had two people working you might be able to do them both at the same time (and it would go even faster if you weren’t waiting for naptime to get more things done.
A few more things: Both the base coat and the clear coat bubble a little when you first apply them. On the base coat the bubbles disappear pretty quickly as you paint, and don’t seem to be a problem when it dries. But the clear coat is much finickier. It’s hard to get all the bubbles out, but you want to because they will be very visible when they dry. Also, make sure you don’t let any clear coat collect in the corners, like this:
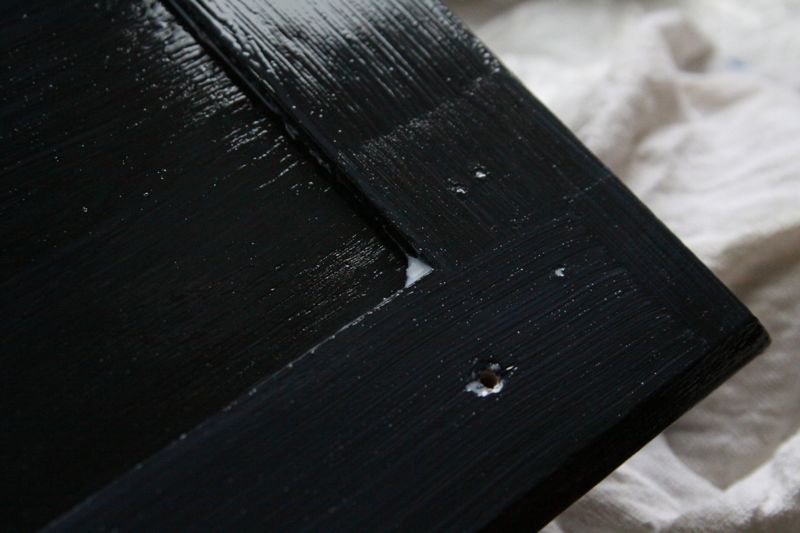
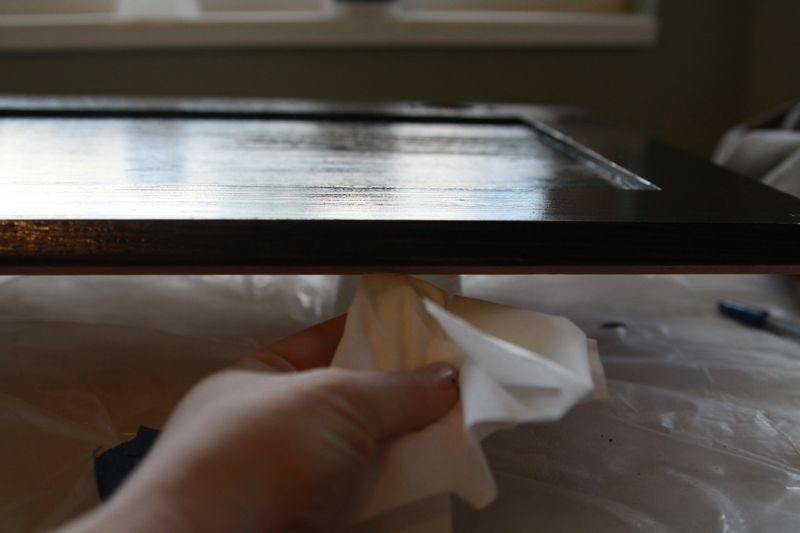
…because it will dry white and look bad. Also, when you are painting or clear coating the backs of the doors, make sure there are no drips on the underside (which is the front) because if there are, when you flip them over to paint the front, you’ll have to sand off bumps of paint or clear coat before you can begin (I eventually solved this problem by wiping the underside of the edges clean as I went along).
It’s a low of work, but for so little money, it’s totally worth it.
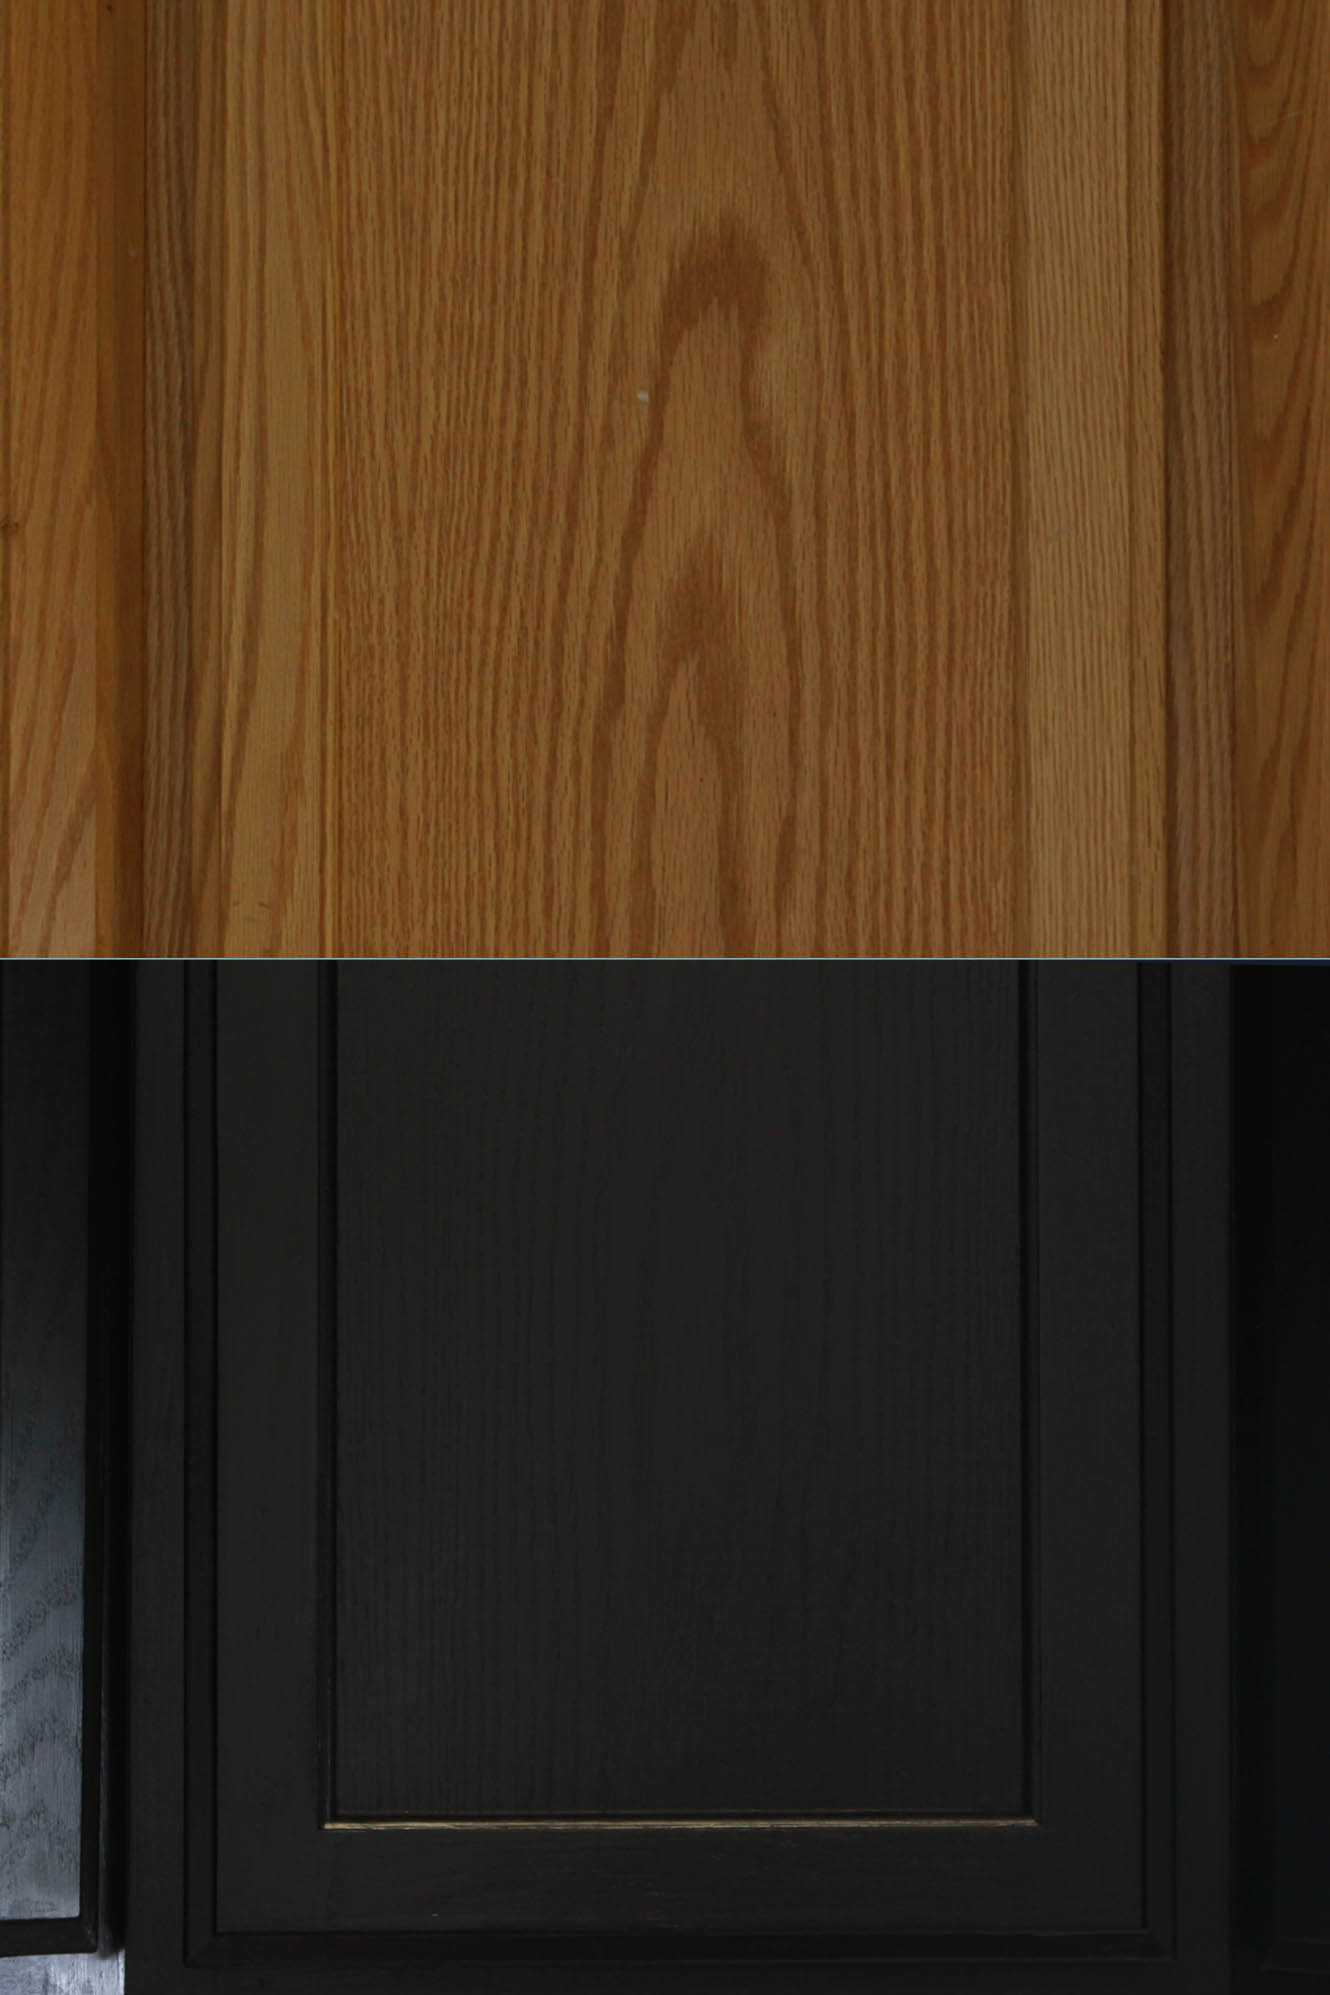
The thing I liked best about Rustoleum Cabinet Transformations is that it’s not a paint (so it’s not thick and doesn’t show brushstrokes), but it’s not quite a stain either. It’s thin enough that the wood grain shows through, which I think is really pretty:
Rustoleum Cabinet Transformations Review: One year later
In the year since I used the Rustoleum Cabinet Transformations kit to refinish the cabinets, I’ve recommended it to a number of friends. I was impressed with the huge different it made in the look of my kitchen for about a hundred dollars.
One thing I worried about when using the kit was how it would hold up to our family of seven (which includes a rather destructive two-year-old). So I thought I’d write a quick post letting everyone know how it’s held up for the past year. The short answer is: beautifully.
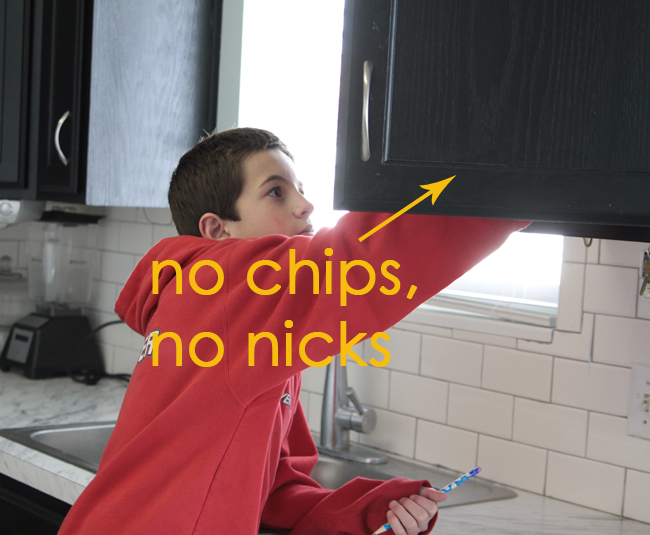
One of the biggest problems with painting your cabinets is that paint chips, nicks, and starts to look really unprofessional. That just hasn’t happened with our cabinets. Sometimes I’ll see a little spot on it and worry that we have a nick, but when I look closer I realize it’s just dried food 🙂
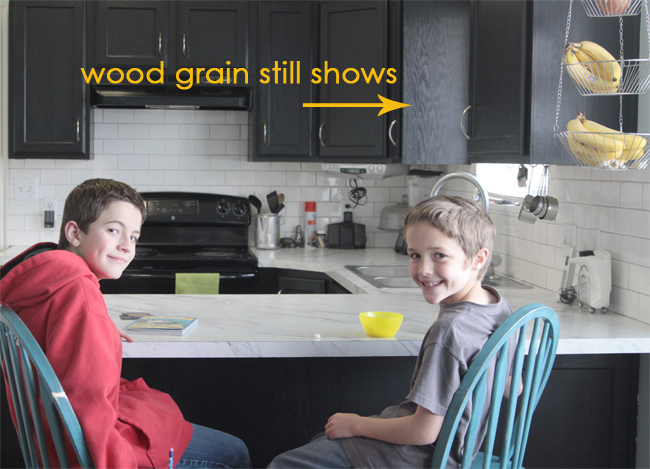
I love the cabinets and think they look professionally done. You can’t see any brush strokes, and since the paint that comes in the kit is stain-based you can still see the wood grain through the paint, which I love.


Lisha says
I would only paint the table legs, and legs and back of the barstools and keep the tabletop and seats a natural color. I was thinking a farmhouse red would be cute. Then you could decorate in a red/white/blue theme for the accessories. But another blue shade would be cute too if its not the whole table or stools. That might be too much color. The great thing about painting them will be if you hate it, you can just repaint!
Heidi says
The back splash looks great, I have been wanting to come over and see it. I think you should consider painting both of the chairs and the table, however, I would wait until you are done with the walls to make your final decision to make sure of what you want with everything looking different from what it is now. I also think it would be fun to do a two tone like Monique suggested, but it will take extra time. I think it could look cute with your table too to paint the legs black and he top another color. for an additional color a bright or pale yellow would look good, also some orange/coral, or reds would look good too. I think it will depend on what you really like with it.
Monique says
It looks amazing! Nice job . You should paint the tops of the stools black with the aqua on the bottom. Cappy did that with hers (I htink they’re white and blue) and it looks great. just a thought if you wanted one.
Denise says
Oh, my! I’ve got to come see this in person. That is one good-looking kitchen! Don’t make me want a backsplash! 🙂
Brittany says
looks so fabulous! makes me so excited for the day next decade that we redo our kitchen! i like the idea of two shades of aqua….