
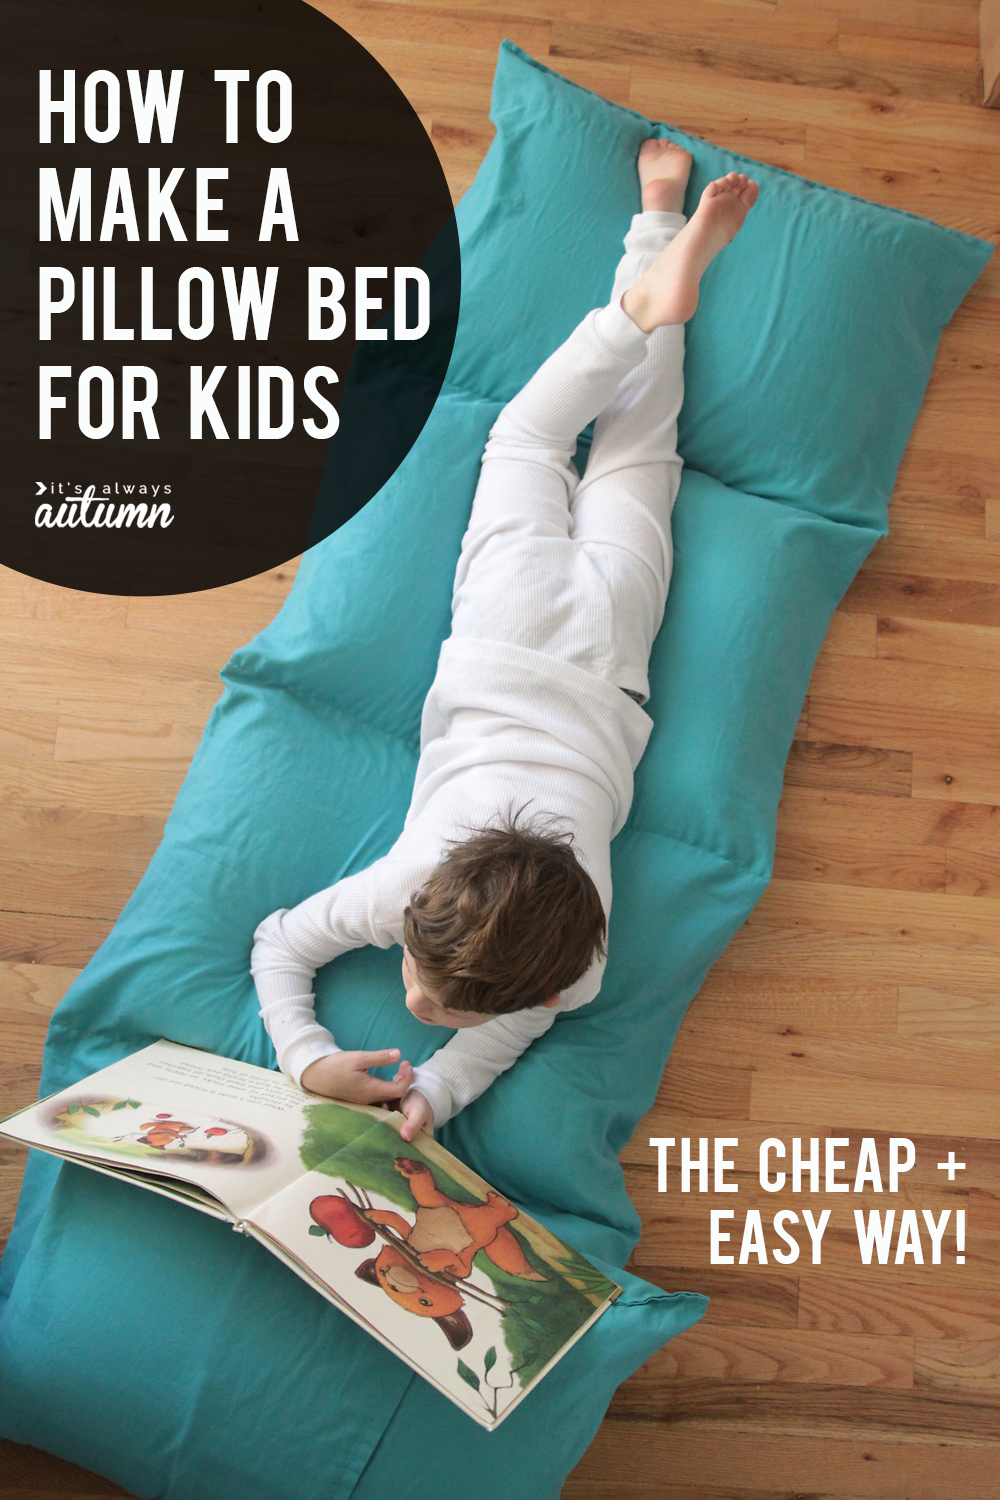
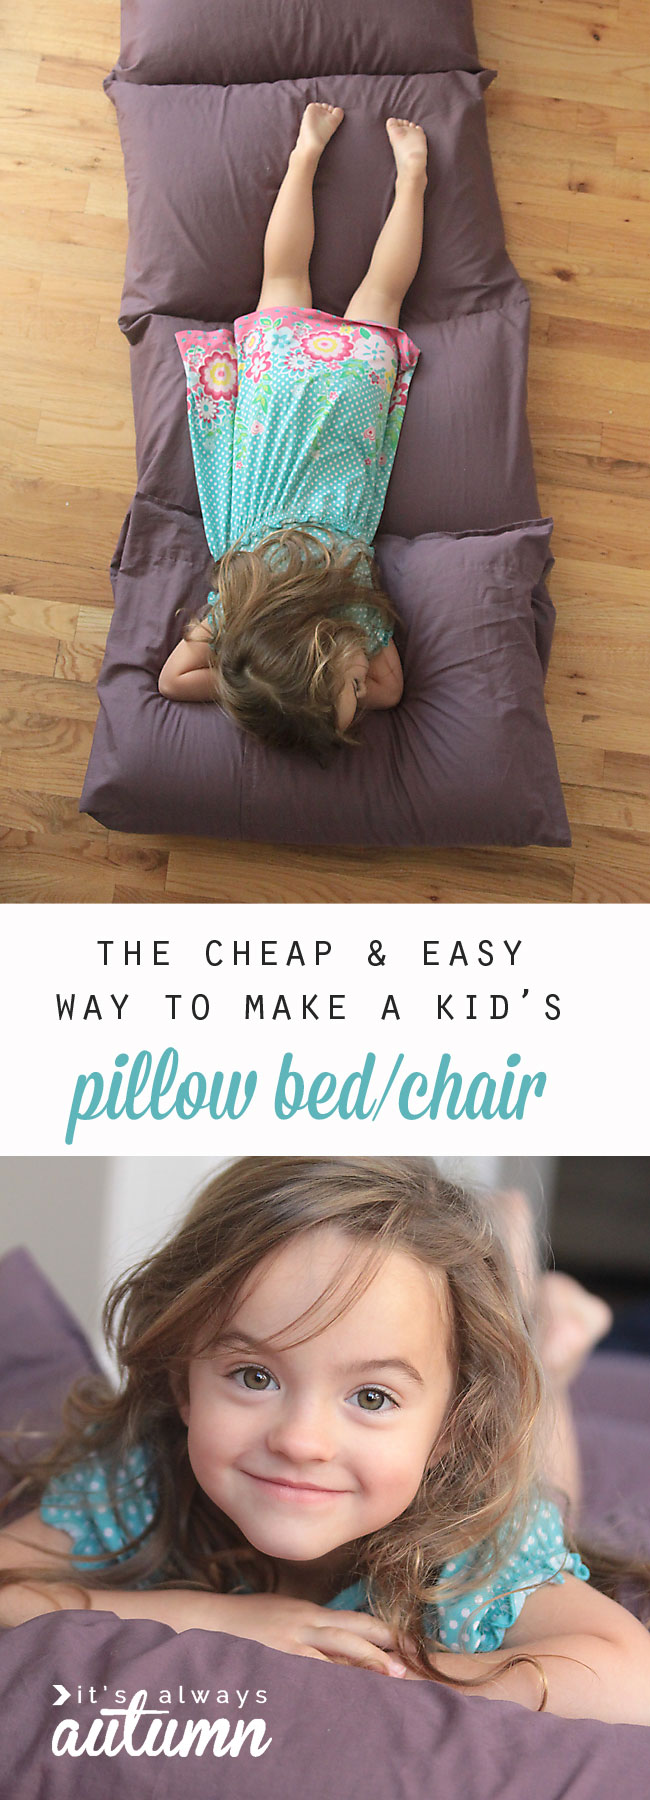
In todays’ post: Learn how to make a portable “pillow bed” for your kids – perfect for spending nights at Grandma’s house or just lounging at home.
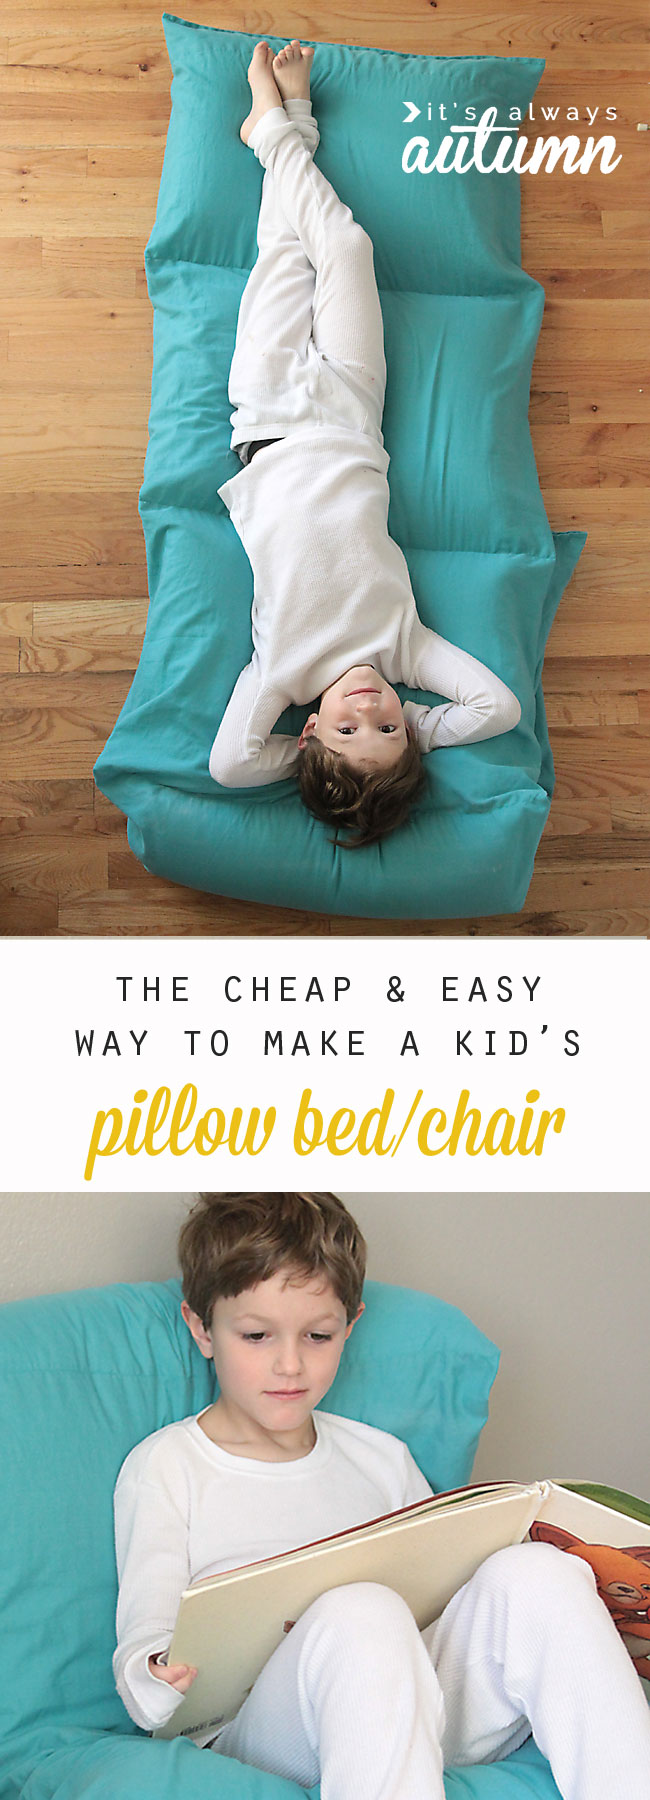
You might be asking yourself: what in the world is a pillow bed, and why would I want one? Well, a pillow bed is a pretty much just what it sounds like: a portable bed made of pillows that are connected in a row. It’s a nice way for kids to have a comfy place to sleep when they are spending the night at someone’s house without worrying about blowing up an air mattress. Pillow beds also work well as loungers for watching TV or reading books.
Best of all: kids love them! A pillow bed is a fantastic homemade gift idea.
You can make a pillow bed by sewing 4 or 5 pillowcases together, and then sewing velcro at the end of each pillowcase to keep the pillow inside. However, to keep this project as cheap and easy as possible, I ditched the pillowcases and velcro and used one flat sheet instead. Fold the sheet and sew a few straight lines and you are done!
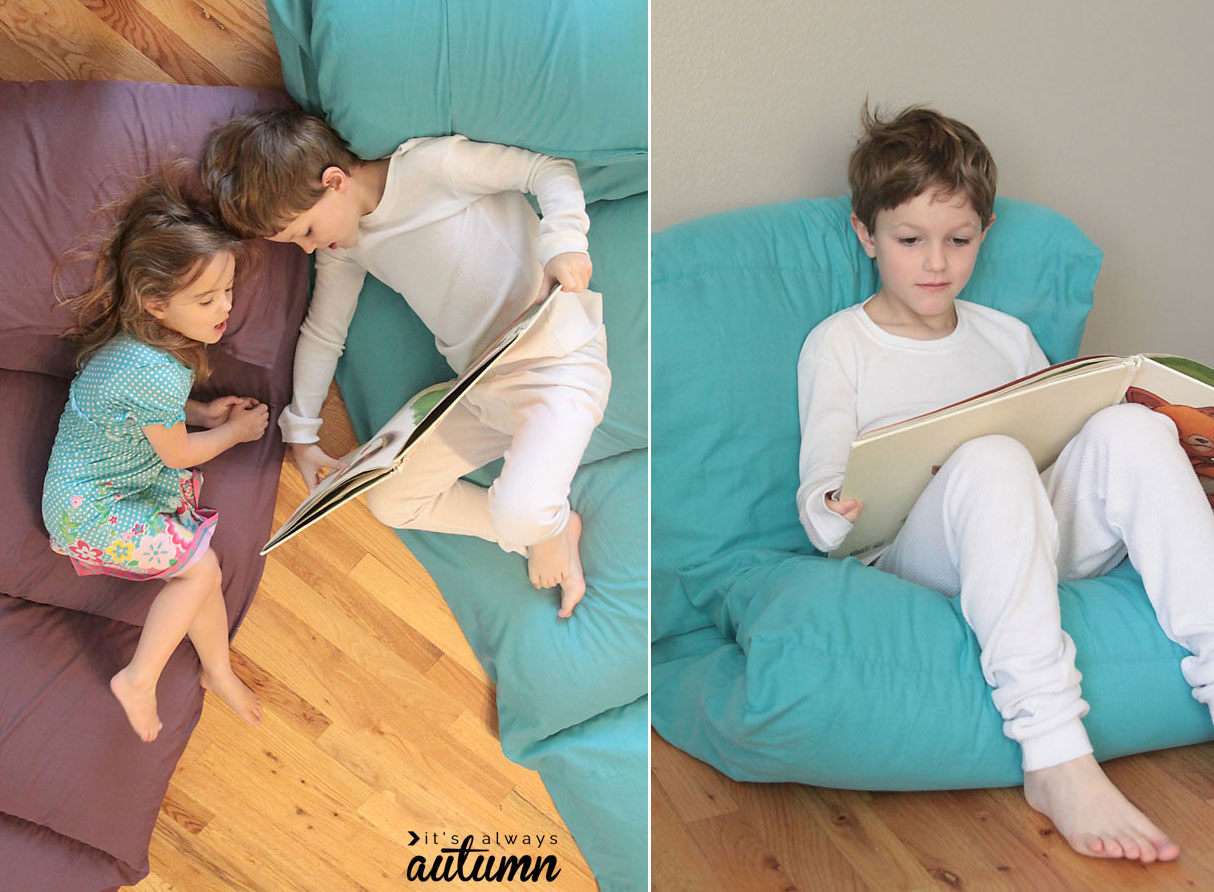
I made a pillow bed for each of my two youngest kids. The main living area of the house we’re renting is all laminate flooring, so these pillow beds make a cozy spot for them to lounge around together.
The secret to a cheap & easy pillow bed is a twin size flat sheet. Walmart sells them in a wide range of colors for $5 or $6 each. They also sell basic pillows for $2.50 each, making a 5 pillow bed under $20. It’s a perfect handmade Christmas gift.
How to make a kids’ pillow bed
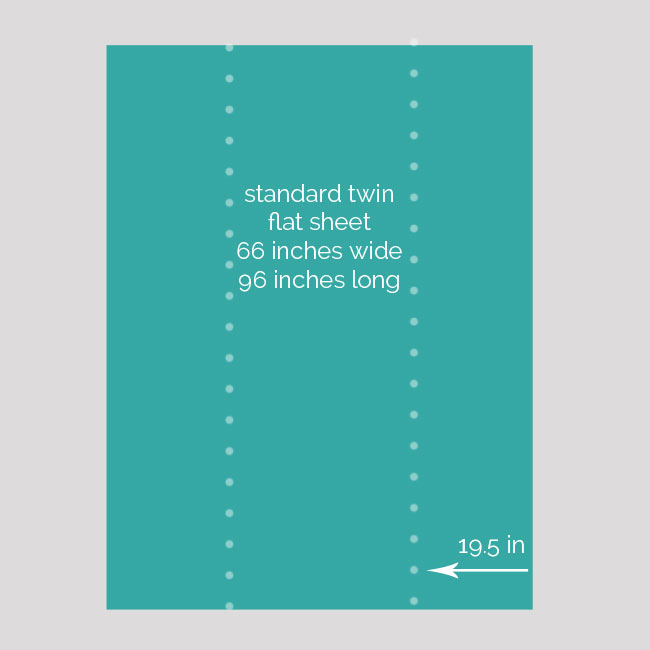
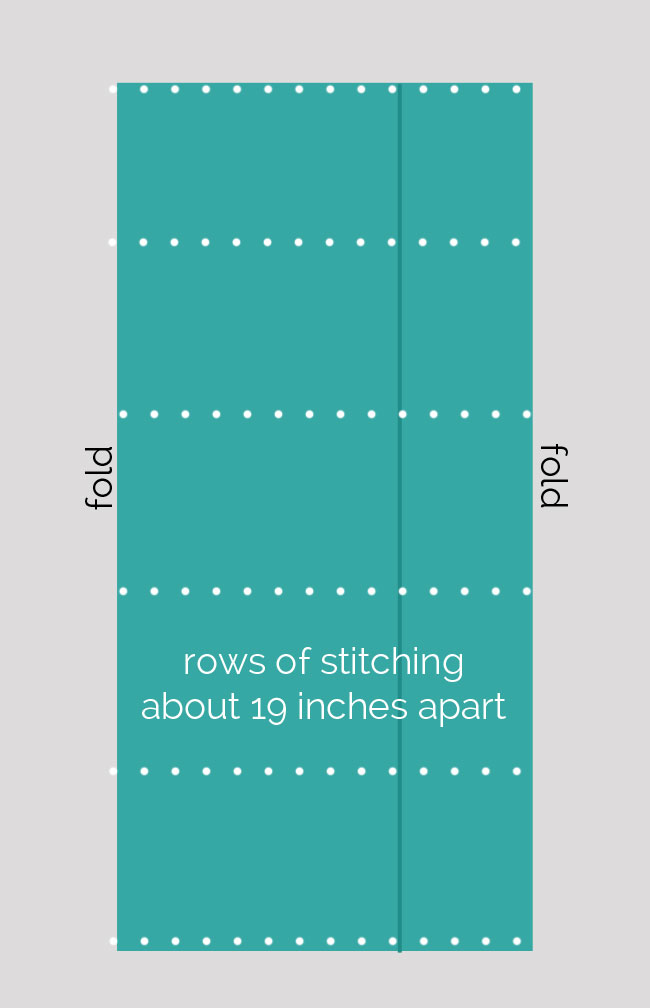
Start by laying out your sheet on a flat surface right side down (a table is easier than the floor). Your sheet should be 66 inches wide by 96 inches long. You’re going to fold in each side along the dotted lines in the diagram below. You want the final width of the pillow bed to be about 27 inches, so if your sheet is exactly 66 inches wide, you’ll fold in 19.5 for each side. (The sheets I bought varied a little in width – so I just adjusted how much I was folding in to get a final width of approximately 27 inches.)
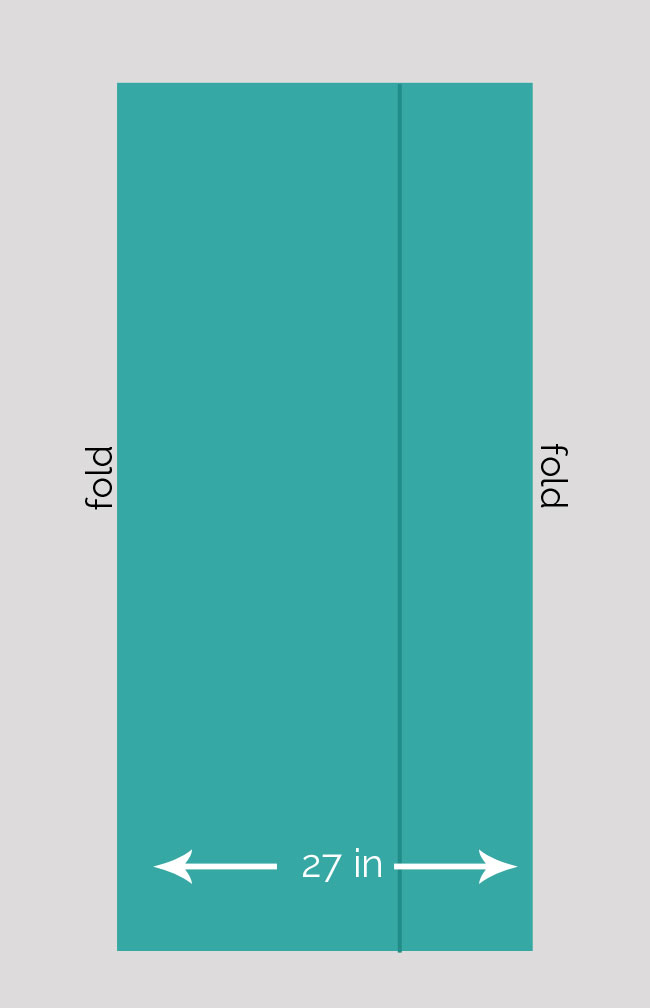
This diagram shows what the sheet will look like once folded. The right side was folded in first, then the left side, which overlaps the right. The overlap means we won’t have to add any velcro to keep the pillows in place.
Pin the sheet together across the top and bottom. Then you’ll want to pin 4 more lines, each approximately 19 inches apart. It would be easiest to mark these lines with tailor’s chalk or something similar. It’s not necessary that they are exact, just try to space them as evenly as you can. Use lots of pins!
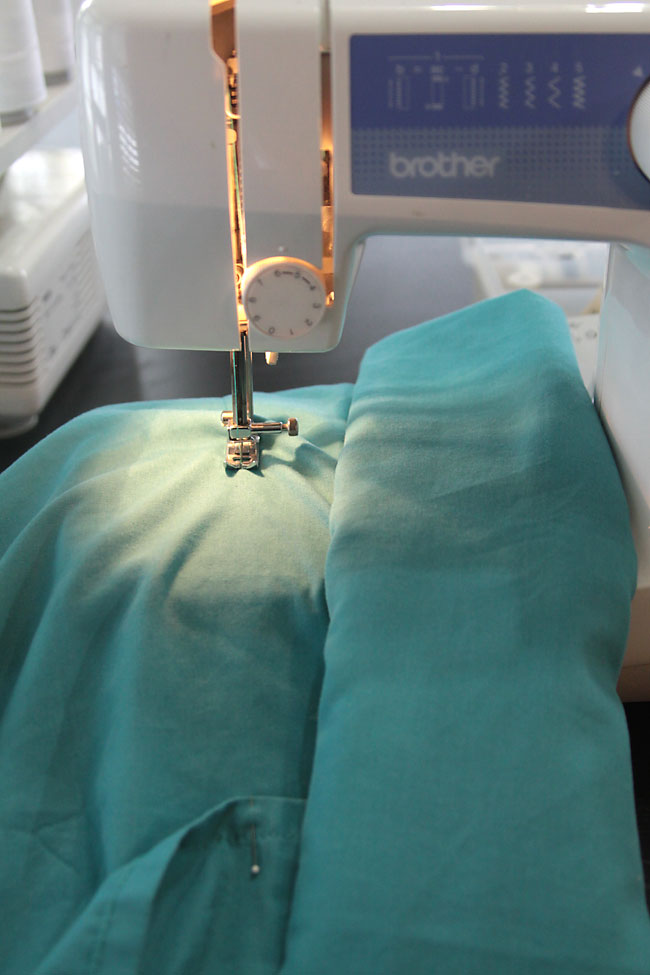
Take the sheet to your sewing machine and sew a line of straight stitching along each row of pins, backstitching and the start and end. I found it was easiest to sew one end first, then roll the sheet from that end up to the next row of pins, then sew that row and roll again. This kept the sheet from getting all bunched up as I sewed:
It only takes 6 seams, and you have a pillow bed cover ready to go! There will be 5 sections that are each much like a pillow sham. Stuff a pillow into each section, and you’re done.
Looking for more easy sewing tutorials? Check out these posts:
How to make a half circle skirt
The Play-All-Day dress (easiest girls’ dress pattern)
The easiest way to make a women’s tee

Corky says
AWESOME!!! I’ve made 3 so far. I haven’t sewed in 30 years and this was just a great Christmas gift for my grandkids!! Thanks a million!!!
Terri Burnett says
Besides using them for home, it might be nice for a mat under sleeping bags for camping.
Prairierose says
This would be a great use for older pillows that I just can’t throw away.
meterr says
Are the pillows removable so the outer sheet can be washed?
autumn says
You actually can take the pillows out to wash the cover – just the same way you can remove pillows from pillow shams to wash them. You could add zipper closures, but I didn’t want to mess with that many zippers (or spend the money on them) so this way seemed easier. Thanks!
Sharon Erickson says
Last year I saw something like this but not with the pillow sham idea and I decided to make them like pillow shams. I had not seen any like the ones I made at all. These are the first ones I have seen like mine. On my first one I used cotton but did not like the mussed look. I started making them for my grandchildren. I made only 4 pockets and my pillow mats measure 68 x 25. I use only flannel in making them. After making 7 of them I started selling them. People really like them and you can get some of the cutest patterns in flannel. Some have ordered custom made ones. I plan to revise my pattern to make them small enough to use in daycare. BTW you can also use foam egg crates in them instead of pillows. Just cut to size of pocket. I loved making these.
Barb says
Yes, just take out the pillows and wash the cover.
Wendy Carter says
You don’t need a zipper. When you create the fold they don’t meet up in the back to form an open seam, they overlap to keep the pillow from falling out. The instructions are such that the back overlaps with each other like an envelope (or expensive pillow case or taco) that you can take the pillow out and wash the sheet. I made two of them and they work great. The biggest challenge is measuring out the 19.5 inches all the way down the length of the sheet on both sides.
joyce says
Why would you have to mark the back side?
Autumn says
yep!
Maureen Coe says
Great idea! I faced similar experience with my 3 great-grandchildren. I saw the other pattern ideas at Christmas and decided too expensive times 3! Thanks, I will sew this more reasonable one for their birthday. Think I will try to embellish or at least embroider their name on to personalize their pillow bed roll. Might add a strip off the left side to finish as a tie (or a purchased cord) when they roll up and carry it for sleepovers!