
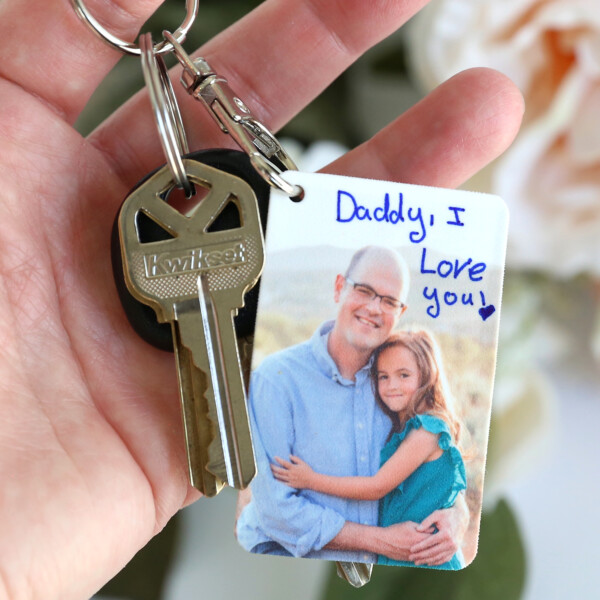
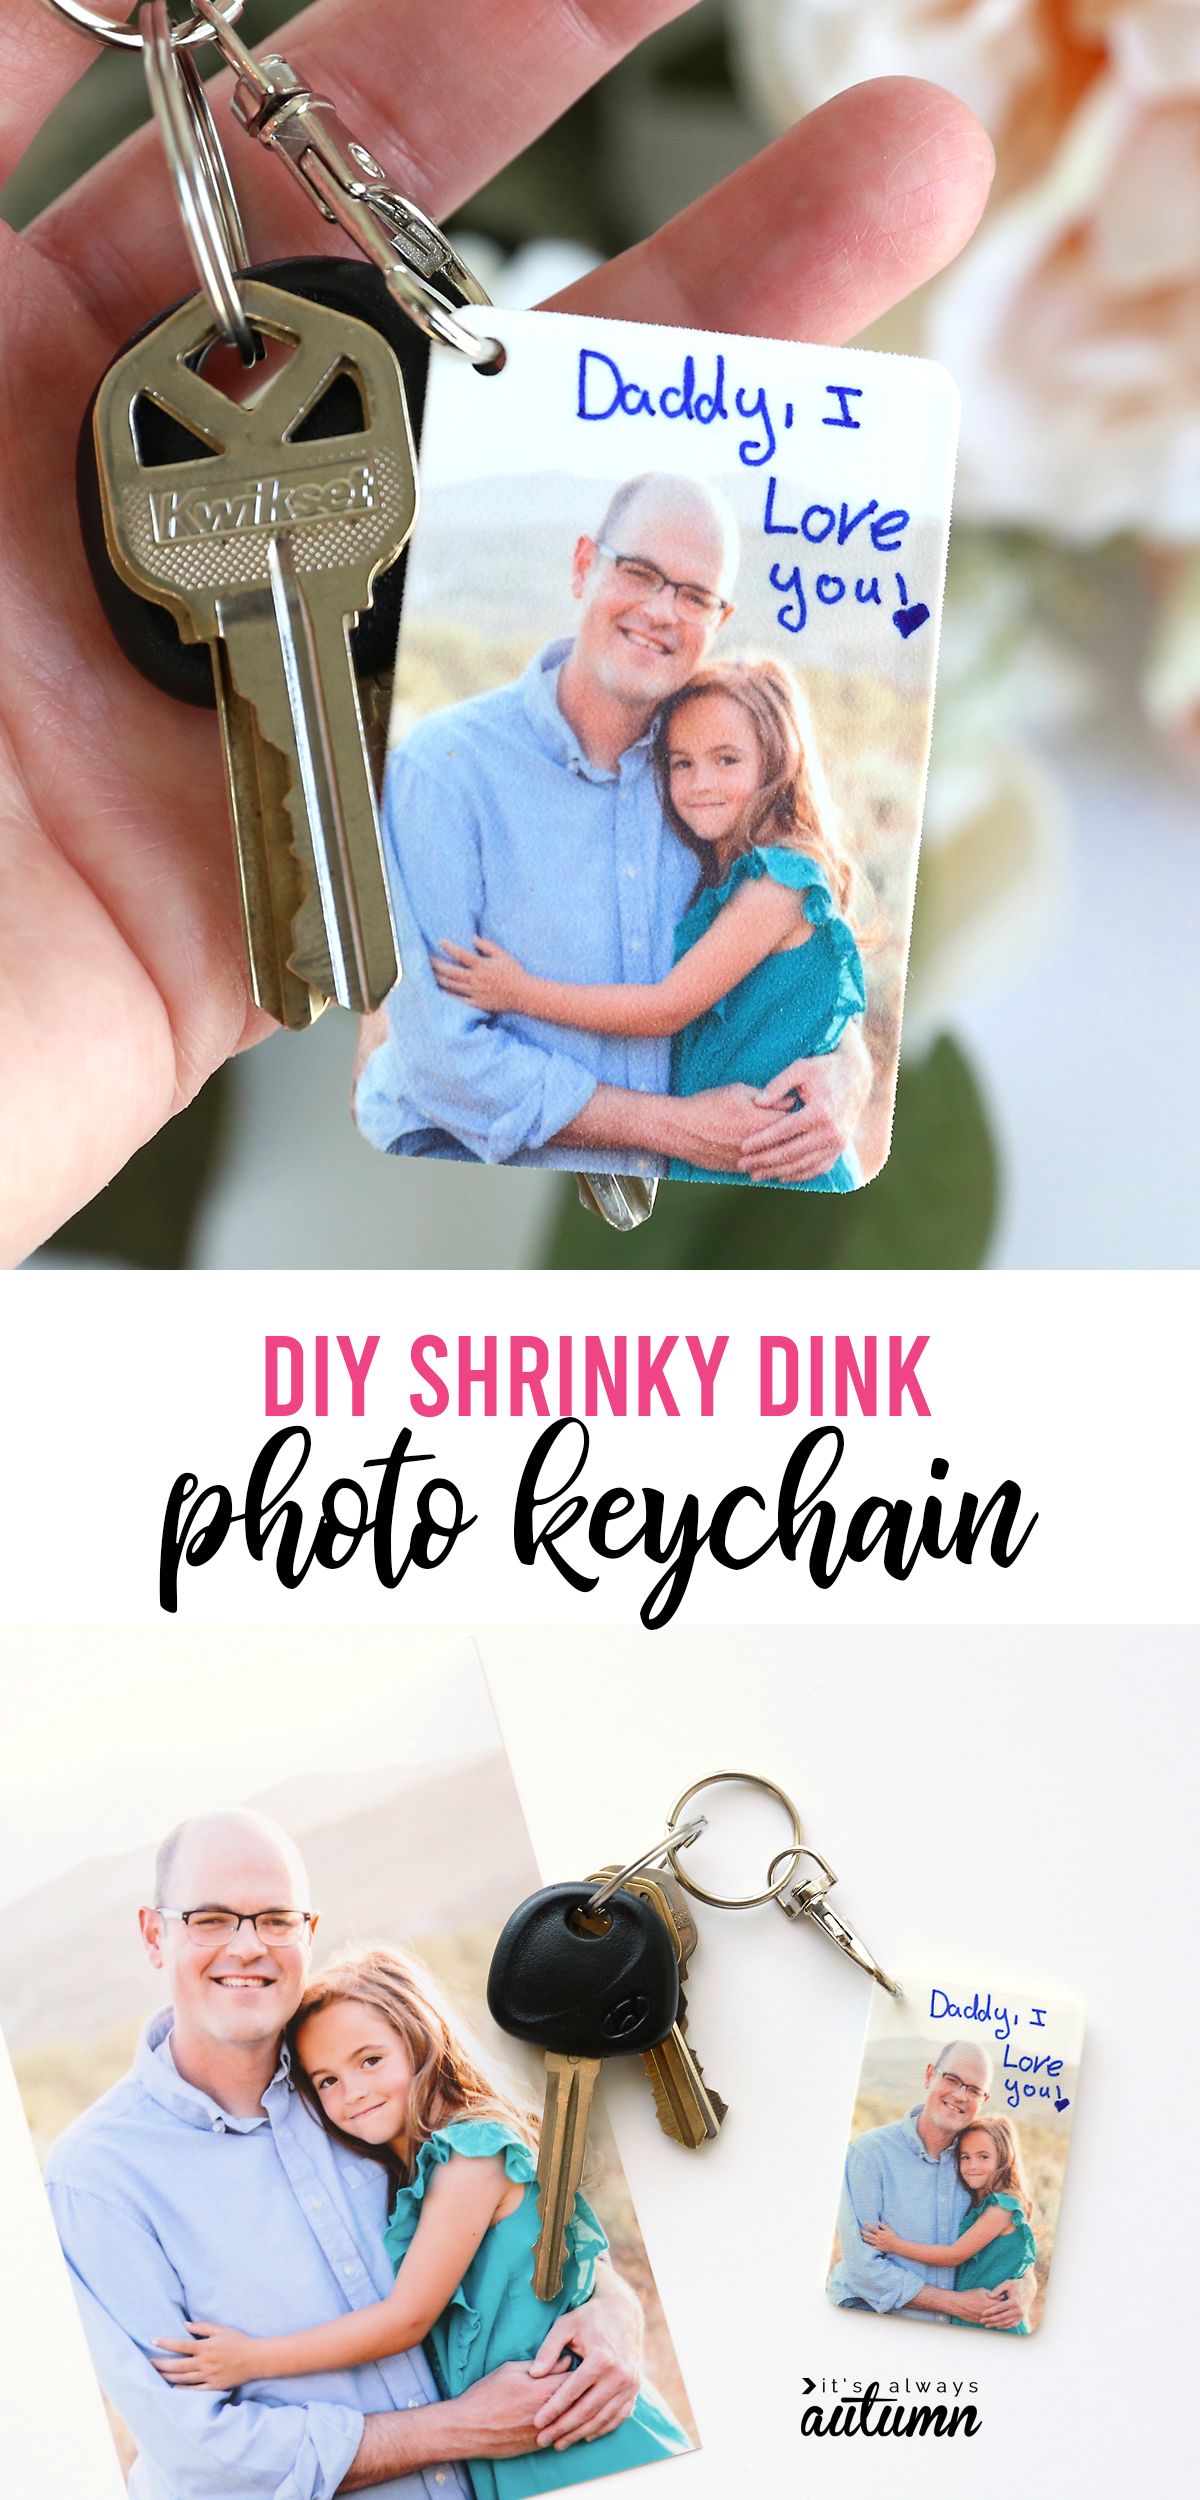
In today’s post: Learn how to turn a favorite photo into a durable keychain using printable shrinky dinks! Kids can write notes or decorate the photos before shrinking for an adorable Mother’s Day or Father’s Day gift.
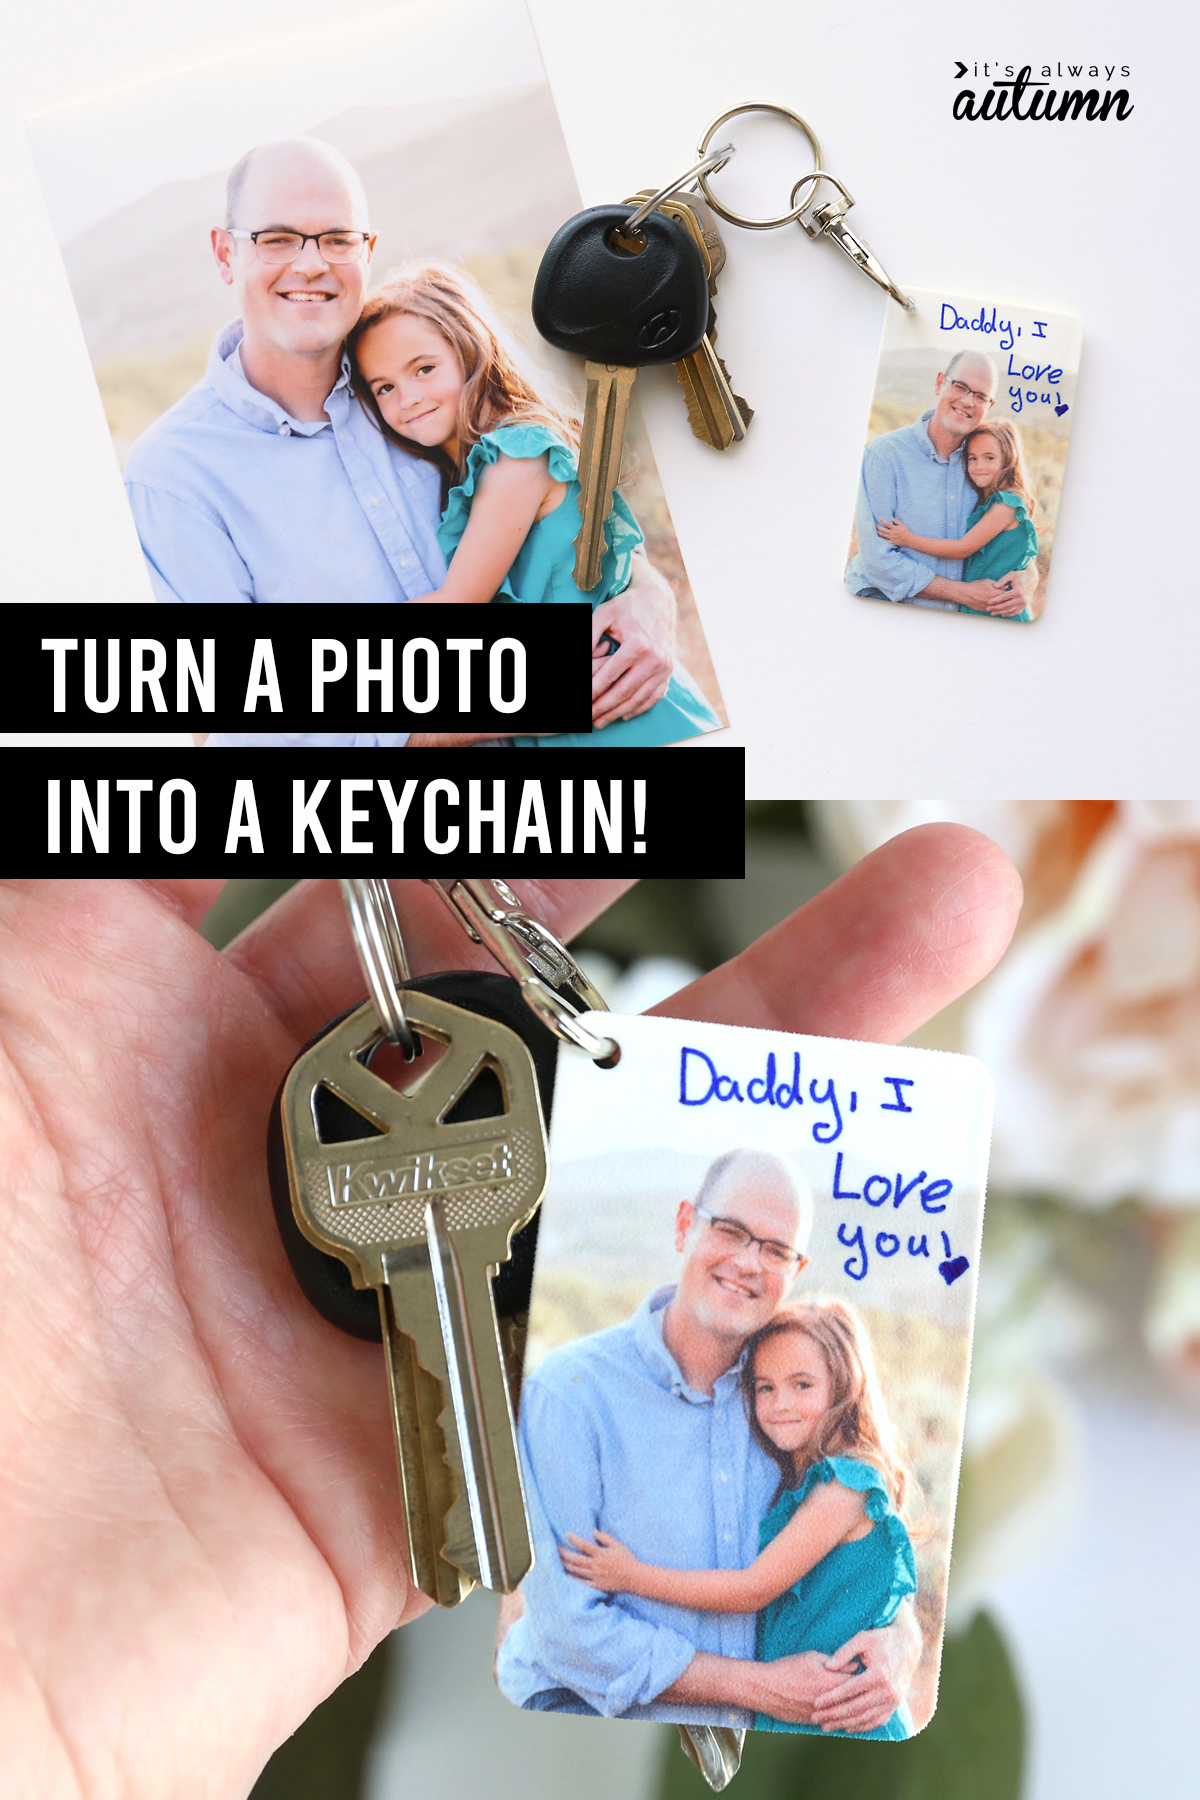
I’m a big fan of Mother’s Day gifts and Father’s Day gifts that kids can make (or help make). Today’s idea is a fun one, because kids can help turn a favorite photo of them and Dad (or Mom) into a photo keychain. Plus, they get to bake shrinky dinks, which is a universal hit with kids!
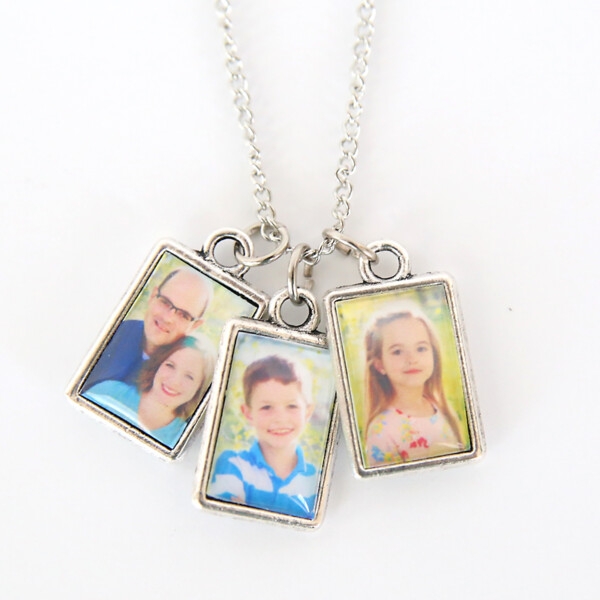
Find more DIY Father’s Day gifts here

DIY Photo Keychains
We’ve had fun creating with shrink film before, but this is the first time I’ve tried out Printable Shrink Film, and it worked great! We printed out a couple favorite photos of my daughter with her dad (and one of her and me!) on the shrink film. Then she added cute notes and we turned them into DIY photo keychains perfect for Mother’s Day or Father’s Day:
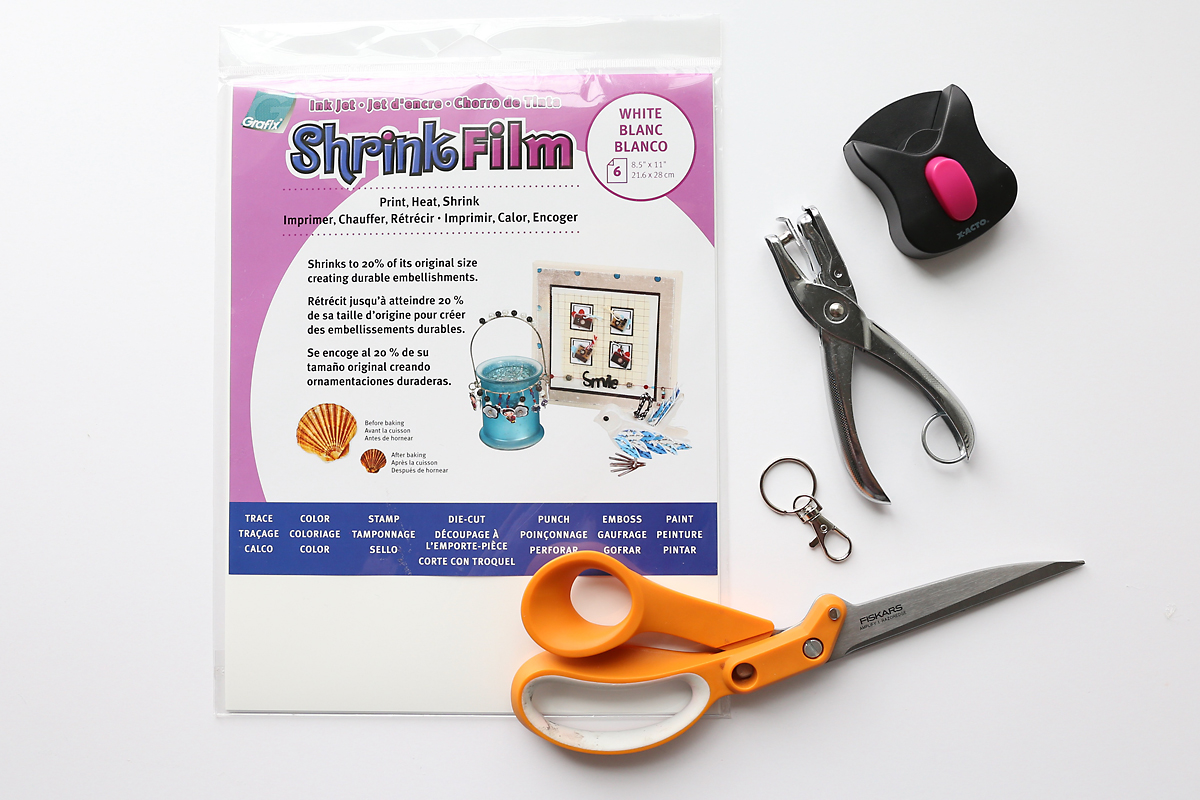
Supplies
You only need a couple supplies to make photo keychains:
- Printable Shrink Film – I used this brand from Amazon but there are lots of other brands available, some of which are cheaper; just be sure it’s labeled “printable” and will work with the type of printer you own
- Keychain – if you are making these with a large group, this set of 50 keychains from Amazon is very inexpensive
- Scissors
- Hole Punch
- Corner Rounder optional
- Parchment Paper for lining your baking sheet optional but I like using it
- You’ll also need an oven, toaster oven, or heat gun
Tips for Success
Making shrinky dinks is pretty simple, and you’ll find step by step instructions below. However, there are a few tips I want to mention that will ensure the process is successful.
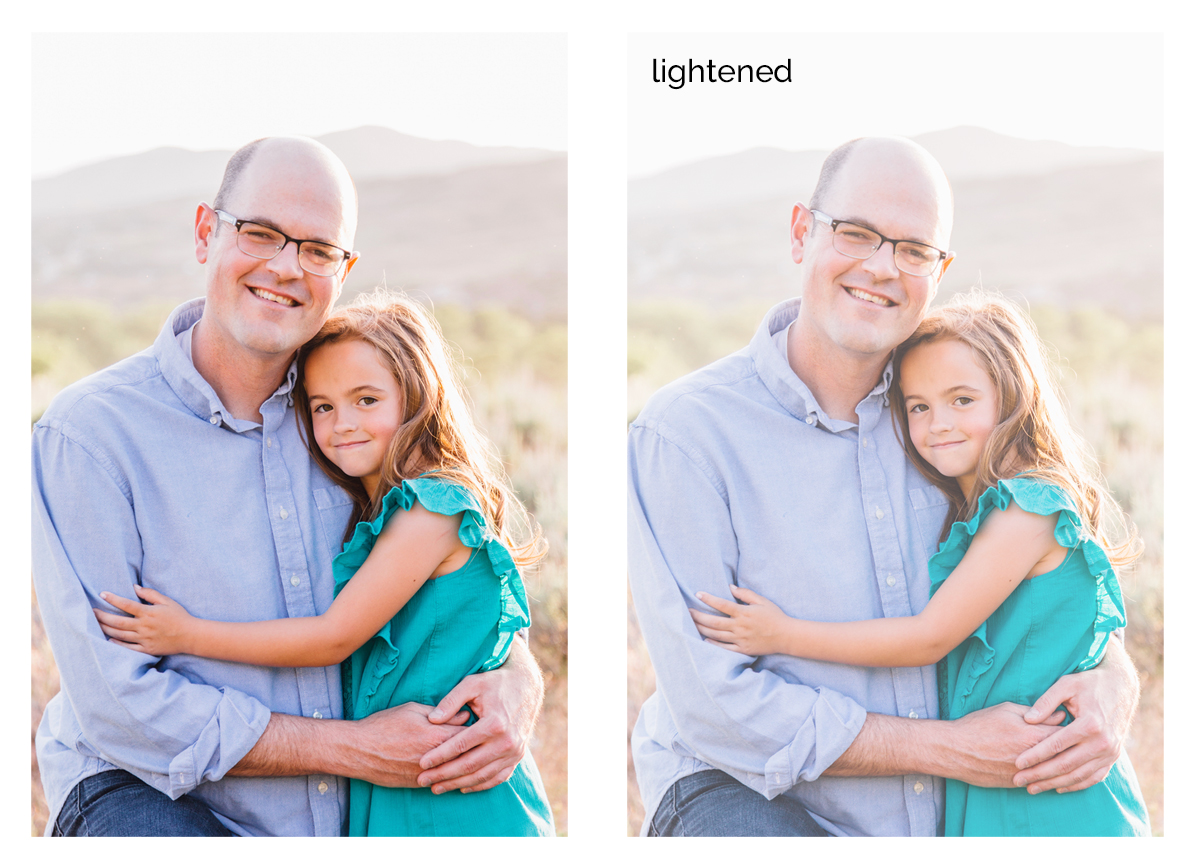
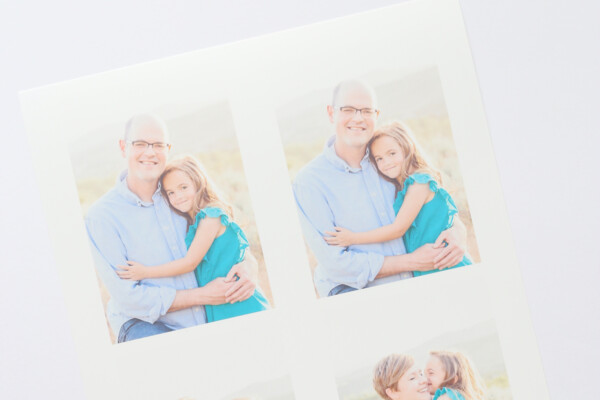
You are going to need to be able to print your photo on your home printer, and you will need to size the photo + lighten it before printing. Use whatever photo editor you have to do both these things.
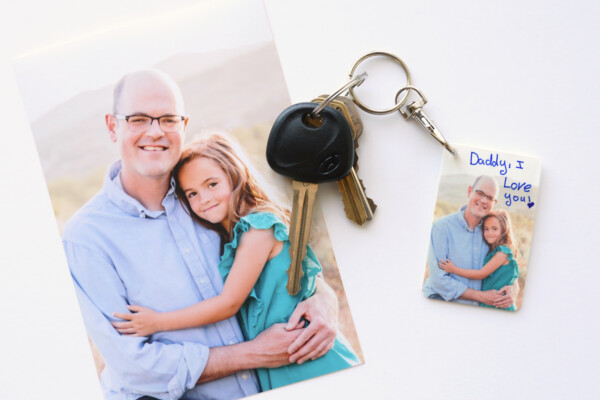
Size: I printed my photos at 3.5 inches wide by 5 inches tall, and after shrinking they ended up 1.5 inches wide and 2.5 inches tall, which is a pretty good size for a keychain.
Lightening: Any time you bake a shrinky dink, the colors get darker. Because your photo will darken after baking, it will look best if you lighten the photo before printing it on the shrink film (lightening the photo is optional, just be aware that if you don’t the finished keychain will look darker than the original photo). If you are using a photo application where you can change opacity, reduce the opacity to about 75% before printing. Or, if you cannot adjust opacity, use a levels adjustment, or just a “brightness” adjustment to lighten the photo. Here you see my original photo and what a lightened version looks like:
Shrinky Dink Baking Tips
The biggest problem people run into with shrinky dinks is not baking them long enough. When you peek into the oven as your shrink film is baking, you’ll see it getting all curled up and warped, and you’ll wonder if this is actually going to work. If you pull a shrinky dink out of the oven when it’s still curled up, you’ll never get it to lay completely flat, and you’ll be unhappy with the finished result. Wait until your item has flattened back out before you remove it from the oven. That may mean you bake your keychains for longer than the instructions on the package say. Most brands of shrink paper tells you to bake 3-5 minutes, but I find that closer to 8 minutes at 325 degrees F works best.
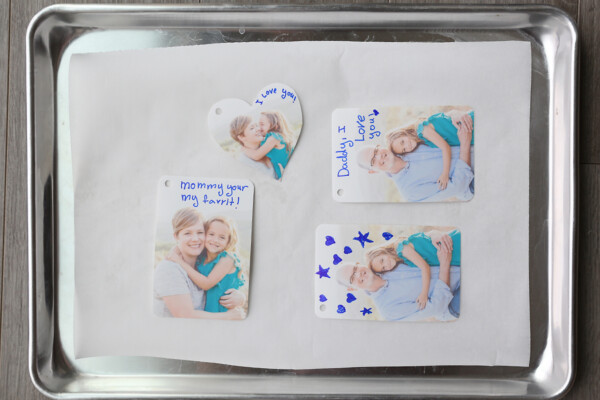
This is what your keychains will look like while they are baking:
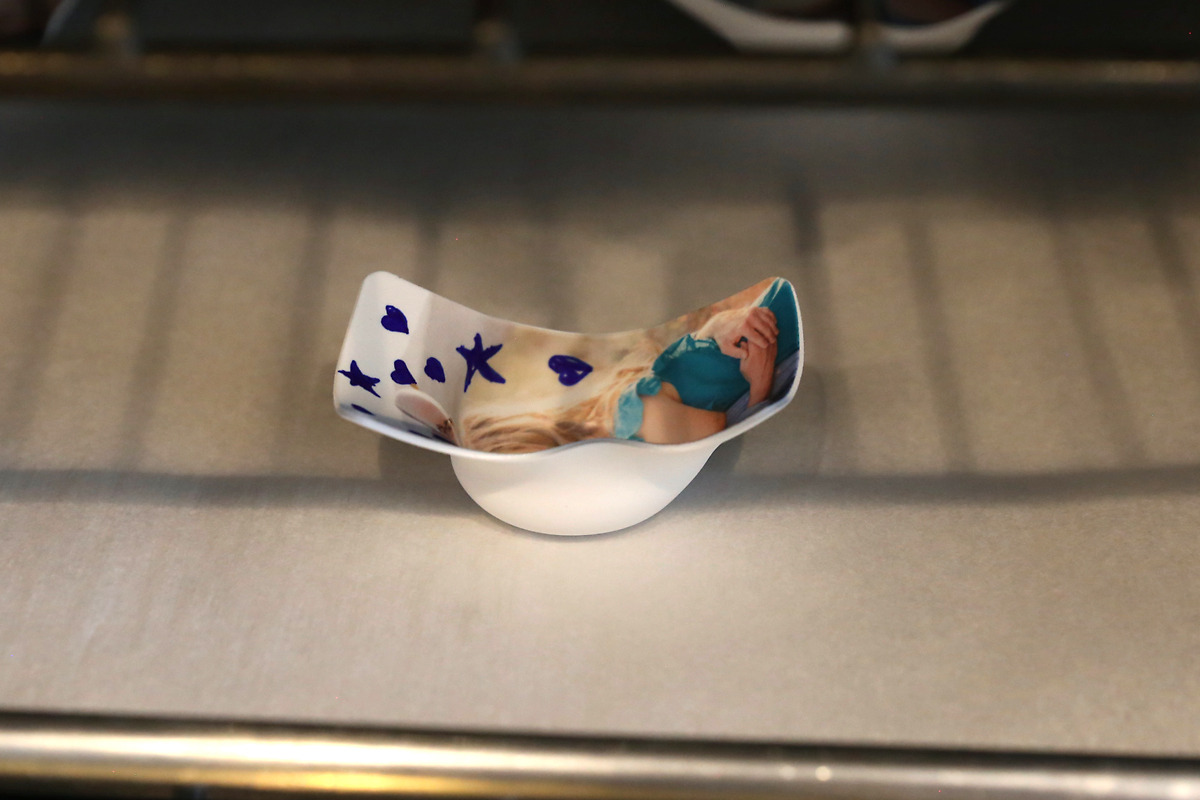
But after 7-8 minutes they should be just about completely flat and you can pull them out of the oven. Have a spatula handy in case your keychain still has a small wave to it – just press down hard with a flat spatula as soon as it comes out of the oven. I also like to fold the parchment paper over the baked keychains and then place a heavy book on top while they cool to make sure they finish totally flat.
DIY Photo Keychain Instructions
DIY Photo Keychains
Supplies
- Printable Shrink Film
- Hole Punch
- Scissors
- Corner Rounder optional
- Cookie Sheet and Oven parchment paper optional
- Keychain
Want more project ideas? Sign up to get my favorite easy crafts and recipes straight to your inbox!
Instructions
- Use a photo editor to size your photo to roughly 5 inches tall and 3.5 inches wide. Also lighten the photo if possible. Then print onto printable shrink film.

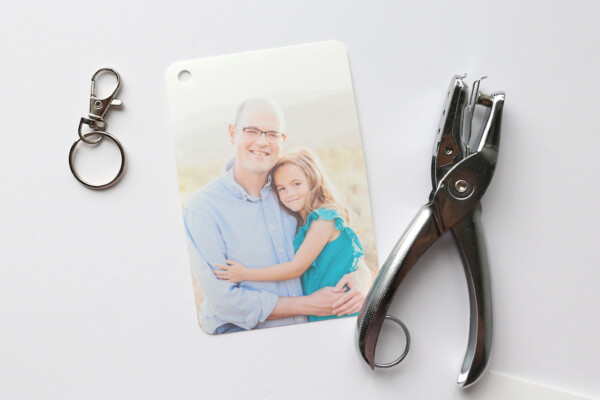
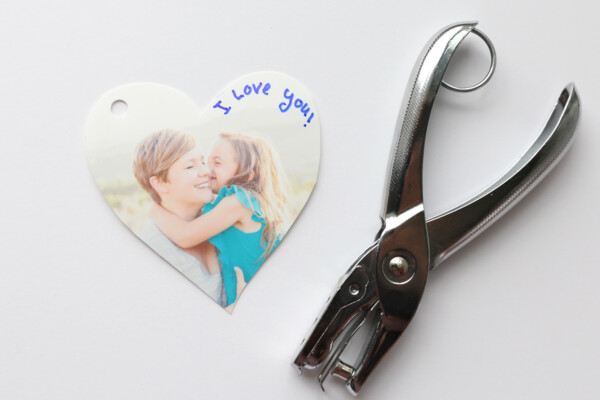
- Cut out your photo and use a corner rounder to round the corners if desired. Use a hole punch to punch a hole near one corner of the photo.
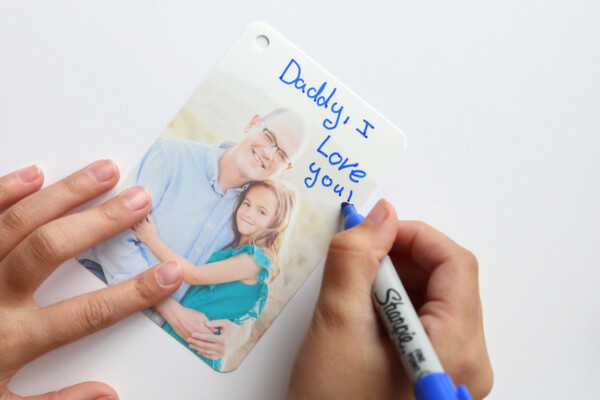
- Use Sharpies to write a message on the photo.
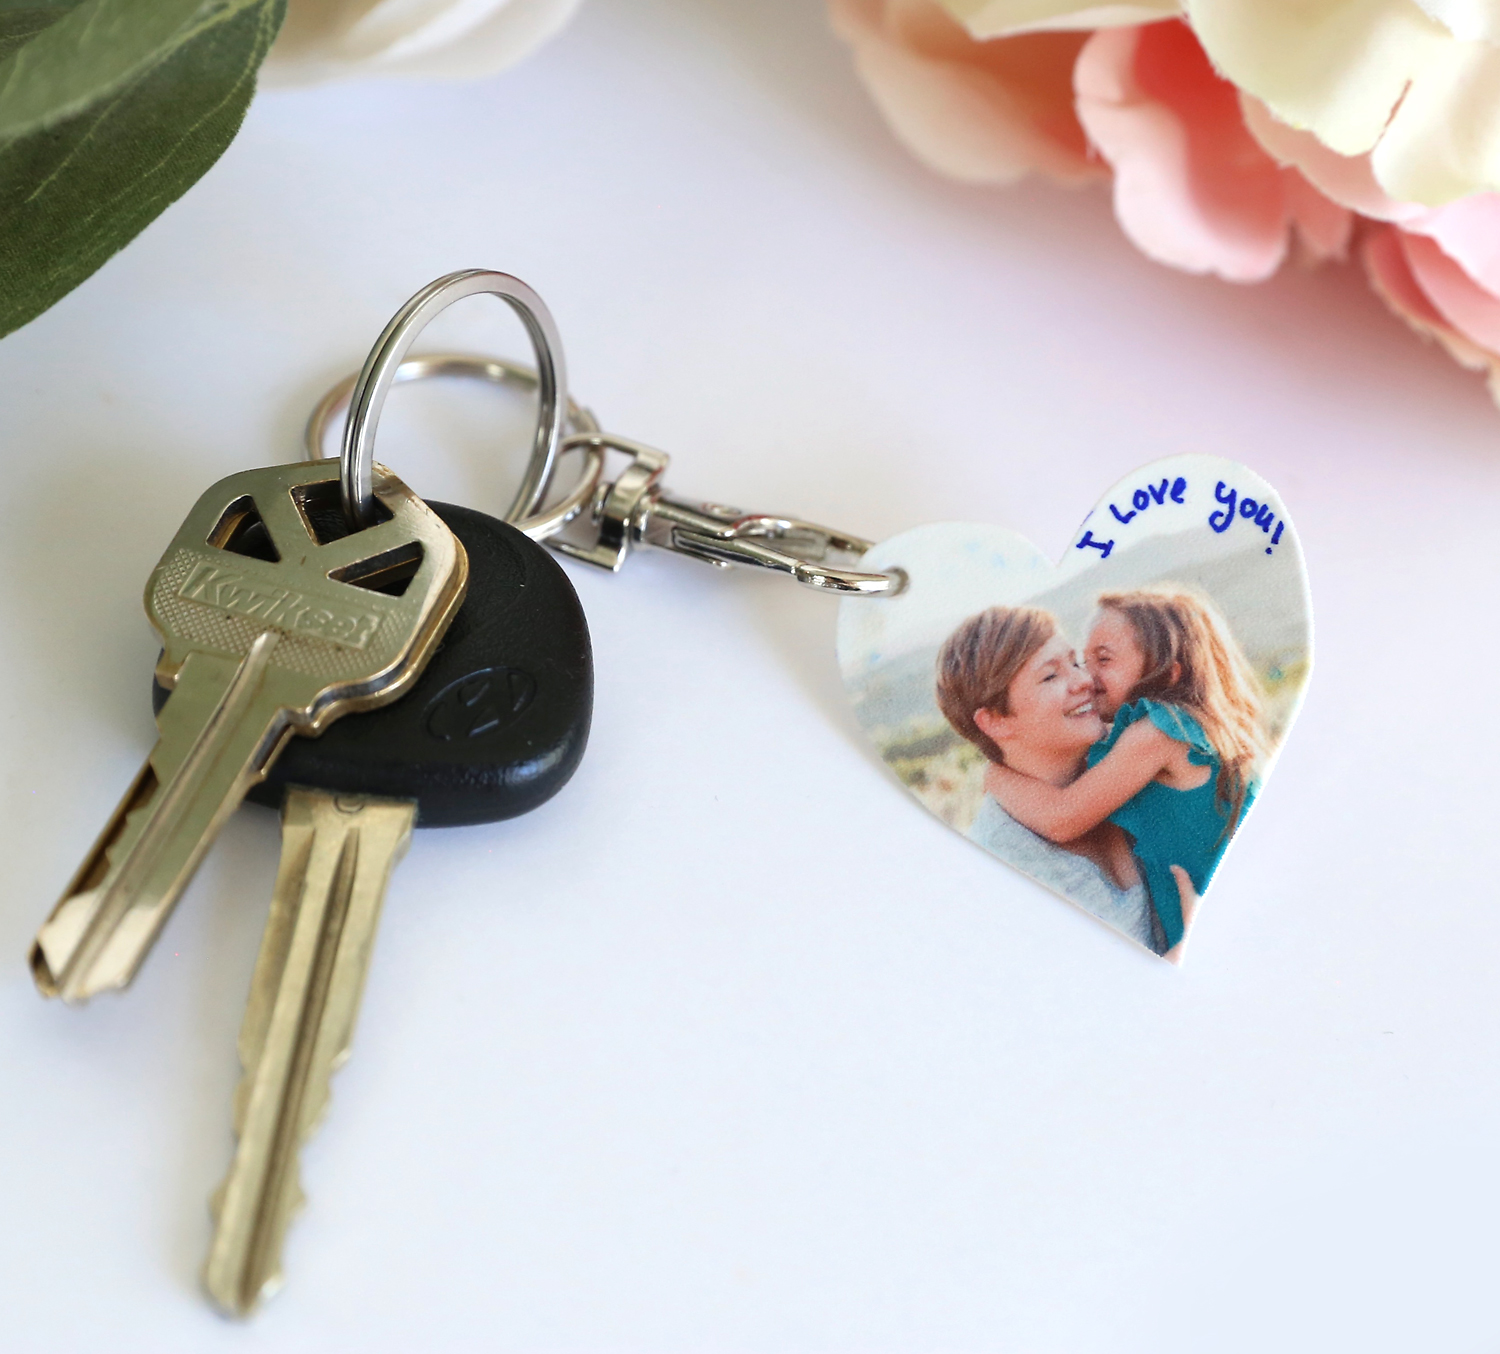
- Photos can be cut into other shapes, such as a heart. Just be sure to punch a hole in them before baking.
- Line a cookie sheet with parchment paper and place photos on it. Bake in a preheated 325 degree F oven for about 7-8 minutes, until photos have shrunk and are back to laying flat.
- As soon as you remove the photos from the oven, press them flat with a spatula OR cover with parchment paper and lay a heavy book on top while they cool. Add a keychain attachment and your photo keychain is complete.

Leave a Comment