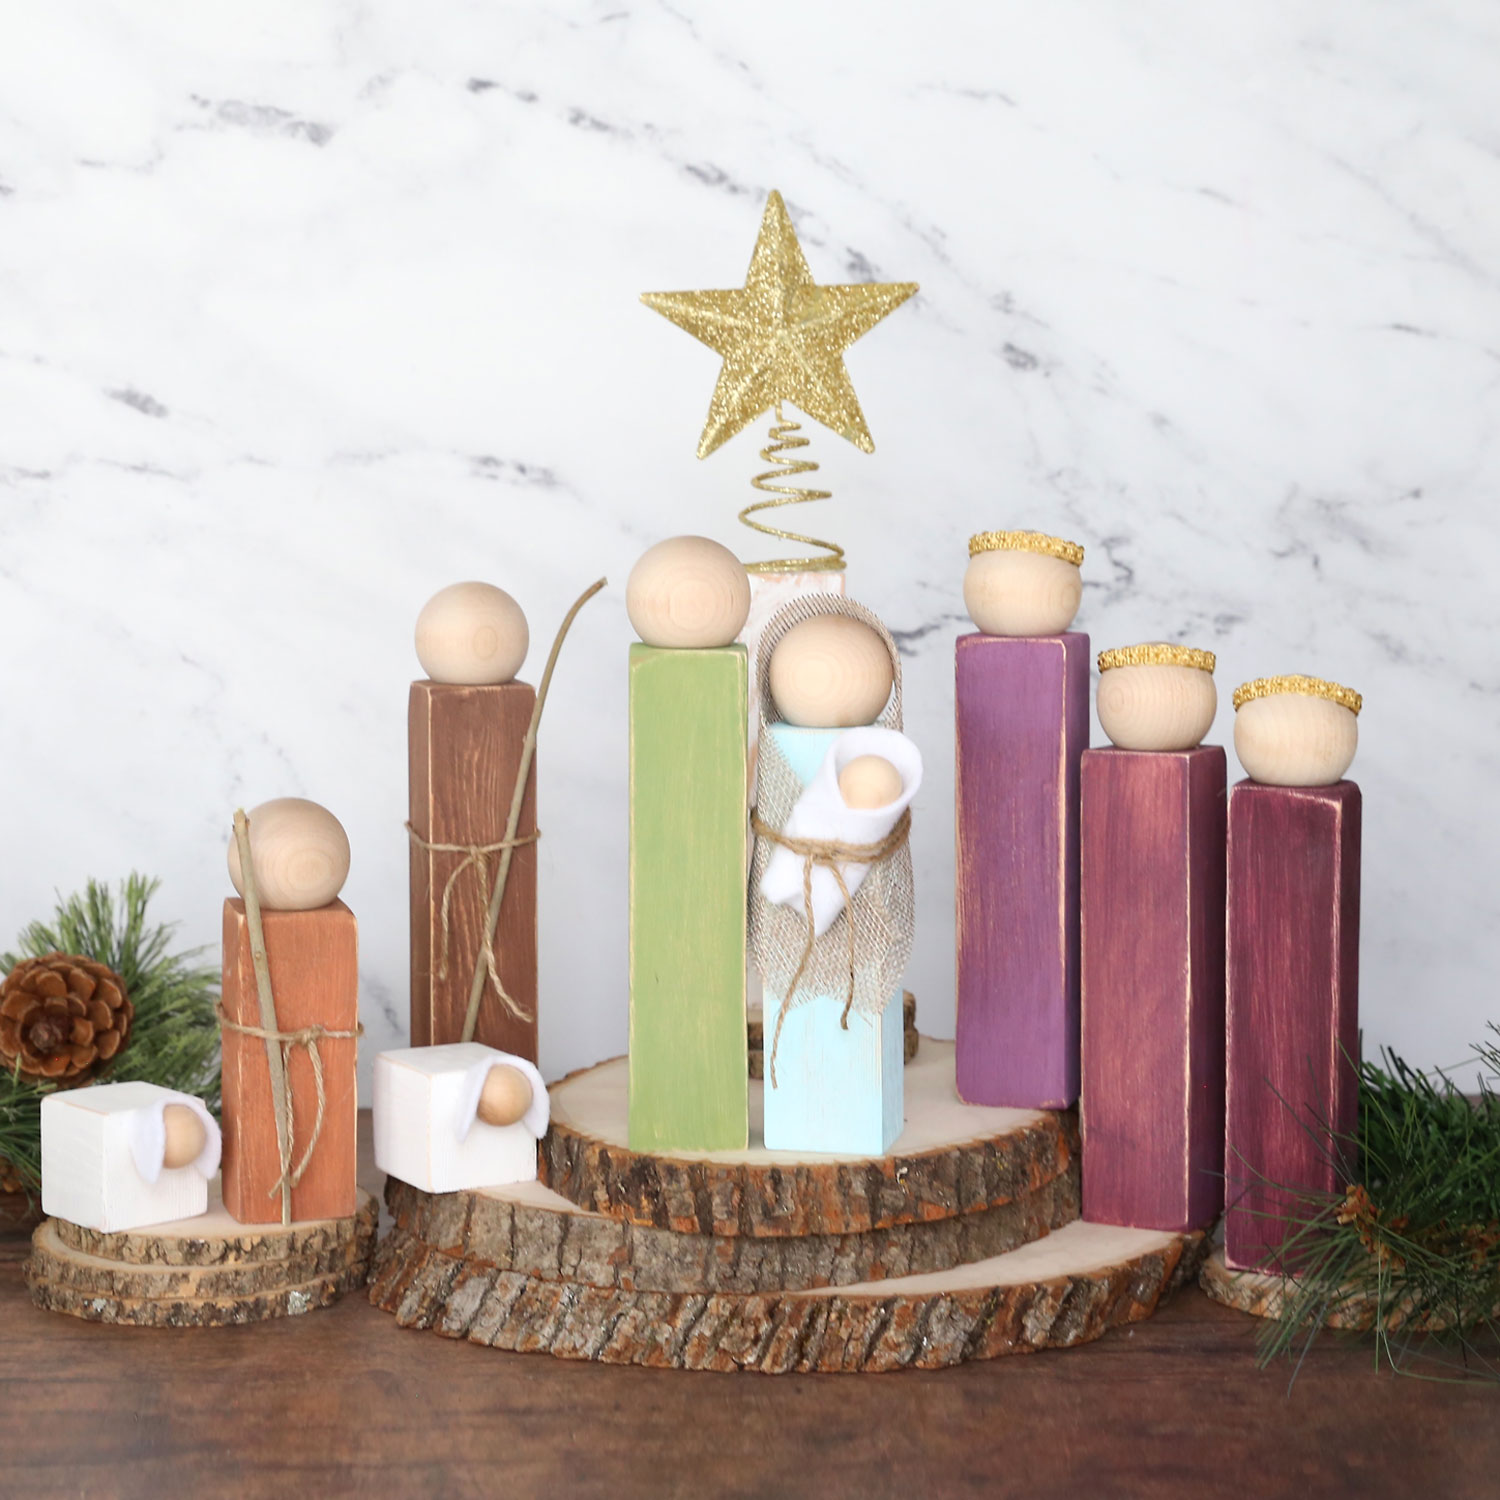
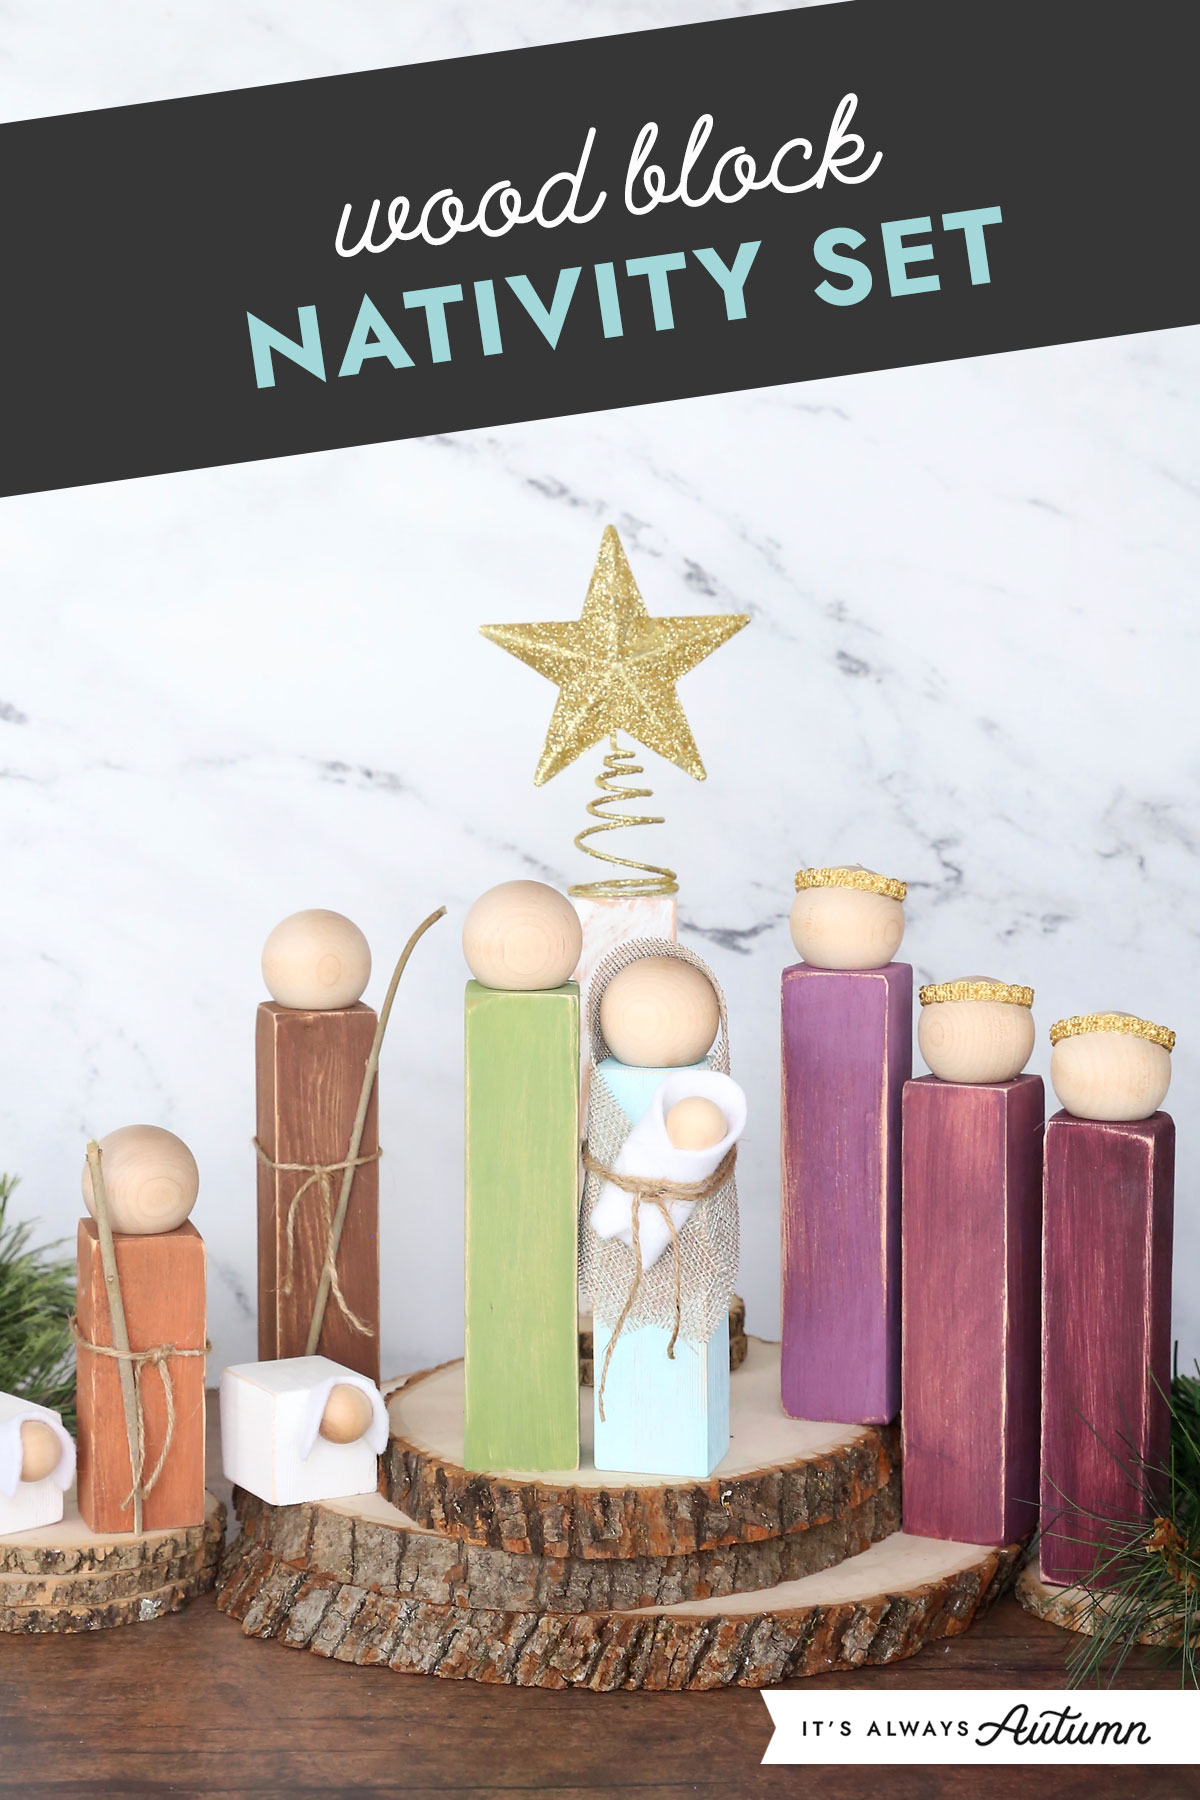
Last year my mom made an adorable Mary, Joseph, and Baby Jesus for my daughter out of wood blocks. It was fun for her to have her own nativity to display in her room. I liked it so much I made my own version this year, adding in wise men, shepherds, and even a few sheep.
This is a fun, EASY Christmas craft for adults or kids. It takes a little time to sand and paint the wood blocks, but the process is very simple – anyone can do this! Choose your favorite colors for each member of the nativity, or paint them colors that will match your Christmas decor.
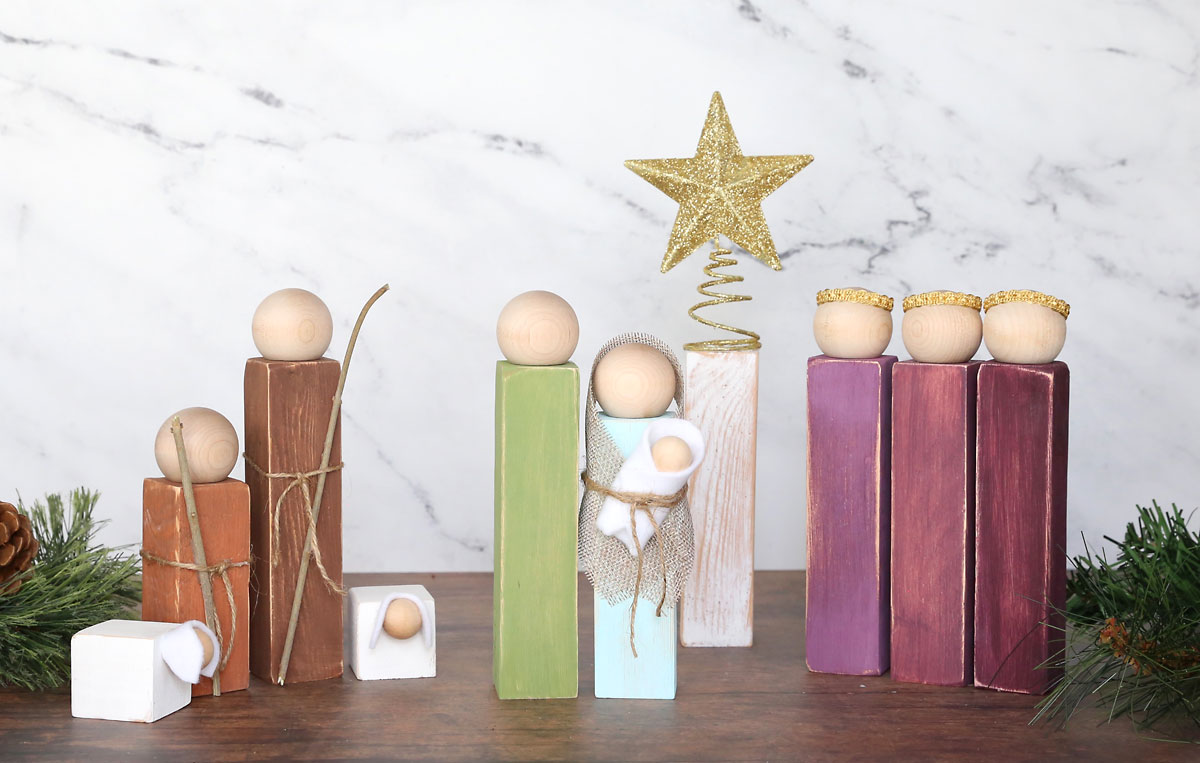
This sweet, rustic nativity looks great displayed just about anywhere. Keep it simple with just a little greenery, as in the photo above, or use different sizes of wood slices to lift some of the pieces higher than others for more visual interest (first photo in the post).
Supplies
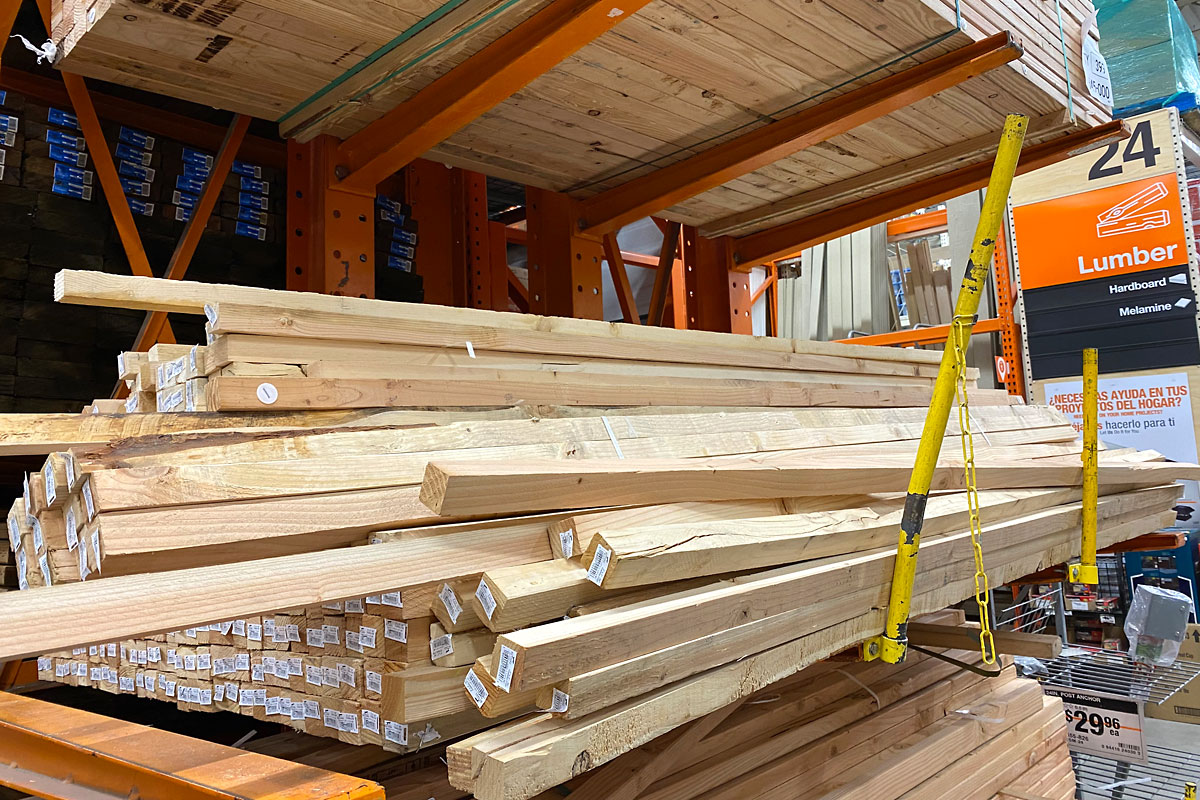
The most important supply for this wood block nativity is, of course, the wood blocks. My nativity is made from a 2×2 inch furring strip board: here’s a link to it at Home Depot so you know what you’re looking for. (Please note the actual dimensions are 1.5×1.5 inches.) The good news is that these boards are easy to find at home improvement stores and they only cost about three dollars for an eight foot length, which is more than enough to make an entire nativity set. However, you will want to be picky when you are buying your board. This is construction grade lumber, which means there will be lots of imperfections. Take a minute to look through the stack to find a board that is straight, doesn’t have any obvious cracks, and has fairly clean edges.
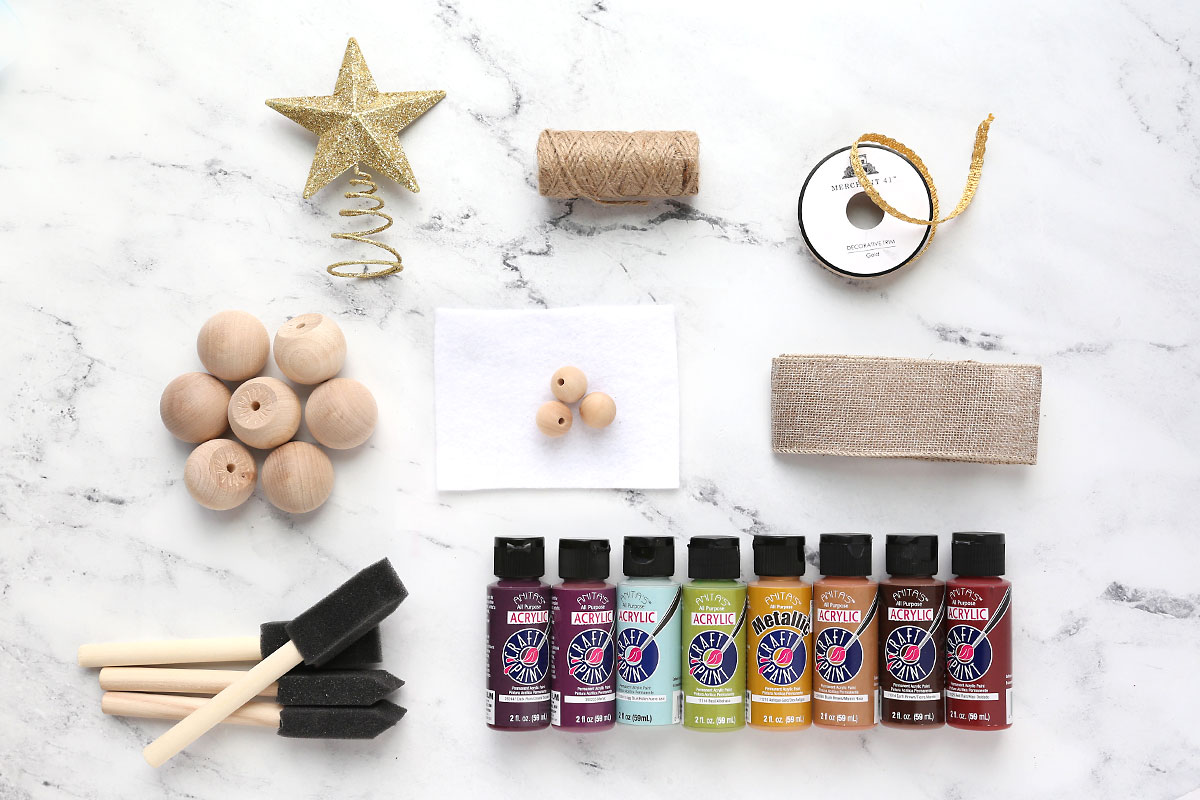
In addition to the wood, you’ll need other supplies to create your nativity:
- 1.5 inch wood ball knob: These will be the heads, so you’ll need one for each person (that’s seven in my set). It’s easiest if you can find the ball knobs, which are wood balls with one flat side. I found them at Hobby Lobby.
- Three quarter inch wood beads: These will be the heads for baby Jesus and the sheep. There will probably be a small hole on either side of the beads; that’s fine.
- Star: I used a mini tree topper star that I found at the dollar store, but you can use any type of star you can find.
- White felt: You’ll use white felt for baby Jesus and the sheep. The thicker, premium felt you can find at Hobby Lobby looks a little nicer, but a normal sheet of craft felt will work too. One 9×12 sheet will be plenty.
- Twine
- Gold trim: You’ll use this to make crowns for the wise men and you’ll need a total of 15 inches.
- Burlap: You’ll need a 2×10 inch piece of burlap for Mary. I cut my piece from a roll of burlap ribbon I had on hand.
- Paintbrushes: It’s nice to have multiple paintbrushes so you don’t have to keep washing them out when you switch colors. The small foam paintbrushes are very inexpensive.
- Acrylic paint: The small, cheap bottles of craft paint work great.
- Sticks or wood skewers for the shepherd’s staff (not pictured)
- Sandpaper and Hot Glue Gun (not pictured)
How to make a wood block nativity
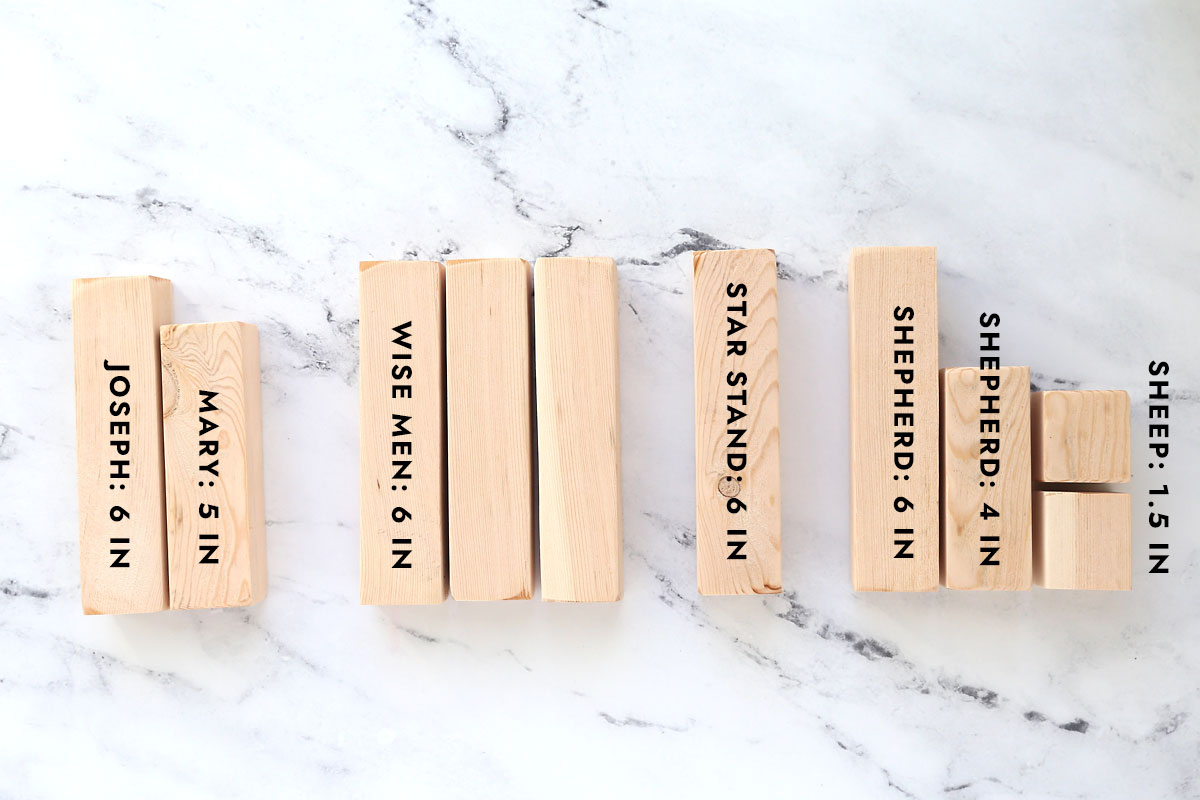
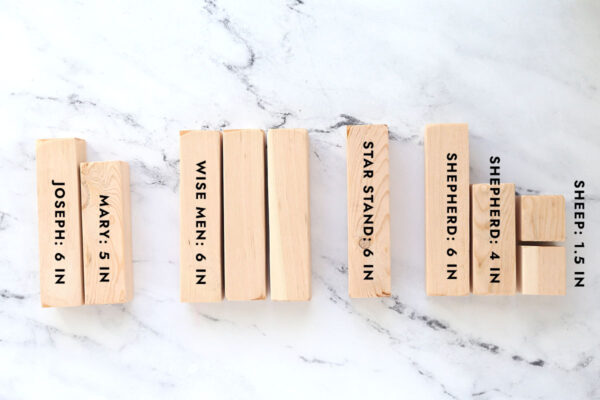
The first thing you need to do is cut and sand your wood pieces. If you don’t have a saw at home, ask an employee at the home improvement store to cut the pieces for you after you purchase your furring strip. Then take them home and sand the individual pieces. If you can cut the wood at home, I think it’s easier to sand the strip first, then cut the pieces. Use a small electric sander if you have one or can borrow one to save time. The wood blocks don’t need to be perfectly smooth, you just want to make sure no one will get a splinter from handling them. These are the pieces you’ll need:
- 6 pieces cut at 6 inches (Joseph, Wise Men, Shepherd, stand for the star)
- 1 piece cut at 5 inches (Mary)
- 1 piece cut at 4 inches (younger Shepherd)
- 2 pieces cut at 1.5 inches (sheep)
Please note that I cut the sand for my star at 6 inches because it’s a tree topper star with a coiled bottom that gives it extra height. If your star does not have extra height, you may want to cut the stand for your star 8-9 inches tall.
Paint the wood Blocks
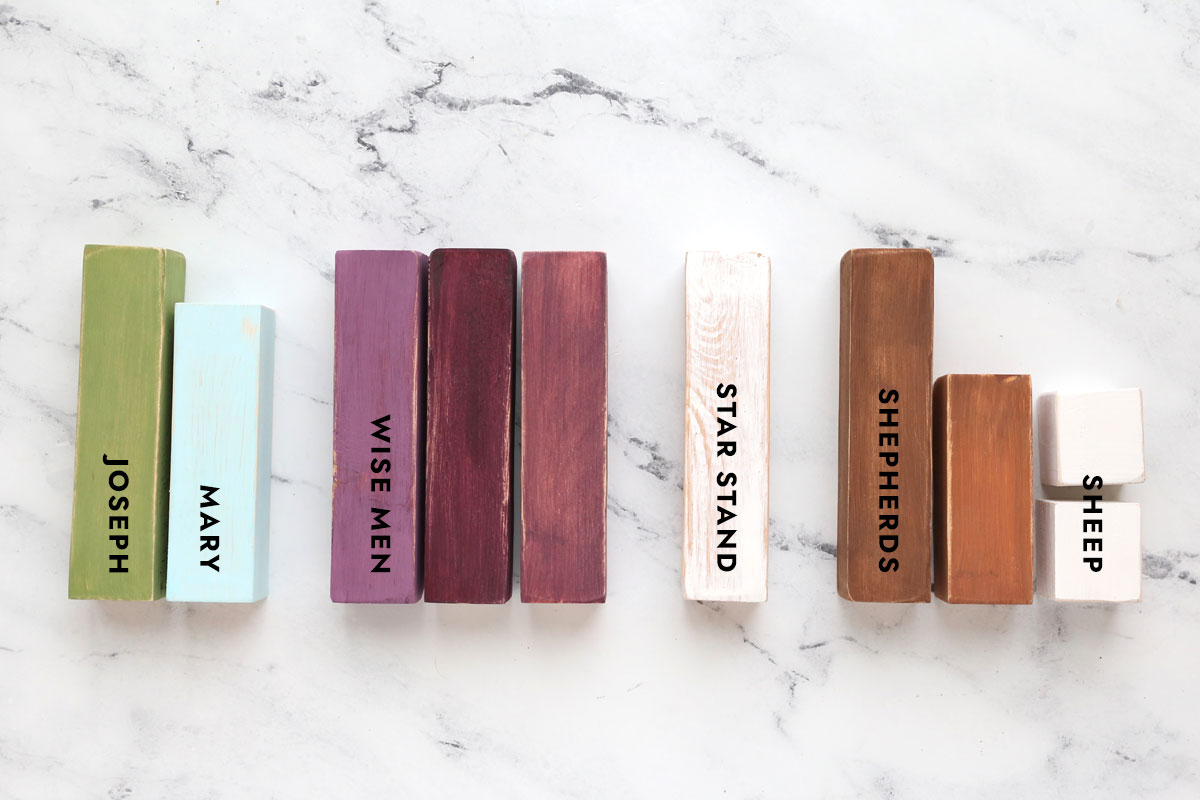
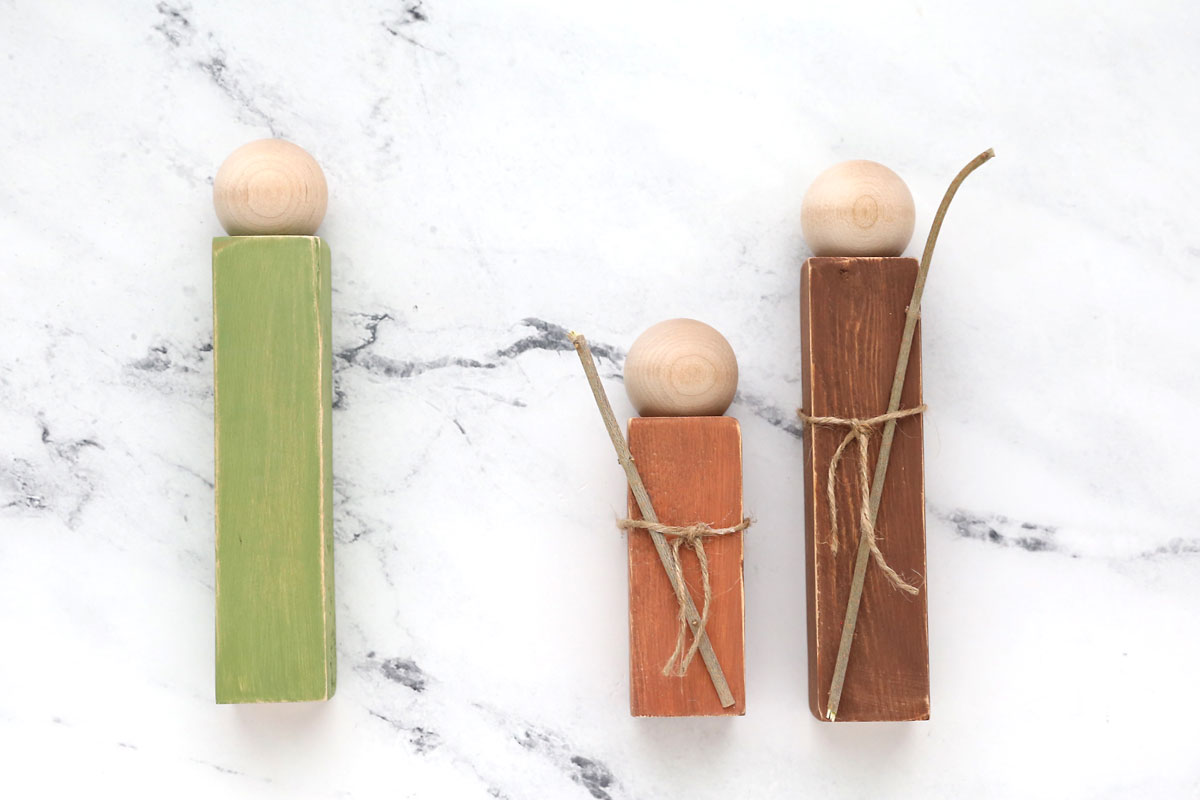
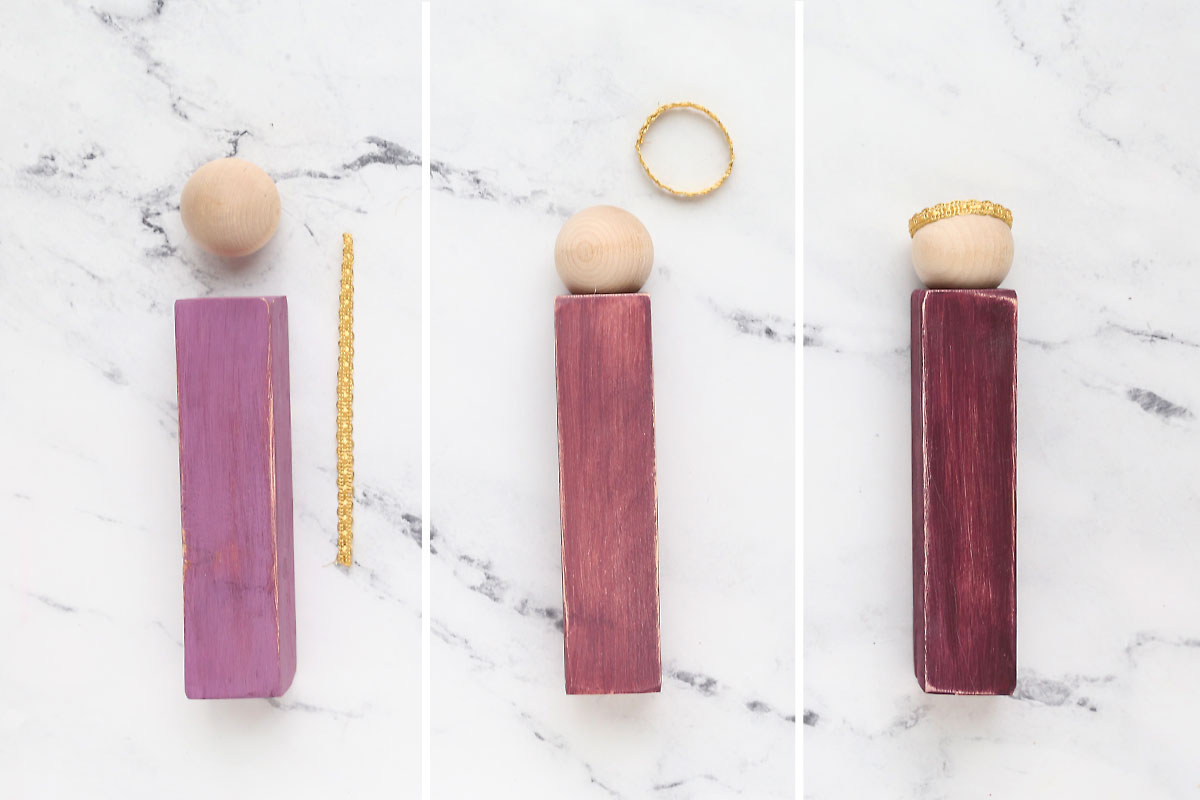
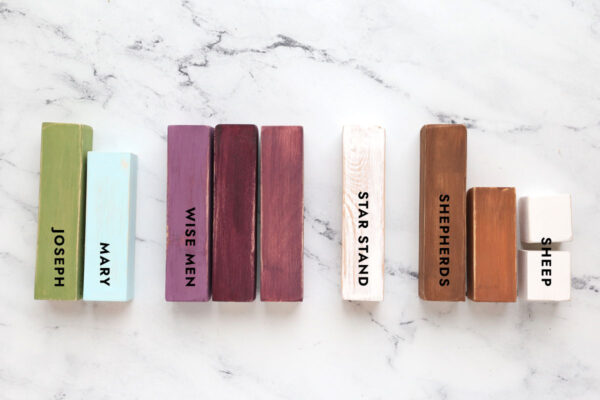
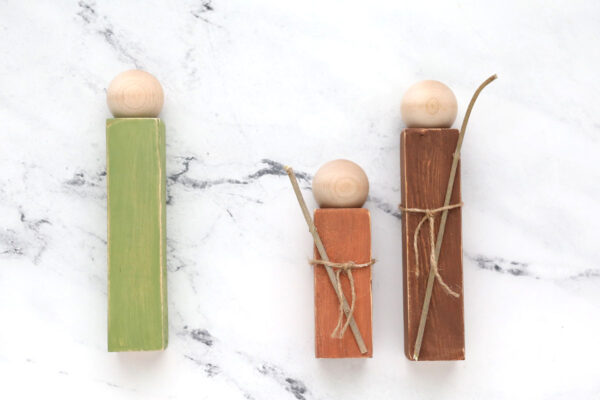
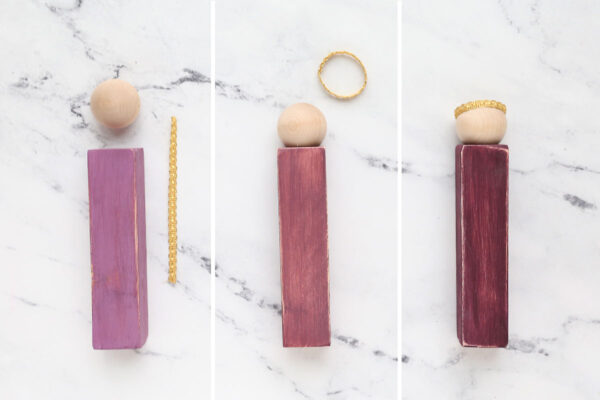
Once the wood is cut and sanded, you’ll paint each block whatever color you’d like. I made Mary a light blue and Joseph a nice grassy green. My wise men are varying shades of purple and the shepherds are varying shades of brown. The star stand is painted gold first, then white over that and sanded back to reveal some of the gold. The sheep are both painted white.
After allowing the blocks to dry completely, use sand paper to sand off some of the paint to give the nativity a more rustic feel if desired.
Make Baby Jesus
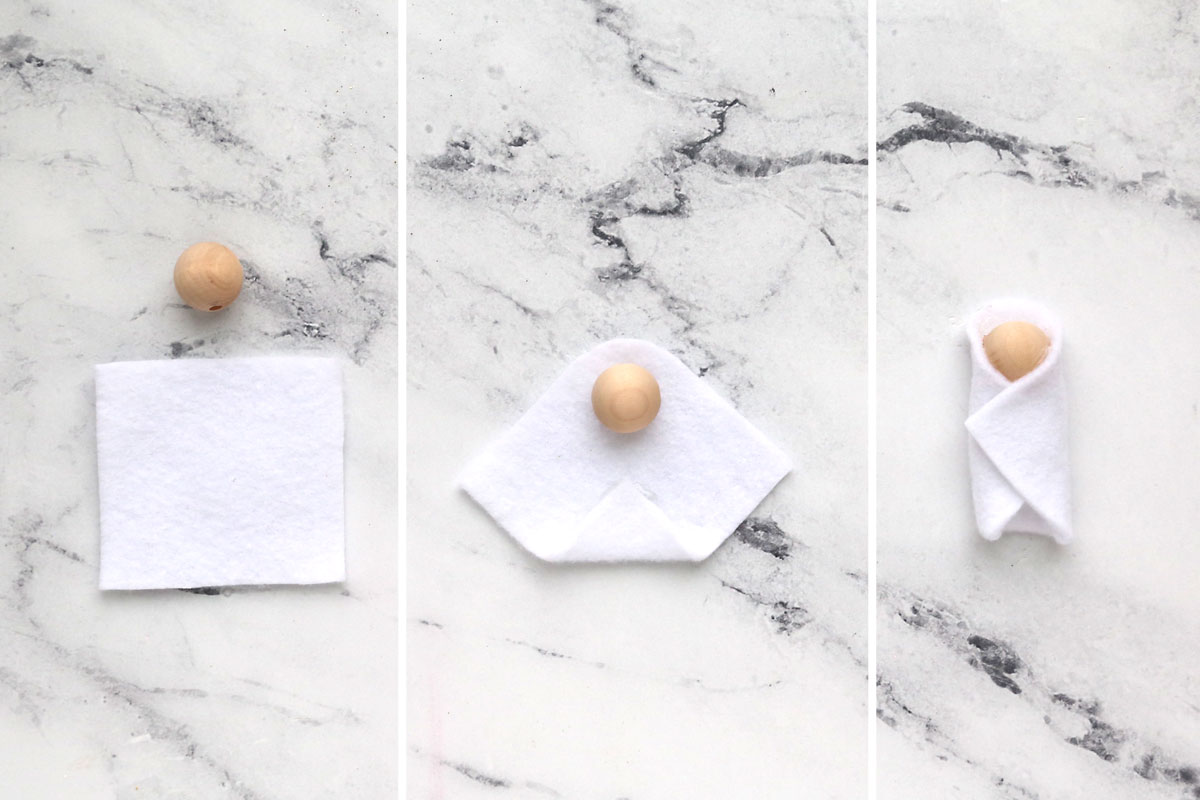
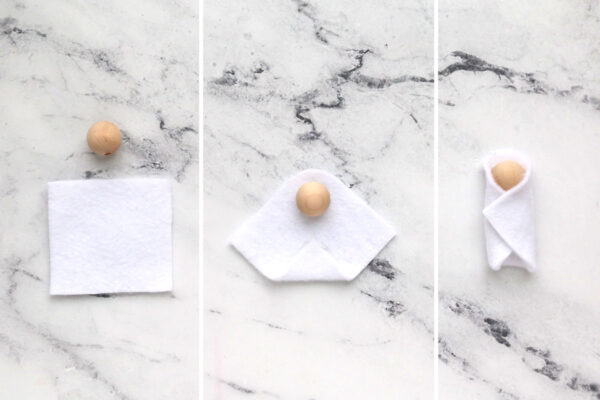
For Baby Jesus, cut a 2.5 inch square of white felt. Cut one corner into a curve, and then glue a 3/4 inch bead just below the curve, making sure the holes in the bead are to the right and left. Fold up the bottom corner and glue (you’ll need to hold it a minute to let the hot glue dry before continuing). Then wrap in both sides as you can see below and glue to secure. The felt should cover the holes in the bead.
Make Mary
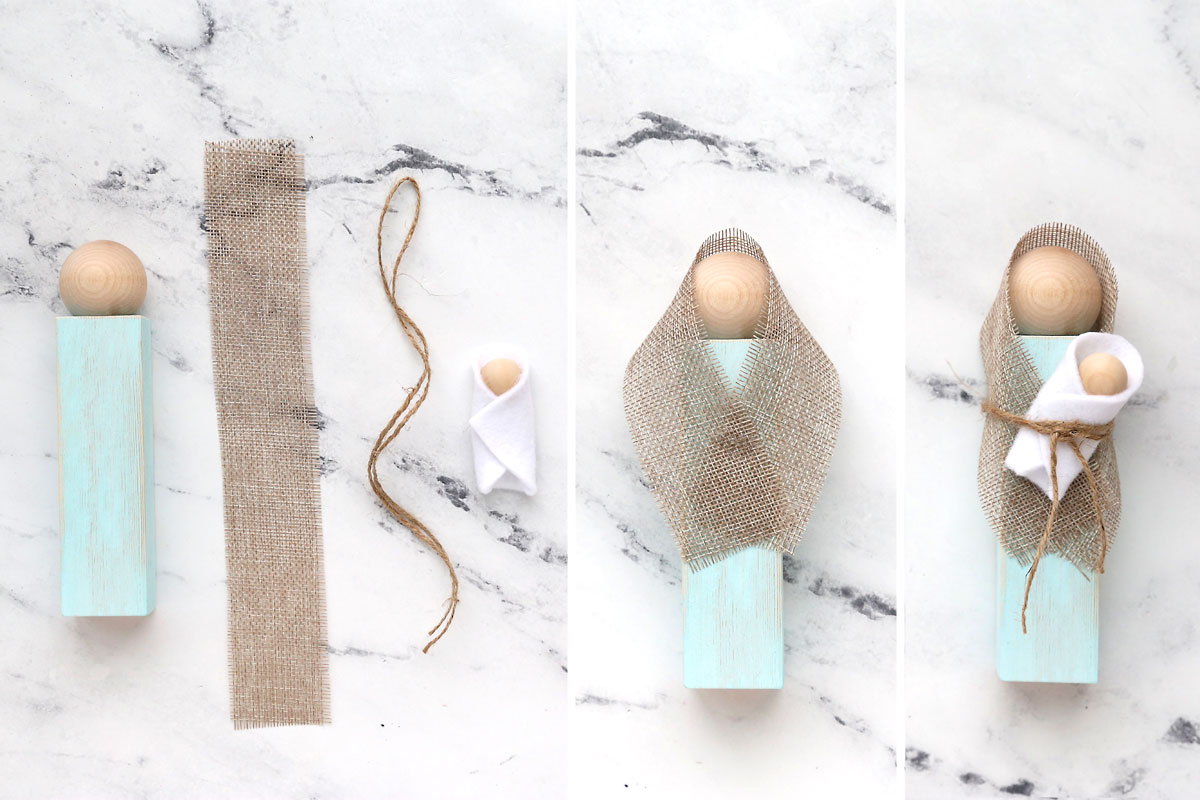
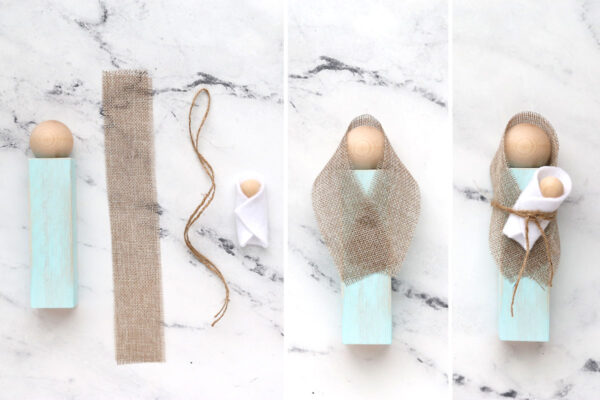
Glue a ball knob on the top of the wood bock for Mary. Then cut a 2×10 inch piece of burlap and a 20 inch piece of twine. Pull a few strings out of the burlap to fray the edges. Wrap the burlap piece around Mary’s head and overlap it in front, glue to secure. Be careful here as the hot glue will seep through the burlap and you could burn yourself. Glue baby Jesus over the burlap, and then double wrap the twine around Mary + baby and tie in the front. Add extra glue to the twine + burlap in the back if desired to keep everything secure.
Make the Sheep
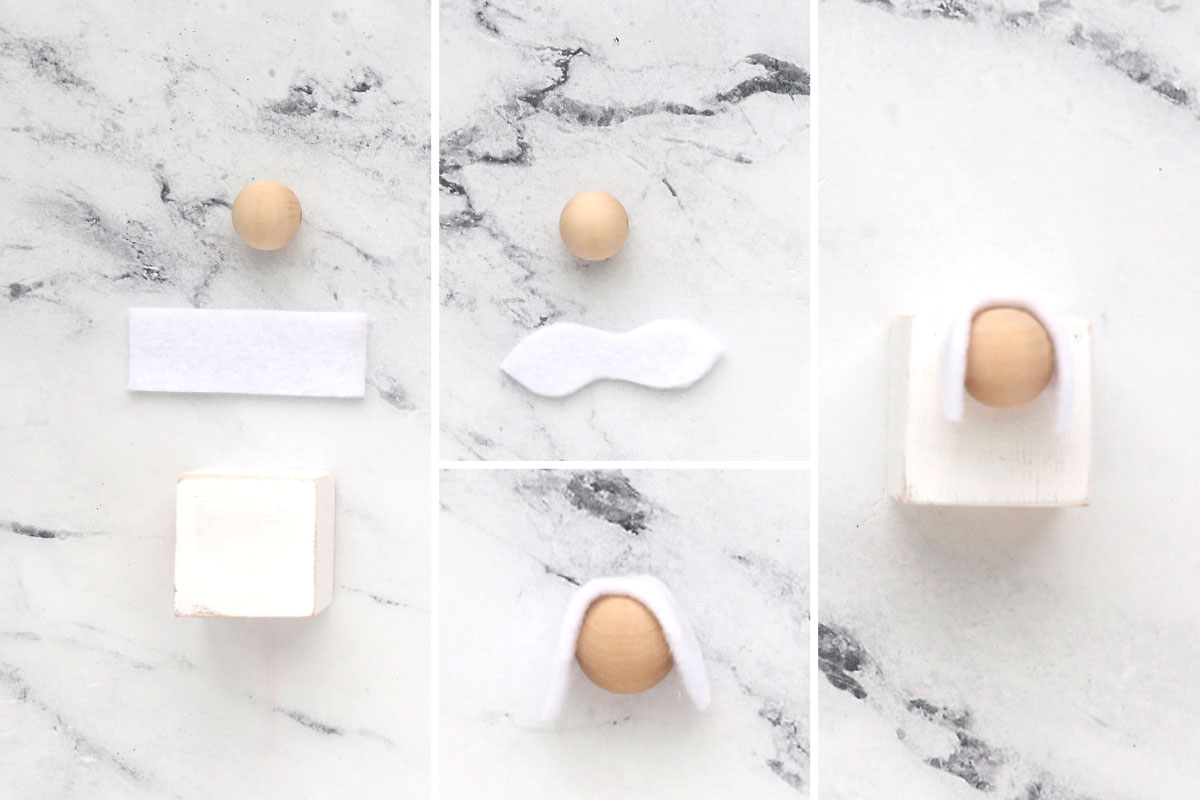
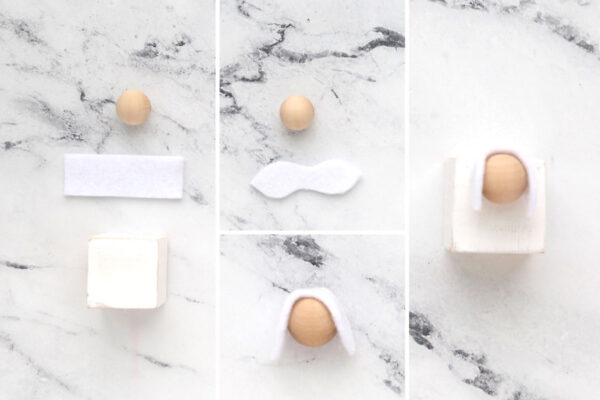
For each sheep you will need one painted block, a 3/4 inch wood bead, and a strip of white felt that’s 2.5 inches long and about 3/4 inch wide. Cut the felt into a wide infinity shape with points on each side, as shown in the photo below. Glue the felt around a wood bead, covering the holes on the bead, to create ears. Then glue the head + ears onto the block.
Make the Star
Glue the star onto the top of the wood block you are using as a star stand. I used a mini tree topper star that I glued onto a six inch block. You could also cut a small block and drill a hole into it large enough to put a wood skewer in, and then glue a wood star to the top of the skewer.
Wood Block Nativity
Supplies
- 8 ft 2×2 inch Furring Strip Board actual dimensions are 1.5×1.5 inches; you will only use about 5 feet total
- Seven 1.5 inch Wood Ball Knobs
- Three .75 inch Wood Beads
- White Felt
- Star
- Twine
- Gold Trim 15 inches
- Burlap 2×10 inch piece
- Craft Paints
- Paint brushes
Want more project ideas? Sign up to get my favorite easy crafts and recipes straight to your inbox!
Equipment
- Hot Glue Gun
- Sander or Sandpaper
Instructions
- Cut the furring strip board to the sizes you'd like your nativity pieces to be. Sand them to remove any splinters.
- Paint each piece and allow to dry. Sand to distress if desired.
- Create Baby Jesus from a 2.5 inch square of white felt and a .75 inch wood bead.
- Create Mary using the five inch wood block, a 1.5 inch ball knob, and a 2×10 inch piece of burlap. Glue Baby Jesus to Mary and tie with twine.
- Glue ball knobs to the top of the Joseph and shepherds blocks. Glue twigs on the front of the shepherds and tie with twine.
- Create heads for the sheep by cutting ears from white felt and gluing them to a wood bead, covering the holes in the bead. Glue the heads onto the small sheep blocks.
- Glue heads on the wise men. Create crowns from 5 inch lengths of gold trim and glue them on.
- Glue the star to the top of the star stand block.

Mary says
Your Nativity is so beautiful and bursting with spiritual simplicity ! I look forward to making this project and gifting the set to many friends. Thank you for this very creative project. Merry Christmas to you and your family.
Emily P Essick says
I followed your instructions and made several sets as gifts and they came out soooo cute! I wish I could attach a picture here.
Leigh says
Could you tell me the names of the colors of the paints that you used? I love those colors. I tired to zoom in on the supplies photo but couldn’t make the color names out. Thanks!!
Christy Strickland says
Could you please list the paint colors you used? I’m having a hard time with the purple shades and I really like yours in the photo.