
This is the fourth installment of Eight Steps to Better Photos on AUTO. Most people think the only way to really improve their photos is to learn to shoot on manual mode, and it’s true that using manual gives you the most control over the finished photo. But what if you don’t have the time or energy to invest in learning about exposure and aperture and all the other details of manual? That’s where this series comes in. There are plenty of things you can do to greatly improve your photos even when shooting on auto, and every Friday for the next eight weeks I’ll share one of them with you.
Step one | Step two | Step three | Step four | Step five | Step six | Step seven | Step eight
The easiest way to make your photos more professional looking is to have a background that looks professional. The good news is that you don’t even need to invest in expensive photography backdrops in order to get a great background. In less than 60 seconds you can find a better background in or around your own home. Keep reading for 8 great background ideas, and turn your distracting snapshots into beautiful portraits.
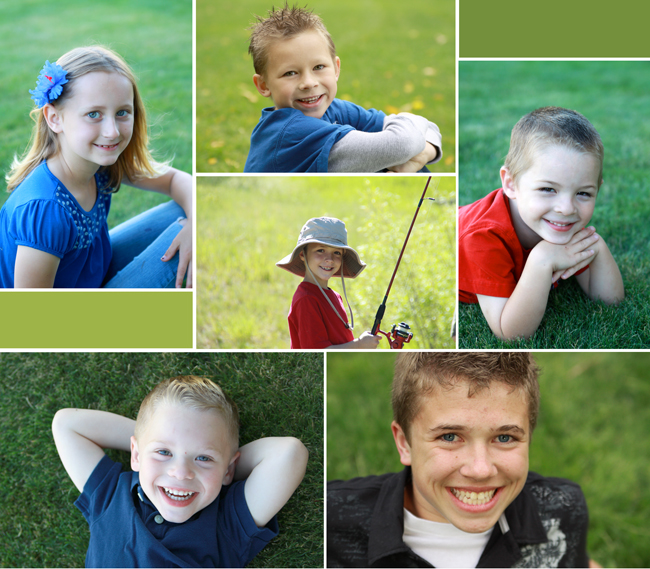
1. Take photos out on the grass. I’ve already told you how much natural light improves your photos and how sun and shade affects that light, but the other great thing about outdoor photography is that grass makes a fantastic background. If you want your subject standing, position her so there is a large grassy area behind her. If you don’t have a large amount of grass, have her sit or lie down on the grass and shoot from above to ensure that nothing other than grass will sneak into the background. It’s easy, it’s cheap, it’s almost always readily available, and outdoor light makes great photos. (Just remember to pay attention to whether the area is sunny or shady – read step 2 for more info.)
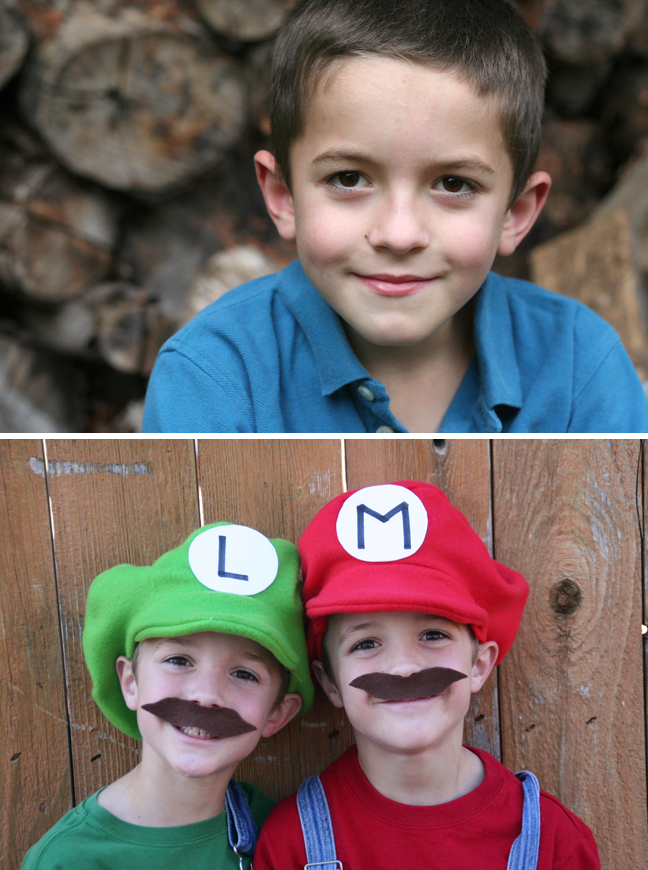
2. Use an outdoor background with texture. Take a walk around your yard and see what other items might make a great impromptu background. Look for spots that are all one color, but don’t feel limited to completed plain areas. A woodpile, fence, or even a brick fireplace or outer wall works great as a photo background! Don’t have a fence? Just use your neighbor’s (that’s what I did for the Halloween photo below). All my close neighbors know by now not to be surprised when they look out their window and find me in their yard taking photos. They also know not to be surprised when I shovel snow in shorts and pink moon boots, but that’s another story…
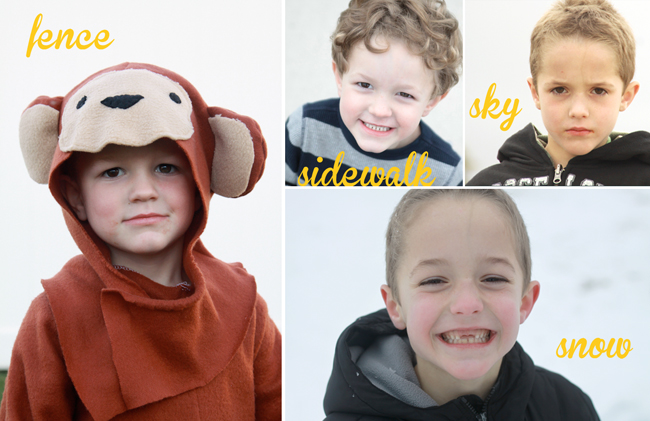
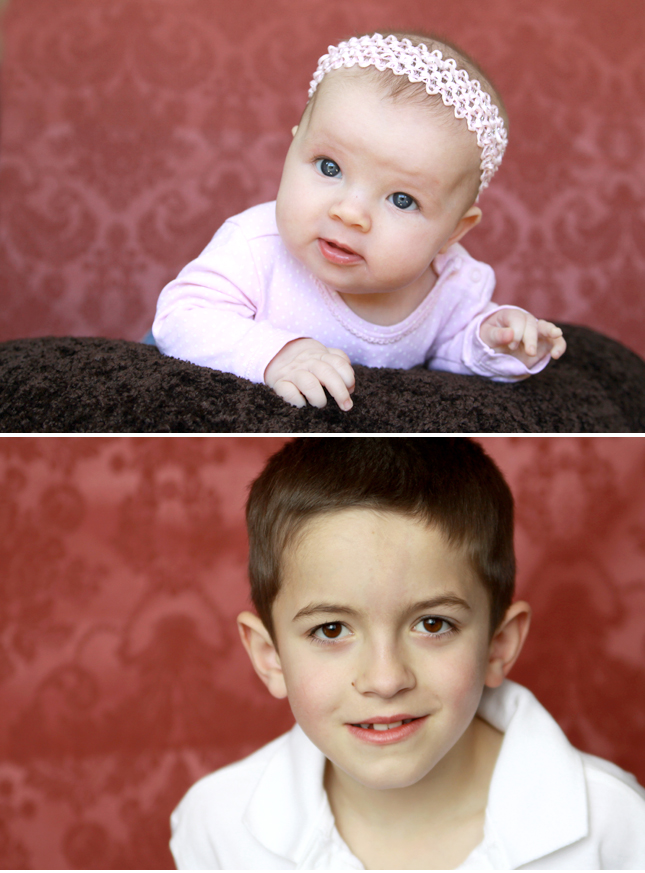
3. Find a plain white background outside. Nothing makes the person in your photo stand out like a plain white background. You could invest $100+ for a plain white photography backdrop and stand, or you could simply take advantage of the plain white backgrounds that are probably already right outside your house. (Yes, a pro background may give you crisper results, and would certainly be a good idea if you’re going into business, but for photos of your own kids these free options will probably work fine.)
A plain white fence, a yard full of snow, the sidewalk, or even a cloudy sky all work well to give you an instant white background outside. (Read step 3 for more info on the sidewalk photo.)
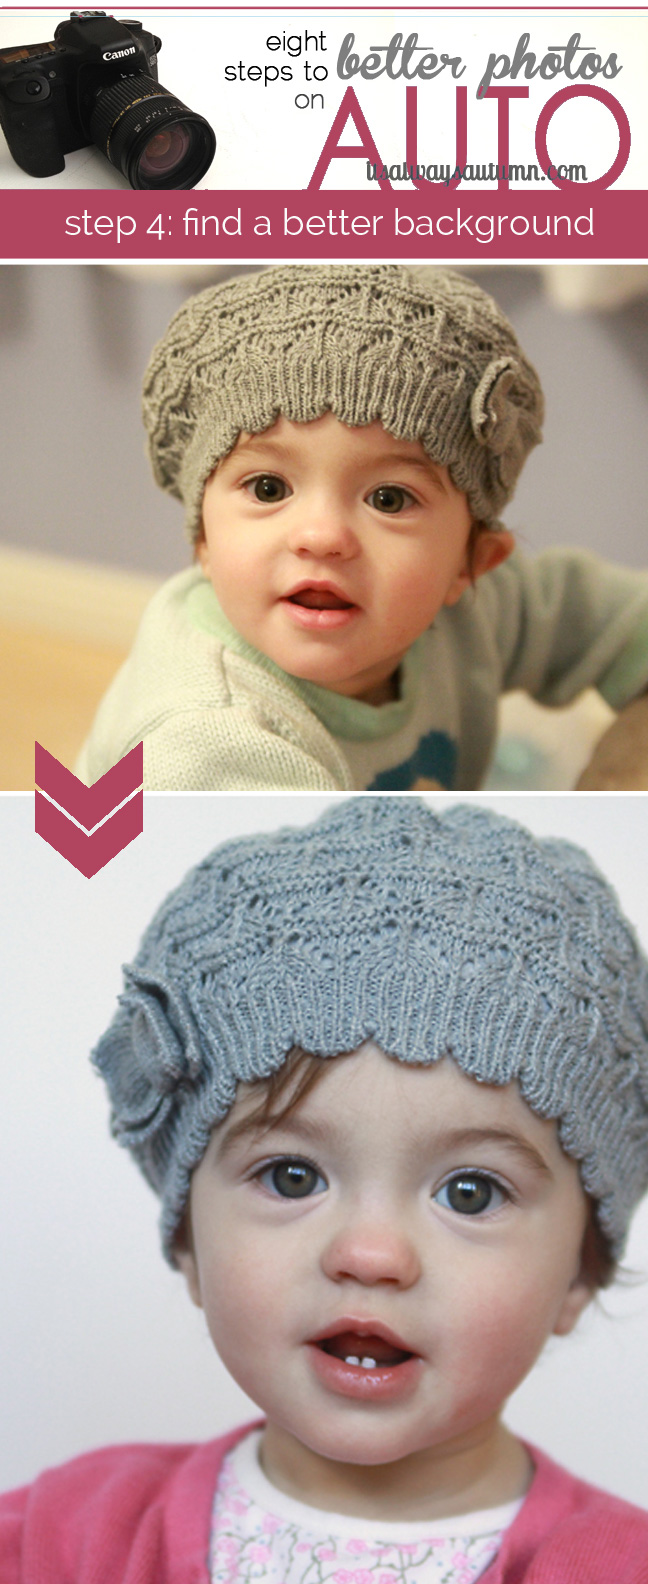
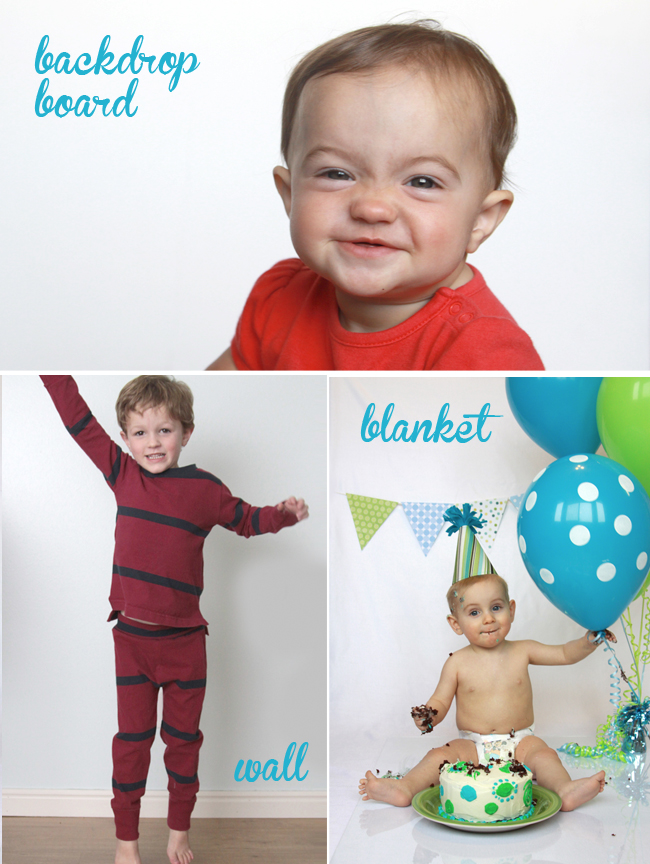
4. Find or create an inexpensive indoor background. The simplest way possible to get a nice plain background is to put your child in front of a plain wall. Walk around your house looking for wall area that is free from furniture/decorations and is near a large window. I like to use the walls in my kitchen/living room area because those rooms have plenty of light and a pretty laminate floor, which looks more professional in a photo than carpet. If you don’t mind putting in a little more effort, create a backdrop using a blanket or spend $10 to make a simple DIY double-sided backdrop board you can use over and over again for professional-looking photos. (More info on the cake smash photoshoot here.)
5. Create a pretty fabric background. Check around town for a home decor fabric warehouse that sells 60 in wide fabric for closeout prices – I got this beautiful rose-colored damask fabric for only $2 a yard. You can tape it up to a wall or clamp it to a bookshelf for an instant backdrop – or just grab another adult and have him or her stand behind your subject and hold the fabric up. (More on fabric backdrops here.)
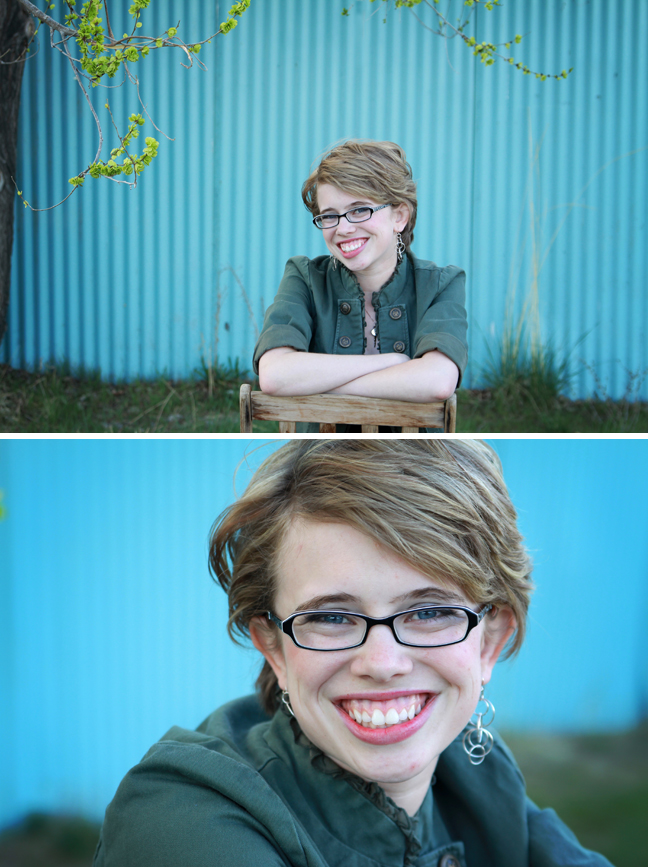
6. Pull up a wall. When you’re planning a photoshoot as opposed to snapping quick photos at home, you can take advantage of cool brick walls or brightly colored metal fences for a background that’s interesting without being distracting. Try out different photo angles instead of always taking the picture from directly in front of your background – you can get some interesting lines in your photo by taken the picture at an angle to the background instead.
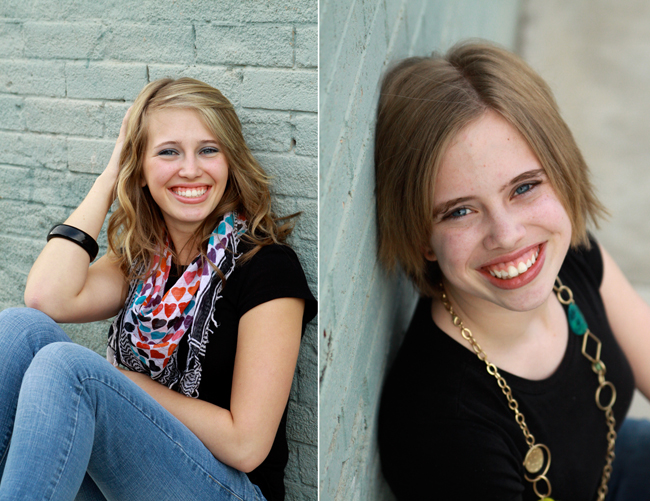
Pay attention to the buildings on the side of the rest as you run errands around town – I don’t know how many times I drove past the bright blue metal fence below before I realized what a fantastic photo background it would make. Now it’s one of my favorites.
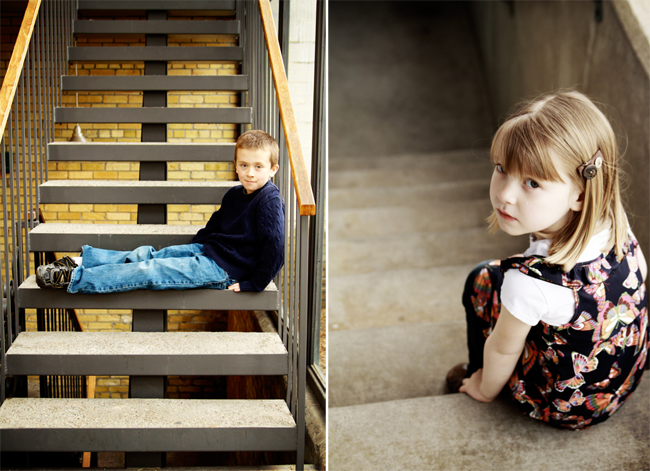
7. Use the stairs. Stairs make really cool photo backdrops because the steps make cool repeating lines, and the different levels make it easy to position your subject. Drive around behind buildings and look for staircases with a retro or industrial feel. (FYI – I obviously avoid private property when taking photos, but I figure a staircase leading to a commercial building that will be walked on by plenty of people each day is fair game for a quick photo.)
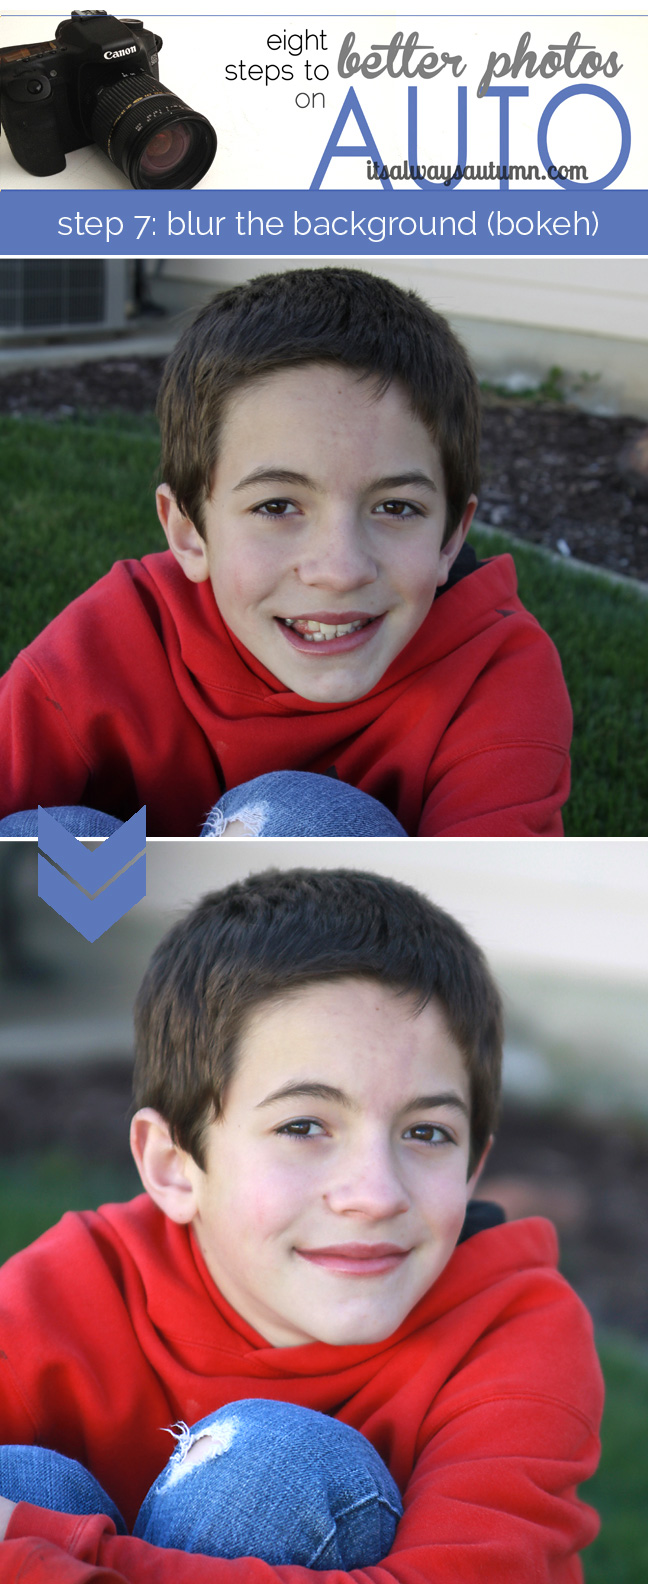
8. Make just about any background gorgeous by blurring it. As you can see in the first photo below, the background in this spot wasn’t terribly photo-worthy. Lots of scrubby branches in a ditch. Not the prettiest thing you’ve ever seen. But with enough blur even scrubby branches turn into a soft, gently blur of colors that allows the girl to really shine. The standard method of blurring background involves shooting on manual and adjusting your f-stop, but the easy way takes nothing more than a zoom lens on auto. Read this post to find out how to turn just about anything into a gorgeous, blurred background.

There you have it – eight easy backgrounds that won’t distract from your photos. Check back next week for more tips for better photos on AUTO, and click below for any of the steps you may have missed. Thanks!
The rest of the series (click each photo below to go to the post):
Beatrice Lawson says
I should just print your articles, laminate them and post them on my fridge….
laciekay says
Just what I needed to see! Thanks!