
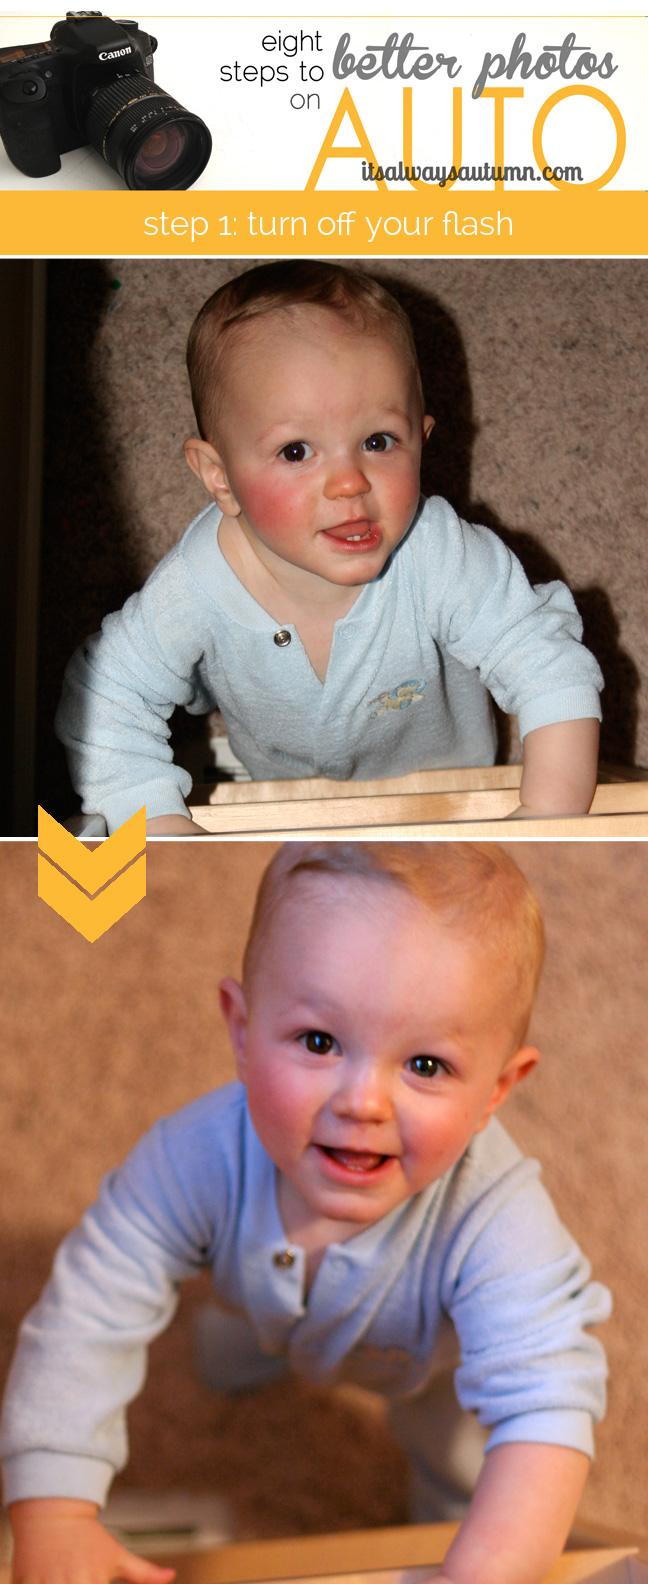
This is the sixth installment of Eight Steps to Better Photos on AUTO. Most people think the only way to really improve their photos is to learn to shoot on manual mode, and it’s true that using manual gives you the most control over the finished photo. But what if you don’t have the time or energy to invest in learning about exposure and aperture and all the other details of manual? That’s where this series comes in. There are plenty of things you can do to greatly improve your photos even when shooting on auto, and every Friday for the next eight weeks I’ll share one of them with you. Step one | Step two | Step three | Step four | Step five | Step six | Step seven | Step eight
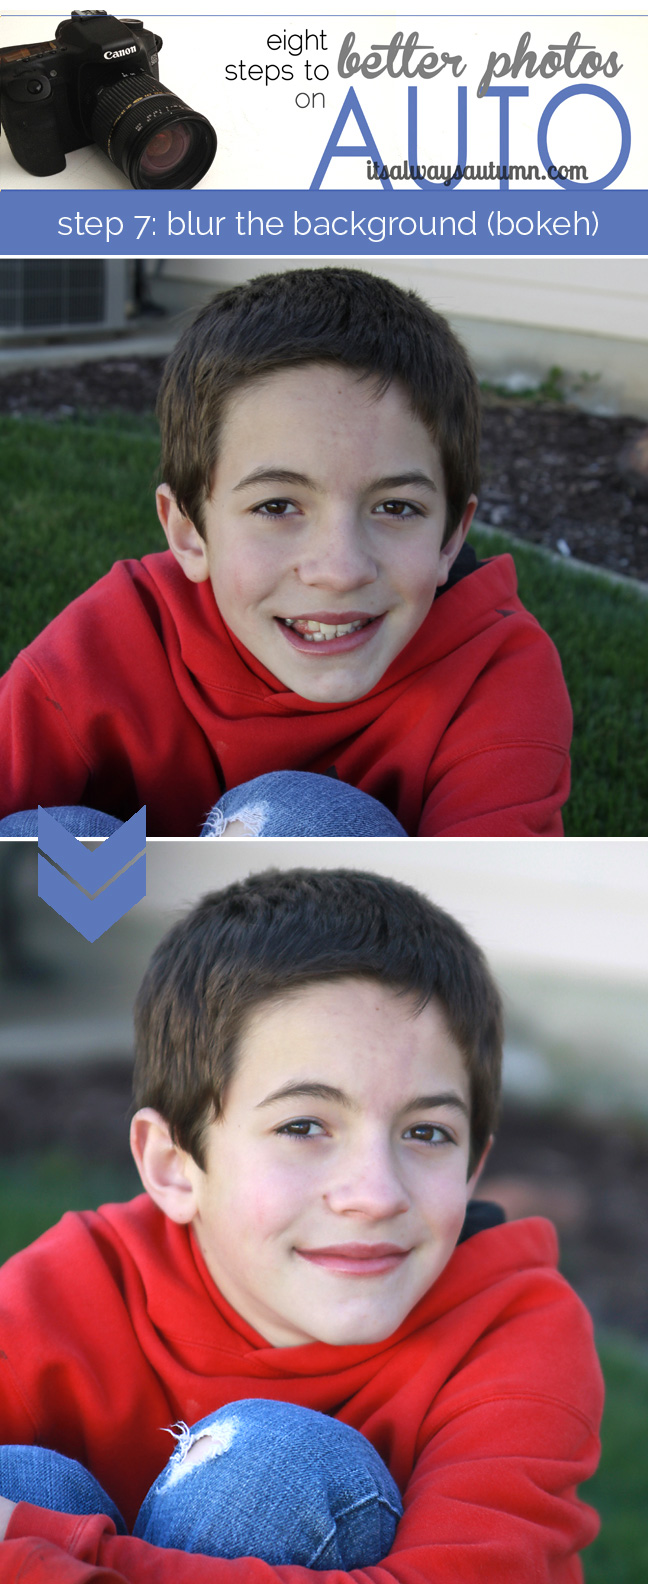
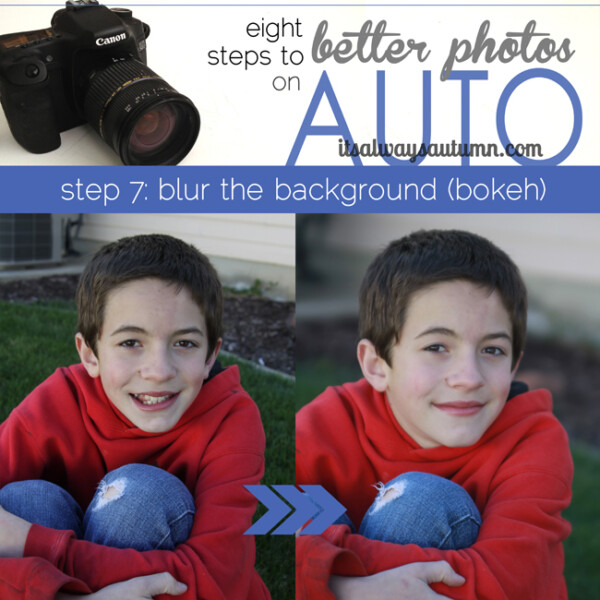
Shooting from a different perspective is really one of the best ways to turn a snapshot into a really interesting photograph. One of the coolest things about great photos is that they show us something we’ve seen before in a different way. Sometimes that happens because the background is blurred, bringing the subject into stark focus (and we’ll talk about that next week). Other times it’s because movement is completely frozen, letting us see something that happened in a split second (we’ll talk about that soon too). Shooting from a new perspective helps us see things differently than we normally do as well. And since things look a little different, we pay more attention. Perspective can help clarify the focus of your photo, it can lend emotion to your photo, and it can simply help you take a more flattering picture of someone. Let’s look at some examples:
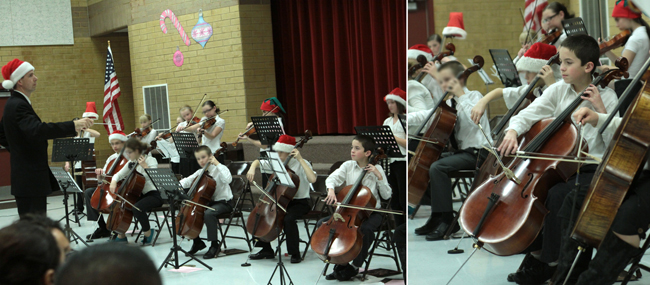
1. Clarify the focus of your photo Look at the first picture below. School orchestra concert. Can you tell which child belongs to me? Can you tell which child I care about in the photo? (Ok, maybe you can because I’ve blurred the other kids’ faces a bit – but without that clue is there any reason to believe I’m more interested in one of the kids than the rest?). I don’t think so. But in the second photo it’s pretty obvious who I’m trying to focus on. All I did was walk to the side of the orchestra and compose my photo so that my son was closer to me and the camera than anyone else. Suddenly, there’s a focus to the photo. When you’re taking pictures of an activity, walk around until you find the shot that showcases the person or thing you want to focus on.
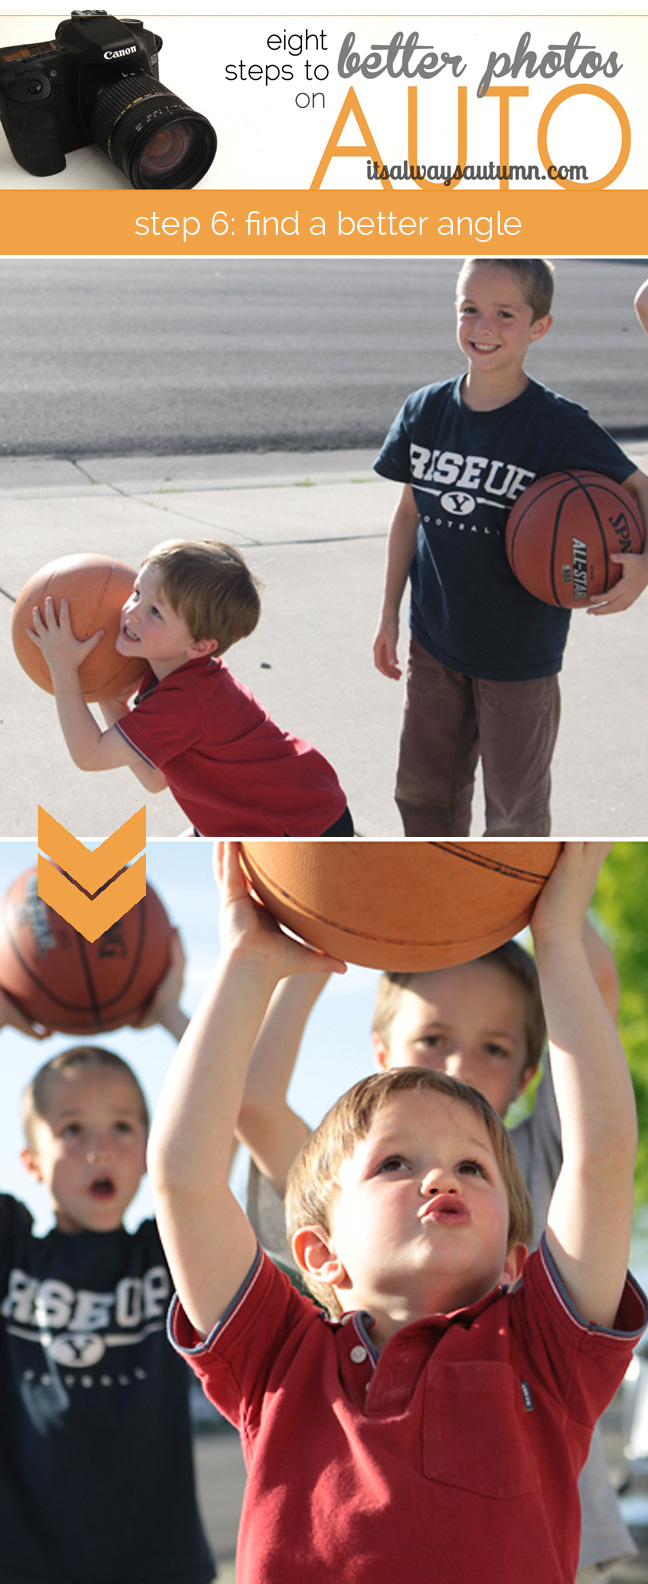
2. Show more emotion Both of the photos below are cute pictures of my kids playing basketball. The top one is the view I normally see when I watch them shoot. For the bottom photo I stood right under the basket and crouched down a bit, then zoomed in on my younger son’s face. From that perspective I could see the expression on his face as he got ready to take a shot. There’s much more emotion in the second photo as a result.

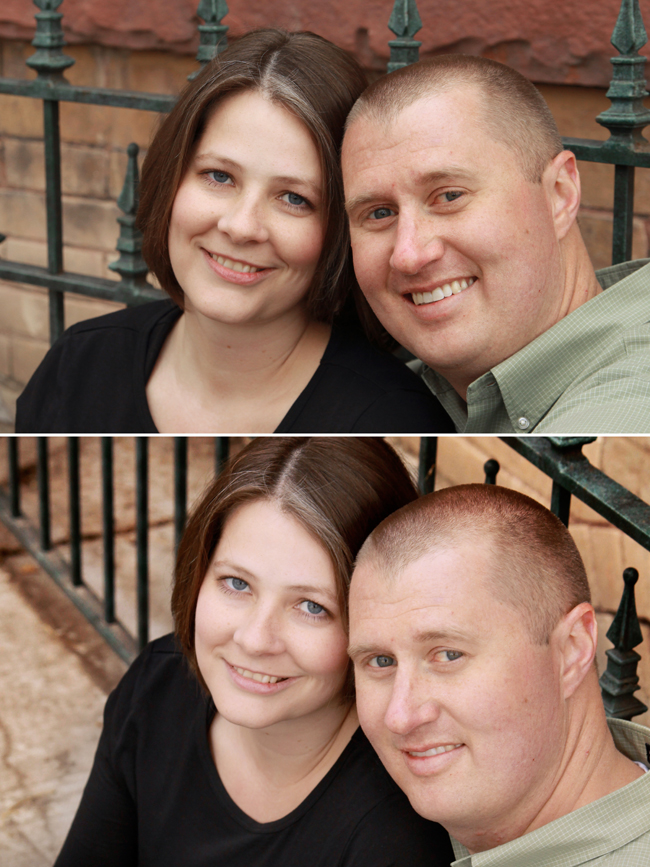
3. Take a more flattering photo I think both of these photos below are gorgeous, but look at the couple’s eyes. In the second photo I stood slightly above them, which caused them to look up for the photo. Anytime someone has to look up, they open their eyes wider, which makes the eyes look larger and brighter. Shooting from a slightly elevated perspective gives you a more flattering photo. I like being photographed this way because a slight upward tilt of my chin makes sure I don’t end up with that hint of double chin that can sneak into photos where I’m looking down.
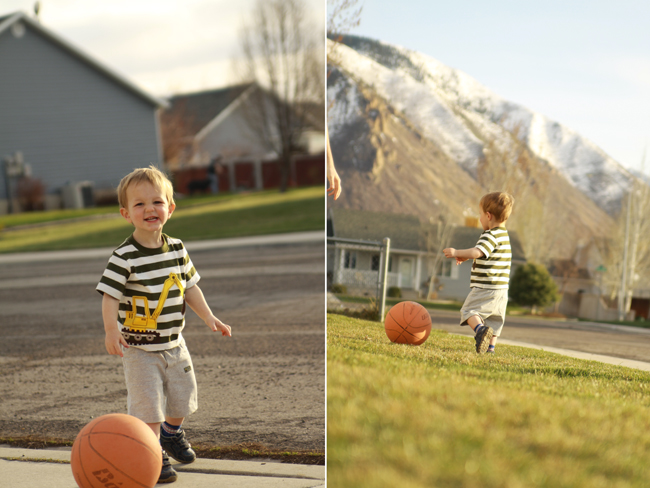
4. Tell a story I love photographing kids from below, because it helps to show how small they are compared to the rest of the world. When you get down to a toddler’s level, suddenly you see the rest of the world from his viewphont – and it looks huge! The second photo below does a better job conveying the toddler’s size in relation to his surroundings.
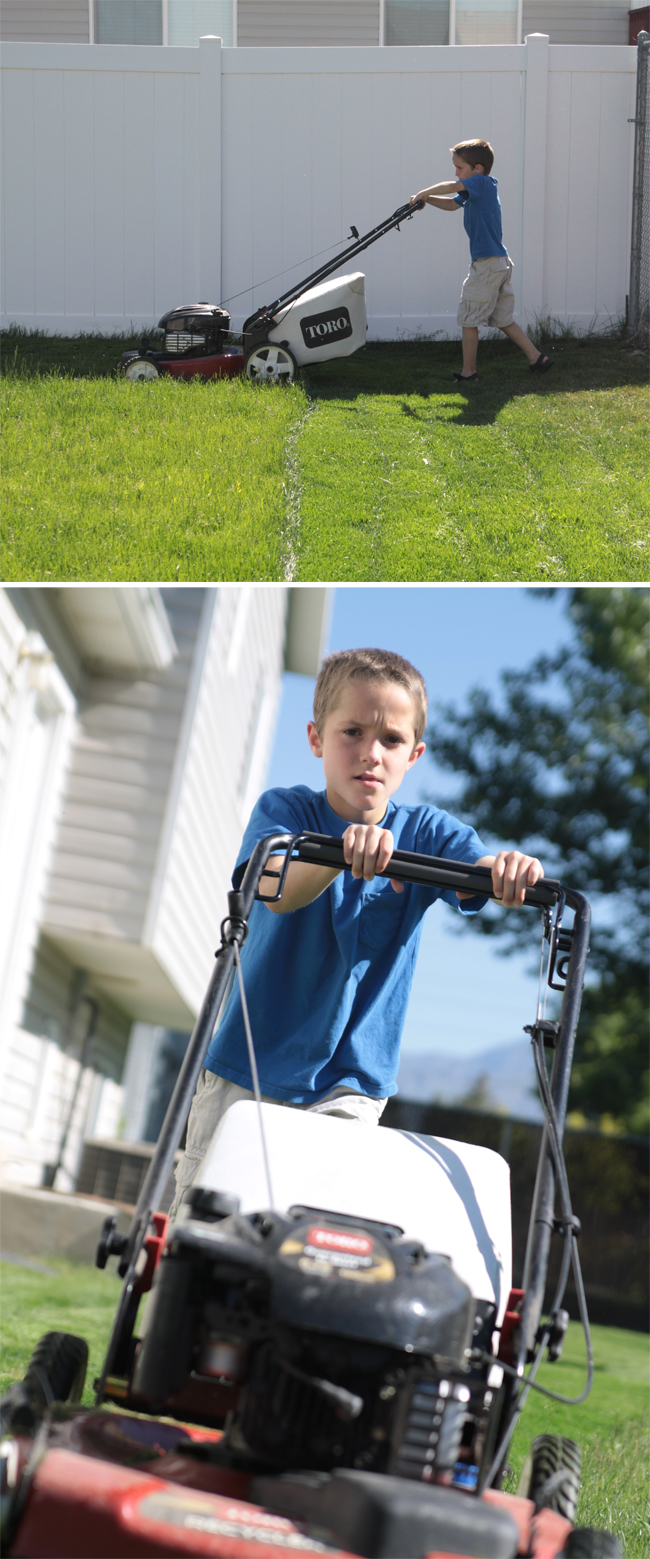
A lower perspective can throw your viewer into the action of the photo as well. The first photo below is what lots of us see every Saturday morning – one of the kids mowing the lawn. It’s a nice photo to have, but it’s a little boring. But if you sit down in front of the mower (zoom in so you don’t have to be too close to the oncoming mower) you get a picture that puts the viewer into the action. You see the child’s expression, adding emotion, and show how hard he’s working to manage that big mower.
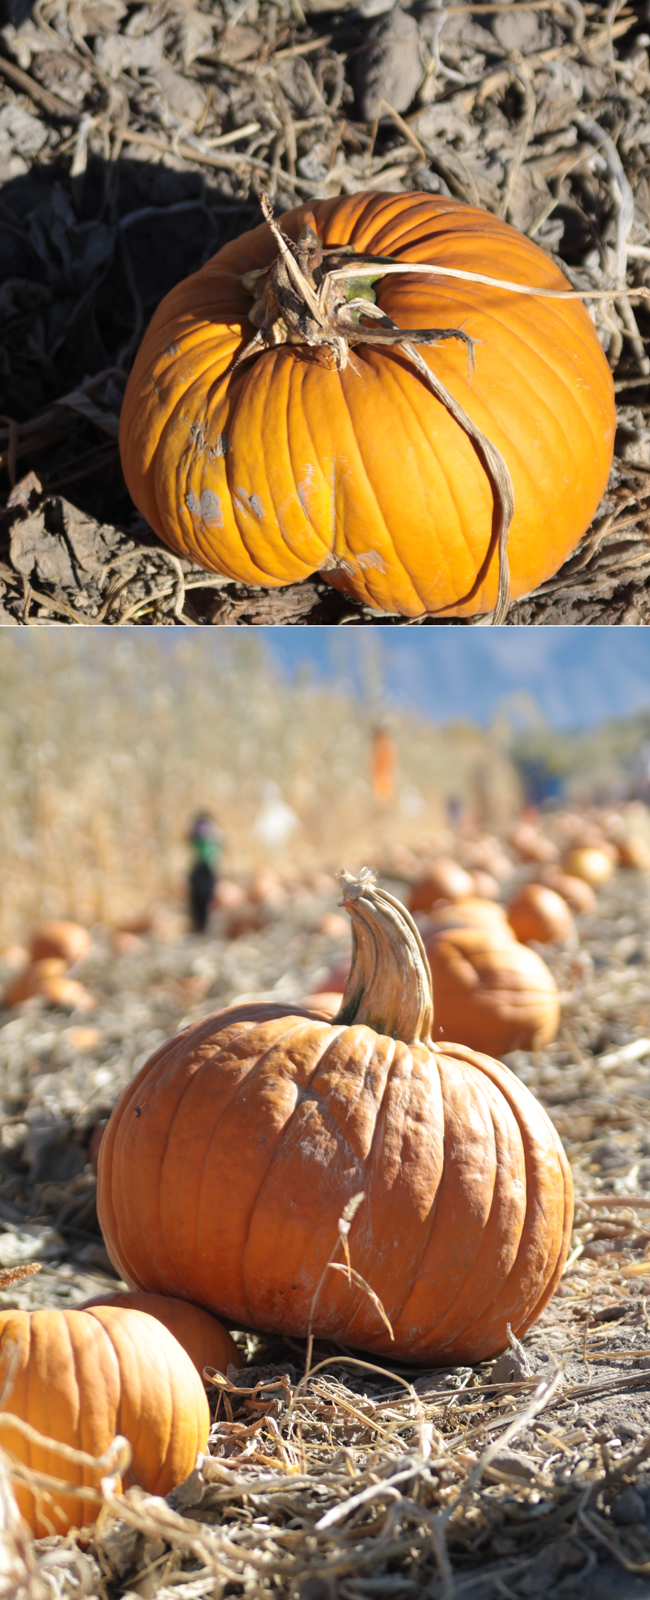
5. Use repetition for a more interesting photo These two photos really show what a difference perspective can make – they were taken about 10 seconds apart and I changed nothing on my camera other than the position it was in. The top photo is a completely boring picture of a pumpkin. The lighting is bad, the pumpkin is just your run of the mill variety, and there’s absolutely nothing interesting about it. But when you change position so that pumpkin is in front of a long line of more pumpkins, things get a lot more interesting and visually pleasing. The lighting problems are minimized as well. (For more info on how to get the background blurred, check back next week or read this post.)
6. Get more variety I’ve talked before about how shooting from different angles helps you get a better variety of good photos, but that post was focused on photographing people, so I wanted to show that the concept works with objects and buildings as well. Look at these four photos of the Washington Monument:
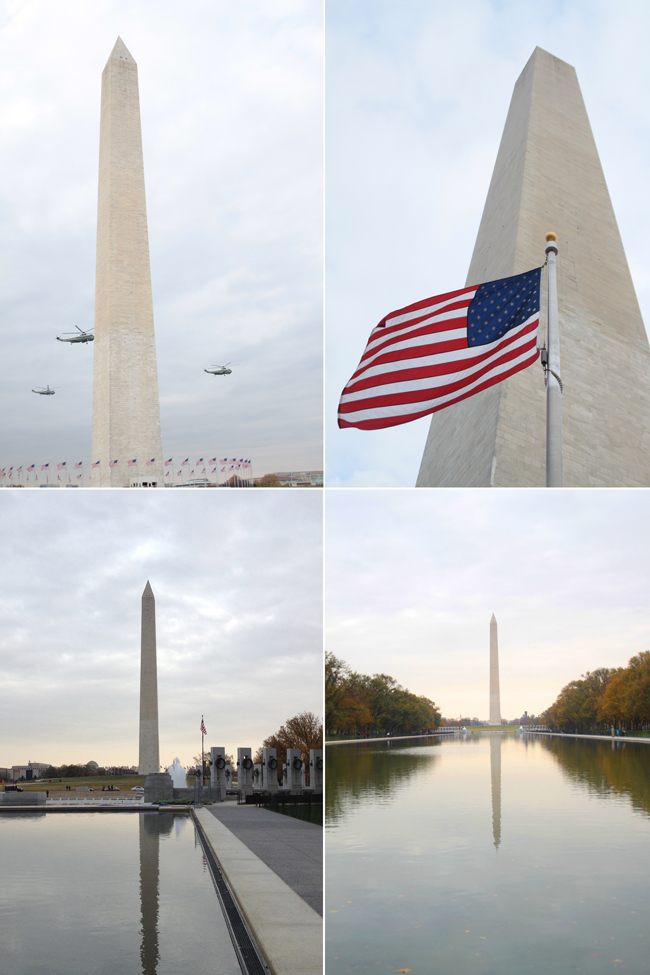
The first photo (top left) is what you see if you stand on the sidewalk going past the monument. It can be a little hard to get the entire monument in the shot from there, and even if you do the photo’s kind of boring. You can just see the flags that surround the monument in the bottom of the photo. The next photo (top right) was taken from right underneath one of those flags. I was much closer to the monument and shooting almost directly up. It gives a different view that’s kind of cool, especially with the flag in the foreground.
The bottom photos are taken from further away and show the monument as well as it’s reflection in the pool. They’re both interesting, but the one on the right is a much prettier picture.
Now, do I really need four different photos of the same monument? Maybe not, but there’s really no good reason not to. Digital cameras make is easy to take as many photos as you want – so give it a try. Next time you’re photographing a building, person, or event, remember to walk around and shoot from different perspectives. Crouch down, get up high, or move in close – you’ll end up with much better photos.
The rest of the series (click on each photo to go to the post):


Leave a Comment